washer fluid BUICK ENVISION 2017 Owner's Manual
[x] Cancel search | Manufacturer: BUICK, Model Year: 2017, Model line: ENVISION, Model: BUICK ENVISION 2017Pages: 366, PDF Size: 5.37 MB
Page 5 of 366
Buick Envision Owner Manual (GMNA-Localizing-U.S./Canada/Mexico-
10122659) - 2017 - crc - 11/16/16
4 Introduction
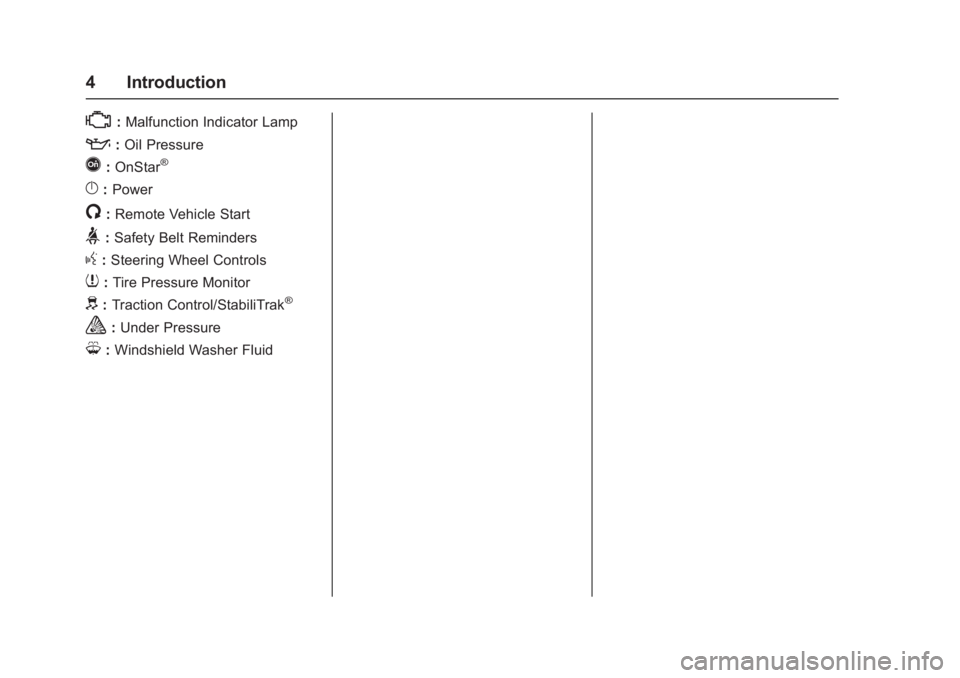
*:Malfunction Indicator Lamp
::Oil Pressure
Q:OnStar®
}:Power
/:Remote Vehicle Start
>:Safety Belt Reminders
g: Steering Wheel Controls
7:Tire Pressure Monitor
d:Traction Control/StabiliTrak®
a:Under Pressure
M: Windshield Washer Fluid
Page 17 of 366

Buick Envision Owner Manual (GMNA-Localizing-U.S./Canada/Mexico-
10122659) - 2017 - crc - 11/16/16
16 In Brief
Windshield Wiper/Washer
Windshield Wiper with Rainsense(AUTO Shown)
Windshield Wiper with IntermittentWipes (INT Shown)
With the ignition in ACC/
ACCESSORY or ON/RUN/START,
move the windshield wiper lever to
select the wiper speed.
HI : Use for fast wipes. LO :
Use for slow wipes.
INT : Use for intermittent wipes. To
adjust wipe frequency, turn the band
up for more frequent wipes or down
for less frequent wipes. If the
vehicle has Rainsense™, see the
following Rainsense information.
OFF : Use to turn the wipers off.
1x : For a single wipe, briefly move
the wiper lever down. For several
wipes, hold the wiper lever down.
f: Pull the windshield wiper
lever toward you to spray windshield
washer fluid and activate the wipers. Rainsense™
For vehicles with Rainsense:
AUTO :
Move the windshield wiper
lever to AUTO. Turn the band on the
wiper lever to adjust the sensitivity.
. Turn the band up for more
sensitivity to moisture.
. Turn the band down for less
sensitivity to moisture.
. Move the windshield wiper lever
out of the AUTO position to
deactivate Rainsense.
Rear Window Wiper/Washer
Turn the end of the windshield wiper
lever to operate the rear window
wiper/washer.
Page 18 of 366

Buick Envision Owner Manual (GMNA-Localizing-U.S./Canada/Mexico-
10122659) - 2017 - crc - 11/16/16
In Brief 17
OFF :Turns the system off.
INT : Intermittent wipes.
ON : Slow wipes.
1:Push the windshield wiper
lever forward to spray washer fluid
on the rear window. The lever
automatically returns to its original
position when released.
See Windshield Wiper/Washer
0 108 andRear Window Wiper/
Washer 0110.
Climate Controls
The heating, cooling, and ventilation for the vehicle can be controlled with
this system.
1. Driver and Passenger
Temperature Controls
2. Heated and Cooled Front Seats (If Equipped)
3. Defrost
4. Air Delivery Mode Controls 5. Fan Control
6. SYNC (Synchronized
Temperature)
7. AUTO (Automatic Operation)
8. Recirculation
9. A/C (Air Conditioning)
Page 108 of 366
Buick Envision Owner Manual (GMNA-Localizing-U.S./Canada/Mexico-
10122659) - 2017 - crc - 11/16/16
Instruments and Controls 107
Steering SystemMessages . . . . . . . . . . . . . . . . . . . 147
Tire Messages . . . . . . . . . . . . . . . . 147
Transmission Messages . . . . . . 148
Washer Fluid Messages . . . . . . 148
Window Messages . . . . . . . . . . . 148
Vehicle Personalization
Vehicle Personalization . . . . . . . 149
Universal Remote System
Universal Remote System . . . . 155
Universal Remote System Programming . . . . . . . . . . . . . . . 155
Universal Remote System Operation . . . . . . . . . . . . . . . . . . . 157
Controls
Steering Wheel
Adjustment
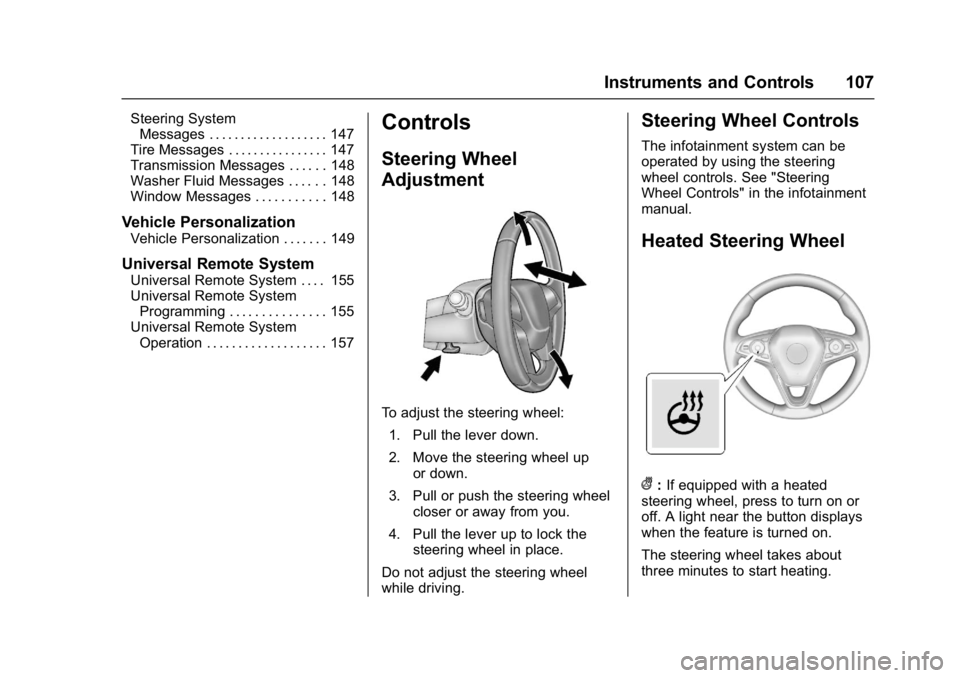
To adjust the steering wheel:
1. Pull the lever down.
2. Move the steering wheel up or down.
3. Pull or push the steering wheel closer or away from you.
4. Pull the lever up to lock the steering wheel in place.
Do not adjust the steering wheel
while driving.
Steering Wheel Controls
The infotainment system can be
operated by using the steering
wheel controls. See "Steering
Wheel Controls" in the infotainment
manual.
Heated Steering Wheel
(: If equipped with a heated
steering wheel, press to turn on or
off. A light near the button displays
when the feature is turned on.
The steering wheel takes about
three minutes to start heating.
Page 110 of 366
Buick Envision Owner Manual (GMNA-Localizing-U.S./Canada/Mexico-
10122659) - 2017 - crc - 11/16/16
Instruments and Controls 109
If the windshield wiper lever is then
moved to OFF before the driver
door is opened or within 10 minutes,
the wipers will restart and move to
the base of the windshield.
If the ignition is changed to LOCK/
OFF while the wipers are performing
wipes due to windshield washing or
Rainsense, the wipers continue to
run until they reach the base of the
windshield.
Rainsense™
If equipped with Rainsense, a
sensor located near the top center
of the windshield detects the
amount of water on the windshield
and automatically controls the
frequency of the windshield wiper.
When Rainsense is enabled, the
normal intermittent control operates
as a sensitivity control.
Keep this area of the windshield
clear of debris to allow for best
system performance.
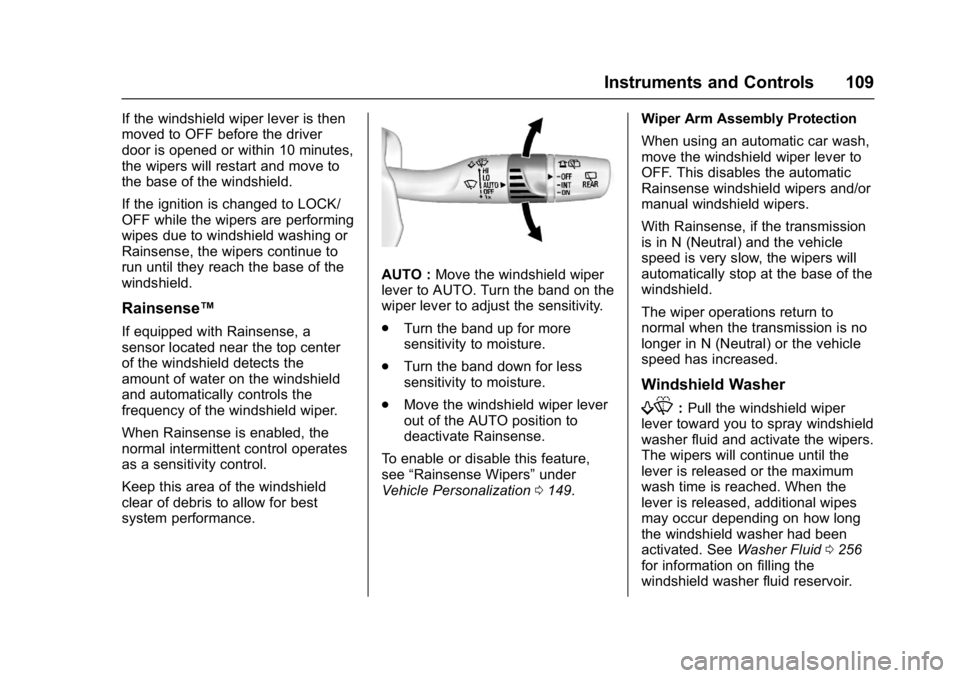
AUTO :Move the windshield wiper
lever to AUTO. Turn the band on the
wiper lever to adjust the sensitivity.
. Turn the band up for more
sensitivity to moisture.
. Turn the band down for less
sensitivity to moisture.
. Move the windshield wiper lever
out of the AUTO position to
deactivate Rainsense.
To enable or disable this feature,
see “Rainsense Wipers” under
Vehicle Personalization 0149. Wiper Arm Assembly Protection
When using an automatic car wash,
move the windshield wiper lever to
OFF. This disables the automatic
Rainsense windshield wipers and/or
manual windshield wipers.
With Rainsense, if the transmission
is in N (Neutral) and the vehicle
speed is very slow, the wipers will
automatically stop at the base of the
windshield.
The wiper operations return to
normal when the transmission is no
longer in N (Neutral) or the vehicle
speed has increased.
Windshield Washer
f:
Pull the windshield wiper
lever toward you to spray windshield
washer fluid and activate the wipers.
The wipers will continue until the
lever is released or the maximum
wash time is reached. When the
lever is released, additional wipes
may occur depending on how long
the windshield washer had been
activated. See Washer Fluid0256
for information on filling the
windshield washer fluid reservoir.
Page 111 of 366

Buick Envision Owner Manual (GMNA-Localizing-U.S./Canada/Mexico-
10122659) - 2017 - crc - 11/16/16
110 Instruments and Controls
{Warning
In freezing weather, do not use
the washer until the windshield is
warmed. Otherwise the washer
fluid can form ice on the
windshield, blocking your vision.
Rear Window Wiper/
Washer
The ignition must be in the ACC/
ACCESSORY or ON/RUN position
to operate the rear window wiper/
washer.
Rear Wiper with Rainsense
Shown, without Rainsense Similar
Turn the end of the windshield wiper
lever to operate the rear window
wiper/washer.
OFF : Turns the system off.
INT : Intermittent wipes.
ON : Slow wipes.
Z:Push the windshield wiper
lever forward to spray washer fluid
on the rear window. The lever
automatically returns to its original
position when released.
{Warning
In freezing weather, do not use
the washer until the windshield is
warmed. Otherwise the washer
fluid can form ice on the
windshield, blocking your vision.
Reverse Gear Wipes
If the rear wiper control is off, the
rear wiper will automatically operate
continuously when the shift lever is
in R (Reverse), and the front
windshield wiper is performing low
or high speed wipes. If the rear
wiper control is off, the shift lever is
in R (Reverse), and the front
windshield wiper is performing
interval wipes, then the rear wiper
automatically performs interval
wipes.
This feature can be turned on or off.
See Vehicle Personalization 0149.
The windshield washer reservoir is
used for the windshield and rear
window. Check the fluid level if
either washer is not working. See
Washer Fluid 0256.
Page 112 of 366
Buick Envision Owner Manual (GMNA-Localizing-U.S./Canada/Mexico-
10122659) - 2017 - crc - 11/16/16
Instruments and Controls 111
Headlamp Washer
If equipped with headlamp washers,
they are located to the side of the
headlamps.
The headlamps must be on in order
to use the headlamp washers. If the
headlamps are not on, only the
windshield will be washed.
Pull the wiper lever toward you and
hold briefly to activate. The
headlamp washers will spray once,
pause, and spray again. The
headlamp washers will spray again
after five windshield wash cycles.
To refill the windshield washer fluid,
seeWasher Fluid 0256.
Compass
The vehicle may have a compass
display on the Driver Information
Center (DIC). The compass receives
its heading and other information
from the Global Positioning
System (GPS) antenna,
StabiliTrak
®, and vehicle speed
information. The compass system is designed to
operate for a certain number of
miles or degrees of turn before
needing a signal from the GPS
satellites. When the compass
display shows CAL, drive the
vehicle for a short distance in an
open area where it can receive a
GPS signal. The compass system
will automatically determine when a
GPS signal is restored and provide
a heading again. See
Compass
Messages 0140 for the messages
that may be displayed for the
compass.
Clock
Setting the Digital Clock
The infotainment system controls
are used to access the time and
date settings through the menu
system. See “Using the System” in
the infotainment manual.
To set the time:
1. Touch SETTINGS from the Home Page, then touch Time
and Date. 2. Touch Set Time and touch
«
orªto increase or decrease
hours, minutes, and AM or PM.
Touch 12–24 Hr for 12 or
24 hour clock.
3. Touch
}to go back to the
previous menu.
Auto Set requires an OnStar
subscription.
If auto timing is set, the time
displayed on the clock may not
update immediately when driving
into a new time zone.
To set the date: 1. Touch SETTINGS from the Home Page, then touch Time
and Date.
2. Touch Set Date and touch
«
orªto increase or decrease
month, day, or year.
3. Touch
}to go back to the
previous menu.
To set the clock display: 1. Touch SETTINGS and touch Time and Date.
Page 149 of 366

Buick Envision Owner Manual (GMNA-Localizing-U.S./Canada/Mexico-
10122659) - 2017 - crc - 11/16/16
148 Instruments and Controls
Transmission Messages
APPLY AND HOLD BRAKE
This message displays along with a
temperature graph when the
transmission clutch overheat
temperature is reached.
INCREASE SPEED OR APPLY
BRAKE
This message displays along with a
temperature graph when the
transmission clutch temperature is
close to reaching an overheated
condition.
PLEASE WAIT
This message displays along with a
temperature graph when the vehicle
is stopped and shows the actual
clutch temperature and its cooled
down target temperature. This may
take several minutes.
READY TO DRIVE AWAY
This message displays along with a
temperature graph when the clutch
cool down temperature is reached
and the vehicle can be driven.
SERVICE TRANSMISSION
This message displays if there is a
problem with the transmission. See
your dealer.
SHIFT TO PARK
This message displays when the
transmission needs to be shifted to
P (Park). This may appear when
attempting to remove the transmitter
from the vehicle if the vehicle is not
in P (Park).
TRANSMISSION HOT—IDLE
ENGINE
This message displays and a chime
sounds if the transmission fluid in
the vehicle gets hot. Driving with the
transmission fluid temperature high
can cause damage to the vehicle.
Stop the vehicle and let it idle to
allow the transmission to cool. This
message clears when the fluid
temperature reaches a safe level.
Washer Fluid Messages
WASHER FLUID LOW ADD
FLUID
This message may display when the
washer fluid level is low. Fill the
windshield washer reservoir as soon
as possible. See Engine
Compartment Overview 0242 for
the location of the windshield
washer reservoir. Also, see Washer
Fluid 0256.
Window Messages
OPEN, THEN CLOSE DRIVER/
PASSENGER WINDOW
This message is displayed when the
window needs to be reprogrammed.
If the vehicle's battery has been
discharged or disconnected, you
may need to program each front
window for the express-up feature to
work. See Power Windows 046.
Page 182 of 366
Buick Envision Owner Manual (GMNA-Localizing-U.S./Canada/Mexico-
10122659) - 2017 - crc - 11/16/16
Driving and Operating 181
.Keep the windshield washer fluid
reservoir filled.
. Have good tires with proper
tread depth. See Tires0271.
. Turn off cruise control.
Hill and Mountain Roads
Driving on steep hills or through
mountains is different than driving
on flat or rolling terrain. Tips include:
.Keep the vehicle serviced and in
good shape.
. Check all fluid levels and brakes,
tires, cooling system, and
transmission.
. Shift to a lower gear when going
down steep or long hills.
{Warning
Using the brakes to slow the
vehicle on a long downhill slope
can cause brake overheating, can
reduce brake performance, and
could result in a loss of braking.
(Continued)
Warning (Continued)
Shift the transmission to a lower
gear to let the engine assist the
brakes on a steep downhill slope.
{Warning
Coasting downhill in N (Neutral)
or with the ignition off is
dangerous. This can cause
overheating of the brakes and
loss of steering. Always have the
engine running and the vehicle
in gear.
. Drive at speeds that keep the
vehicle in its own lane. Do not
swing wide or cross the
center line.
. Be alert on top of hills;
something could be in your lane
(e.g., stalled car, accident). .
Pay attention to special road
signs (e.g., falling rocks area,
winding roads, long grades,
passing or no-passing zones)
and take appropriate action.
Winter Driving
Driving on Snow or Ice
Snow or ice between the tires and
the road creates less traction or
grip, so drive carefully. Wet ice can
occur at about 0 °C (32 °F) when
freezing rain begins to fall. Avoid
driving on wet ice or in freezing rain
until roads can be treated.
For Slippery Road Driving:
.Accelerate gently. Accelerating
too quickly causes the wheels to
spin and makes the surface
under the tires slick.
. Turn on Traction Control. See
Traction Control/Electronic
Stability Control 0201.
. Antilock Brake System (ABS)
improves vehicle stability during
hard stops, but the brakes
should be applied sooner than
Page 239 of 366
Buick Envision Owner Manual (GMNA-Localizing-U.S./Canada/Mexico-
10122659) - 2017 - crc - 11/16/16
238 Vehicle Care
Vehicle Care
General Information
General Information . . . . . . . . . . 239
California Proposition65 Warning . . . . . . . . . . . . . . . . . 239
California Perchlorate Materials Requirements . . . . . 239
Accessories and Modifications . . . . . . . . . . . . . . . . 240
Vehicle Checks
Doing Your OwnService Work . . . . . . . . . . . . . . . 240
Hood . . . . . . . . . . . . . . . . . . . . . . . . . 241
Engine Compartment Overview . . . . . . . . . . . . . . . . . . . . 242
Engine Oil . . . . . . . . . . . . . . . . . . . . 245
Engine Oil Life System . . . . . . . 247
Automatic Transmission Fluid . . . . . . . . . . . . . . . . . . . . . . . . 248
Engine Air Cleaner/Filter . . . . . . 249
Cooling System . . . . . . . . . . . . . . 251
Engine Coolant . . . . . . . . . . . . . . . 252
Engine Overheating . . . . . . . . . . 255
Washer Fluid . . . . . . . . . . . . . . . . . 256
Brakes . . . . . . . . . . . . . . . . . . . . . . . 257
Brake Fluid . . . . . . . . . . . . . . . . . . . 258
Battery - North America . . . . . . 259
All-Wheel Drive . . . . . . . . . . . . . . . 260 Starter Switch Check . . . . . . . . . 260
Automatic Transmission Shift
Lock Control Function
Check . . . . . . . . . . . . . . . . . . . . . . . 260
Park Brake and P (Park)
Mechanism Check . . . . . . . . . . 261
Wiper Blade Replacement . . . . 261
Windshield Replacement . . . . . 263
Headlamp Aiming
Headlamp Aiming . . . . . . . . . . . . 263
Bulb Replacement
Bulb Replacement . . . . . . . . . . . . 263
Halogen Bulbs . . . . . . . . . . . . . . . . 263
High Intensity Discharge (HID) Lighting . . . . . . . . . . . . . . . . . . . . . 264
License Plate Lamp . . . . . . . . . . 264
Replacement Bulbs . . . . . . . . . . . 265
Electrical System
Electrical System Overload . . . 265
Fuses and Circuit Breakers . . . 266
Engine Compartment Fuse Block . . . . . . . . . . . . . . . . . . . . . . . . 266
Instrument Panel Fuse Block . . . . . . . . . . . . . . . . . . . . . . . . 269
Rear Compartment Fuse Block . . . . . . . . . . . . . . . . . . . . . . . . 270
Wheels and Tires
Tires . . . . . . . . . . . . . . . . . . . . . . . . . . 271 All-Season Tires . . . . . . . . . . . . . . 272
Winter Tires . . . . . . . . . . . . . . . . . . 273
Summer Tires . . . . . . . . . . . . . . . . 273
Tire Sidewall Labeling . . . . . . . . 274
Tire Designations . . . . . . . . . . . . . 276
Tire Terminology and
Definitions . . . . . . . . . . . . . . . . . . 276
Tire Pressure . . . . . . . . . . . . . . . . . 279
Tire Pressure Monitor System . . . . . . . . . . . . . . . . . . . . . . 280
Tire Pressure Monitor Operation . . . . . . . . . . . . . . . . . . . 281
Tire Inspection . . . . . . . . . . . . . . . . 284
Tire Rotation . . . . . . . . . . . . . . . . . 284
When It Is Time for New Tires . . . . . . . . . . . . . . . . . . . . . . . . 285
Buying New Tires . . . . . . . . . . . . . 286
Different Size Tires and Wheels . . . . . . . . . . . . . . . . . . . . . . 288
Uniform Tire Quality Grading . . . . . . . . . . . . . . . . . . . . . 288
Wheel Alignment and Tire Balance . . . . . . . . . . . . . . . . . . . . . 289
Wheel Replacement . . . . . . . . . . 290
Tire Chains . . . . . . . . . . . . . . . . . . . 290
If a Tire Goes Flat . . . . . . . . . . . . 291
Tire Changing . . . . . . . . . . . . . . . . 292
Compact Spare Tire . . . . . . . . . . 297