tow BUICK ENVISION 2019 Owner's Manual
[x] Cancel search | Manufacturer: BUICK, Model Year: 2019, Model line: ENVISION, Model: BUICK ENVISION 2019Pages: 377, PDF Size: 6.03 MB
Page 15 of 377
Buick Envision Owner Manual (GMNA-Localizing-U.S./Canada/Mexico-
12032235) - 2019 - CRC - 6/27/18
14 In Brief
Exterior Mirrors
Power Mirrors
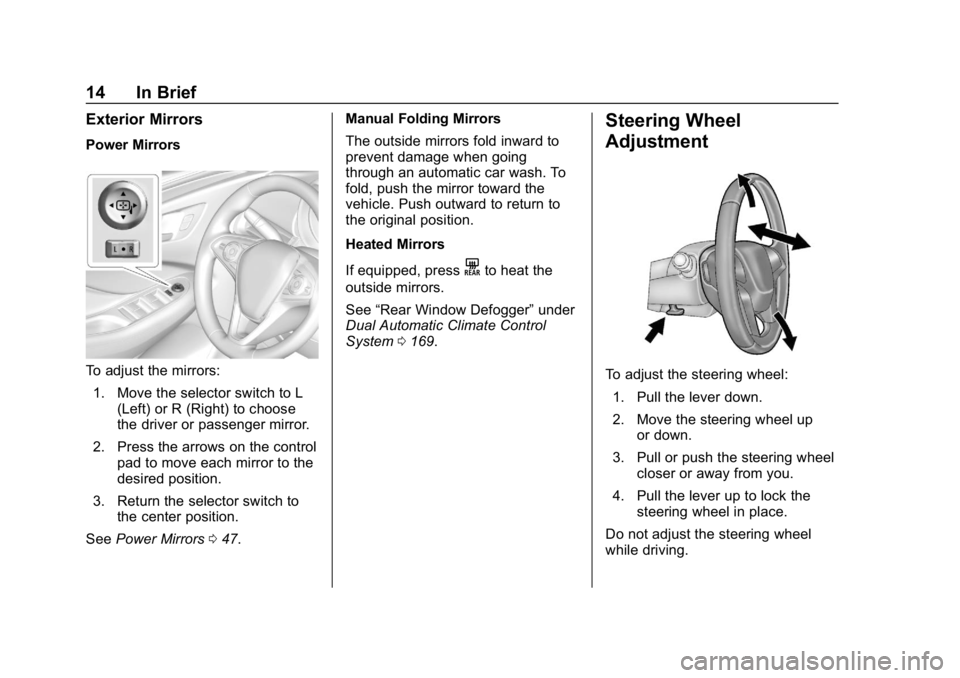
To adjust the mirrors:1. Move the selector switch to L (Left) or R (Right) to choose
the driver or passenger mirror.
2. Press the arrows on the control pad to move each mirror to the
desired position.
3. Return the selector switch to the center position.
See Power Mirrors 047. Manual Folding Mirrors
The outside mirrors fold inward to
prevent damage when going
through an automatic car wash. To
fold, push the mirror toward the
vehicle. Push outward to return to
the original position.
Heated Mirrors
If equipped, press
Kto heat the
outside mirrors.
See “Rear Window Defogger” under
Dual Automatic Climate Control
System 0169.
Steering Wheel
Adjustment
To adjust the steering wheel:
1. Pull the lever down.
2. Move the steering wheel up or down.
3. Pull or push the steering wheel closer or away from you.
4. Pull the lever up to lock the steering wheel in place.
Do not adjust the steering wheel
while driving.
Page 18 of 377
Buick Envision Owner Manual (GMNA-Localizing-U.S./Canada/Mexico-
12032235) - 2019 - CRC - 6/27/18
In Brief 17
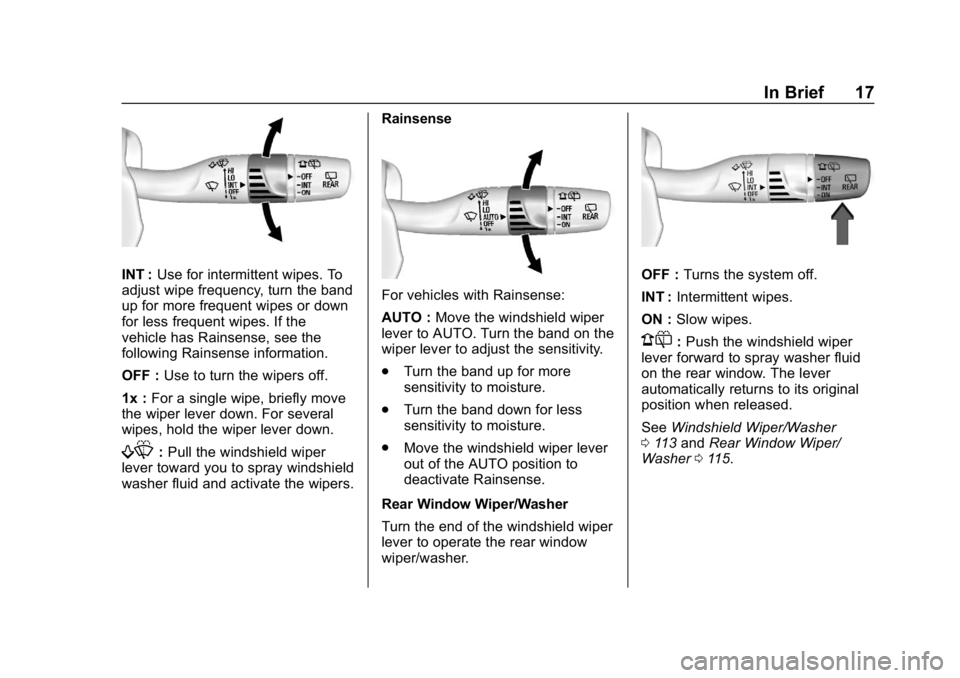
INT :Use for intermittent wipes. To
adjust wipe frequency, turn the band
up for more frequent wipes or down
for less frequent wipes. If the
vehicle has Rainsense, see the
following Rainsense information.
OFF : Use to turn the wipers off.
1x : For a single wipe, briefly move
the wiper lever down. For several
wipes, hold the wiper lever down.
f: Pull the windshield wiper
lever toward you to spray windshield
washer fluid and activate the wipers. Rainsense
For vehicles with Rainsense:
AUTO :
Move the windshield wiper
lever to AUTO. Turn the band on the
wiper lever to adjust the sensitivity.
. Turn the band up for more
sensitivity to moisture.
. Turn the band down for less
sensitivity to moisture.
. Move the windshield wiper lever
out of the AUTO position to
deactivate Rainsense.
Rear Window Wiper/Washer
Turn the end of the windshield wiper
lever to operate the rear window
wiper/washer.
OFF : Turns the system off.
INT : Intermittent wipes.
ON : Slow wipes.
1:Push the windshield wiper
lever forward to spray washer fluid
on the rear window. The lever
automatically returns to its original
position when released.
See Windshield Wiper/Washer
0 113 and Rear Window Wiper/
Washer 0115.
Page 35 of 377
Buick Envision Owner Manual (GMNA-Localizing-U.S./Canada/Mexico-
12032235) - 2019 - CRC - 6/27/18
34 Keys, Doors, and Windows
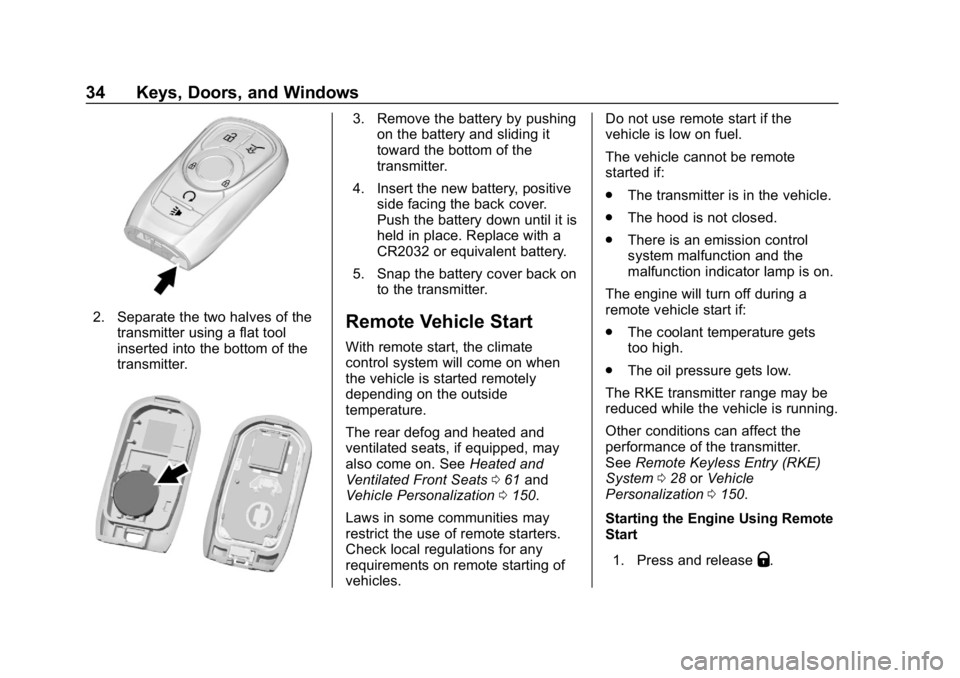
2. Separate the two halves of thetransmitter using a flat tool
inserted into the bottom of the
transmitter.
3. Remove the battery by pushingon the battery and sliding it
toward the bottom of the
transmitter.
4. Insert the new battery, positive side facing the back cover.
Push the battery down until it is
held in place. Replace with a
CR2032 or equivalent battery.
5. Snap the battery cover back on to the transmitter.
Remote Vehicle Start
With remote start, the climate
control system will come on when
the vehicle is started remotely
depending on the outside
temperature.
The rear defog and heated and
ventilated seats, if equipped, may
also come on. See Heated and
Ventilated Front Seats 061 and
Vehicle Personalization 0150.
Laws in some communities may
restrict the use of remote starters.
Check local regulations for any
requirements on remote starting of
vehicles. Do not use remote start if the
vehicle is low on fuel.
The vehicle cannot be remote
started if:
.
The transmitter is in the vehicle.
. The hood is not closed.
. There is an emission control
system malfunction and the
malfunction indicator lamp is on.
The engine will turn off during a
remote vehicle start if:
. The coolant temperature gets
too high.
. The oil pressure gets low.
The RKE transmitter range may be
reduced while the vehicle is running.
Other conditions can affect the
performance of the transmitter.
See Remote Keyless Entry (RKE)
System 028 orVehicle
Personalization 0150.
Starting the Engine Using Remote
Start
1. Press and release
Q.
Page 48 of 377

Buick Envision Owner Manual (GMNA-Localizing-U.S./Canada/Mexico-
12032235) - 2019 - CRC - 6/27/18
Keys, Doors, and Windows 47
Exterior Mirrors
Convex Mirrors
{Warning
A convex mirror can make things,
like other vehicles, look farther
away than they really are. If you
cut too sharply into the right lane,
you could hit a vehicle on the
right. Check the inside mirror or
glance over your shoulder before
changing lanes.
The passenger side mirror is convex
shaped. A convex mirror's surface is
curved so more can be seen from
the driver seat.
Power Mirrors
To adjust the mirrors: 1. Move the selector switch to the L (Left) or R (Right) to choose
the driver or passenger mirror.
2. Press the arrows on the control pad to move each mirror to the
desired position.
3. Return the selector switch to the center position.
Turn Signal Indicator
The vehicle may also have a turn
signal indicator on the mirror. An
arrow on the mirror flashes in the
direction of the turn or lane change.
Folding Mirrors
Manual Folding Mirrors
The mirrors can be folded inward
toward the vehicle to prevent
damage when going through an
automatic car wash. Push the mirror
outward to return it to the original
position.
Heated Mirrors
If equipped with heated mirrors:
K:The rear window defogger also
heats the outside mirrors.
See Dual Automatic Climate Control
System 0169.
Page 49 of 377
Buick Envision Owner Manual (GMNA-Localizing-U.S./Canada/Mexico-
12032235) - 2019 - CRC - 6/27/18
48 Keys, Doors, and Windows
Automatic Dimming
Mirror
If equipped, the vehicle has an
automatic dimming outside mirror(s).
The mirror(s) will adjust for the glare
of headlamps behind you.
Reverse Tilt Mirrors
If equipped with memory seats, the
passenger and/or driver mirror tilts
to a preselected position when the
vehicle is in R (Reverse). This
allows the curb to be seen when
parallel parking.
The mirror(s) return to the original
position when:
.The vehicle is shifted out of
R (Reverse), or remains in
R (Reverse) for about
30 seconds.
. The ignition is turned off.
. The vehicle is driven in
R (Reverse) above a set speed.
To turn this feature on or off, see
Vehicle Personalization 0150.
Interior Mirrors
Interior Rearview Mirrors
Adjust the rearview mirror for a clear
view of the area behind the vehicle.
Do not spray glass cleaner directly
on the mirror. Use a soft towel
dampened with water.
Automatic Dimming
Rearview Mirror
The rearview mirror automatically
dims to reduce the glare of the
headlamps from behind. This
feature comes on when the vehicle
is started.
Windows
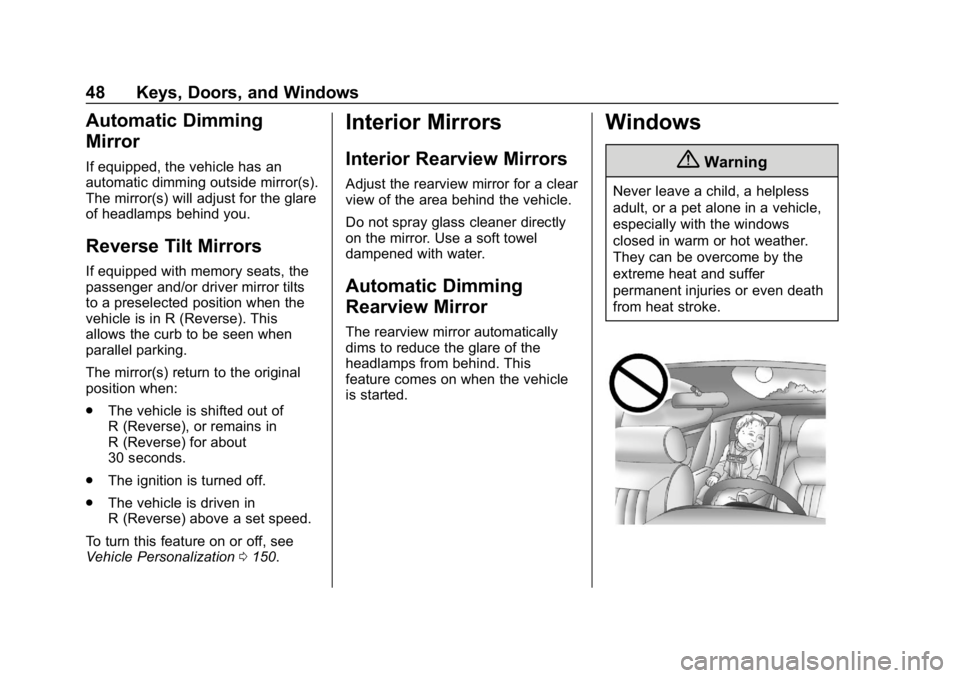
{Warning
Never leave a child, a helpless
adult, or a pet alone in a vehicle,
especially with the windows
closed in warm or hot weather.
They can be overcome by the
extreme heat and suffer
permanent injuries or even death
from heat stroke.
Page 64 of 377
Buick Envision Owner Manual (GMNA-Localizing-U.S./Canada/Mexico-
12032235) - 2019 - CRC - 6/27/18
Seats and Restraints 63
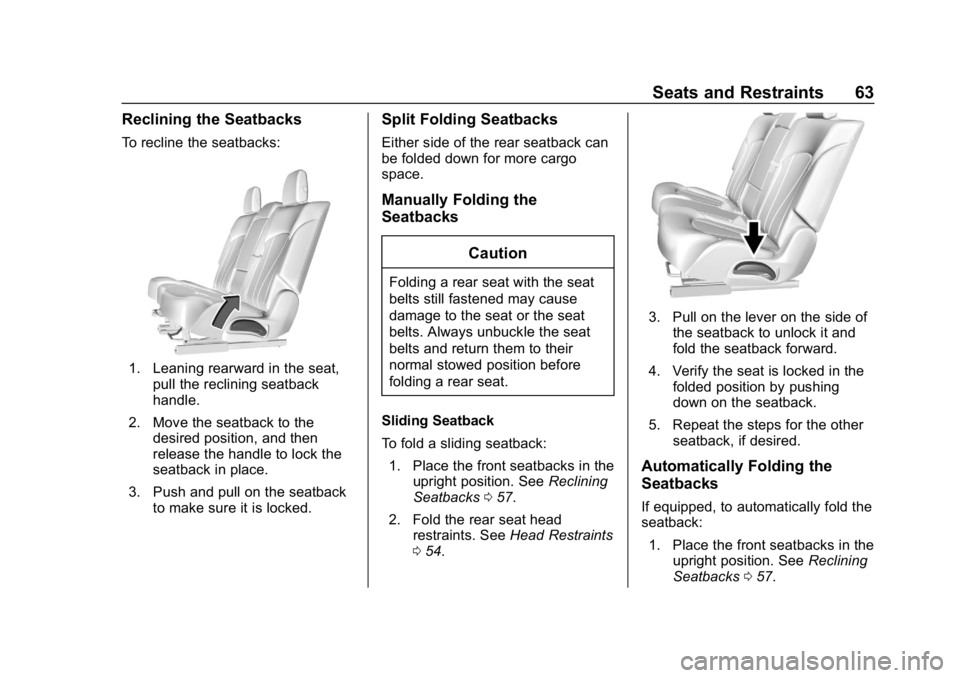
Reclining the Seatbacks
To recline the seatbacks:
1. Leaning rearward in the seat,pull the reclining seatback
handle.
2. Move the seatback to the desired position, and then
release the handle to lock the
seatback in place.
3. Push and pull on the seatback to make sure it is locked.
Split Folding Seatbacks
Either side of the rear seatback can
be folded down for more cargo
space.
Manually Folding the
Seatbacks
Caution
Folding a rear seat with the seat
belts still fastened may cause
damage to the seat or the seat
belts. Always unbuckle the seat
belts and return them to their
normal stowed position before
folding a rear seat.
Sliding Seatback
To fold a sliding seatback: 1. Place the front seatbacks in the upright position. See Reclining
Seatbacks 057.
2. Fold the rear seat head restraints. See Head Restraints
0 54.
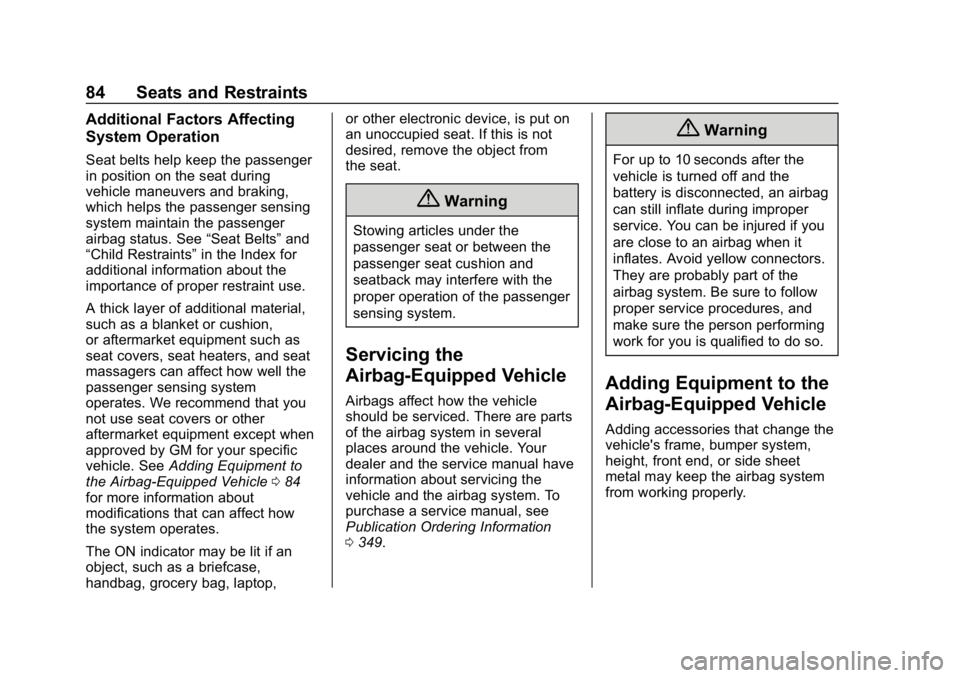
3. Pull on the lever on the side of
the seatback to unlock it and
fold the seatback forward.
4. Verify the seat is locked in the folded position by pushing
down on the seatback.
5. Repeat the steps for the other seatback, if desired.
Automatically Folding the
Seatbacks
If equipped, to automatically fold the
seatback:
1. Place the front seatbacks in the upright position. See Reclining
Seatbacks 057.
Page 71 of 377
Buick Envision Owner Manual (GMNA-Localizing-U.S./Canada/Mexico-
12032235) - 2019 - CRC - 6/27/18
70 Seats and Restraints
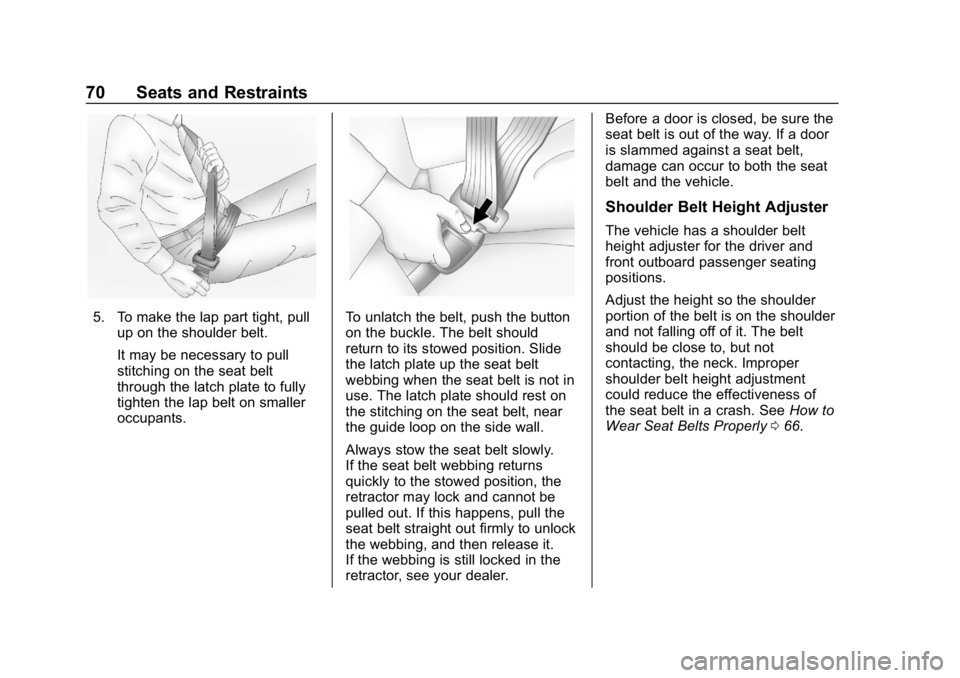
5. To make the lap part tight, pullup on the shoulder belt.
It may be necessary to pull
stitching on the seat belt
through the latch plate to fully
tighten the lap belt on smaller
occupants.To unlatch the belt, push the button
on the buckle. The belt should
return to its stowed position. Slide
the latch plate up the seat belt
webbing when the seat belt is not in
use. The latch plate should rest on
the stitching on the seat belt, near
the guide loop on the side wall.
Always stow the seat belt slowly.
If the seat belt webbing returns
quickly to the stowed position, the
retractor may lock and cannot be
pulled out. If this happens, pull the
seat belt straight out firmly to unlock
the webbing, and then release it.
If the webbing is still locked in the
retractor, see your dealer. Before a door is closed, be sure the
seat belt is out of the way. If a door
is slammed against a seat belt,
damage can occur to both the seat
belt and the vehicle.
Shoulder Belt Height Adjuster
The vehicle has a shoulder belt
height adjuster for the driver and
front outboard passenger seating
positions.
Adjust the height so the shoulder
portion of the belt is on the shoulder
and not falling off of it. The belt
should be close to, but not
contacting, the neck. Improper
shoulder belt height adjustment
could reduce the effectiveness of
the seat belt in a crash. See
How to
Wear Seat Belts Properly 066.
Page 79 of 377
Buick Envision Owner Manual (GMNA-Localizing-U.S./Canada/Mexico-
12032235) - 2019 - CRC - 6/27/18
78 Seats and Restraints
The passenger seat position sensor
and the passenger seat belt buckle
also provide information that is used
to determine if the passenger knee
airbag should inflate.
Seat-mounted side impact airbags
are designed to inflate in moderate
to severe side crashes depending
on the location of the impact.
Seat-mounted side impact airbags
are not designed to inflate in frontal
impacts, near frontal impacts,
rollovers, or rear impacts.
A seat-mounted side impact airbag
is designed to inflate on the side of
the vehicle that is struck.
Roof-rail airbags are designed to
inflate in moderate to severe side
crashes depending on the location
of the impact. In addition, these
roof-rail airbags are designed to
inflate during a rollover or in a
severe frontal impact. Roof-rail
airbags are not designed to inflate in
rear impacts. Both roof-rail airbags
will inflate when either side of the
vehicle is struck, if the sensingsystem predicts that the vehicle is
about to roll over on its side, or in a
severe frontal impact.
In any particular crash, no one can
say whether an airbag should have
inflated simply because of the
vehicle damage or the repair costs.
What Makes an Airbag
Inflate?
In a deployment event, the sensing
system sends an electrical signal
triggering a release of gas from the
inflator. Gas from the inflator fills the
airbag causing the bag to break out
of the cover. The inflator, the airbag,
and related hardware are all part of
the airbag module.
For airbag locations, see
Where Are
the Airbags? 075.
How Does an Airbag
Restrain?
In moderate to severe frontal or
near frontal collisions, even belted
occupants can contact the steering
wheel or the instrument panel. In moderate to severe side collisions,
even belted occupants can contact
the inside of the vehicle.
Airbags supplement the protection
provided by seat belts by
distributing the force of the impact
more evenly over the
occupant's body.
Rollover capable roof-rail airbags
are designed to help contain the
head and chest of occupants in the
outboard seating positions in the
first and second rows. The rollover
capable roof-rail airbags are
designed to help reduce the risk of
full or partial ejection in rollover
events, although no system can
prevent all such ejections.
But airbags would not help in many
types of collisions, primarily
because the occupant's motion is
not toward those airbags. See
When
Should an Airbag Inflate? 077.
Airbags should never be regarded
as anything more than a supplement
to seat belts.
Page 85 of 377
Buick Envision Owner Manual (GMNA-Localizing-U.S./Canada/Mexico-
12032235) - 2019 - CRC - 6/27/18
84 Seats and Restraints
Additional Factors Affecting
System Operation
Seat belts help keep the passenger
in position on the seat during
vehicle maneuvers and braking,
which helps the passenger sensing
system maintain the passenger
airbag status. See“Seat Belts”and
“Child Restraints” in the Index for
additional information about the
importance of proper restraint use.
A thick layer of additional material,
such as a blanket or cushion,
or aftermarket equipment such as
seat covers, seat heaters, and seat
massagers can affect how well the
passenger sensing system
operates. We recommend that you
not use seat covers or other
aftermarket equipment except when
approved by GM for your specific
vehicle. See Adding Equipment to
the Airbag-Equipped Vehicle 084
for more information about
modifications that can affect how
the system operates.
The ON indicator may be lit if an
object, such as a briefcase,
handbag, grocery bag, laptop, or other electronic device, is put on
an unoccupied seat. If this is not
desired, remove the object from
the seat.
{Warning
Stowing articles under the
passenger seat or between the
passenger seat cushion and
seatback may interfere with the
proper operation of the passenger
sensing system.
Servicing the
Airbag-Equipped Vehicle
Airbags affect how the vehicle
should be serviced. There are parts
of the airbag system in several
places around the vehicle. Your
dealer and the service manual have
information about servicing the
vehicle and the airbag system. To
purchase a service manual, see
Publication Ordering Information
0
349.
{Warning
For up to 10 seconds after the
vehicle is turned off and the
battery is disconnected, an airbag
can still inflate during improper
service. You can be injured if you
are close to an airbag when it
inflates. Avoid yellow connectors.
They are probably part of the
airbag system. Be sure to follow
proper service procedures, and
make sure the person performing
work for you is qualified to do so.
Adding Equipment to the
Airbag-Equipped Vehicle
Adding accessories that change the
vehicle's frame, bumper system,
height, front end, or side sheet
metal may keep the airbag system
from working properly.
Page 88 of 377
Buick Envision Owner Manual (GMNA-Localizing-U.S./Canada/Mexico-
12032235) - 2019 - CRC - 6/27/18
Seats and Restraints 87
Q: What is the proper way towear seat belts?
A: An older child should wear a
lap-shoulder belt and get the
additional restraint a shoulder
belt can provide. The shoulder
belt should not cross the face or
neck. The lap belt should fit
snugly below the hips, just
touching the top of the thighs.
This applies belt force to the
child's pelvic bones in a crash.
It should never be worn over the
abdomen, which could cause
severe or even fatal internal
injuries in a crash.
Also see “Rear Seat Belt Comfort
Guides” underLap-Shoulder Belt
0 68.
According to accident statistics,
children are safer when properly
restrained in a rear seating position.
In a crash, children who are not
buckled up can strike other people
who are buckled up, or can be
thrown out of the vehicle. Older
children need to use seat belts
properly.{Warning
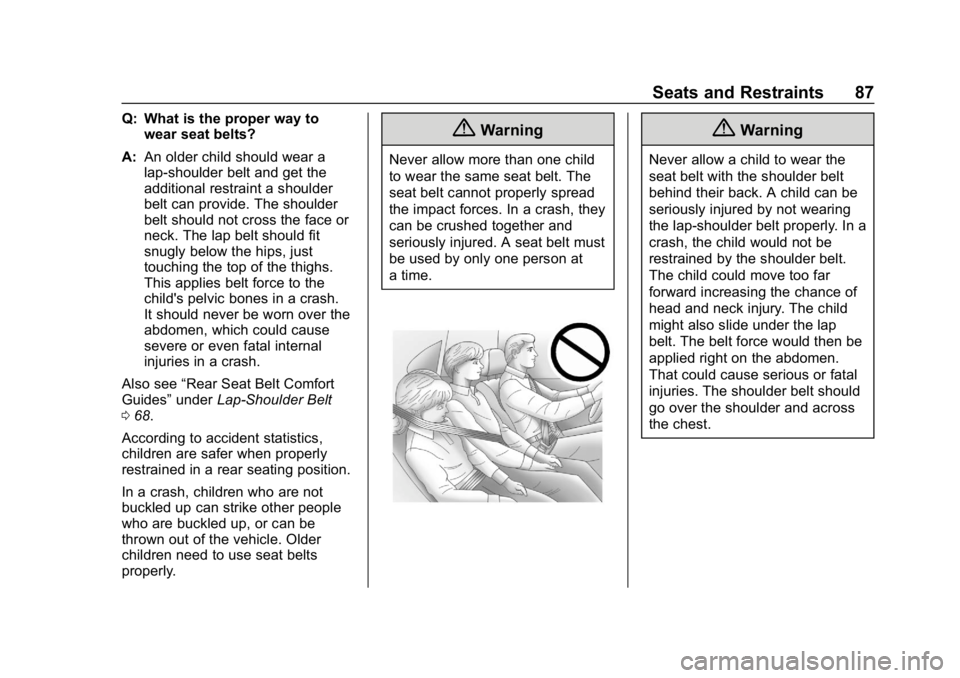
Never allow more than one child
to wear the same seat belt. The
seat belt cannot properly spread
the impact forces. In a crash, they
can be crushed together and
seriously injured. A seat belt must
be used by only one person at
a time.
{Warning
Never allow a child to wear the
seat belt with the shoulder belt
behind their back. A child can be
seriously injured by not wearing
the lap-shoulder belt properly. In a
crash, the child would not be
restrained by the shoulder belt.
The child could move too far
forward increasing the chance of
head and neck injury. The child
might also slide under the lap
belt. The belt force would then be
applied right on the abdomen.
That could cause serious or fatal
injuries. The shoulder belt should
go over the shoulder and across
the chest.