stop start BUICK LACROSSE 2006 User Guide
[x] Cancel search | Manufacturer: BUICK, Model Year: 2006, Model line: LACROSSE, Model: BUICK LACROSSE 2006Pages: 444, PDF Size: 2.66 MB
Page 170 of 444
Emissions Inspection and Maintenance
Programs
Some state/provincial and local governments have or
may begin programs to inspect the emission control
equipment on your vehicle. Failure to pass this
inspection could prevent you from getting a vehicle
registration.
Here are some things you need to know to help your
vehicle pass an inspection:
Your vehicle will not pass this inspection if the check
engine light is on or not working properly.
Your vehicle will not pass this inspection if the OBD
(on-board diagnostic) system determines that critical
emission control systems have not been completely
diagnosed by the system. The vehicle would be
considered not ready for inspection. This can happen if
you have recently replaced your battery or if your battery
has run down. The diagnostic system is designed to
evaluate critical emission control systems during normal
driving. This may take several days of routine driving. If
you have done this and your vehicle still does not pass
the inspection for lack of OBD system readiness, your
GM dealer can prepare the vehicle for inspection.
Oil Pressure Light
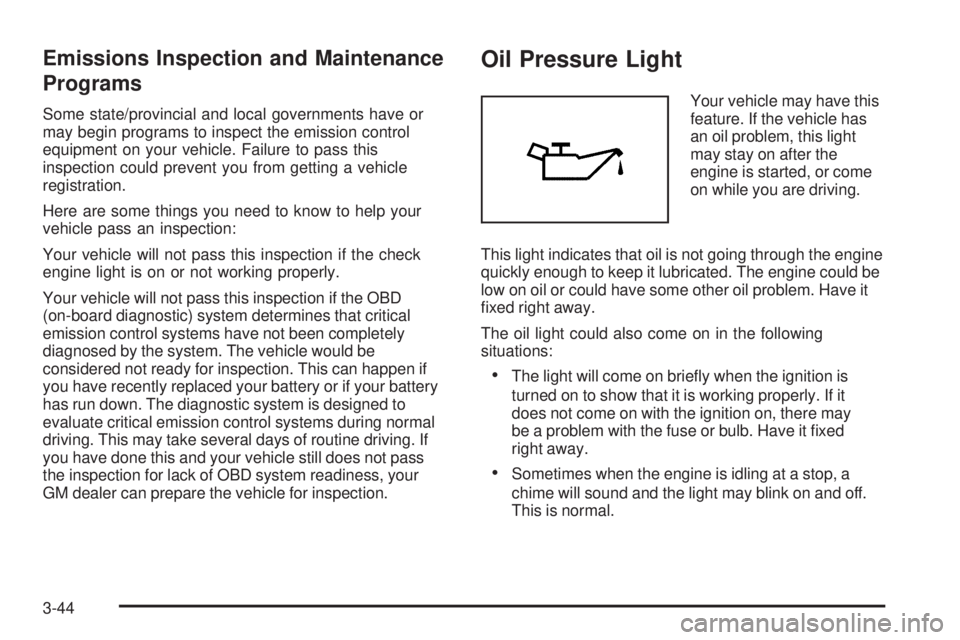
Your vehicle may have this
feature. If the vehicle has
an oil problem, this light
may stay on after the
engine is started, or come
on while you are driving.
This light indicates that oil is not going through the engine
quickly enough to keep it lubricated. The engine could be
low on oil or could have some other oil problem. Have it
�xed right away.
The oil light could also come on in the following
situations:
The light will come on brie�y when the ignition is
turned on to show that it is working properly. If it
does not come on with the ignition on, there may
be a problem with the fuse or bulb. Have it �xed
right away.
Sometimes when the engine is idling at a stop, a
chime will sound and the light may blink on and off.
This is normal.
3-44
Page 179 of 444
There is also a retroactive trip odometer function that
performs the following for each trip odometer:
If the vehicle’s speed has exceeded 3 mph (5 km/h)
during the current ignition cycle, this function will
set the trip odometer to the distance driven
during the current ignition cycle.
If the vehicle’s speed has not exceeded 3 mph
(5 km/h), this function will set the trip odometer
to the distance driven during the previous ignition
cycle plus the distance driven during the current
ignition cycle.
Press and hold the set/reset button on the uplevel
vehicle or the trip/odometer button on the base level
vehicle for three seconds, then release the button.
The retroactive trip odometer value will be set into the
currently displayed trip odometer.
Time Elapsed (Uplevel Only)
Press the trip/odometer button until TIME ELAPSED :00
displays. This mode is like a stopwatch, in that you
can clock the time it takes to get from one point
to another. Each of the �elds for the hours, minutes,
and seconds are two numeric digits.Once TIME ELAPSED :00 is displayed, press the
set/reset button on the uplevel vehicle to start the timing
feature. Press the set/reset button again to stop it. If
you will be starting and stopping your vehicle, during a
trip for instance, the TIME ELAPSED feature will
automatically start timing where it left off when you last
stopped. To reset it, press and hold the set/reset
button for approximately 1.5 seconds. The display will
return to zero. Press the trip/odometer button to
exit from the TIME ELAPSED display.
Average Speed (Uplevel Only)
Press the trip/odometer button until AVERAGE SPEED
displays. This mode shows the average speed of the
vehicle in miles per hour (mph) or kilometers per hour
(km/h). This average is calculated based on the various
vehicle speed recorded since the last reset of this value.
To reset the value, press the trip/odometer button to
display AVERAGE SPEED, then press and hold the
set/reset button on the uplevel vehicle. The display will
return to zero.
3-53
Page 186 of 444
BATTERY SAVER ACTIVE
This message will display when the system detects that
the battery voltage is dropping beyond a reasonable
level. The battery saver system will start reducing certain
features of the vehicle that you may be able to notice.
At the point that the features are disabled, this message
is displayed. It means that the vehicle is trying to
save the charge in the battery.
Turn off all unnecessary accessories to allow the battery
to recharge.
The normal battery voltage range is 11.5 to 15.5 volts.
If you have an uplevel DIC, you can monitor the
battery voltage by pressing the gages button until
BATTERY displays.
CHANGE OIL SOON
This message will display when service is required
for the vehicle. See your GM dealer. SeeEngine Oil on
page 5-15andScheduled Maintenance on page 6-4
for more information.
The CHANGE OIL SOON message is reset by
acknowledging the message. The OIL LIFE screen
under the gages menu on the DIC must also be reset.
See “Oil Life” underDIC Operation and Displays on
page 3-51andEngine Oil Life System on page 5-18.
This message will display while the ignition is in RUN.
Press any of the DIC buttons to acknowledge this
message and to clear it from the screen.This message will continue to display for two seconds
if it has not been acknowledged when the engine is
turned off. It will also re-display for two seconds if the
message has been acknowledged, but the condition still
exists when the engine is turned off.
If the condition still exists, the message will re-appear
when the engine is turned on.
CHARGING SYSTEM FAILURE
This message will display when there is a problem
with the generator and battery charging systems. Driving
with this problem could drain your battery. Turn off all
unnecessary accessories. Stop and turn off the vehicle
as soon as it is safe to do so. Have the electrical system
checked by your GM dealer immediately.
This message will display and a chime will sound while
the ignition is in RUN. Press any of the DIC buttons
to acknowledge this message and to clear it from
the screen.
This message will continue to display for two seconds if
it has not been acknowledged when the engine is turned
off. It will also re-display for two seconds if the message
has been acknowledged, but the condition still exists
when the engine is turned off.
If the condition still exists, the message will re-appear
when the engine is turned on.
3-60
Page 195 of 444
This message will continue to display for two seconds
if it has not been acknowledged when the engine is
turned off. It will also re-display for two seconds if the
message has been acknowledged, but the condition still
exists when the engine is turned off.
If the condition still exists, the message will re-appear
when the engine is turned on.
REDUCED POWER STOP WHEN SAFE
This message will display when your vehicle is in an
overheated engine operating mode. This operating mode
allows your vehicle to be driven to a safe place in an
emergency. In this mode, you will notice a signi�cant
loss in power and engine performance. SeeOverheated
Engine Protection Operating Mode on page 5-29for
more information. Anytime this message is on, the
vehicle should be taken to your GM dealer for service
as soon as possible.
This message will display and a chime will sound only
when the ignition is in RUN. Press any of the DIC
buttons to acknowledge this message and to clear it
from the screen.
This message will continue to display for two seconds
if it has not been acknowledged when the engine is
turned off. It will also re-display for two seconds if the
message has been acknowledged, but the condition still
exists when the engine is turned off.
If the condition still exists, the message will re-appear
when the engine is turned on.
REMOTE START DISABLED
This warning message will come on if a remote start
attempt is unsuccessful. This may be caused if any of
the following conditions are true when a remote
start attempt is made:
The remote start system is disabled through
the DIC.
The key is in the ignition.
The hood or the doors are not closed.
There is an emission control system malfunction.
The engine coolant temperature is too high.
The oil pressure is low.
The hazard warning �ashers are turned on.
The maximum number of remote starts or remote
start attempts between ignition cycles has been
reached.
The content theft-deterrent alarm is on while
attempting to remote start the vehicle.
See “REMOTE START” underDIC Vehicle
Personalization on page 3-75and “Remote Vehicle
Start” underRemote Keyless Entry System Operation
on page 2-4for more information.
3-69
Page 214 of 444
To adjust the balance and the fade to the middle
position, push the speaker knob, then push it again and
hold it until you hear one beep.
To adjust all tone and speaker controls to the middle
position, push and hold the speaker knob when no tone
or speaker control is displayed. CEN will appear on
the display and you will hear a beep.
Radio Messages
CAL (Calibration):The audio system has been
calibrated for your vehicle from the factory. If CAL
appears on the display it means that the radio has not
been con�gured properly for your vehicle and it must be
returned to your GM dealer for service.
LOC (Locked):This message is displayed when the
THEFTLOCK
®system has locked up. Take your vehicle
to your GM dealer for service.
If any error occurs repeatedly or if an error cannot be
corrected, contact your GM dealer.
Playing a CD
Insert a CD partway into the slot, label side up. The
player will pull it in and the CD should begin playing.
If you want to insert a CD with the ignition off, �rst press
the eject button or the DISP knob.
If the ignition or radio is turned off with a CD in the
player it will stay in the player. When the ignition or radio
is turned on, the CD will start to play where it stopped,
if it was the last selected audio source.
When the CD is inserted, CD will appear on the display.
As each new track starts to play, the track number
will appear on the display.
The CD player can play the smaller 3 inch (8 cm)
single CDs with an adapter ring. Full-size CDs and
the smaller CDs are loaded in the same manner.
If playing a CD-R, the sound quality may be reduced
due to CD-R quality, the method of recording, the quality
of the music that has been recorded, and the way the
CD-R has been handled. There may be an increase
in skipping, difficulty in �nding tracks, and/or difficulty in
loading and ejecting. If these problems occur, check
the bottom surface of the CD. If the surface of the CD is
damaged, such as cracked, broken, or scratched, the
CD will not play properly. If the surface of the CD
is soiled, seeCare of Your CDs on page 3-128for more
information.
3-88
Page 215 of 444
If there is no apparent damage, try a known good CD.
Do not add any label to a CD, it could get caught in the
CD player. If a CD is recorded on a personal computer
and a description label is needed, try labeling the top
of the recorded CD with a marking pen instead.
Notice:If you add any label to a CD, insert more
than one CD into the slot at a time, or attempt to play
scratched or damaged CDs, you could damage the
CD player. When using the CD player, use only CDs
in good condition without any label, load one CD at a
time, and keep the CD player and the loading slot free
of foreign materials, liquids, and debris.
If an error appears on the display, see “CD Messages”
later in this section.
1
s(Reverse):Press this button to reverse within
the current track.
2
\(Fast Forward):Press this button to fast forward
within the current track.
4 RDM (Random):Press this pushbutton to hear the
tracks in random, rather than sequential, order. RND will
appear on the display. Press this pushbutton again to
turn off random play.
oSEEKp:Press the left arrow to go to the start of
the current or the previous track. Press the right
arrow to go to the start of the next track.
To scan tracks, press either arrow for more than
two seconds until SCN appears on the display. The
radio will go to the next track, play for 10 seconds, then
go on to the next track. Press either arrow to stop
scanning.
DISP (Display):Press this button to see how long the
current track has been playing. The elapsed time of
the track will appear on the display. To change
the default on the display, track, elapsed time, or time of
day, press this button until you see the display you
want, then hold the button for two seconds. The radio
will produce one beep and the selected display will now
be the default.
BAND:Press this button to listen to the radio when a
CD is playing. The inactive CD will remain safely
inside the radio for future listening.
CD:Press this button to play a CD when listening to
the radio. The CD symbol will appear on the display
when a CD is loaded.
Z(Eject):Press this button to eject a CD. Eject may
be activated with either the ignition or radio off. CDs
may be loaded with the ignition and radio off if this
button is pressed �rst.
3-89
Page 223 of 444
Playing a CD
Insert a CD partway into the slot, label side up. The
player will pull it in and the CD should begin playing.
If you want to insert a CD with the ignition off, �rst press
the eject button or the DISP knob.
If the ignition or radio is turned off with a CD in the
player it will stay in the player. When the ignition or radio
is turned on, the CD will start to play where it stopped,
if it was the last selected audio source.
When the CD is inserted, the CD symbol will appear
on the display. As each new track starts to play,
the track number will appear on the display.
The CD player can play the smaller 3 inch (8 cm) single
CDs with an adapter ring. Full-size CDs and the
smaller CDs are loaded in the same manner.
If playing a CD-R, the sound quality may be reduced due
to CD-R quality, the method of recording, the quality of
the music that has been recorded, and the way the CD-R
has been handled. There may be an increase in skipping,
difficulty in �nding tracks, and/or difficulty in loading and
ejecting. If these problems occur, check the bottom
surface of the CD. If the surface of the CD is damaged,
such as cracked, broken, or scratched, the CD will not
play properly. If the surface of the CD is soiled, seeCare
of Your CDs on page 3-128for more information.If there is no apparent damage, try a known good CD.
Do not add any label to a CD, it could get caught in the
CD player. If a CD is recorded on a personal computer
and a description label is needed, try labeling the top
of the recorded CD with a marking pen instead.
Notice:If you add any label to a CD, insert more
than one CD into the slot at a time, or attempt to play
scratched or damaged CDs, you could damage the
CD player. When using the CD player, use only CDs
in good condition without any label, load one CD at a
time, and keep the CD player and the loading slot free
of foreign materials, liquids, and debris.
If an error appears on the display, see “CD Messages”
later in this section.
1
s(Reverse):Press this pushbutton to go to the
start of the current track if more than eight seconds have
played. The reverse symbol and the track number will
appear on the display. If this pushbutton is held or
pressed more than once, the player will continue moving
backward through the CD.
3-97
Page 232 of 444
Playing a CD
Insert a CD partway into the slot, label side up. The
player will pull it in and the CD should begin playing.
If you want to insert a CD with the ignition off, �rst press
the eject button or the DISP knob.
If the ignition or radio is turned off with a CD in the
player it will stay in the player. When the ignition or radio
is turned on, the CD will start to play where it stopped,
if it was the last selected audio source.
When the CD is inserted, the CD symbol will appear on
the display. As each new track starts to play, the
track number will appear on the display.
The CD player can play the smaller 3 inch (8 cm) single
CDs with an adapter ring. Full-size CDs and the smaller
CDs are loaded in the same manner.
If playing a CD-R, the sound quality may be reduced
due to CD-R quality, the method of recording, the quality
of the music that has been recorded, and the way the
CD-R has been handled. There may be an increase
in skipping, difficulty in �nding tracks, and/or difficulty in
loading and ejecting. If these problems occur, check
the bottom surface of the CD. If the surface of the CD is
damaged, such as cracked, broken, or scratched, the
CD will not play properly. If the surface of the CD
is soiled, seeCare of Your CDs on page 3-128for more
information.If there is no apparent damage, try a known good CD.
Do not add any label to a CD, it could get caught in the
CD player. If a CD is recorded on a personal computer
and a description label is needed, try labeling the top of
the recorded CD with a marking pen instead.
Notice:If you add any label to a CD, insert more
than one CD into the slot at a time, or attempt
to play scratched or damaged CDs, you could
damage the CD player. When using the CD player,
use only CDs in good condition without any
label, load one CD at a time, and keep the CD player
and the loading slot free of foreign materials,
liquids, and debris.
If an error appears on the display, see “CD Messages”
later in this section.
1
s(Reverse):Press this button to reverse within
the current track.
2
\(Fast Forward):Press this button to fast forward
within the current track.
3
N(Repeat):Press this pushbutton to hear a track
over again. REPEAT TRACK will appear on the display.
The current track will continue to repeat. Press this
pushbutton again to turn off repeat play.
3-106
Page 236 of 444
If the ignition or radio is turned off with a CD in the
player it will stay in the player. When the ignition or radio
is turned on, the CD will start to play where it stopped,
if it was the last selected audio source.
The CD player can play the smaller 3 inch (8 cm) single
CDs with an adapter ring. Full-size CDs and the
smaller CDs are loaded in the same manner.
If playing a CD-R, the sound quality may be reduced due
to CD-R quality, the method of recording, the quality of
the music that has been recorded, and the way the CD-R
has been handled. There may be an increase in skipping,
difficulty in �nding tracks, and/or difficulty in loading and
ejecting. If these problems occur, check the bottom
surface of the CD. If the surface of the CD is damaged,
such as cracked, broken, or scratched, the CD will not
play properly. If the surface of the CD is soiled, seeCare
of Your CDs on page 3-128for more information.
If there is no apparent damage, try a known good CD.
Do not add any label to a CD, it could get caught in the
CD player. If a CD is recorded on a personal computer
and a description label is needed, try labeling the top
of the recorded CD with a marking pen instead.Notice:If you add any label to a CD, insert more
than one CD into the slot at a time, or attempt to play
scratched or damaged CDs, you could damage the
CD player. When using the CD player, use only CDs
in good condition without any label, load one CD at a
time, and keep the CD player and the loading slot free
of foreign materials, liquids, and debris.
If an error appears on the display, see “CD Messages”
later in this section.
1
s(Reverse):Press this button to reverse within
the current track.
2
\(Fast Forward):Press this button to fast forward
within the current track.
3
N(Repeat):With repeat, one track, the entire
folder, or playlist can be repeated.
Press and release this pushbutton until REPEAT
TRACK, REPEAT FOLDER, or REPEAT P-LIST
appears on the display. The current track, folder or
playlist will continue to repeat. Press and release this
pushbutton until REPEAT OFF appears on the display to
turn off repeated play.
3-110
Page 246 of 444
Playing a CD
If the ignition or radio is turned off, with a CD in the
player, it will stay in the player. When the ignition or
radio is turned on, the CD will start playing where it
stopped, if it was the last selected audio source.
When a CD is inserted, the CD symbol will appear on
the CD. As each new track starts to play, the track
number will appear on the display.
The CD player can play the smaller 3 inch (8 cm) single
CDs with an adapter ring. Full-size CDs and the smaller
CDs are loaded in the same manner.
If playing a CD-R, the sound quality may be reduced
due to CD-R quality, the method of recording, the quality
of the music that has been recorded, and the way the
CD-R has been handled. There may be an increase
in skipping, difficulty in �nding tracks, and/or difficulty
in loading and ejecting. If these problems occur, check
the bottom surface of the CD. If the surface of the
CD is damaged, such as cracked, broken, or scratched,
the CD will not play properly. If the surface of the CD
is soiled, seeCare of Your CDs on page 3-128for
more information.
If there is no apparent damage, try a known good CD.Do not add any label to a CD, it could get caught in the
CD player. If a CD is recorded on a personal computer
and a description label is needed, try labeling the top of
the recorded CD with a marking pen instead.
Notice:If you add any label to a CD, insert more
than one CD into the slot at a time, or attempt to play
scratched or damaged CDs, you could damage the
CD player. When using the CD player, use only CDs
in good condition without any label, load one CD at a
time, and keep the CD player and the loading slot free
of foreign materials, liquids, and debris.
If an error appears on the display, see “CD Messages”
later in this section.
LOAD:Press this button to load CDs into the CD
player. This CD player will hold up to six CDs.
To insert one CD, do the following:
1. Turn the ignition on.
2. Press and release the LOAD button.
3. Wait for the indicator light, located to the right of
the slot, to turn green.
4. Load a CD. Insert the CD partway into the slot,
label side up. The player will pull the CD in.
3-120