buttons BUICK LACROSSE 2007 User Guide
[x] Cancel search | Manufacturer: BUICK, Model Year: 2007, Model line: LACROSSE, Model: BUICK LACROSSE 2007Pages: 512
Page 138 of 512
Programming Universal Home Remote
Follow these steps to program up to three
channels:
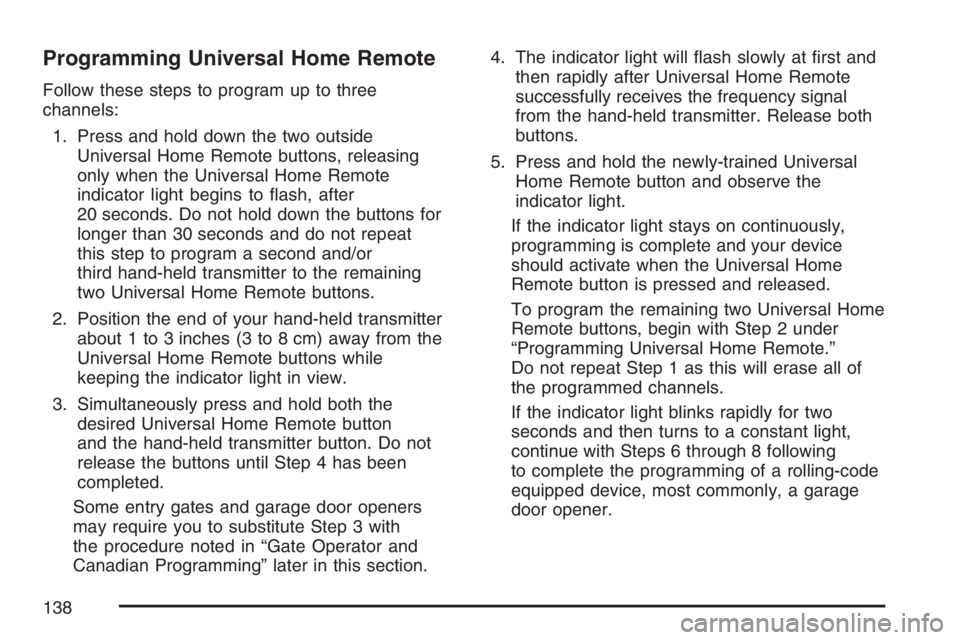
1. Press and hold down the two outside
Universal Home Remote buttons, releasing
only when the Universal Home Remote
indicator light begins to �ash, after
20 seconds. Do not hold down the buttons for
longer than 30 seconds and do not repeat
this step to program a second and/or
third hand-held transmitter to the remaining
two Universal Home Remote buttons.
2. Position the end of your hand-held transmitter
about 1 to 3 inches (3 to 8 cm) away from the
Universal Home Remote buttons while
keeping the indicator light in view.
3. Simultaneously press and hold both the
desired Universal Home Remote button
and the hand-held transmitter button. Do not
release the buttons until Step 4 has been
completed.
Some entry gates and garage door openers
may require you to substitute Step 3 with
the procedure noted in “Gate Operator and
Canadian Programming” later in this section.4. The indicator light will �ash slowly at �rst and
then rapidly after Universal Home Remote
successfully receives the frequency signal
from the hand-held transmitter. Release both
buttons.
5. Press and hold the newly-trained Universal
Home Remote button and observe the
indicator light.
If the indicator light stays on continuously,
programming is complete and your device
should activate when the Universal Home
Remote button is pressed and released.
To program the remaining two Universal Home
Remote buttons, begin with Step 2 under
“Programming Universal Home Remote.”
Do not repeat Step 1 as this will erase all of
the programmed channels.
If the indicator light blinks rapidly for two
seconds and then turns to a constant light,
continue with Steps 6 through 8 following
to complete the programming of a rolling-code
equipped device, most commonly, a garage
door opener.
138
Page 139 of 512
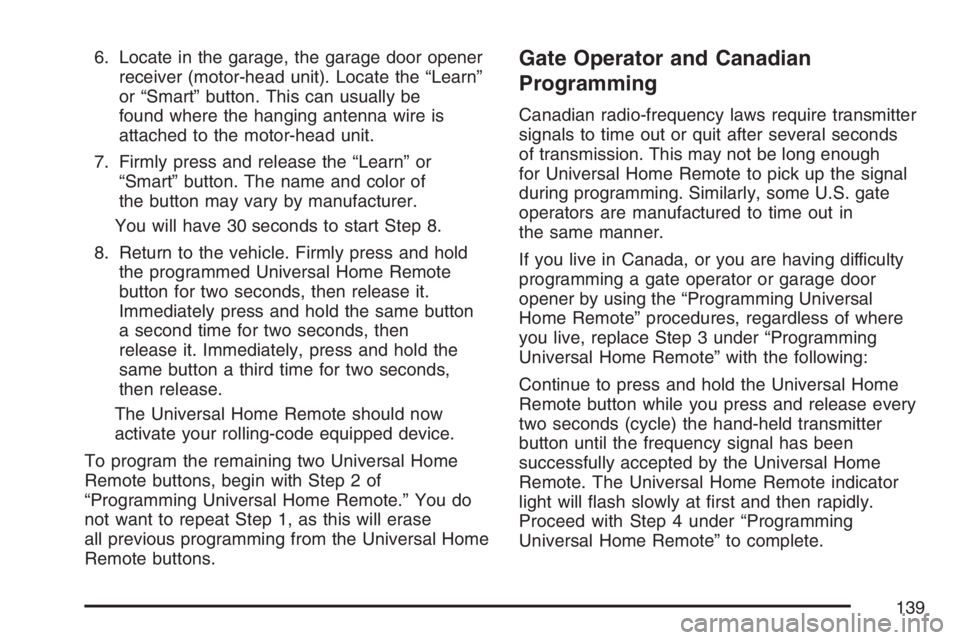
6. Locate in the garage, the garage door opener
receiver (motor-head unit). Locate the “Learn”
or “Smart” button. This can usually be
found where the hanging antenna wire is
attached to the motor-head unit.
7. Firmly press and release the “Learn” or
“Smart” button. The name and color of
the button may vary by manufacturer.
You will have 30 seconds to start Step 8.
8. Return to the vehicle. Firmly press and hold
the programmed Universal Home Remote
button for two seconds, then release it.
Immediately press and hold the same button
a second time for two seconds, then
release it. Immediately, press and hold the
same button a third time for two seconds,
then release.
The Universal Home Remote should now
activate your rolling-code equipped device.
To program the remaining two Universal Home
Remote buttons, begin with Step 2 of
“Programming Universal Home Remote.” You do
not want to repeat Step 1, as this will erase
all previous programming from the Universal Home
Remote buttons.Gate Operator and Canadian
Programming
Canadian radio-frequency laws require transmitter
signals to time out or quit after several seconds
of transmission. This may not be long enough
for Universal Home Remote to pick up the signal
during programming. Similarly, some U.S. gate
operators are manufactured to time out in
the same manner.
If you live in Canada, or you are having difficulty
programming a gate operator or garage door
opener by using the “Programming Universal
Home Remote” procedures, regardless of where
you live, replace Step 3 under “Programming
Universal Home Remote” with the following:
Continue to press and hold the Universal Home
Remote button while you press and release every
two seconds (cycle) the hand-held transmitter
button until the frequency signal has been
successfully accepted by the Universal Home
Remote. The Universal Home Remote indicator
light will �ash slowly at �rst and then rapidly.
Proceed with Step 4 under “Programming
Universal Home Remote” to complete.
139
Page 140 of 512
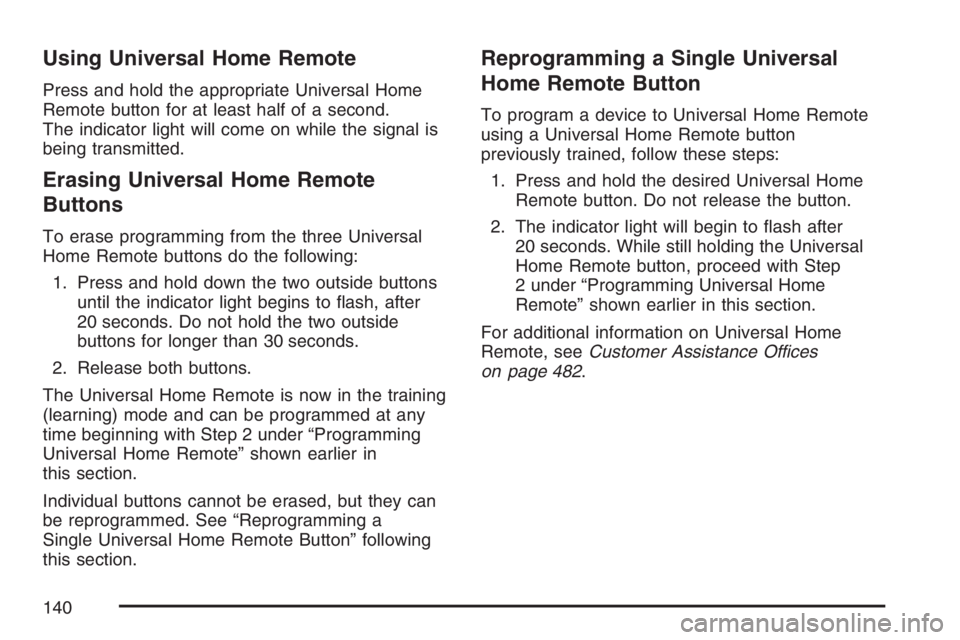
Using Universal Home Remote
Press and hold the appropriate Universal Home
Remote button for at least half of a second.
The indicator light will come on while the signal is
being transmitted.
Erasing Universal Home Remote
Buttons
To erase programming from the three Universal
Home Remote buttons do the following:
1. Press and hold down the two outside buttons
until the indicator light begins to �ash, after
20 seconds. Do not hold the two outside
buttons for longer than 30 seconds.
2. Release both buttons.
The Universal Home Remote is now in the training
(learning) mode and can be programmed at any
time beginning with Step 2 under “Programming
Universal Home Remote” shown earlier in
this section.
Individual buttons cannot be erased, but they can
be reprogrammed. See “Reprogramming a
Single Universal Home Remote Button” following
this section.
Reprogramming a Single Universal
Home Remote Button
To program a device to Universal Home Remote
using a Universal Home Remote button
previously trained, follow these steps:
1. Press and hold the desired Universal Home
Remote button. Do not release the button.
2. The indicator light will begin to �ash after
20 seconds. While still holding the Universal
Home Remote button, proceed with Step
2 under “Programming Universal Home
Remote” shown earlier in this section.
For additional information on Universal Home
Remote, seeCustomer Assistance Offices
on page 482.
140
Page 149 of 512
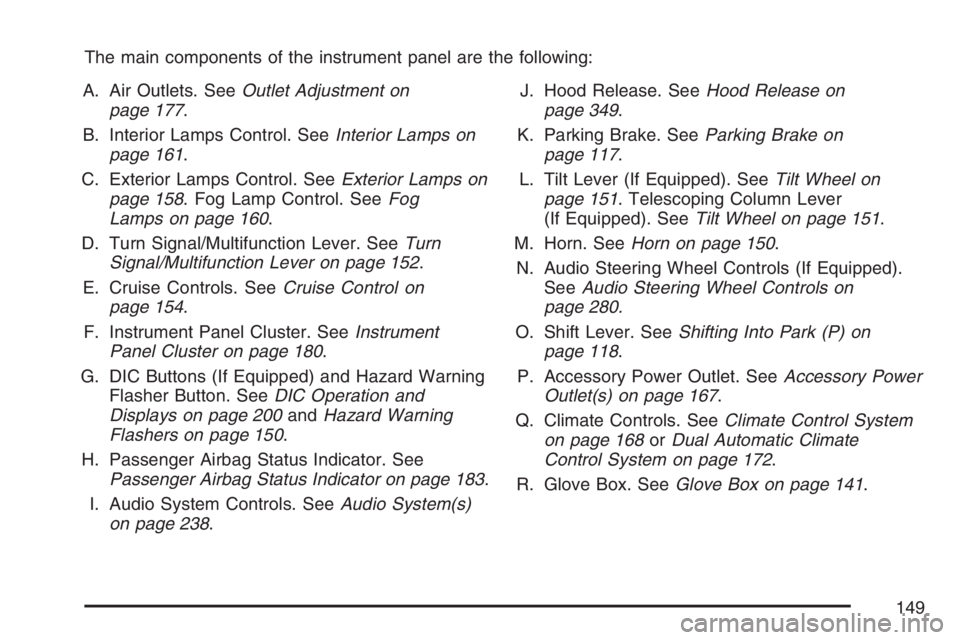
The main components of the instrument panel are the following:
A. Air Outlets. SeeOutlet Adjustment on
page 177.
B. Interior Lamps Control. SeeInterior Lamps on
page 161.
C. Exterior Lamps Control. SeeExterior Lamps on
page 158. Fog Lamp Control. SeeFog
Lamps on page 160.
D. Turn Signal/Multifunction Lever. SeeTurn
Signal/Multifunction Lever on page 152.
E. Cruise Controls. SeeCruise Control on
page 154.
F. Instrument Panel Cluster. SeeInstrument
Panel Cluster on page 180.
G. DIC Buttons (If Equipped) and Hazard Warning
Flasher Button. SeeDIC Operation and
Displays on page 200andHazard Warning
Flashers on page 150.
H. Passenger Airbag Status Indicator. See
Passenger Airbag Status Indicator on page 183.
I. Audio System Controls. SeeAudio System(s)
on page 238.J. Hood Release. SeeHood Release on
page 349.
K. Parking Brake. SeeParking Brake on
page 117.
L. Tilt Lever (If Equipped). SeeTilt Wheel on
page 151. Telescoping Column Lever
(If Equipped). SeeTilt Wheel on page 151.
M. Horn. SeeHorn on page 150.
N. Audio Steering Wheel Controls (If Equipped).
SeeAudio Steering Wheel Controls on
page 280.
O. Shift Lever. SeeShifting Into Park (P) on
page 118.
P. Accessory Power Outlet. SeeAccessory Power
Outlet(s) on page 167.
Q. Climate Controls. SeeClimate Control System
on page 168orDual Automatic Climate
Control System on page 172.
R. Glove Box. SeeGlove Box on page 141.
149
Page 155 of 512
{CAUTION:
Cruise control can be dangerous where
you cannot drive safely at a steady speed.
So, do not use your cruise control on
winding roads or in heavy traffic.
Cruise control can be dangerous on
slippery roads. On such roads, fast
changes in tire traction can cause
excessive wheel slip, and you could lose
control. Do not use cruise control on
slippery roads.
If your vehicle is in cruise control when the
Traction Control System (TCS), if your vehicle
has this feature, begins to limit wheel spin,
the cruise control will automatically disengage.
SeeTraction Control System (TCS) on page 294.
When road conditions allow you to safely use
it again, the cruise control can be turned back on.The cruise control
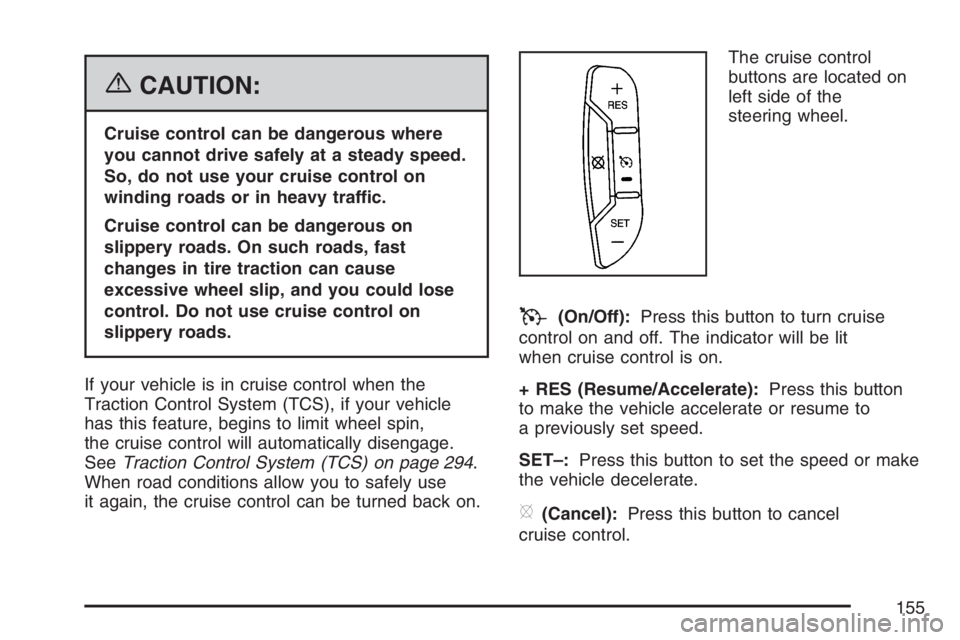
buttons are located on
left side of the
steering wheel.
T(On/Off):Press this button to turn cruise
control on and off. The indicator will be lit
when cruise control is on.
+ RES (Resume/Accelerate):Press this button
to make the vehicle accelerate or resume to
a previously set speed.
SET–:Press this button to set the speed or make
the vehicle decelerate.
[(Cancel):Press this button to cancel
cruise control.
155
Page 170 of 512
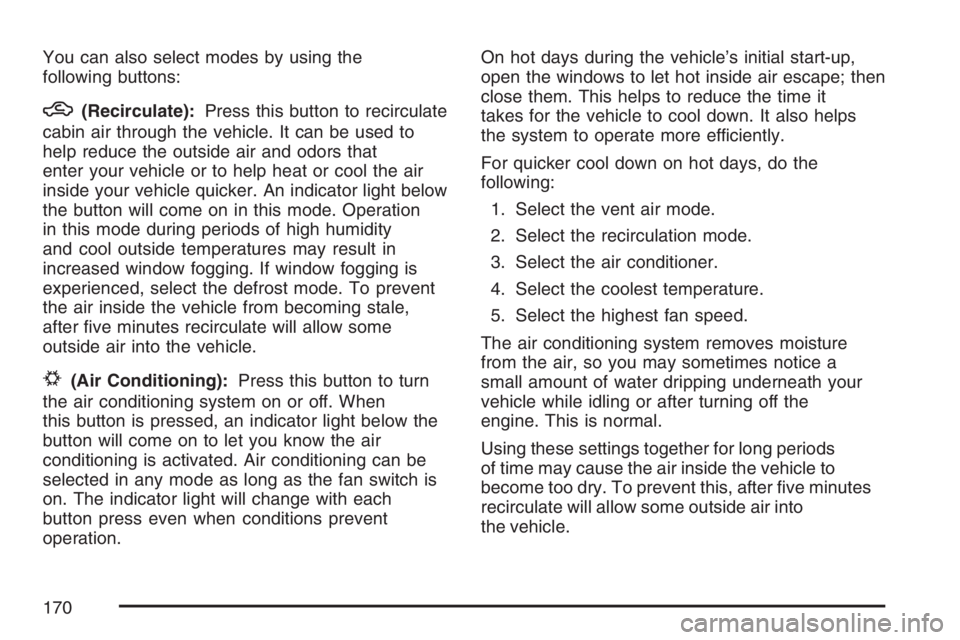
You can also select modes by using the
following buttons:
h(Recirculate):Press this button to recirculate
cabin air through the vehicle. It can be used to
help reduce the outside air and odors that
enter your vehicle or to help heat or cool the air
inside your vehicle quicker. An indicator light below
the button will come on in this mode. Operation
in this mode during periods of high humidity
and cool outside temperatures may result in
increased window fogging. If window fogging is
experienced, select the defrost mode. To prevent
the air inside the vehicle from becoming stale,
after �ve minutes recirculate will allow some
outside air into the vehicle.
#(Air Conditioning):Press this button to turn
the air conditioning system on or off. When
this button is pressed, an indicator light below the
button will come on to let you know the air
conditioning is activated. Air conditioning can be
selected in any mode as long as the fan switch is
on. The indicator light will change with each
button press even when conditions prevent
operation.On hot days during the vehicle’s initial start-up,
open the windows to let hot inside air escape; then
close them. This helps to reduce the time it
takes for the vehicle to cool down. It also helps
the system to operate more efficiently.
For quicker cool down on hot days, do the
following:
1. Select the vent air mode.
2. Select the recirculation mode.
3. Select the air conditioner.
4. Select the coolest temperature.
5. Select the highest fan speed.
The air conditioning system removes moisture
from the air, so you may sometimes notice a
small amount of water dripping underneath your
vehicle while idling or after turning off the
engine. This is normal.
Using these settings together for long periods
of time may cause the air inside the vehicle to
become too dry. To prevent this, after �ve minutes
recirculate will allow some outside air into
the vehicle.
170
Page 174 of 512
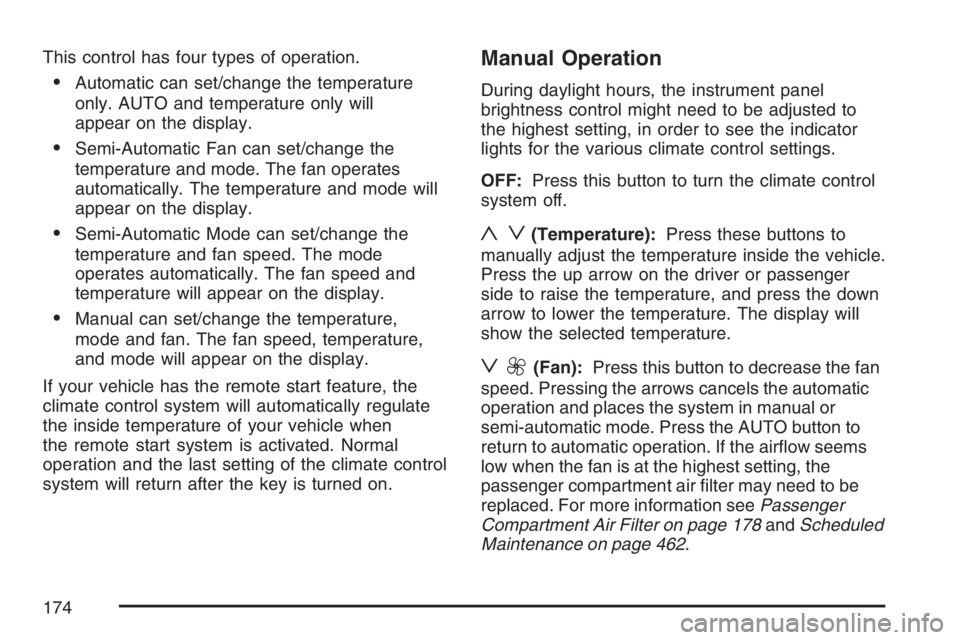
This control has four types of operation.
Automatic can set/change the temperature
only. AUTO and temperature only will
appear on the display.
Semi-Automatic Fan can set/change the
temperature and mode. The fan operates
automatically. The temperature and mode will
appear on the display.
Semi-Automatic Mode can set/change the
temperature and fan speed. The mode
operates automatically. The fan speed and
temperature will appear on the display.
Manual can set/change the temperature,
mode and fan. The fan speed, temperature,
and mode will appear on the display.
If your vehicle has the remote start feature, the
climate control system will automatically regulate
the inside temperature of your vehicle when
the remote start system is activated. Normal
operation and the last setting of the climate control
system will return after the key is turned on.
Manual Operation
During daylight hours, the instrument panel
brightness control might need to be adjusted to
the highest setting, in order to see the indicator
lights for the various climate control settings.
OFF:Press this button to turn the climate control
system off.
yz(Temperature):Press these buttons to
manually adjust the temperature inside the vehicle.
Press the up arrow on the driver or passenger
side to raise the temperature, and press the down
arrow to lower the temperature. The display will
show the selected temperature.
z9(Fan):Press this button to decrease the fan
speed. Pressing the arrows cancels the automatic
operation and places the system in manual or
semi-automatic mode. Press the AUTO button to
return to automatic operation. If the air�ow seems
low when the fan is at the highest setting, the
passenger compartment air �lter may need to be
replaced. For more information seePassenger
Compartment Air Filter on page 178andScheduled
Maintenance on page 462.
174
Page 199 of 512
Check Gas Cap Light
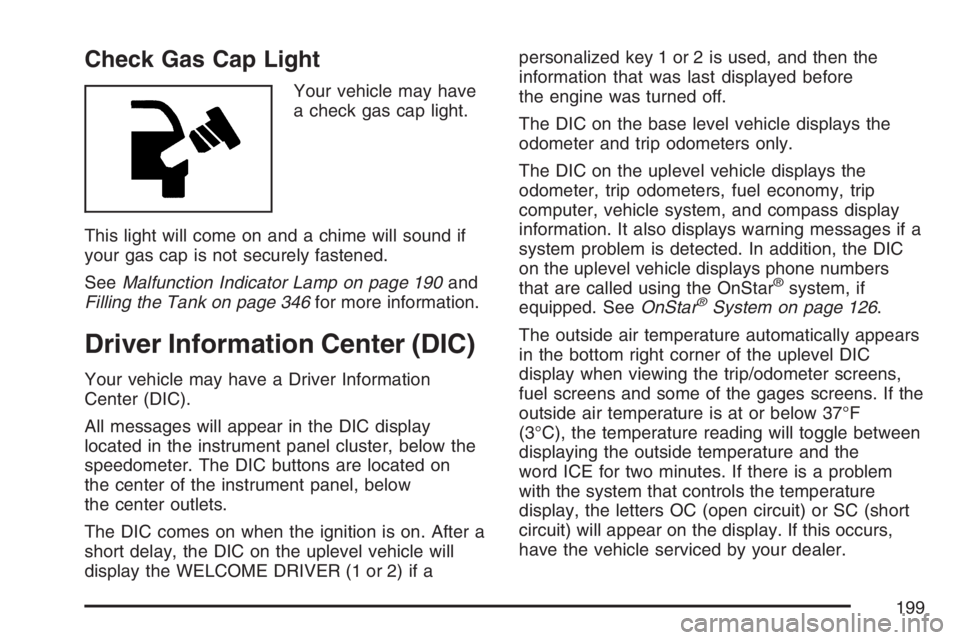
Your vehicle may have
a check gas cap light.
This light will come on and a chime will sound if
your gas cap is not securely fastened.
SeeMalfunction Indicator Lamp on page 190and
Filling the Tank on page 346for more information.
Driver Information Center (DIC)
Your vehicle may have a Driver Information
Center (DIC).
All messages will appear in the DIC display
located in the instrument panel cluster, below the
speedometer. The DIC buttons are located on
the center of the instrument panel, below
the center outlets.
The DIC comes on when the ignition is on. After a
short delay, the DIC on the uplevel vehicle will
display the WELCOME DRIVER (1 or 2) if apersonalized key 1 or 2 is used, and then the
information that was last displayed before
the engine was turned off.
The DIC on the base level vehicle displays the
odometer and trip odometers only.
The DIC on the uplevel vehicle displays the
odometer, trip odometers, fuel economy, trip
computer, vehicle system, and compass display
information. It also displays warning messages if a
system problem is detected. In addition, the DIC
on the uplevel vehicle displays phone numbers
that are called using the OnStar
®system, if
equipped. SeeOnStar®System on page 126.
The outside air temperature automatically appears
in the bottom right corner of the uplevel DIC
display when viewing the trip/odometer screens,
fuel screens and some of the gages screens. If the
outside air temperature is at or below 37°F
(3°C), the temperature reading will toggle between
displaying the outside temperature and the
word ICE for two minutes. If there is a problem
with the system that controls the temperature
display, the letters OC (open circuit) or SC (short
circuit) will appear on the display. If this occurs,
have the vehicle serviced by your dealer.
199
Page 200 of 512
The DIC on the uplevel vehicle also allows some
features to be customized or personalized.
SeeDIC Vehicle Personalization on page 229for
more information.
DIC Operation and Displays
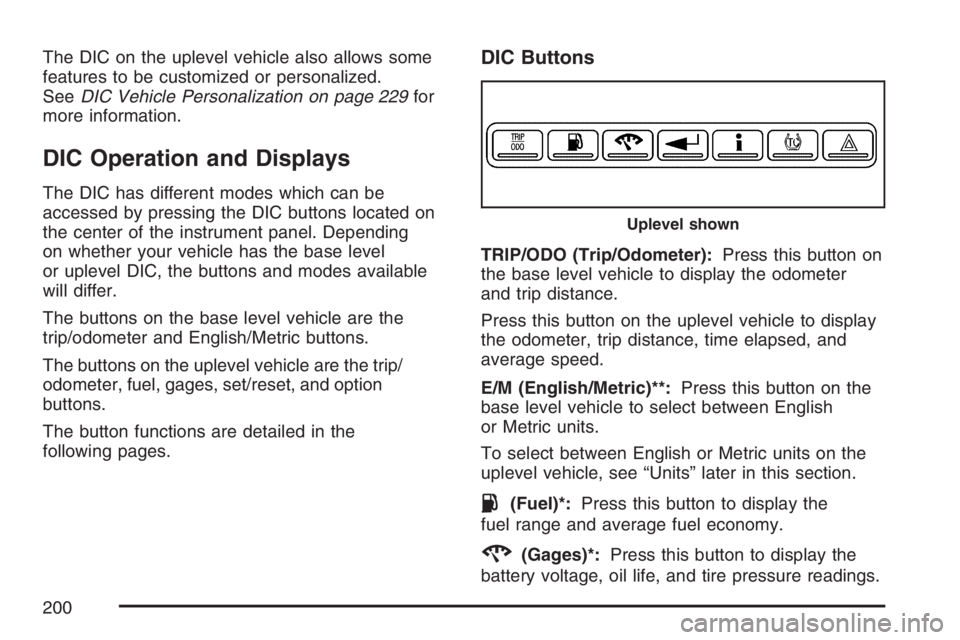
The DIC has different modes which can be
accessed by pressing the DIC buttons located on
the center of the instrument panel. Depending
on whether your vehicle has the base level
or uplevel DIC, the buttons and modes available
will differ.
The buttons on the base level vehicle are the
trip/odometer and English/Metric buttons.
The buttons on the uplevel vehicle are the trip/
odometer, fuel, gages, set/reset, and option
buttons.
The button functions are detailed in the
following pages.
DIC Buttons
TRIP/ODO (Trip/Odometer):Press this button on
the base level vehicle to display the odometer
and trip distance.
Press this button on the uplevel vehicle to display
the odometer, trip distance, time elapsed, and
average speed.
E/M (English/Metric)**:Press this button on the
base level vehicle to select between English
or Metric units.
To select between English or Metric units on the
uplevel vehicle, see “Units” later in this section.
.(Fuel)*:Press this button to display the
fuel range and average fuel economy.
2(Gages)*:Press this button to display the
battery voltage, oil life, and tire pressure readings.
Uplevel shown
200
Page 201 of 512
r(Set/Reset)*:Press this button to set or
reset certain functions and to turn off or
acknowledge messages on the DIC.
4(Option)*:Press this button to display the units,
language, personalization, compass zone, and
compass calibration. SeeDIC Vehicle
Personalization on page 229andDIC Compass
(Uplevel Only) on page 206for more information.
t(Traction Control)*:If your vehicle has
the traction control system, press this button to
turn traction control on or off. SeeTraction Control
System (TCS) on page 294for more information.
|(Hazard):Press this button to turn the
hazard warning �ashers on and off. SeeHazard
Warning Flashers on page 150for more
information.
*These buttons are available on uplevel
vehicles only.
**This button is available on base level
vehicles only.
Trip/Odometer Menu Items
TRIP/ODO (Trip Odometer):Press this button to
scroll through the following menu items:
Odometer
Press the trip/odometer button until the odometer
displays. This mode shows the distance the vehicle
has been driven in either miles or kilometers.
Trip A and Trip B
Press the trip/odometer button until A or B
displays. This mode shows the current distance
traveled in either miles or kilometers since the last
reset for each trip odometer. Both trip odometers
can be used at the same time.
The display will show the odometer on the top line
and the trip odometer information, either A or B,
on the bottom line.
Each trip odometer can be reset to zero separately
by brie�y pressing the set/reset button on the
uplevel vehicle or by brie�y pressing and holding
the trip odometer button on the base level vehicle
while the desired trip odometer is displayed.
201