BUICK LACROSSE 2010 Owner's Guide
Manufacturer: BUICK, Model Year: 2010, Model line: LACROSSE, Model: BUICK LACROSSE 2010Pages: 414
Page 21 of 414
Keys, Doors and Windows 1-15
If the keyless access transmitter
appears to be undamaged, try
another keyless access transmitter.
Or, you may try placing the
transmitter in the transmitter pocket
located in the center console. See
“No Remote Detected”underKey
and Lock Messages on page 4‑36.
If the engine does not start with the
other transmitter or when the
transmitter is on the pocket in the
center console, your vehicle needs
service. See your dealer/retailer
who can service the theft-deterrent
system and have a new transmitter
programmed to the vehicle.
Do not leave the key or device that
disarms or deactivates the theft
deterrent system in the vehicle.Exterior Mirrors
Power Mirrors
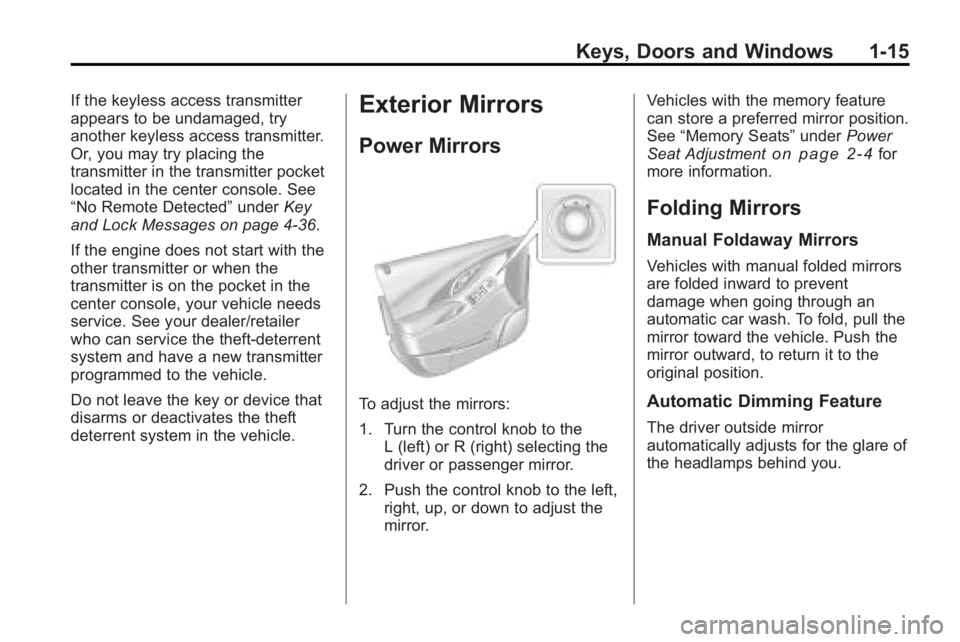
To adjust the mirrors:
1. Turn the control knob to the L (left) or R (right) selecting the
driver or passenger mirror.
2. Push the control knob to the left, right, up, or down to adjust the
mirror. Vehicles with the memory feature
can store a preferred mirror position.
See
“Memory Seats” underPower
Seat Adjustment
on page 2‑4for
more information.
Folding Mirrors
Manual Foldaway Mirrors
Vehicles with manual folded mirrors
are folded inward to prevent
damage when going through an
automatic car wash. To fold, pull the
mirror toward the vehicle. Push the
mirror outward, to return it to the
original position.
Automatic Dimming Feature
The driver outside mirror
automatically adjusts for the glare of
the headlamps behind you.
Page 22 of 414
1-16 Keys, Doors and Windows
Turn Signal Indicator
The vehicle might have a turn signal
indicator lamp that is built into the
mirror housing. The turn signal lamp
flashes with the use of the vehicle's
turn signal and hazard flashers.
Heated Mirrors
For vehicles with heated mirrors:
<(Rear Window Defogger):
Press to heat the mirrors.
See “Rear Window Defogger” under
Automatic Climate Control System
on page 7‑1for more information.
Park Tilt Mirrors
If the vehicle has the memory
package, the outside mirrors have a
park tilt feature. This feature tilts the
outside mirrors to a preselected
position when the vehicle is in
R (Reverse). This allows the driver
to view the curb for parallel parking.
The passenger and driver mirror
returns to its original position when
the vehicle is shifted out of
R (Reverse), or the ignition is turned
off or to OFF/LOCK.
This feature can be turned on or off
through the Driver Information
Center (DIC). See Vehicle
Personalization
on page 4‑38for
more information.
Interior Mirrors
Manual Rearview Mirror
Adjust this mirror for a clear view of
the area behind the vehicle. Hold
the mirror in the center to move it
up, down, or side-to-side. To reduce
headlamp glare during night-time
use, move the lever at the bottom of
the mirror to the right.
Vehicles with OnStar
®have three
additional control buttons located at
the bottom of the mirror. See your
dealer/retailer for more information
on the system and how to subscribe
to OnStar. See OnStar
®Systemon
page 4‑43for more information
about the services OnStar provides.
Page 23 of 414
Keys, Doors and Windows 1-17
Windows
{WARNING
Leaving children, helpless adults,
or pets in a vehicle with the
windows closed is dangerous.
They can be overcome by the
extreme heat and suffer
permanent injuries or even death
from heat stroke. Never leave a
child, a helpless adult, or a pet
alone in a vehicle, especially with
the windows closed in warm or
hot weather.
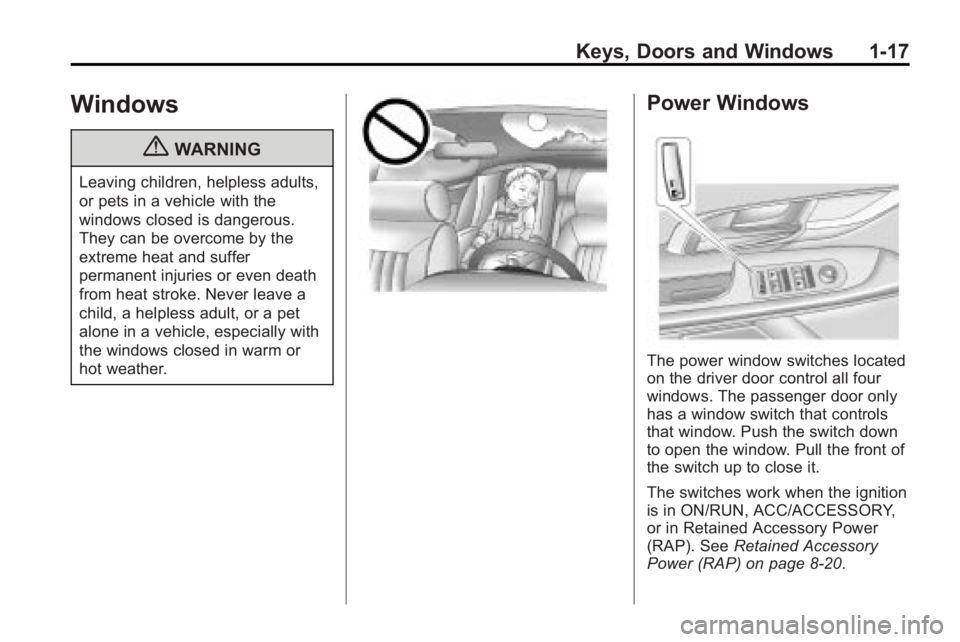
Power Windows
The power window switches located
on the driver door control all four
windows. The passenger door only
has a window switch that controls
that window. Push the switch down
to open the window. Pull the front of
the switch up to close it.
The switches work when the ignition
is in ON/RUN, ACC/ACCESSORY,
or in Retained Accessory Power
(RAP). SeeRetained Accessory
Power (RAP) on page 8‑20.
Page 24 of 414
1-18 Keys, Doors and Windows
Express Window Operation
Windows with an express-up or
down feature allow the window to be
lowered or raised without holding
the switch. Rear windows only have
express down. Pull a window switch
up or push it down all the way,
release it, and the window goes
down or up automatically. Stop the
window by pushing or pulling the
switch.
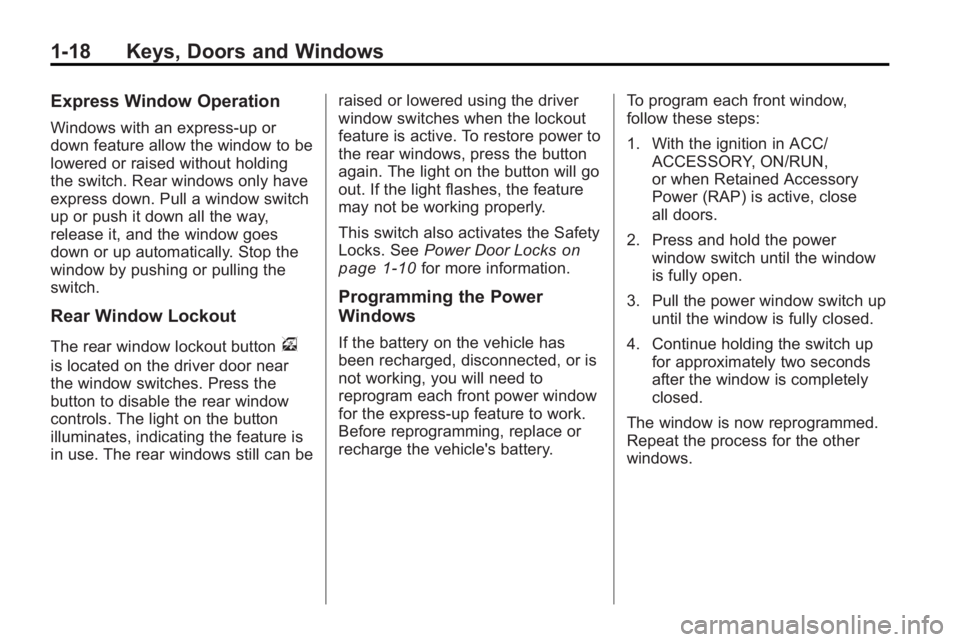
Rear Window Lockout
The rear window lockout buttonv
is located on the driver door near
the window switches. Press the
button to disable the rear window
controls. The light on the button
illuminates, indicating the feature is
in use. The rear windows still can beraised or lowered using the driver
window switches when the lockout
feature is active. To restore power to
the rear windows, press the button
again. The light on the button will go
out. If the light flashes, the feature
may not be working properly.
This switch also activates the Safety
Locks. See
Power Door Locks
on
page 1‑10for more information.
Programming the Power
Windows
If the battery on the vehicle has
been recharged, disconnected, or is
not working, you will need to
reprogram each front power window
for the express-up feature to work.
Before reprogramming, replace or
recharge the vehicle's battery. To program each front window,
follow these steps:
1. With the ignition in ACC/
ACCESSORY, ON/RUN,
or when Retained Accessory
Power (RAP) is active, close
all doors.
2. Press and hold the power window switch until the window
is fully open.
3. Pull the power window switch up until the window is fully closed.
4. Continue holding the switch up for approximately two seconds
after the window is completely
closed.
The window is now reprogrammed.
Repeat the process for the other
windows.
Page 25 of 414
Keys, Doors and Windows 1-19
Sun Visors
Pull the sun visor toward you or
move it to the side to reduce glare.
Rear Window Sunshade
On vehicles with this feature the
switch
Qis located on the center
console, to the right of the shifter.
The engine must be running to
operate it.
Press the switch
Qto raise or
lower the sunshade.
If the shade is up, and the vehicle is
shifted into R (Reverse) it will
automatically lower. When the
vehicle is shifted out of R (Reverse)
it does not automatically raise itself.
To raise the sunshade, press the
front of the switch.
Roof
Sunroof
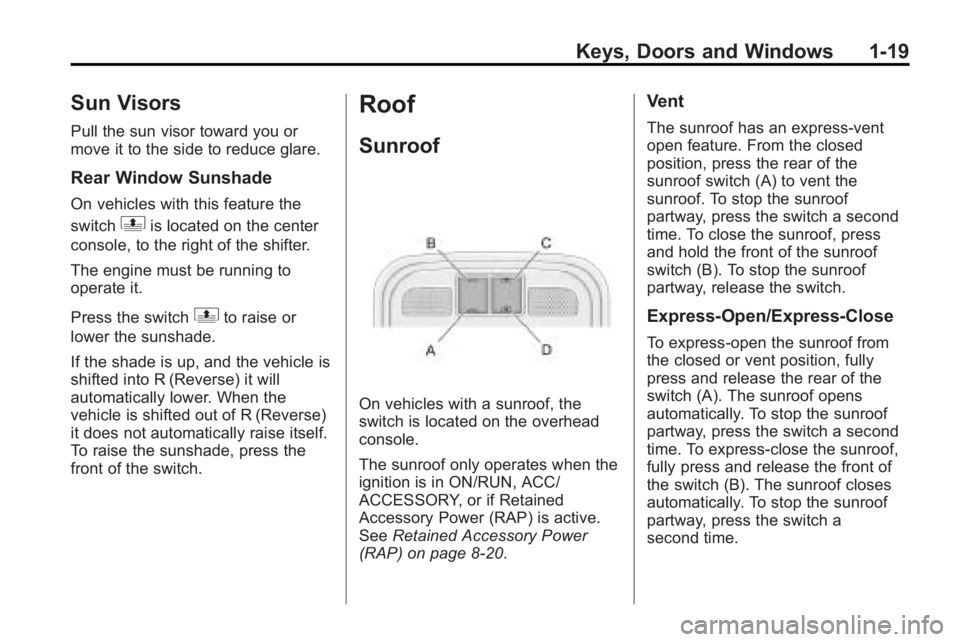
On vehicles with a sunroof, the
switch is located on the overhead
console.
The sunroof only operates when the
ignition is in ON/RUN, ACC/
ACCESSORY, or if Retained
Accessory Power (RAP) is active.
See Retained Accessory Power
(RAP) on page 8‑20.
Vent
The sunroof has an express-vent
open feature. From the closed
position, press the rear of the
sunroof switch (A) to vent the
sunroof. To stop the sunroof
partway, press the switch a second
time. To close the sunroof, press
and hold the front of the sunroof
switch (B). To stop the sunroof
partway, release the switch.
Express-Open/Express-Close
To express-open the sunroof from
the closed or vent position, fully
press and release the rear of the
switch (A). The sunroof opens
automatically. To stop the sunroof
partway, press the switch a second
time. To express-close the sunroof,
fully press and release the front of
the switch (B). The sunroof closes
automatically. To stop the sunroof
partway, press the switch a
second time.
Page 26 of 414
1-20 Keys, Doors and Windows
If the sunshade is closed, it opens
automatically with the sunroof but
can also be express-opened/
express-closed by using the
sunshade control (C) (D). The
sunshade cannot be fully closed
with the sunroof open.
Notice:Forcing the sunshade
forward of the sliding glass panel
may cause damage and the
sunroof may not operate properly.
Always close the glass panel
before closing the sunshade.
The sunroof glass panel cannot be
opened or closed if the vehicle has
an electrical failure.Anti-Pinch Feature
If an object is in the path of the
sunroof while it is closing, the
anti-pinch feature will detect the
object and stop the sunroof from
closing at the point of the
obstruction. The sunroof, and
sunshade will then return to the
open or vent position. To close the
sunroof once the obstruction has
been removed, refer to the
"Express-Open/Express-Close"
functions described previously.
Do not keep the sunroof open for
long periods of time while the
vehicle is not in use. Debris can
collect in the tracks, damage the
sunroof operation and plug the
water draining system.
Page 27 of 414
Seats and Restraints 2-1
Seats and
Restraints
Head Restraints
Head Restraints . . . . . . . . . . . . . . . 2-2
Front Seats
Seat Adjustment . . . . . . . . . . . . . . 2-3
Power Seat Adjustment . . . . . . . 2-4
Lumbar Adjustment . . . . . . . . . . . 2-5
Reclining Seatbacks . . . . . . . . . . 2-6
Heated Front Seats . . . . . . . . . . . 2-8
Heated and Ventilated FrontSeats . . . . . . . . . . . . . . . . . . . . . . . . 2-8
Rear Seats
Rear Seats . . . . . . . . . . . . . . . . . . . . 2-9
Safety Belts
Safety Belts . . . . . . . . . . . . . . . . . . 2-10
How to Wear Safety BeltsProperly . . . . . . . . . . . . . . . . . . . . 2-13
Lap-Shoulder Belt . . . . . . . . . . . 2-19 Safety Belt Use During
Pregnancy . . . . . . . . . . . . . . . . . . 2-22
Safety Belt Extender . . . . . . . . . 2-23
Safety System Check . . . . . . . . 2-23
Safety Belt Care . . . . . . . . . . . . . 2-23
Replacing Safety Belt System Parts After a Crash . . . . . . . . . 2-24
Airbag System
Airbag System . . . . . . . . . . . . . . . 2-24
Where Are the Airbags? . . . . . 2-27
When Should an AirbagInflate? . . . . . . . . . . . . . . . . . . . . . 2-28
What Makes an Airbag Inflate? . . . . . . . . . . . . . . . . . . . . . 2-30
How Does an Airbag Restrain? . . . . . . . . . . . . . . . . . . . 2-30
What Will You See After an Airbag Inflates? . . . . . . . . . . . . 2-30
Passenger Sensing System . . . . . . . . . . . . . . . . . . . . . 2-32
Servicing the Airbag-Equipped Vehicle . . . . . . . . . . . . . . . . . . . . . 2-37 Adding Equipment to the
Airbag-Equipped Vehicle . . . 2-38
Airbag System Check . . . . . . . . 2-39
Replacing Airbag System Parts After a Crash . . . . . . . . . 2-39
Child Restraints
Older Children . . . . . . . . . . . . . . . 2-40
Infants and Young
Children . . . . . . . . . . . . . . . . . . . . 2-42
Child Restraint Systems . . . . . 2-45
Where to Put the Restraint . . . 2-46
Lower Anchors and Tethers for Children (LATCH
System) . . . . . . . . . . . . . . . . . . . . 2-48
Replacing LATCH System Parts After a Crash . . . . . . . . . 2-55
Securing Child Restraints (Rear Seat) . . . . . . . . . . . . . . . . . 2-55
Securing Child Restraints (Front Seat ) . . . . . . . . . . . . . . . 2-57
Page 28 of 414
2-2 Seats and Restraints
Head Restraints
The vehicle's front seats have
adjustable head restraints in the
outboard seating positions.
The vehicle's rear seats have
adjustable head rests in the
outboard seating positions.
{WARNING
With head restraints that are not
installed and adjusted properly,
there is a greater chance that
occupants will suffer a neck/
spinal injury in a crash. Do not
drive until the head restraints for
all occupants are installed and
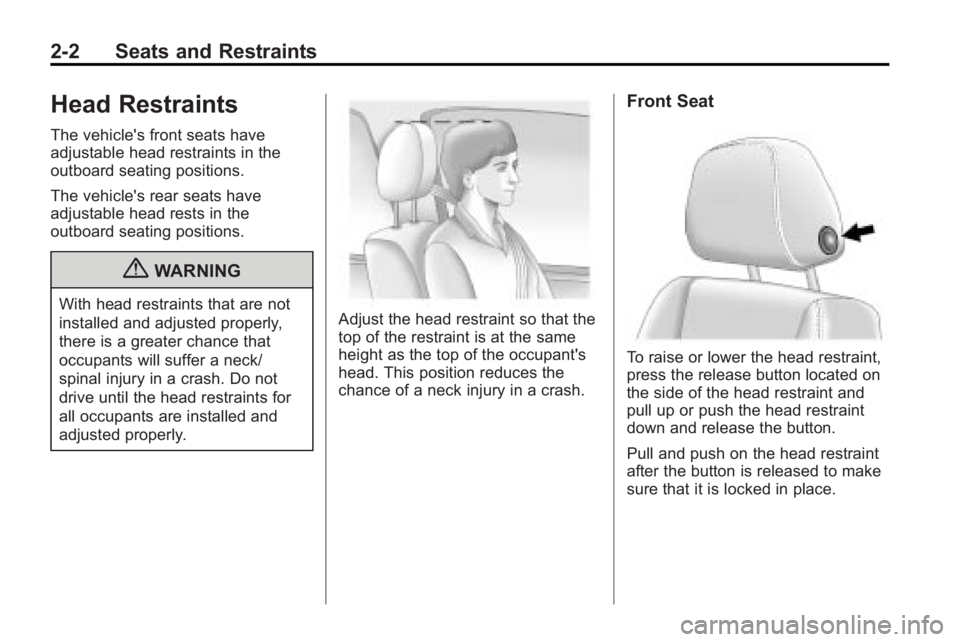
adjusted properly.Adjust the head restraint so that the
top of the restraint is at the same
height as the top of the occupant's
head. This position reduces the
chance of a neck injury in a crash.
Front Seat
To raise or lower the head restraint,
press the release button located on
the side of the head restraint and
pull up or push the head restraint
down and release the button.
Pull and push on the head restraint
after the button is released to make
sure that it is locked in place.
Page 29 of 414
Seats and Restraints 2-3
Rear Seat
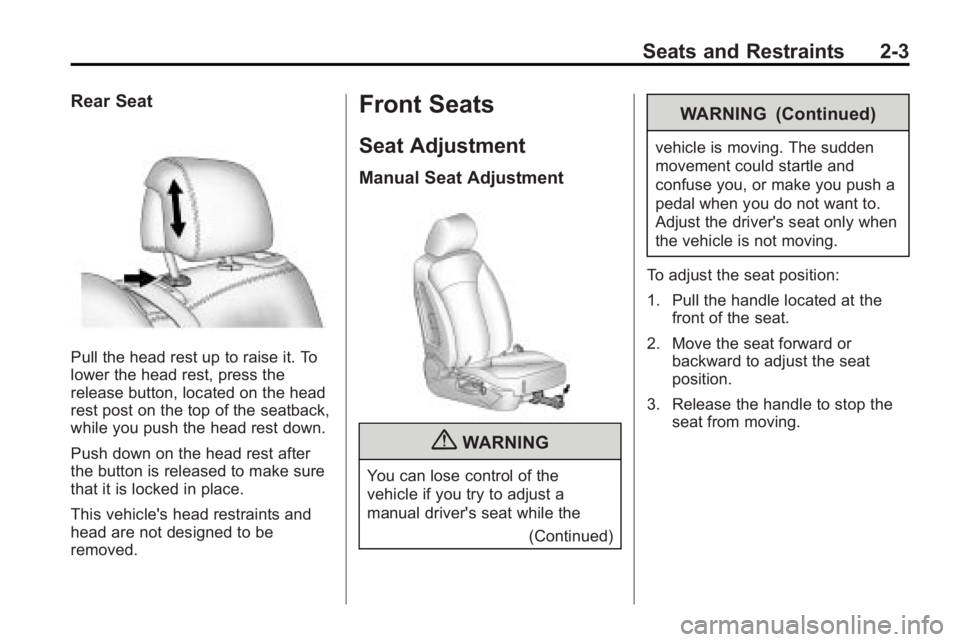
Pull the head rest up to raise it. To
lower the head rest, press the
release button, located on the head
rest post on the top of the seatback,
while you push the head rest down.
Push down on the head rest after
the button is released to make sure
that it is locked in place.
This vehicle's head restraints and
head are not designed to be
removed.
Front Seats
Seat Adjustment
Manual Seat Adjustment
{WARNING
You can lose control of the
vehicle if you try to adjust a
manual driver's seat while the(Continued)
WARNING (Continued)
vehicle is moving. The sudden
movement could startle and
confuse you, or make you push a
pedal when you do not want to.
Adjust the driver's seat only when
the vehicle is not moving.
To adjust the seat position:
1. Pull the handle located at the front of the seat.
2. Move the seat forward or backward to adjust the seat
position.
3. Release the handle to stop the seat from moving.
Page 30 of 414
2-4 Seats and Restraints
Power Seat Adjustment
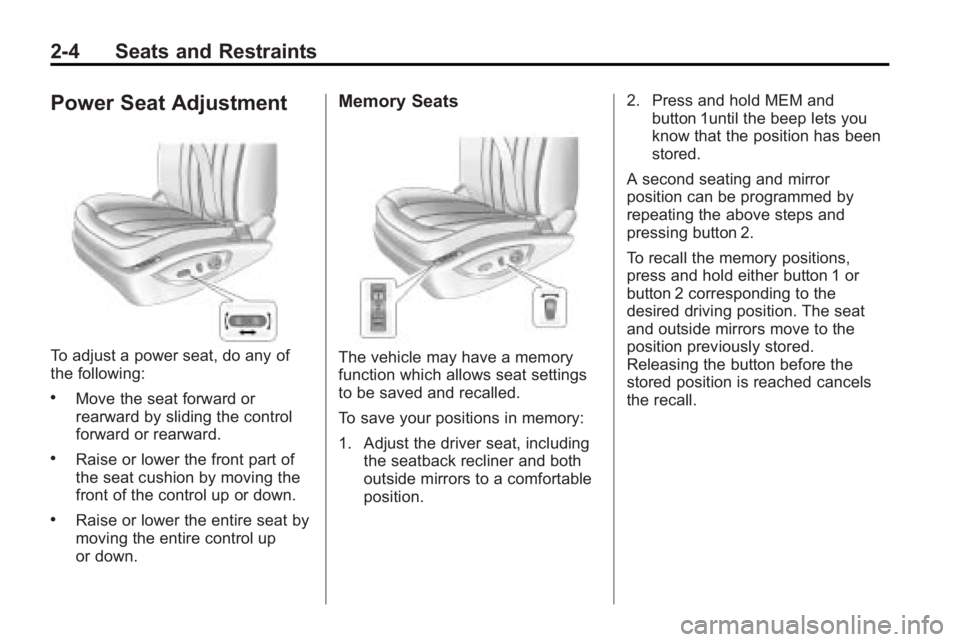
To adjust a power seat, do any of
the following:
.Move the seat forward or
rearward by sliding the control
forward or rearward.
.Raise or lower the front part of
the seat cushion by moving the
front of the control up or down.
.Raise or lower the entire seat by
moving the entire control up
or down.
Memory Seats
The vehicle may have a memory
function which allows seat settings
to be saved and recalled.
To save your positions in memory:
1. Adjust the driver seat, includingthe seatback recliner and both
outside mirrors to a comfortable
position. 2. Press and hold MEM and
button 1until the beep lets you
know that the position has been
stored.
A second seating and mirror
position can be programmed by
repeating the above steps and
pressing button 2.
To recall the memory positions,
press and hold either button 1 or
button 2 corresponding to the
desired driving position. The seat
and outside mirrors move to the
position previously stored.
Releasing the button before the
stored position is reached cancels
the recall.