door lock BUICK LACROSSE 2010 Owner's Guide
[x] Cancel search | Manufacturer: BUICK, Model Year: 2010, Model line: LACROSSE, Model: BUICK LACROSSE 2010Pages: 414
Page 93 of 414
Instruments and Controls 4-5
A.Air Vents on page 7‑8.
B. Head-Up Display (HUD)
on
page 4‑28(If Equipped).
C. Turn and Lane-Change Lever. See Turn and Lane-Change
Signals
on page 5‑4. Driver
Information Center Buttons. See
Driver Information Center (DIC)
on page 4‑25.
D. Instrument Cluster
on
page 4‑13. Driver Information
Center Display. See Driver
Information Center (DIC)
on
page 4‑25.
E. Windshield Wiper/Washer
on
page 4‑7.
F. Info-Display.
G. AM-FM Radio on page 6‑12.
H. Exterior Lamp Controls
on
page 5‑1. Fog Lampson
page 5‑5(If Equipped).
Instrument Panel Illumination
Control on page 5‑5. I.
Front Storage on page 3‑1.
J. Cruise Control
on page 8‑37.
Heated Steering Wheelon
page 4‑7.
K. Steering Wheel Adjustment
on
page 4‑6.
L. Horn on page 4‑7.
M. Steering Wheel Controls
on
page 4‑6.
N. Ignition Positions (Key Access)
on page 8‑18orIgnition
Positions (Keyless Access)on
page 8‑19.
O. Heated and Ventilated Front
Seats on page 2‑8.
P. Automatic Climate Control
System
on page 7‑1orDual
Automatic Climate Control
System on page 7‑4.
Q. Power Door Locks
on
page 1‑10. Hazard Warning
Flasherson page 5‑4.
Passenger Sensing Systemon
page 2‑32. R.
Parking Brake on page 8‑32.
S. PRNDL. See Automatic
Transmission on page 8‑27.
T. Shift Lever. See Shifting Into
Park on page 8‑23.
U. Traction Control System (TCS)
on page 8‑34.Electronic
Stability Control (ESC)on
page 8‑35. Ultrasonic Parking
Assiston page 8‑40. Power
Rear Sunshade.
V. Glove Box on page 3‑1.
Page 96 of 414
4-8 Instruments and Controls
Wipe Parking
If the ignition is turned LOCK/OFF
while the wipers are on 1, 2 or
&,
they will immediately stop.
If the windshield wiper lever is then
moved to OFF before the driver
door is opened or within 10 minutes,
the wipers will restart and move to
the base of the windshield.
If the ignition is turned to LOCK/
OFF while the wipers are performing
wipes due to windshield wash, the
wipers continue to run until they
reach the base of the windshield.
Windshield Washer
Pull the windshield wiper lever to
spray windshield washer fluid and
activate the wipers.
The wipers will continue until the
lever is released or the maximum
wash time is reached. When the windshield wiper lever is
released, additional wipes may
occur depending on how long the
windshield washer had been
activated. See
Washer Fluid
on
page 9‑23for information on filling
the windshield washer fluid
reservoir.
{WARNING
In freezing weather, do not use
your washer until the windshield
is warmed. Otherwise the washer
fluid can form ice on the
windshield, blocking your vision.
Compass
The vehicle may have a compass
display on the Driver Information
Center (DIC). The compass receives
its heading and other information
from Global Positioning
System (GPS) antenna, StabiliTrak,
and vehicle speed information. Avoid covering the GPS antenna for
long periods of time with objects
that may interfere with the antenna's
ability to receive a satellite signal.
See
Backglass Antenna
on
page 6‑19and Satellite Radio
Antennaon page 6‑19for the
location of the vehicle's antennas.
The compass system is designed to
operate for a certain number of
miles or degrees of turn before
needing a signal from the GPS
satellites. When the compass
display shows CAL, drive the
vehicle for a short distance in an
open area where it can receive a
GPS signal. The compass system
will automatically determine when
GPS signal is restored and provide
a heading again. See Compass
Messages
on page 4‑33for more
information on the messages that
may be displayed for the compass.
Page 126 of 414
4-38 Instruments and Controls
Window Messages
Open, Then Close Driver
Window
This message is displayed when the
window needs to be reprogrammed.
If the vehicle's battery has been
recharged or disconnected, you will
need to reprogram each front
window for the express up feature to
work. SeePower Windows
on
page 1‑17for more information.
Open, Then Close Passenger
Window
This message is displayed when the
window needs to be reprogrammed.
If the vehicle's battery has been
recharged or disconnected, you will
need to reprogram each front
window for the express up feature to
work. See Power Windows
on
page 1‑17for more information.
Vehicle
Personalization
The audio system controls are used
to access the personalization
menus for customizing vehicle
features.
CONFIG (Configuration): Press to
access the Configuration
Settings Menu.
MENU / SELECT Knob: Press the
center of this knob to enter the
menus and select menu items.
Turn the knob to scroll through the
menus.
0BACK: Press to exit or move
backwards in a menu.
Entering the Personalization
Menus
1. Press CONFIG to access the Configuration Settings menu.
2. Turn the MENU / SELECT knob to highlight Vehicle Settings. 3. Press the center of the
MENU / SELECT knob to select
the Vehicle Settings menu.
The following list of menu items will
be available:
.Climate and Air Quality
.Comfort and Convenience
.Collision/Detection Systems
.Language
.Lighting
.Power Door Locks
.Remote Lock/Unlock/Start
.Return to Factory Settings
Turn the MENU / SELECT knob to
highlight the menu. Press the knob
to select it. Each of the menus is
detailed in the following information.
Page 129 of 414
Instruments and Controls 4-41
Turn the MENU / SELECT knob to
select the language. Press the knob
to confirm and go back to the
last menu.
Lighting
Select the Lighting menu and the
following will be displayed:
.Exit Lighting
.Vehicle Locator Lights
Exit Lighting
This allows the selection of how
long the exterior lamps stay on
when leaving the vehicle when it is
dark outside.
Press the MENU / SELECT knob
when Exit Lighting is highlighted.
Turn the knob to select Off,
30 Seconds, 1 Minute, or 2 Minutes.
Press the knob to confirm and go
back to the last menu. Vehicle Locator Lights
This allows the vehicle locator lights
to be turned on or off.
Press the MENU / SELECT knob
when Vehicle Locator Lights is
highlighted. Turn the knob to select
On or Off. Press the knob to confirm
and go back to the last menu.Power Door Locks
Select Power Door Locks and the
following will be displayed:
.Unlocked Door Anti Lock Out
.Auto Door Unlock
.Delayed Door Lock
Unlocked Door Anti Lock Out
When on, this feature will keep the
driver door from locking when the
door is open. If off is selected, the
Delayed Door Lock menu will be
available and the door will lock as
programmed through this menu. Press the MENU / SELECT knob
when Auto Door Unlock is
highlighted. Turn the knob to select
On or Off. Press the knob to confirm
and go back to the last menu.
Delayed Door Lock
When on, this feature will delay the
locking of the doors until
five seconds after the last door is
closed. You will hear three chimes
to signal delayed locking is in use.
Pressing either the power lock
button or the lock button on the
RKE transmitter twice will override
the delayed locking feature and
immediately lock all of the doors.
Press the MENU / SELECT knob
when Delayed Door Lock is
highlighted. Turn the knob to select
On or Off. Press the knob to confirm
and go back to the last menu.
Page 130 of 414
4-42 Instruments and Controls
Auto Door Unlock
This allows selection of which of the
doors will automatically unlock when
the vehicle is shifted into P (Park).
Press the MENU / SELECT knob
when Auto Door Unlock is
highlighted. Turn the knob to select
All Doors, Driver Door, or Off. Press
the knob to confirm and go back to
the last menu.
Remote Lock/Unlock/Start
Select Remote Lock/Unlock/Start
and the following will be displayed:
.Unlock Feedback (Lights)
.Locking Feedback
.Door Unlock Options
.Remote Vehicle Start
.Remote RecallUnlock Feedback (Lights)
When on, the exterior lamps will
flash when unlocking the vehicle
with the RKE transmitter.
Press the MENU / SELECT knob
when Unlock Feedback (Lights) is
highlighted. Turn the knob to select
Flash Lights or Off. Press the knob
to confirm and go back to the
last menu.
Locking Feedback
This allows selection of what type of
feedback is given when locking the
vehicle with the RKE transmitter.
Press the MENU / SELECT knob
when Locking Feedback is
highlighted. Turn the knob to select
Lights and Horn, Lights Only, Horn
Only, or Off. Press the knob to
confirm and go back to the
last menu. Door Unlock Options
This allows selection of which doors
will unlock when pressing the unlock
button on the RKE transmitter.
Press the MENU / SELECT knob
when Door Unlock Options is
highlighted. Turn the knob to select
All Doors or Driver Door Only. When
set to Driver Door Only, the driver
door will unlock the first time the
unlock button is pressed and all
doors will unlock when the button is
pressed a second time. When set to
All Doors, all of the doors will unlock
at the first press of the unlock
button. Press the knob to confirm
and go back to the last menu.
Remote Vehicle Start
This allows the Remote Vehicle
Start to be turned on or off, if the
vehicle has this feature.
Press the MENU / SELECT knob
when Remote Vehicle Start is
highlighted. Turn the knob to select
On or Off. Press the knob to confirm
and go back to the last menu.
Page 131 of 414
Instruments and Controls 4-43
Remote Recall
This allows the Remote Recall
feature to be turned on or off.
Remote Recall is when the
memorized settings will be recalled
as you unlock and enter the vehicle.
Press the MENU / SELECT knob
when Remote Recall is highlighted.
Turn the knob to select On or Off.
Press the knob to confirm and go
back to the last menu.
Return to Factory Settings
Select Return to Factory Settings to
return all of the vehicle
personalization to the default
settings. Turn the knob to select
Yes or No. Press the knob to
confirm and go back to the
last menu.
OnStar System®
OnStar®System
OnStar®uses several innovative
technologies and live advisors to
provide a wide range of safety,
security, navigation, diagnostics,
and calling services.
Automatic Crash Response
In a crash, built in sensors can
automatically alert an OnStar
advisor who is immediately
connected to the vehicle to see if
you need help.
How OnStar Service Works
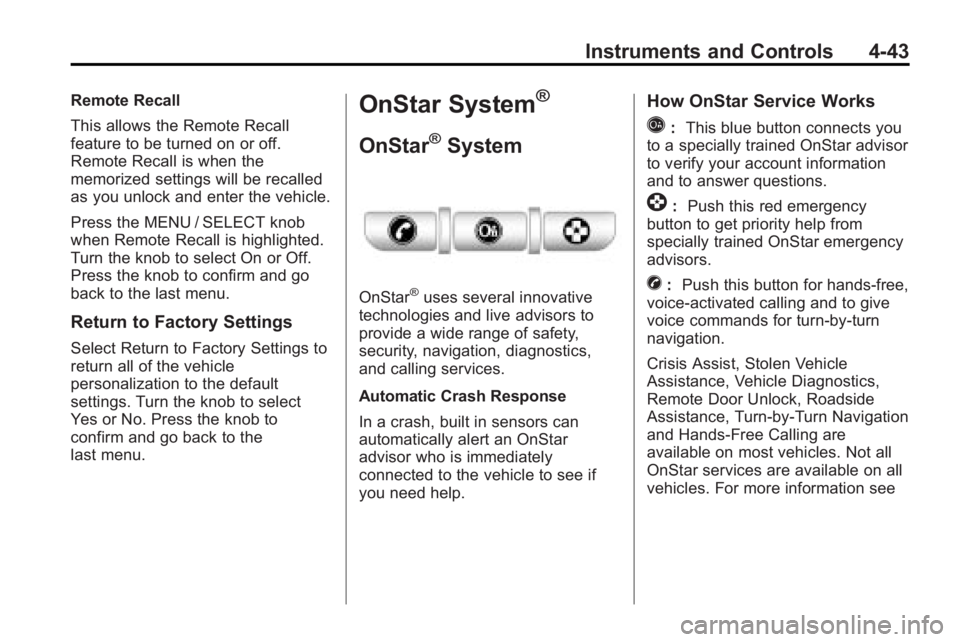
Q: This blue button connects you
to a specially trained OnStar advisor
to verify your account information
and to answer questions.
]: Push this red emergency
button to get priority help from
specially trained OnStar emergency
advisors.
X: Push this button for hands-free,
voice-activated calling and to give
voice commands for turn-by-turn
navigation.
Crisis Assist, Stolen Vehicle
Assistance, Vehicle Diagnostics,
Remote Door Unlock, Roadside
Assistance, Turn-by-Turn Navigation
and Hands-Free Calling are
available on most vehicles. Not all
OnStar services are available on all
vehicles. For more information see
Page 220 of 414
7-8 Climate Controls
Air Vents
Use the louvers located on the air
vents to change the direction of the
airflow.
To open the vent, move the
thumbwheel to
R. To close the vent,
move the thumbwheel to
(.
Operation Tips
.Keep all outlets open whenever
possible for best system
performance.
.Keep the path under all seats
clear of objects to help circulate
the air inside the vehicle more
effectively.
.Use of non-GM approved hood
deflectors can adversely affect
the performance of the system.
Maintenance
Air Intake
Clear away any ice, snow, or leaves
from the air intake at the base of the
windshield that can block the flow of
air into the vehicle.
Passenger Compartment
Air Filter
The filter removes dust, pollen, and
other airborne irritants from outside
air that is pulled into the vehicle.
The filter should be replaced as part
of routine scheduled maintenance.
See Scheduled Maintenance
on
page 10‑2for replacement
intervals. To find out what type of
filter to use, see Maintenance
Replacement Parts on page 10‑9. The passenger compartment air
filter can be accessed by removing
the entire glove box.
1. Open the passenger side door.
Remove the end cover located
on the side of the instrument
panel in the top right corner.
Remove the screw affixed to the
side of the glove box.
2. Open the glove box door and remove the attached screws
from around the glove box.
3. Lower the loosened glove box housing.
4. Unplug both wire cables and remove the glove box.
5. Pull the three tabs to release and open the filter door.
Page 235 of 414
Driving and Operating 8-13
Tire and Loading Information
Label
Label Example
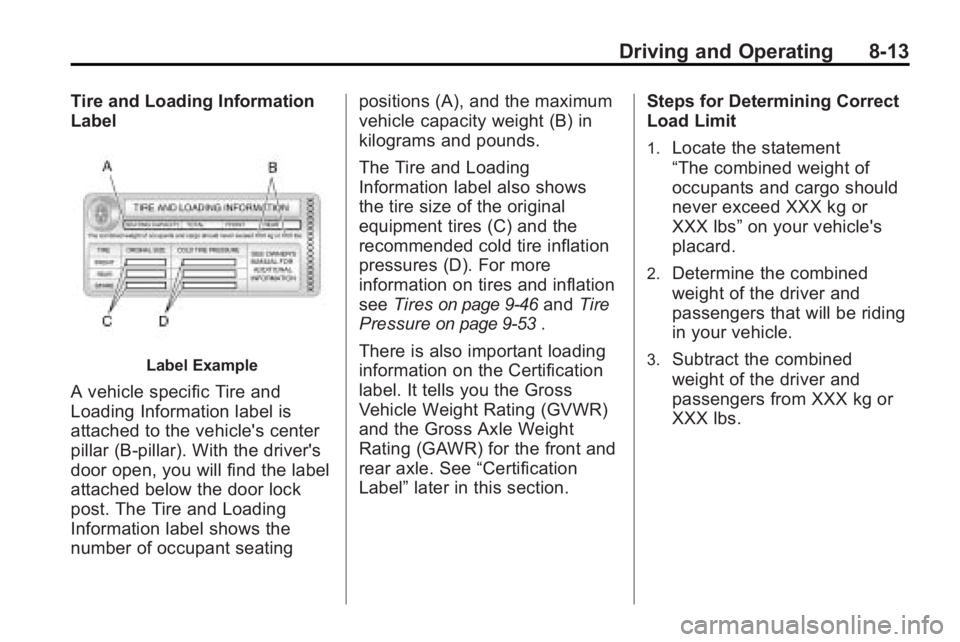
A vehicle specific Tire and
Loading Information label is
attached to the vehicle's center
pillar (B-pillar). With the driver's
door open, you will find the label
attached below the door lock
post. The Tire and Loading
Information label shows the
number of occupant seatingpositions (A), and the maximum
vehicle capacity weight (B) in
kilograms and pounds.
The Tire and Loading
Information label also shows
the tire size of the original
equipment tires (C) and the
recommended cold tire inflation
pressures (D). For more
information on tires and inflation
see
Tires
on page 9‑46and Tire
Pressure
on page 9‑53.
There is also important loading
information on the Certification
label. It tells you the Gross
Vehicle Weight Rating (GVWR)
and the Gross Axle Weight
Rating (GAWR) for the front and
rear axle. See “Certification
Label” later in this section. Steps for Determining Correct
Load Limit
1.Locate the statement
“The combined weight of
occupants and cargo should
never exceed XXX kg or
XXX lbs”
on your vehicle's
placard.
2.Determine the combined
weight of the driver and
passengers that will be riding
in your vehicle.
3.Subtract the combined
weight of the driver and
passengers from XXX kg or
XXX lbs.
Page 240 of 414
8-18 Driving and Operating
Ignition Positions (Key
Access)
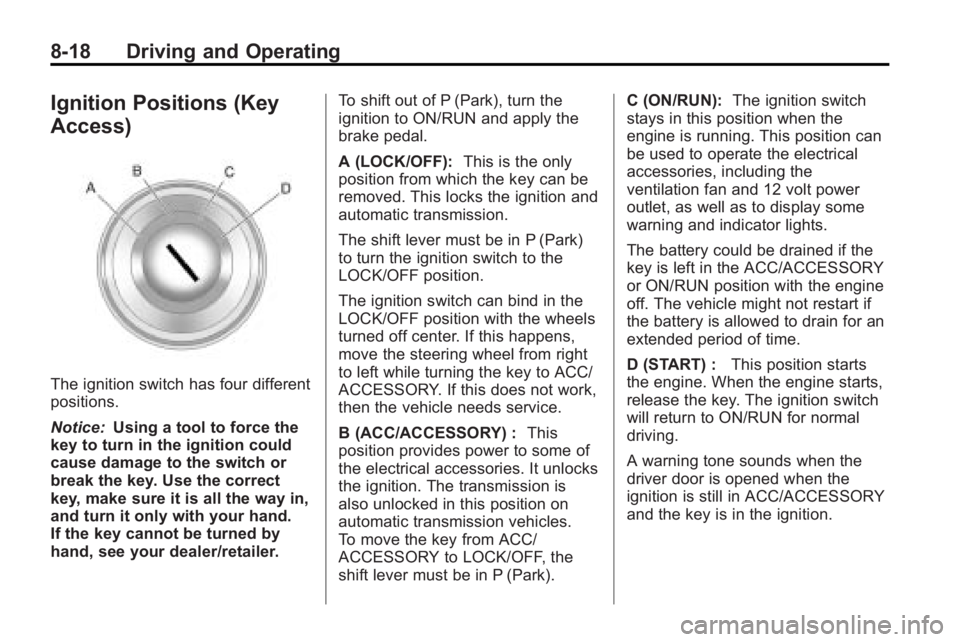
The ignition switch has four different
positions.
Notice:Using a tool to force the
key to turn in the ignition could
cause damage to the switch or
break the key. Use the correct
key, make sure it is all the way in,
and turn it only with your hand.
If the key cannot be turned by
hand, see your dealer/retailer. To shift out of P (Park), turn the
ignition to ON/RUN and apply the
brake pedal.
A (LOCK/OFF):
This is the only
position from which the key can be
removed. This locks the ignition and
automatic transmission.
The shift lever must be in P (Park)
to turn the ignition switch to the
LOCK/OFF position.
The ignition switch can bind in the
LOCK/OFF position with the wheels
turned off center. If this happens,
move the steering wheel from right
to left while turning the key to ACC/
ACCESSORY. If this does not work,
then the vehicle needs service.
B (ACC/ACCESSORY) : This
position provides power to some of
the electrical accessories. It unlocks
the ignition. The transmission is
also unlocked in this position on
automatic transmission vehicles.
To move the key from ACC/
ACCESSORY to LOCK/OFF, the
shift lever must be in P (Park). C (ON/RUN):
The ignition switch
stays in this position when the
engine is running. This position can
be used to operate the electrical
accessories, including the
ventilation fan and 12 volt power
outlet, as well as to display some
warning and indicator lights.
The battery could be drained if the
key is left in the ACC/ACCESSORY
or ON/RUN position with the engine
off. The vehicle might not restart if
the battery is allowed to drain for an
extended period of time.
D (START) : This position starts
the engine. When the engine starts,
release the key. The ignition switch
will return to ON/RUN for normal
driving.
A warning tone sounds when the
driver door is opened when the
ignition is still in ACC/ACCESSORY
and the key is in the ignition.
Page 274 of 414
8-52 Driving and Operating
Gasolines containing oxygenates,
such as ethers and ethanol, and
reformulated gasolines might be
available in your area. We
recommend that you use these
gasolines, if they comply with the
specifications described earlier.
However, E85 (85% ethanol) and
other fuels containing more than
10% ethanol must not be used in
vehicles that were not designed for
those fuels.
Notice:This vehicle was not
designed for fuel that contains
methanol. Do not use fuel
containing methanol. It can
corrode metal parts in the fuel
system and also damage plastic
and rubber parts. That damage
would not be covered under the
vehicle warranty.
Some gasolines that are
not reformulated for low
emissions can contain an
octane-enhancing additive called
methylcyclopentadienyl manganese tricarbonyl (MMT); ask the attendant
where you buy gasoline whether the
fuel contains MMT. We recommend
against the use of such gasolines.
Fuels containing MMT can reduce
the life of spark plugs and the
performance of the emission control
system could be affected. The
malfunction indicator lamp might
turn on. If this occurs, return to your
dealer/retailer for service.
Filling the Tank
{WARNING
Fuel vapor burns violently and a
fuel fire can cause bad injuries.
To help avoid injuries to you and
others, read and follow all the
instructions on the fuel pump
island. Turn off the engine when
refueling. Do not smoke near fuel
or when refueling the vehicle.
Do not use cellular phones. Keep
(Continued)
WARNING (Continued)
sparks, flames, and smoking
materials away from fuel. Do not
leave the fuel pump unattended
when refueling the vehicle. This is
against the law in some places.
Do not re-enter the vehicle while
pumping fuel. Keep children away
from the fuel pump; never let
children pump fuel.
The tethered fuel cap is behind the
fuel door on the vehicle's passenger
side. Turn the fuel cap
counterclockwise to remove. While
refueling, hang the tethered fuel cap
from the disk on the end of the fuel
cap to the mating feature on the fuel
door hinge. Reinstall the cap by
turning it clockwise until it clicks.