remote control BUICK LACROSSE 2010 Owner's Guide
[x] Cancel search | Manufacturer: BUICK, Model Year: 2010, Model line: LACROSSE, Model: BUICK LACROSSE 2010Pages: 414
Page 186 of 414
6-40 Infotainment System
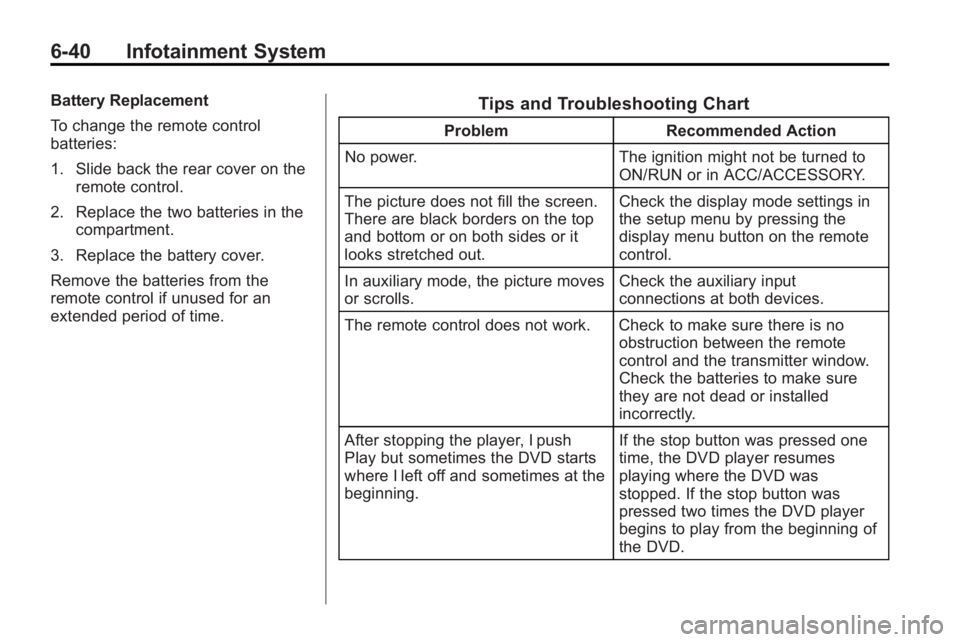
Battery Replacement
To change the remote control
batteries:
1. Slide back the rear cover on theremote control.
2. Replace the two batteries in the compartment.
3. Replace the battery cover.
Remove the batteries from the
remote control if unused for an
extended period of time.Tips and Troubleshooting Chart
Problem Recommended Action
No power. The ignition might not be turned to
ON/RUN or in ACC/ACCESSORY.
The picture does not fill the screen.
There are black borders on the top
and bottom or on both sides or it
looks stretched out. Check the display mode settings in
the setup menu by pressing the
display menu button on the remote
control.
In auxiliary mode, the picture moves
or scrolls. Check the auxiliary input
connections at both devices.
The remote control does not work. Check to make sure there is no obstruction between the remote
control and the transmitter window.
Check the batteries to make sure
they are not dead or installed
incorrectly.
After stopping the player, I push
Play but sometimes the DVD starts
where I left off and sometimes at the
beginning. If the stop button was pressed one
time, the DVD player resumes
playing where the DVD was
stopped. If the stop button was
pressed two times the DVD player
begins to play from the beginning of
the DVD.
Page 187 of 414
Infotainment System 6-41
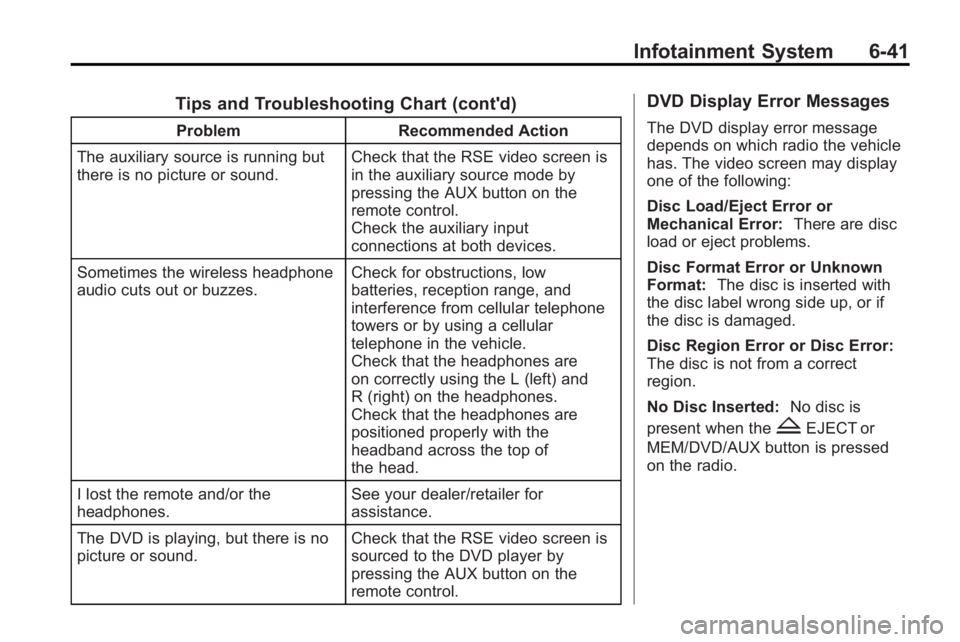
Tips and Troubleshooting Chart (cont'd)
ProblemRecommended Action
The auxiliary source is running but
there is no picture or sound. Check that the RSE video screen is
in the auxiliary source mode by
pressing the AUX button on the
remote control.
Check the auxiliary input
connections at both devices.
Sometimes the wireless headphone
audio cuts out or buzzes. Check for obstructions, low
batteries, reception range, and
interference from cellular telephone
towers or by using a cellular
telephone in the vehicle.
Check that the headphones are
on correctly using the L (left) and
R (right) on the headphones.
Check that the headphones are
positioned properly with the
headband across the top of
the head.
I lost the remote and/or the
headphones. See your dealer/retailer for
assistance.
The DVD is playing, but there is no
picture or sound. Check that the RSE video screen is
sourced to the DVD player by
pressing the AUX button on the
remote control.
DVD Display Error Messages
The DVD display error message
depends on which radio the vehicle
has. The video screen may display
one of the following:
Disc Load/Eject Error or
Mechanical Error:
There are disc
load or eject problems.
Disc Format Error or Unknown
Format: The disc is inserted with
the disc label wrong side up, or if
the disc is damaged.
Disc Region Error or Disc Error:
The disc is not from a correct
region.
No Disc Inserted: No disc is
present when the
ZEJECT or
MEM/DVD/AUX button is pressed
on the radio.
Page 215 of 414
Climate Controls 7-3
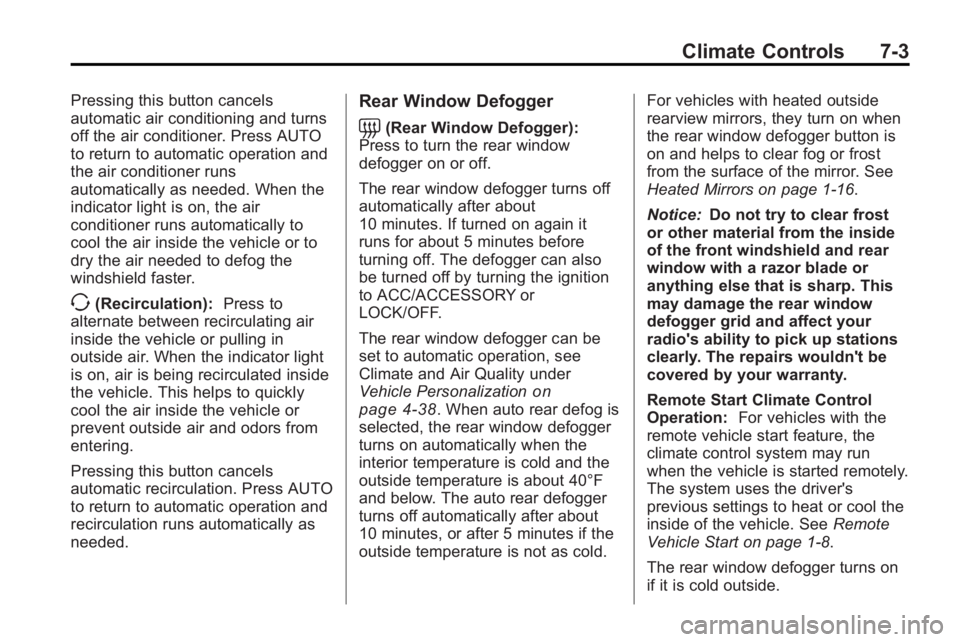
Pressing this button cancels
automatic air conditioning and turns
off the air conditioner. Press AUTO
to return to automatic operation and
the air conditioner runs
automatically as needed. When the
indicator light is on, the air
conditioner runs automatically to
cool the air inside the vehicle or to
dry the air needed to defog the
windshield faster.
>(Recirculation):Press to
alternate between recirculating air
inside the vehicle or pulling in
outside air. When the indicator light
is on, air is being recirculated inside
the vehicle. This helps to quickly
cool the air inside the vehicle or
prevent outside air and odors from
entering.
Pressing this button cancels
automatic recirculation. Press AUTO
to return to automatic operation and
recirculation runs automatically as
needed.
Rear Window Defogger
=(Rear Window Defogger):
Press to turn the rear window
defogger on or off.
The rear window defogger turns off
automatically after about
10 minutes. If turned on again it
runs for about 5 minutes before
turning off. The defogger can also
be turned off by turning the ignition
to ACC/ACCESSORY or
LOCK/OFF.
The rear window defogger can be
set to automatic operation, see
Climate and Air Quality under
Vehicle Personalization
on
page 4‑38. When auto rear defog is
selected, the rear window defogger
turns on automatically when the
interior temperature is cold and the
outside temperature is about 40°F
and below. The auto rear defogger
turns off automatically after about
10 minutes, or after 5 minutes if the
outside temperature is not as cold. For vehicles with heated outside
rearview mirrors, they turn on when
the rear window defogger button is
on and helps to clear fog or frost
from the surface of the mirror. See
Heated Mirrors on page 1‑16.
Notice:
Do not try to clear frost
or other material from the inside
of the front windshield and rear
window with a razor blade or
anything else that is sharp. This
may damage the rear window
defogger grid and affect your
radio's ability to pick up stations
clearly. The repairs wouldn't be
covered by your warranty.
Remote Start Climate Control
Operation: For vehicles with the
remote vehicle start feature, the
climate control system may run
when the vehicle is started remotely.
The system uses the driver's
previous settings to heat or cool the
inside of the vehicle. See Remote
Vehicle Start on page 1‑8.
The rear window defogger turns on
if it is cold outside.
Page 219 of 414
Climate Controls 7-7
Rear Window Defogger
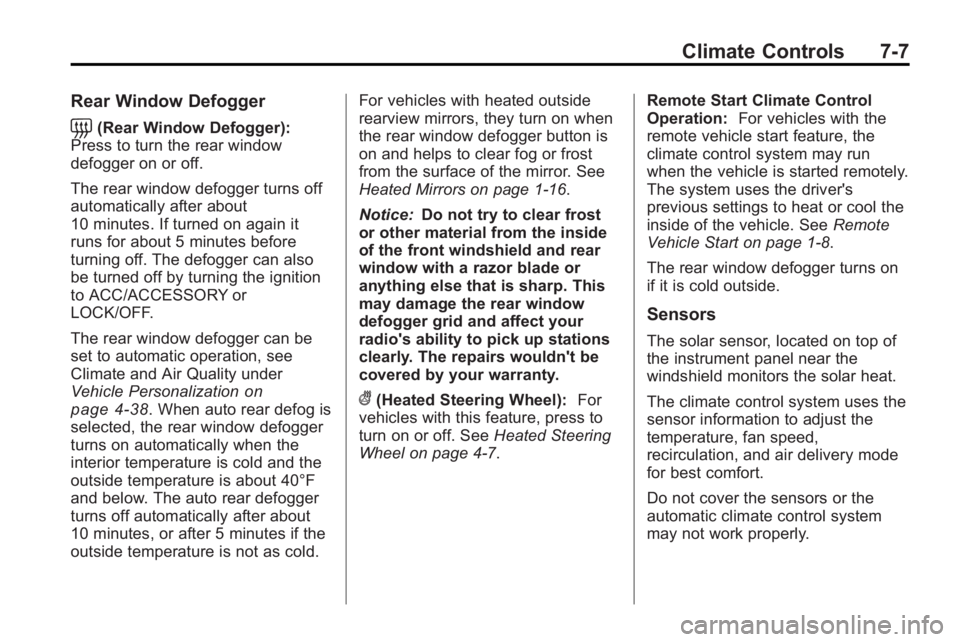
=(Rear Window Defogger):
Press to turn the rear window
defogger on or off.
The rear window defogger turns off
automatically after about
10 minutes. If turned on again it
runs for about 5 minutes before
turning off. The defogger can also
be turned off by turning the ignition
to ACC/ACCESSORY or
LOCK/OFF.
The rear window defogger can be
set to automatic operation, see
Climate and Air Quality under
Vehicle Personalization
on
page 4‑38. When auto rear defog is
selected, the rear window defogger
turns on automatically when the
interior temperature is cold and the
outside temperature is about 40°F
and below. The auto rear defogger
turns off automatically after about
10 minutes, or after 5 minutes if the
outside temperature is not as cold. For vehicles with heated outside
rearview mirrors, they turn on when
the rear window defogger button is
on and helps to clear fog or frost
from the surface of the mirror. See
Heated Mirrors on page 1‑16.
Notice:
Do not try to clear frost
or other material from the inside
of the front windshield and rear
window with a razor blade or
anything else that is sharp. This
may damage the rear window
defogger grid and affect your
radio's ability to pick up stations
clearly. The repairs wouldn't be
covered by your warranty.((Heated Steering Wheel): For
vehicles with this feature, press to
turn on or off. See Heated Steering
Wheel on page 4‑7. Remote Start Climate Control
Operation:
For vehicles with the
remote vehicle start feature, the
climate control system may run
when the vehicle is started remotely.
The system uses the driver's
previous settings to heat or cool the
inside of the vehicle. See Remote
Vehicle Start on page 1‑8.
The rear window defogger turns on
if it is cold outside.
Sensors
The solar sensor, located on top of
the instrument panel near the
windshield monitors the solar heat.
The climate control system uses the
sensor information to adjust the
temperature, fan speed,
recirculation, and air delivery mode
for best comfort.
Do not cover the sensors or the
automatic climate control system
may not work properly.
Page 243 of 414
Driving and Operating 8-21
The vehicle has a
Computer-Controlled Cranking
System. This feature assists in
starting the engine and protects
components. If the ignition key is
turned to the START position,
and then released when the
engine begins cranking, the
engine will continue cranking for
a few seconds or until the
vehicle starts. If the engine does
not start and the key is held in
START for many seconds,
cranking will be stopped after
15 seconds to prevent cranking
motor damage. To prevent gear
damage, this system also
prevents cranking if the engine
is already running. Engine
cranking can be stopped by
turning the ignition switch to
ACC/ACCESSORY or
LOCK/OFF.
Notice: Cranking the engine for
long periods of time, by returning
the key to the START position
immediately after cranking has
ended, can overheat and damage the cranking motor, and drain the
battery. Wait at least 15 seconds
between each try, to let the
cranking motor cool down.
2. If the engine does not start after
5-10 seconds, especially in very
cold weather (below −18°C or
0°F), it could be flooded with too
much gasoline. Try pushing the
accelerator pedal all the way to
the floor and holding it there as
you hold the key in START,
or press the START button, for
up to a maximum of 15 seconds.
Wait at least 15 seconds
between each try, to allow the
cranking motor to cool down.
When the engine starts, let go of
the key or button, and the
accelerator. If the vehicle starts
briefly but then stops again, do
the same thing. This clears the
extra gasoline from the engine.
Do not race the engine
immediately after starting it.
Operate the engine and transmission gently until the oil
warms up and lubricates all
moving parts.
Starting Procedure (Keyless
Access)
1. If the vehicle has the keyless access system, the transmitter
must be in the vehicle. Put your
foot on the brake pedal and
push the START button. When
the engine begins cranking, let
go of the button.
The idle speed will go down as
your engine gets warm. Do not
race the engine immediately
after starting it. Operate the
engine and transmission gently
to allow the oil to warm up and
lubricate all moving parts.
If the transmitter is not in the
vehicle or something is
interfering with the transmitter,
the Driver Information Center
(DIC) will display NO REMOTE
DETECTED. See Driver
Information Center (DIC)
on
page 4‑25for more information.
Page 244 of 414
8-22 Driving and Operating
If the battery in the keyless
access transmitter needs
replacing, the DIC displays
REPLACE BATTERY IN
REMOTE KEY. The vehicle can
still be driven. See Starting the
Vehicle with a Low Transmitter
Battery inRemote Keyless Entry
(RKE) System Operation (Key
Access)
on page 1‑3or
Remote Keyless Entry (RKE)
System Operation (Keyless
Access)
on page 1‑5for more
information.
The vehicle has a
Computer-Controlled Cranking
System. This feature assists in
starting the engine and protects
components. If the START
button is pressed, and then
released when the engine
begins cranking, the engine will
continue cranking for a few
seconds or until the vehicle
starts. If the engine does not
start and the button is pressed
for many seconds, cranking will
be stopped after 15 seconds to prevent cranking motor damage.
To prevent gear damage, this
system also prevents cranking if
the engine is already running.
Engine cranking can be stopped
by pressing the START button a
second time.
Notice: Cranking the engine for
long periods of time, by returning
the key to the START position
immediately after cranking has
ended, can overheat and damage
the cranking motor, and drain the
battery. Wait at least 15 seconds
between each try, to let the
cranking motor cool down.
2. If the engine does not start after
5-10 seconds, especially in very
cold weather (below −18°C or
0°F), it could be flooded with too
much gasoline. Try pushing the
accelerator pedal all the way to
the floor and holding it there as
you hold the key in START,
or press the START button, for
up to a maximum of 15 seconds.
Wait at least 15 seconds
between each try, to allow the cranking motor to cool down.
When the engine starts, let go of
the key or button, and the
accelerator. If the vehicle starts
briefly but then stops again, do
the same thing. This clears the
extra gasoline from the engine.
Do not race the engine
immediately after starting it.
Operate the engine and
transmission gently until the oil
warms up and lubricates all
moving parts.
Engine Heater
The engine coolant heater,
if available, can help in cold weather
conditions at or below
−18°C (0°F)
for easier starting and better fuel
economy during engine warm-up.
Plug in the coolant heater at least
four hours before starting the
vehicle. An internal thermostat in
the plug-end of the cord will prevent
engine coolant heater operation at
temperatures above −18°C (0°F).
Page 285 of 414
Vehicle Care 9-3
California Perchlorate
Materials Requirements
Certain types of automotive
applications, such as airbag
initiators, seat belt pretensioners,
and lithium batteries contained in
remote keyless transmitters, may
contain perchlorate materials.
Special handling may be necessary.
For additional information, see
www.dtsc.ca.gov/hazardouswaste/
perchlorate.
Accessories and
Modifications
Adding non-dealer/non-retailer
accessories to the vehicle can affect
vehicle performance and safety,
including such things as airbags,
braking, stability, ride and handling,
emissions systems, aerodynamics,
durability, and electronic systems
like antilock brakes, traction control,
and stability control. Some of these
accessories could even cause
malfunction or damage not covered
by the vehicle warranty.
Damage to vehicle components
resulting from the installation or use
of non-GM certified parts, including
control module modifications, are
not covered under the terms of the
vehicle warranty and may affect
remaining warranty coverage for
affected parts.GM Accessories are designed to
complement and function with other
systems on the vehicle. Your GM
dealer/retailer can accessorize the
vehicle using genuine GM
Accessories. When you go to your
GM dealer/retailer and ask for GM
Accessories, you will know that
GM-trained and supported service
technicians will perform the work
using genuine GM Accessories.
Also, see
Adding Equipment to the
Airbag-Equipped Vehicle
on
page 2‑38.
Page 408 of 414
i-6 INDEX
Heated and Ventilated FrontSeats . . . . . . . . . . . . . . . . . . . . . . . . . 2-8
Heated Front Seats . . . . . . . . . . . . . 2-8
Heated Mirrors . . . . . . . . . . . . . . . . . 1-16
High-Beam On Light . . . . . . . . . . . 4-24
Highway Hypnosis . . . . . . . . . . . . . . 8-8
Hill and Mountain Roads . . . . . . . . 8-9
Hood . . . . . . . . . . . . . . . . . . . . . . . . . . . 9-5
Horn . . . . . . . . . . . . . . . . . . . . . . . . . . . . 4-7
How to Wear Safety Belts Properly . . . . . . . . . . . . . . . . . . . . . . 2-13
I
Ignition Positions . . . . . . . . 8-18, 8-19
Ignition Transmission Lock
Check . . . . . . . . . . . . . . . . . . . . . . . . 9-28
Illumination Control . . . . . . . . . . . . . 5-5
Immobilizer . . . . . . . . . . . . . . . . . . . . 1-13
Infants and Young Children, Restraints . . . . . . . . . . . . . . . . . . . . 2-42
Instrument Cluster . . . . . . . . . . . . . 4-13
Instrument Panel . . . . . . . . . . . . . . . 5-5
Introduction . . . . . . . . . . . . . . . . . . .iii, 6-2
J
Jump Starting . . . . . . . . . . . . . . . . . . 9-75
K
Key and Lock Messages . . . . . . . 4-36
Keyless Entry Remote (RKE) System . . . 1-3, 1-5
Keyless Entry System . . . . . . . . . . 1-3
Keys . . . . . . . . . . . . . . . . . . . . . . . . . . . . 1-2
L
Labeling, Tire Sidewall . . . . . . . . . 9-47
Lamp Messages . . . . . . . . . . . . . . . 4-36
Lamps Daytime Running (DRL) . . . . . . . 5-2
Dome . . . . . . . . . . . . . . . . . . . . . . . . . . 5-5
Exterior Controls . . . . . . . . . . . . . . . 5-1
Exterior Lamps Off
Reminder . . . . . . . . . . . . . . . . . . . . 5-2
Headlamps, Front Turn
Signal and Parking
Lamps . . . . . . . . . . . . . . . . . . . . . . 9-33
License Plate . . . . . . . . . . . . . . . . . 9-36 Lamps (cont.)
Malfunction Indicator . . . . . . . . . 4-17
Reading . . . . . . . . . . . . . . . . . . . . . . . 5-5
Sun Visor . . . . . . . . . . . . . . . . . . . . . . 5-5
Lap-Shoulder Belt . . . . . . . . . . . . . 2-19
LATCH System Replacing Parts After aCrash . . . . . . . . . . . . . . . . . . . . . . . 2-55
Latch, Lower Anchors and
Tethers for Children . . . . . . . . . . 2-48
Light Electric Parking Brake . . . . . . . . 4-20
Lighting Adaptive Forward . . . . . . . . . . . . . . 5-3
Entry . . . . . . . . . . . . . . . . . . . . . . . . . . 5-6
Exit . . . . . . . . . . . . . . . . . . . . . . . . . . . . 5-6
Lights Airbag Readiness . . . . . . . . . . . . . 4-16
Antilock Brake System
(ABS) Warning . . . . . . . . . . . . . . 4-21
Charging System . . . . . . . . . . . . . 4-17
Cruise Control . . . . . . . . . . . . . . . . 4-25
Engine Oil Pressure . . . . . . . . . . 4-23
Page 411 of 414
INDEX i-9
Reading Lamps . . . . . . . . . . . . . . . . . 5-5
Rear Seat EntertainmentSystem . . . . . . . . . . . . . . . . . . . . . . . 6-34
Rear Seats . . . . . . . . . . . . . . . . . . . . . 2-9
Rear Vision Camera (RVC) . . . . 8-46
Rearview Mirrors . . . . . . . . . . . . . . 1-16
Reclining Seatbacks . . . . . . . . . . . . 2-6
Recommended Fluids and Lubricants . . . . . . . . . . . . . . . . . . . . 10-7
Recommended Fuel . . . . . . . . . . . 8-50
Records Maintenance . . . . . . . . . . . . . . . . 10-10
Recreational Vehicle Towing . . . 9-79
Reimbursement Program, GM Mobility . . . . . . . . . . . . . . . . . . 12-5
Remote Keyless Entry
(RKE) System . . . . . . . . . . . . . 1-3, 1-5
Remote Vehicle Start . . . . . . . . . . . 1-8
Replacement Bulbs . . . . . . . . . . . . 9-37
Replacement Parts Airbags . . . . . . . . . . . . . . . . . . . . . . . 2-39
Maintenance . . . . . . . . . . . . . . . . . . 10-9
Replacing Airbag System . . . . . . 2-39 Replacing LATCH System
Parts After a Crash . . . . . . . . . . . 2-55
Replacing Safety Belt System Parts After a
Crash . . . . . . . . . . . . . . . . . . . . . . . . 2-24
Reporting Safety Defects Canadian Government . . . . . . 12-14
General Motors . . . . . . . . . . . . . 12-14
U.S. Government . . . . . . . . . . . 12-13
Retained Accessory Power (RAP) . . . . . . . . . . . . . . . . . 8-20
Ride Control Systems . . . . . . . . . 8-35 Electronic Stability (ESC) . . . . . 8-35
Messages . . . . . . . . . . . . . . . . . . . . 4-36
Selective . . . . . . . . . . . . . . . . . . . . . 8-36
Roadside Assistance
Program . . . . . . . . . . . . . . . . . . . . . . 12-6
Roof Sunroof . . . . . . . . . . . . . . . . . . . . . . . 1-19
Rotation, Tires . . . . . . . . . . . . . . . . . 9-59
Routing, Engine Drive Belt . . . . . 11-4
Running the Vehicle While Parked . . . . . . . . . . . . . . . . . . . . . . . 8-26S
Safety Belts . . . . . . . . . . . . . . . . . . . 2-10Care . . . . . . . . . . . . . . . . . . . . . . . . . . 2-23
Extender . . . . . . . . . . . . . . . . . . . . . . 2-23
How to Wear Safety BeltsProperly . . . . . . . . . . . . . . . . . . . . . 2-13
Lap-Shoulder Belt . . . . . . . . . . . . 2-19
Reminders . . . . . . . . . . . . . . . . . . . . 4-15
Replacing After a Crash . . . . . . 2-24
Use During Pregnancy . . . . . . . . 2-22
Safety Defects Reporting
Canadian Government . . . . . . 12-14
General Motors . . . . . . . . . . . . . 12-14
U.S. Government . . . . . . . . . . . 12-13
Safety Locks . . . . . . . . . . . . . . . . . . . 1-11
Safety System Check . . . . . . . . . . 2-23
Satellite Radio . . . . . . . . . . . . . . . . . 6-14
Scheduled Maintenance . . . . . . . 10-2
Scheduling Appointments . . . . . . 12-8
Seats Adjustment, Front . . . . . . . . . . . . . . 2-3
Head Restraints . . . . . . . . . . . . . . . 2-2
Heated and Ventilated Front . . . 2-8
Page 412 of 414
i-10 INDEX
Seats (cont.)Heated Front . . . . . . . . . . . . . . . . . . 2-8
Lumbar Adjustment, Front . . . . . 2-5
Power Adjustment, Front . . . . . . 2-4
Rear . . . . . . . . . . . . . . . . . . . . . . . . . . . 2-9
Reclining Seatbacks . . . . . . . . . . . 2-6
Securing Child Restraints . . . . . . . . . . . . . . 2-55, 2-57
Security
Light . . . . . . . . . . . . . . . . . . . . . . . . . . 4-24
Vehicle . . . . . . . . . . . . . . . . . . . . . . . 1-13
Selective Ride Control . . . . . . . . . 8-36
Service Accessories and
Modifications . . . . . . . . . . . . . . . . . 9-3
Doing Your Own Work . . . . . . . . . 9-4
Engine Soon Lamp . . . . . . . . . . . 4-17
Maintenance Records . . . . . . 10-10
Maintenance, General Information . . . . . . . . . . . . . . . . . . 10-1
Parts Identification Label . . . . . 11-1
Publications Ordering Information . . . . . . . . . . . . . . . . 12-12
Scheduling Appointments . . . . . 12-8 Servicing the
Airbag-Equipped Vehicle . . . . . 2-37
Shifting Into Park . . . . . . . . . . . . . . . . . . . . . . 8-23
Out of Park . . . . . . . . . . . . . . . . . . . 8-25
Side Blind Zone Alert . . . . . . . . . . 8-43
Signals, Turn and Lane-Change . . . . . . . . . . . . . . . . . 5-4
Spare Tire Compact . . . . . . . . . . . . . . . . . . . . . . 9-74
Specifications and
Capacities . . . . . . . . . . . . . . . . . . . . 11-2
Speedometer . . . . . . . . . . . . . . . . . . 4-14
Start Vehicle, Remote . . . . . . . . . . 1-8
Starter Switch Check . . . . . . . . . . 9-27
Starting the Engine . . . . . . . . . . . . 8-20
Steering . . . . . . . . . . . . . . . . . . . . . . . . 8-5 Fluid, Power . . . . . . . . . . . . . . . . . . 9-22
Heated Wheel . . . . . . . . . . . . . . . . . 4-7
Wheel Adjustment . . . . . . . . . . . . . 4-6
Wheel Controls . . . . . . . . . . . . . . . . 4-6
Stoplamps and Back-Up Lamps Bulb Replacement . . . . . . . . . . . . 9-35
Storage Mass Media (MEM) . . . . . . . . . . . 6-25 Storage Areas
Center Console . . . . . . . . . . . . . . . . 3-1
Convenience Net . . . . . . . . . . . . . . 3-2
Front . . . . . . . . . . . . . . . . . . . . . . . . . . 3-1
Glove Box . . . . . . . . . . . . . . . . . . . . . 3-1
Stuck Vehicle . . . . . . . . . . . . . . . . . . 8-11
Sun Visor Lamps . . . . . . . . . . . . . . . 5-5
Sun Visors . . . . . . . . . . . . . . . . . . . . . 1-19
Sunroof . . . . . . . . . . . . . . . . . . . . . . . . 1-19
Symbols . . . . . . . . . . . . . . . . . . . . . . . . . . .v
System Check Automatic TransmissionShiftlock Control . . . . . . . . . . . . 9-27
T
Tachometer . . . . . . . . . . . . . . . . . . . . 4-14
Taillamp Indicator Light . . . . . . . . 4-25
TaillampsBulb Replacement . . . . . . . . . . . . 9-35
Text Telephone (TTY) Users . . . 12-4
Theft-Deterrent Systems . . . . . . . . . . . . . . . 1-13, 1-14
Immobilizer . . . . . . . . . . . . . . . . . . . 1-13
Time . . . . . . . . . . . . . . . . . . . . . . . . . . . . 4-9