fog light BUICK LACROSSE 2010 Owner's Manual
[x] Cancel search | Manufacturer: BUICK, Model Year: 2010, Model line: LACROSSE, Model: BUICK LACROSSE 2010Pages: 414
Page 5 of 414
Introduction v
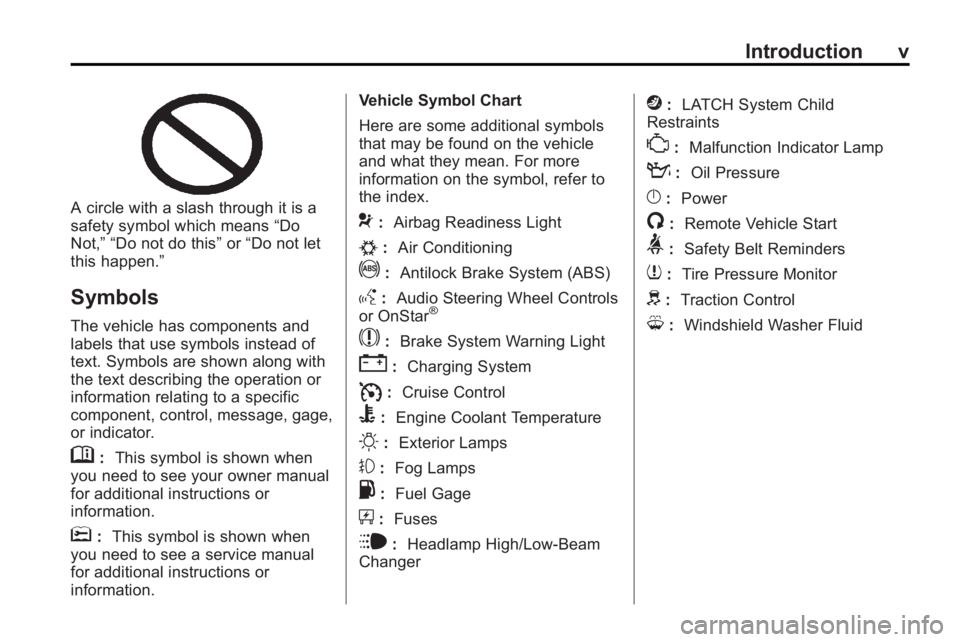
A circle with a slash through it is a
safety symbol which means“Do
Not,” “Do not do this” or“Do not let
this happen.”
Symbols
The vehicle has components and
labels that use symbols instead of
text. Symbols are shown along with
the text describing the operation or
information relating to a specific
component, control, message, gage,
or indicator.
M: This symbol is shown when
you need to see your owner manual
for additional instructions or
information.
*: This symbol is shown when
you need to see a service manual
for additional instructions or
information. Vehicle Symbol Chart
Here are some additional symbols
that may be found on the vehicle
and what they mean. For more
information on the symbol, refer to
the index.
9:
Airbag Readiness Light
#:Air Conditioning
!:Antilock Brake System (ABS)
g:Audio Steering Wheel Controls
or OnStar®
$: Brake System Warning Light
":Charging System
I:Cruise Control
B: Engine Coolant Temperature
O:Exterior Lamps
#:Fog Lamps
.: Fuel Gage
+:Fuses
i: Headlamp High/Low-Beam
Changer
j: LATCH System Child
Restraints
*: Malfunction Indicator Lamp
::Oil Pressure
}:Power
/:Remote Vehicle Start
>:Safety Belt Reminders
7:Tire Pressure Monitor
d:Traction Control
M:Windshield Washer Fluid
Page 89 of 414
Instruments and Controls 4-1
Instruments and
Controls
Instrument Panel Overview
Instrument Panel Overview . . . . 4-4
Controls
Steering Wheel Adjustment . . . 4-6
Steering Wheel Controls . . . . . . 4-6
Heated Steering Wheel . . . . . . . 4-7
Horn . . . . . . . . . . . . . . . . . . . . . . . . . . 4-7
Windshield Wiper/Washer . . . . . 4-7
Compass . . . . . . . . . . . . . . . . . . . . . 4-8
Clock (Without DateDisplay) . . . . . . . . . . . . . . . . . . . . . 4-9
Clock (With Date Display) . . . . . 4-9
Power Outlets . . . . . . . . . . . . . . . 4-10
Warning Lights, Gages, and
Indicators
Warning Lights, Gages, and Indicators . . . . . . . . . . . . . . 4-12
Instrument Cluster . . . . . . . . . . . 4-13
Speedometer . . . . . . . . . . . . . . . . 4-14
Odometer . . . . . . . . . . . . . . . . . . . . 4-14
Tachometer . . . . . . . . . . . . . . . . . . 4-14
Fuel Gage . . . . . . . . . . . . . . . . . . . 4-14
Engine Coolant Temperature Gage . . . . . . . . . 4-15
Safety Belt Reminders . . . . . . . 4-15
Airbag Readiness Light . . . . . . 4-16
Passenger Airbag Status Indicator . . . . . . . . . . . . . . . . . . . . 4-16
Charging System Light . . . . . . 4-17
Malfunction Indicator Lamp . . . . . . . . . . . . . 4-17
Brake System Warning Light . . . . . . . . . . . . . . . . . . . . . . . 4-20 Electric Parking Brake
Light . . . . . . . . . . . . . . . . . . . . . . . 4-20
Antilock Brake System (ABS) Warning Light . . . . . . . . . . . . . . 4-21
Traction Off Light . . . . . . . . . . . . 4-22
Electronic Stability Control
(ESC) Indicator Light . . . . . . . 4-22
Electronic Stability Control (ESC)/Traction Control
System (TCS) Indicator/
Warning Light . . . . . . . . . . . . . . 4-22
Tire Pressure Light . . . . . . . . . . 4-23
Engine Oil Pressure Light . . . . 4-23
Low Fuel Warning Light . . . . . . 4-24
Security Light . . . . . . . . . . . . . . . . 4-24
High-Beam on Light . . . . . . . . . 4-24
Fog Lamp Light . . . . . . . . . . . . . . 4-24
Taillamp Indicator Light . . . . . . 4-25
Cruise Control Light . . . . . . . . . 4-25
Page 112 of 414
4-24 Instruments and Controls
If the light comes on and stays on, it
means that oil is not flowing through
the engine properly. The vehicle
could be low on oil and might have
some other system problem. See
your dealer/retailer.
For vehicles with the uplevel cluster
this telltale displays in the Driver
Information Center (DIC) screen.
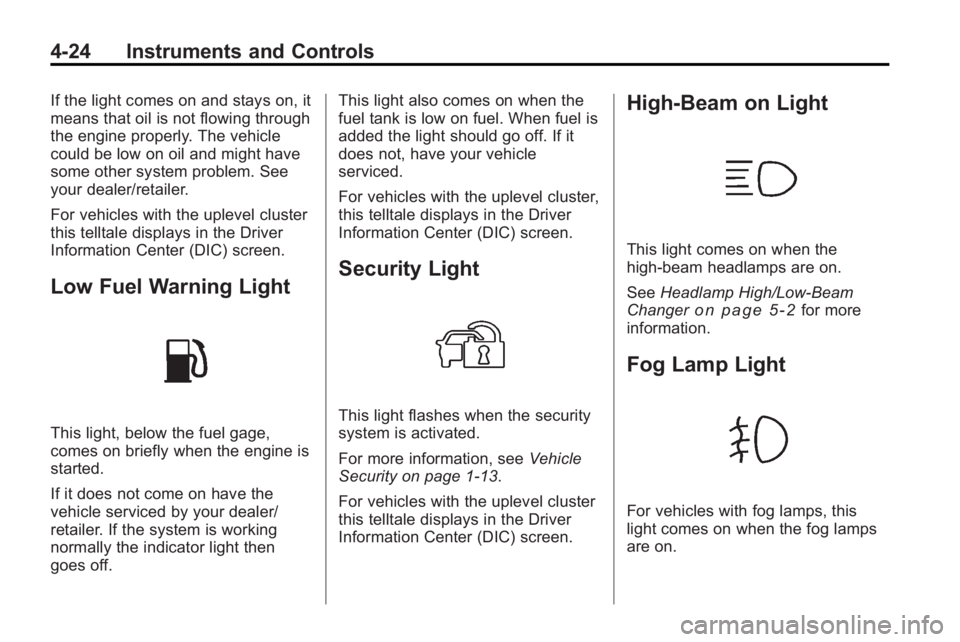
Low Fuel Warning Light
This light, below the fuel gage,
comes on briefly when the engine is
started.
If it does not come on have the
vehicle serviced by your dealer/
retailer. If the system is working
normally the indicator light then
goes off.This light also comes on when the
fuel tank is low on fuel. When fuel is
added the light should go off. If it
does not, have your vehicle
serviced.
For vehicles with the uplevel cluster,
this telltale displays in the Driver
Information Center (DIC) screen.
Security Light
This light flashes when the security
system is activated.
For more information, see
Vehicle
Security on page 1‑13.
For vehicles with the uplevel cluster
this telltale displays in the Driver
Information Center (DIC) screen.
High-Beam on Light
This light comes on when the
high-beam headlamps are on.
See Headlamp High/Low-Beam
Changer
on page 5‑2for more
information.
Fog Lamp Light
For vehicles with fog lamps, this
light comes on when the fog lamps
are on.
Page 113 of 414
Instruments and Controls 4-25
The light goes out when the fog
lamps are turned off. SeeFog
Lamps
on page 5‑5for more
information.
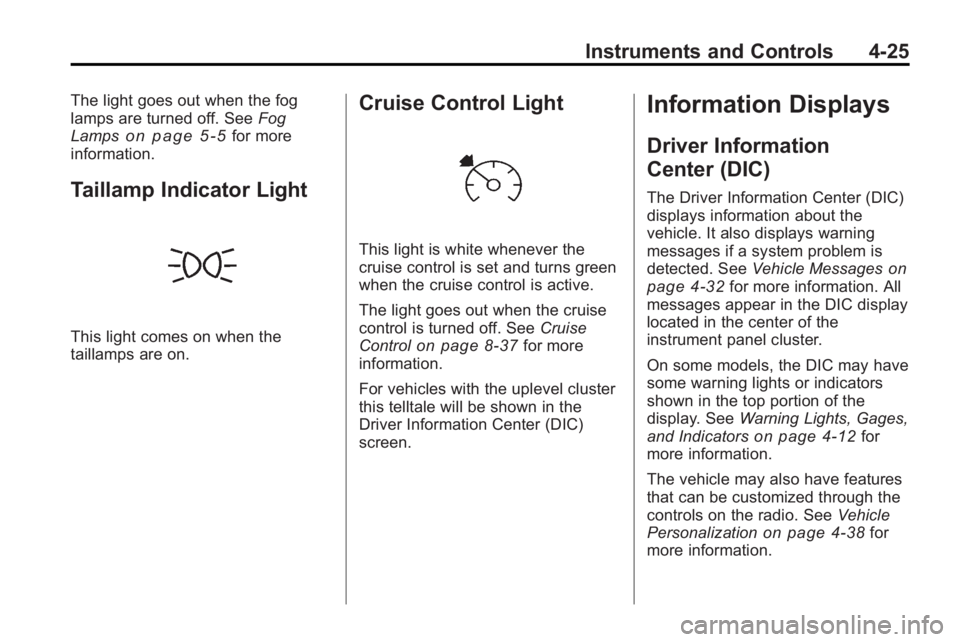
Taillamp Indicator Light
This light comes on when the
taillamps are on.
Cruise Control Light
This light is white whenever the
cruise control is set and turns green
when the cruise control is active.
The light goes out when the cruise
control is turned off. See Cruise
Control
on page 8‑37for more
information.
For vehicles with the uplevel cluster
this telltale will be shown in the
Driver Information Center (DIC)
screen.
Information Displays
Driver Information
Center (DIC)
The Driver Information Center (DIC)
displays information about the
vehicle. It also displays warning
messages if a system problem is
detected. See Vehicle Messages
on
page 4‑32for more information. All
messages appear in the DIC display
located in the center of the
instrument panel cluster.
On some models, the DIC may have
some warning lights or indicators
shown in the top portion of the
display. See Warning Lights, Gages,
and Indicators
on page 4‑12for
more information.
The vehicle may also have features
that can be customized through the
controls on the radio. See Vehicle
Personalization
on page 4‑38for
more information.
Page 127 of 414
Instruments and Controls 4-39
Climate and Air Quality
Select the Climate and Air Quality
menu and the following will be
displayed:
.Auto Fan Control
.Air Quality Control
.Auto Heated Seats
.Remote Start Heated Seats
.Remote Start Cooled Seats
.Auto Defog
.Auto Rear Defog
Auto Fan Control
This will allow you to select the
automatic fan speed it can be
adjusted to run lower or higher than
normal.
Press the MENU / SELECT knob
when Auto Fan Control is
highlighted to open the menu. Turn
the knob to highlight High, Medium,
or Low. Press the knob to confirm
the selection and move back to the
last menu. Air Quality Control
This will allow you to select the
whether the system will operate at
high or low sensitivity. Only vehicles
with the dual zone climate control
will have this option.
Press the MENU / SELECT knob
when Air Quality Control is
highlighted to open the menu. Turn
the knob to highlight High or Low.
Press the knob to confirm the
selection and move back to the
last menu.
Remote Start Heated Seats
When on, this feature will turn the
heated seats on when using remote
start on cold days.
Press the MENU / SELECT knob
when Remote Start Heated Seats is
highlighted. Turn the knob to select
On or Off. Press the knob to confirm
and go back to the last menu.
Remote Start Cooled Seats
When on, this feature will turn the
cooled seats on when using remote
start on warm days.
Press the MENU / SELECT knob
when Remote Start Cooled Seats is
highlighted. Turn the knob to select
On or Off. Press the knob to confirm
and go back to the last menu.
Auto Defog
This will allow you to turn the auto
defog on or off. Only vehicles with
the dual zone climate control will
have this option.
Press the MENU / SELECT knob
when Auto Defog is highlighted to
open the menu. Turn the knob to
highlight On or Off. Press the knob
to confirm the selection and move
back to the last menu.
Auto Rear Defog
This will allow you to turn the auto
rear defog on or off. This feature will
automatically turn on the rear
defogger when it is cold outside.
Page 128 of 414
4-40 Instruments and Controls
Press the MENU / SELECT knob
when Auto Rear Defog is
highlighted to open the menu.
Turn the knob to highlight On or Off.
Press the knob to confirm the
selection and move back to the
last menu.
Comfort and Convenience
Select the Comfort and
Convenience menu and the
following will be displayed:
.Chime Volume
.Personalization by Driver
.Driver Seat Easy Exit
.Parking Tilt Mirrors
Chime Volume
This allows the selection of the
chime volume level.
Press the MENU / SELECT knob
when Chime Volume is highlighted.
Turn the knob to select Normal or
High. Press the knob to confirm and
go back to the last menu. Personalization by Driver
This allows the selection of if the
personalization settings are specific
to each driver or the same no matter
which key was used to enter and
start the vehicle.
Press the MENU / SELECT knob
when Personalization by Driver is
highlighted. Turn the knob to select
On or Off. Press the knob to confirm
and go back to the last menu.
Driver Seat Easy Exit
This allows you to turn the easy exit
seat feature on or off.
Press the MENU / SELECT knob
when Driver Seat Easy Exit is
highlighted. Turn the knob to select
On or Off. Press the knob to confirm
and go back to the last menu.
Park Tilt Mirrors
This allows you to turn the park tilt
mirrors feature on or off.
Press the MENU / SELECT knob
when Park Tilt Mirrors is highlighted.
Turn the knob to select Driver &Passenger or Off. Press the knob to
confirm and go back to the
last menu.
Collision/Detection Systems
Select the Collision/Detection
Systems menu and the following will
be displayed:
.Park Assist
Park Assist
This allows the Ultrasonic Parking
Assist feature to be turned on or off.
Press the MENU / SELECT knob
when Park Assist is highlighted.
Turn the knob to select On or Off.
Press the knob to confirm and go
back to the last menu.
Language
Select the Language menu and the
following will be displayed:
.English
.French
.Spanish
Page 139 of 414
Lighting 5-1
Lighting
Exterior Lighting
Exterior Lamp Controls . . . . . . . . 5-1
Exterior Lamps OffReminder . . . . . . . . . . . . . . . . . . . . 5-2
Headlamp High/Low-Beam Changer . . . . . . . . . . . . . . . . . . . . . 5-2
Flash-to-Pass . . . . . . . . . . . . . . . . . 5-2
Daytime Running Lamps (DRL) . . . . . . . . . . . . . . . . 5-2
Automatic Headlamp System . . . . . . . . . . . . . . . . . . . . . . 5-3
Adaptive Forward Lighting (AFL) . . . . . . . . . . . . . . . 5-3 Hazard Warning Flashers . . . . . 5-4
Turn and Lane-Change
Signals . . . . . . . . . . . . . . . . . . . . . . 5-4
Fog Lamps . . . . . . . . . . . . . . . . . . . . 5-5Interior Lighting
Instrument Panel Illumination Control . . . . . . . . . . . . . . . . . . . . . . 5-5
Dome Lamps . . . . . . . . . . . . . . . . . 5-5
Reading Lamps . . . . . . . . . . . . . . . 5-5
Sun Visor Lamps . . . . . . . . . . . . . . 5-5
Lighting Features
Entry Lighting . . . . . . . . . . . . . . . . . 5-6
Exit Lighting . . . . . . . . . . . . . . . . . . . 5-6
Battery Load Management . . . . 5-6
Battery Power Protection . . . . . . 5-7
Exterior Lighting
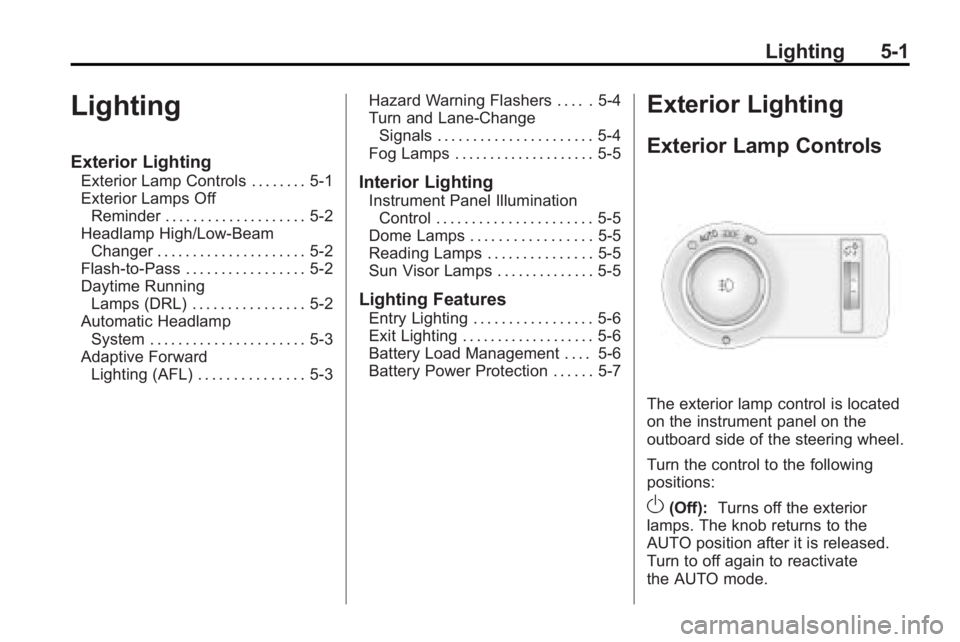
Exterior Lamp Controls
The exterior lamp control is located
on the instrument panel on the
outboard side of the steering wheel.
Turn the control to the following
positions:
O(Off): Turns off the exterior
lamps. The knob returns to the
AUTO position after it is released.
Turn to off again to reactivate
the AUTO mode.
Page 143 of 414
Lighting 5-5
Fog Lamps
For vehicles with fog lamps, the
button is located on the exterior
lamp control, on the outboard side
of the steering wheel.
To turn on the fog lamps, the ignition
and the headlamps or parking lamps
must be on.
If the fog lamps are turned on while
the exterior lamp switch is in the
AUTO position, the headlamps
come on automatically.
#:Press to turn on or off. An
indicator light on the instrument
panel cluster comes on when the
fog lamps are on.
Some localities have laws that
require the headlamps to be on
along with the fog lamps.
Interior Lighting
Instrument Panel
Illumination Control
The brightness of the instrument
panel lighting and steering wheel
controls can be adjusted. Use the
thumbwheel located next to the
exterior lamps control on the
outboard side of the steering wheel.
D: Move the thumbwheel up or
down to brighten or dim the lights.
Dome Lamps
The interior lamps control located in
the overhead console controls both
the front and rear interior lamps.
To operate, press the following
buttons:
*(Off): Turns the lamp off.
1Door: Turns the lamp on when
any door is opened.
+ON: Keeps the lamp on all
the time.
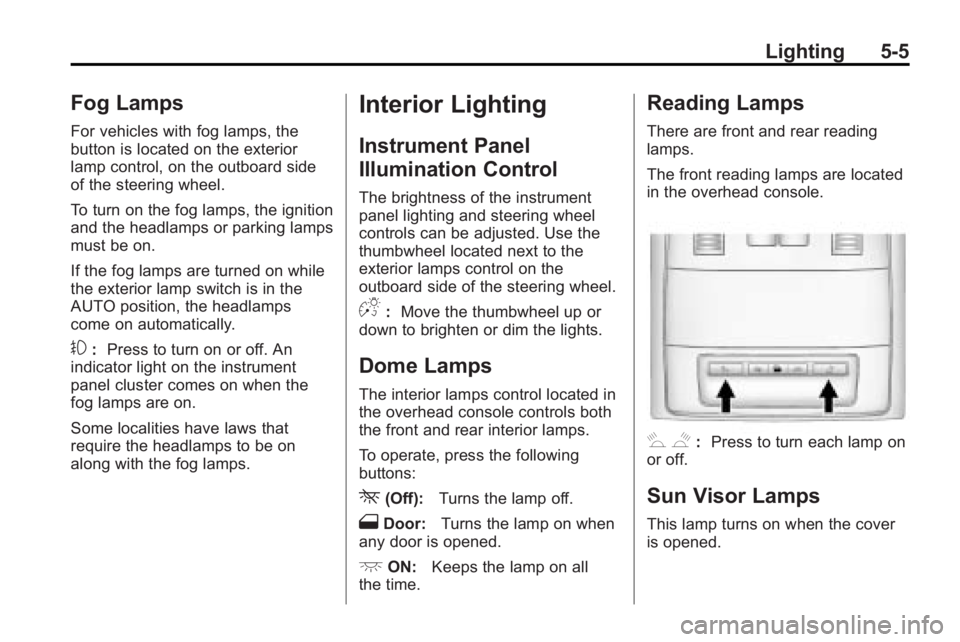
Reading Lamps
There are front and rear reading
lamps.
The front reading lamps are located
in the overhead console.
# $: Press to turn each lamp on
or off.
Sun Visor Lamps
This lamp turns on when the cover
is opened.
Page 145 of 414
Lighting 5-7
has a voltmeter gage or a voltage
display on the Driver Information
Center (DIC), you may see the
voltage move up or down. This is
normal. If there is a problem, an
alert will be displayed.
The battery can be discharged at
idle if the electrical loads are very
high. This is true for all vehicles.
This is because the generator
(alternator) may not be spinning fast
enough at idle to produce all the
power that is needed for very high
electrical loads.
A high electrical load occurs when
several of the following are on, such
as: headlamps, high beams, fog
lamps, rear window defogger,
climate control fan at high speed,
heated seats, engine cooling fans,
trailer loads, and loads plugged into
accessory power outlets.EPM works to prevent excessive
discharge of the battery. It does this
by balancing the generator's output
and the vehicle's electrical needs.
It can increase engine idle speed to
generate more power, whenever
needed. It can temporarily reduce
the power demands of some
accessories.
Normally, these actions occur in
steps or levels, without being
noticeable. In rare cases at the
highest levels of corrective action,
this action may be noticeable to the
driver. If so, a Driver Information
Center (DIC) message might be
displayed, such as BATTERY
SAVER ACTIVE, BATTERY
VOLTAGE LOW, or LOW BATTERY.
If one of these messages display, it
is recommended that the driver
reduce the electrical loads as much
as possible. See
Driver Information
Center (DIC) on page 4‑25.Battery Power Protection
The battery saver feature is
designed to protect the vehicle's
battery.
If the exterior lamps or any interior
light is left on and the ignition is
turned off, the battery rundown
protection system automatically
turns the lamp off after about
10 minutes.
Page 214 of 414
7-2 Climate Controls
Automatic Operation
The system automatically controls
the fan speed, air delivery, air
conditioning and recirculation in
order to heat or cool the vehicle to
the desired temperature.
When the AUTO indicator light is
on, the system is in full automatic
operation. If the air delivery mode,
fan speed, recirculation or air
conditioning setting is adjusted, the
AUTO indicator turns off and the
selected settings will appear on the
display.
To place the system in automatic
mode do the following:
1. Press AUTO.
2. Set the temperature. Allow thesystem time to stabilize. Adjust
the temperature as needed for
best comfort.
Q/R(Temperature Control):
Press to increase or decrease the
temperature. Manual Operation
O(Power):
Press to turn the fan
on or off.
D C(Fan Control): Press to
increase or decrease the fan speed.
The fan speed setting appears on
the main display. Pressing either
button cancels automatic fan control
and the fan can be controlled
manually. Press AUTO to return to
automatic operation.
e *(Air Delivery Mode
Control): Press to change the
direction of the airflow. The current
mode appears in the display screen.
Pressing either button cancels
automatic air delivery control and
the direction of the airflow can be
controlled manually. Press AUTO to
return to automatic operation.
To change the current mode, select
one of the following:
Y(Vent): Air is directed to the
instrument panel outlets.
\(Bi-Level): Air is divided
between the instrument panel
outlets and the floor outlets.
C(Tri-Level): Air is divided
between the windshield, instrument
panel, and floor outlets.
[(Floor): Air is directed to the
floor outlets.
-(Defog): Clears the windows of
fog or moisture. Air is directed to the
windshield and floor outlets.
0(Defrost): Clears the
windshield of fog or frost more
quickly. Air is directed to the
windshield. Selecting defrost will
disable automatic control.
For best results, clear all snow and
ice from windshield before
defrosting.
#(Air Conditioning): Press to
turn the air conditioning system on
or off. If the fan is turned off or the
outside temperature falls below
freezing, the air conditioning system
will not run.