spare wheel BUICK LACROSSE 2010 Owner's Manual
[x] Cancel search | Manufacturer: BUICK, Model Year: 2010, Model line: LACROSSE, Model: BUICK LACROSSE 2010Pages: 414
Page 252 of 414
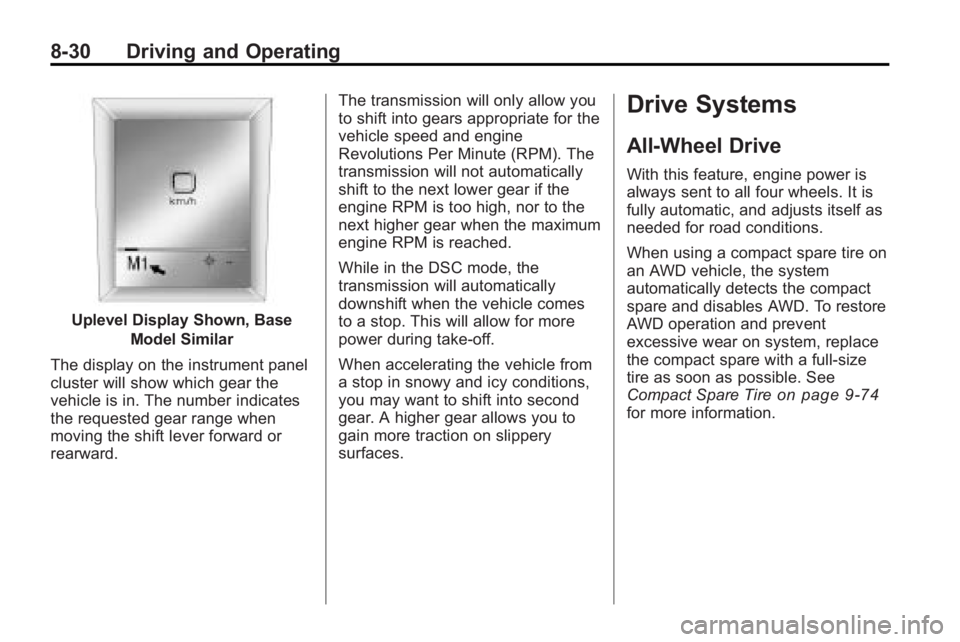
8-30 Driving and Operating
Uplevel Display Shown, BaseModel Similar
The display on the instrument panel
cluster will show which gear the
vehicle is in. The number indicates
the requested gear range when
moving the shift lever forward or
rearward. The transmission will only allow you
to shift into gears appropriate for the
vehicle speed and engine
Revolutions Per Minute (RPM). The
transmission will not automatically
shift to the next lower gear if the
engine RPM is too high, nor to the
next higher gear when the maximum
engine RPM is reached.
While in the DSC mode, the
transmission will automatically
downshift when the vehicle comes
to a stop. This will allow for more
power during take-off.
When accelerating the vehicle from
a stop in snowy and icy conditions,
you may want to shift into second
gear. A higher gear allows you to
gain more traction on slippery
surfaces.
Drive Systems
All-Wheel Drive
With this feature, engine power is
always sent to all four wheels. It is
fully automatic, and adjusts itself as
needed for road conditions.
When using a compact spare tire on
an AWD vehicle, the system
automatically detects the compact
spare and disables AWD. To restore
AWD operation and prevent
excessive wear on system, replace
the compact spare with a full-size
tire as soon as possible. See
Compact Spare Tire
on page 9‑74for more information.
Page 284 of 414
9-2 Vehicle Care
Tire Pressure MonitorOperation . . . . . . . . . . . . . . . . . . 9-55
Tire Inspection . . . . . . . . . . . . . . . 9-59
Tire Rotation . . . . . . . . . . . . . . . . . 9-59
When It Is Time for New Tires . . . . . . . . . . . . . . . . . . . . . . . 9-60
Buying New Tires . . . . . . . . . . . . 9-61
Different Size Tires and Wheels . . . . . . . . . . . . . . . . . . . . . 9-63
Uniform Tire Quality Grading . . . . . . . . . . . . . . . . . . . . 9-64
Wheel Alignment and Tire Balance . . . . . . . . . . . . . . . . . . . . 9-65
Wheel Replacement . . . . . . . . . 9-66
Tire Chains . . . . . . . . . . . . . . . . . . 9-67
If a Tire Goes Flat . . . . . . . . . . . 9-67
Tire Changing . . . . . . . . . . . . . . . 9-69
Compact Spare Tire . . . . . . . . . 9-74
Jump Starting
Jump Starting . . . . . . . . . . . . . . . . 9-75
Towing
Towing the Vehicle . . . . . . . . . . . 9-79
Recreational Vehicle Towing . . . . . . . . . . . . . . . . . . . . . 9-79
Appearance Care
Exterior Care . . . . . . . . . . . . . . . . 9-82
Interior Care . . . . . . . . . . . . . . . . . 9-86
General Information
For service and parts needs, visit
your dealer/retailer. You will receive
genuine GM parts and GM-trained
and supported service people.
Genuine GM parts have one of
these marks:
California Proposition
65 Warning
Most motor vehicles, including this
one, contain and/or emit chemicals
known to the State of California to
cause cancer and birth defects or
other reproductive harm. Engine
exhaust, many parts and systems,
many fluids, and some component
wear by-products contain and/or
emit these chemicals.
Page 329 of 414
Vehicle Care 9-47
If you choose to use winter tires:
.Use tires of the same brand and
tread type on all four wheel
positions.
.Use only radial ply tires of the
same size, load range, and
speed rating as the original
equipment tires.
Winter tires with the same speed
rating as your original equipment
tires may not be available for H, V,
W, Y, and ZR speed rated tires.
If you choose winter tires with a
lower speed rating, never exceed
the tire's maximum speed capability.
Tire Sidewall Labeling
Useful information about a tire is
molded into its sidewall. The
examples below show a typical
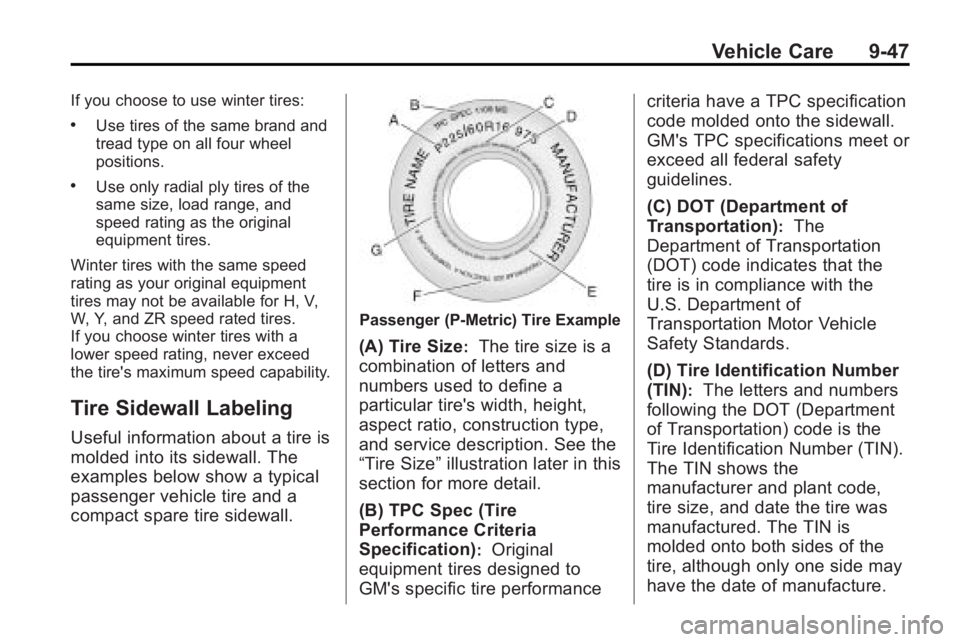
passenger vehicle tire and a
compact spare tire sidewall.
Passenger (P-Metric) Tire Example
(A) Tire Size:The tire size is a
combination of letters and
numbers used to define a
particular tire's width, height,
aspect ratio, construction type,
and service description. See the
“Tire Size” illustration later in this
section for more detail.
(B) TPC Spec (Tire
Performance Criteria
Specification)
:Original
equipment tires designed to
GM's specific tire performance criteria have a TPC specification
code molded onto the sidewall.
GM's TPC specifications meet or
exceed all federal safety
guidelines.
(C) DOT (Department of
Transportation)
:The
Department of Transportation
(DOT) code indicates that the
tire is in compliance with the
U.S. Department of
Transportation Motor Vehicle
Safety Standards.
(D) Tire Identification Number
(TIN)
:The letters and numbers
following the DOT (Department
of Transportation) code is the
Tire Identification Number (TIN).
The TIN shows the
manufacturer and plant code,
tire size, and date the tire was
manufactured. The TIN is
molded onto both sides of the
tire, although only one side may
have the date of manufacture.
Page 331 of 414
Vehicle Care 9-49
(E) Tire Inflation:The
temporary use tire or compact
spare tire should be inflated to
420 kPa (60 psi). For more
information on tire pressure and
inflation see Tire Pressure
on
page 9‑53
.
(F) Tire Size
:A combination of
letters and numbers define a
tire's width, height, aspect ratio,
construction type, and service
description. The letter T as the
first character in the tire size
means the tire is for temporary
use only.
(G) TPC Spec (Tire
Performance Criteria
Specification)
:Original
equipment tires designed to
GM's specific tire performance
criteria have a TPC specification
code molded onto the sidewall.
GM's TPC specifications meet or
exceed all federal safety
guidelines.
Tire Designations
Tire Size
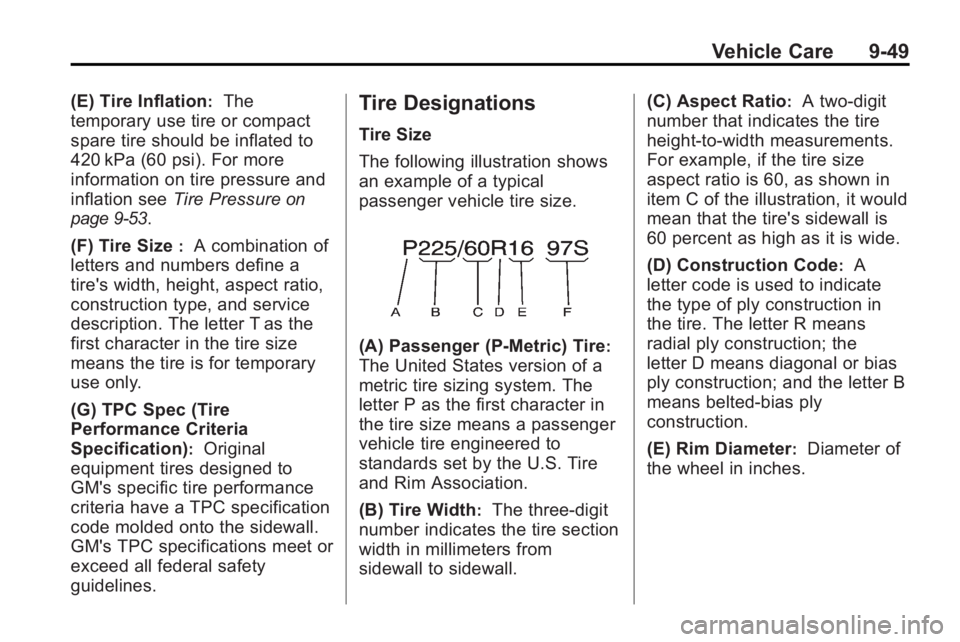
The following illustration shows
an example of a typical
passenger vehicle tire size.
(A) Passenger (P-Metric) Tire:
The United States version of a
metric tire sizing system. The
letter P as the first character in
the tire size means a passenger
vehicle tire engineered to
standards set by the U.S. Tire
and Rim Association.
(B) Tire Width
:The three-digit
number indicates the tire section
width in millimeters from
sidewall to sidewall. (C) Aspect Ratio
:A two-digit
number that indicates the tire
height-to-width measurements.
For example, if the tire size
aspect ratio is 60, as shown in
item C of the illustration, it would
mean that the tire's sidewall is
60 percent as high as it is wide.
(D) Construction Code
:A
letter code is used to indicate
the type of ply construction in
the tire. The letter R means
radial ply construction; the
letter D means diagonal or bias
ply construction; and the letter B
means belted-bias ply
construction.
(E) Rim Diameter
:Diameter of
the wheel in inches.
Page 337 of 414
Vehicle Care 9-55
Please note that the TPMS is
not a substitute for proper tire
maintenance, and it is the driver's
responsibility to maintain correct tire
pressure, even if under-inflation has
not reached the level to trigger
illumination of the TPMS low tire
pressure telltale.
Your vehicle has also been
equipped with a TPMS malfunction
indicator to indicate when the
system is not operating properly.
The TPMS malfunction indicator is
combined with the low tire pressure
telltale. When the system detects a
malfunction, the telltale will flash for
approximately one minute and then
remain continuously illuminated.
This sequence will continue upon
subsequent vehicle start-ups as
long as the malfunction exists.
When the malfunction indicator is
illuminated, the system may not be
able to detect or signal low tire
pressure as intended. TPMS
malfunctions may occur for a variety
of reasons, including the installation
of replacement or alternate tires orwheels on the vehicle that prevent
the TPMS from functioning properly.
Always check the TPMS malfunction
telltale after replacing one or more
tires or wheels on your vehicle to
ensure that the replacement or
alternate tires and wheels allow the
TPMS to continue to function
properly.
See
Tire Pressure Monitor
Operation
on page 9‑55for
additional information.
Federal Communications
Commission (FCC) and
Industry and Science Canada
See Radio Frequency Statement
(US, Can)on page 12‑16for
information regarding Part 15 of the
Federal Communications
Commission (FCC) Rules and
RSS-210/211 of Industry and
Science Canada.
Tire Pressure Monitor
Operation
This vehicle may have a Tire
Pressure Monitor System (TPMS).
The TPMS is designed to warn the
driver when a low tire pressure
condition exists. TPMS sensors are
mounted onto each tire and wheel
assembly, excluding the spare tire
and wheel assembly. The TPMS
sensors monitor the air pressure in
the vehicle's tires and transmits the
tire pressure readings to a receiver
located in the vehicle.
When a low tire pressure condition
is detected, the TPMS illuminates
the low tire pressure warning light
located on the instrument panel
cluster.
Page 341 of 414
Vehicle Care 9-59
Tire Inspection
We recommend that you
regularly inspect your vehicle's
tires, including the spare tire,
if the vehicle has one, for signs
of wear or damage. SeeWhen It
Is Time for New Tires
on
page 9‑60
for more information.
Tire Rotation
Tires should be rotated every
8 000 to 13 000 km (5,000 to
8,000 miles). See Scheduled
Maintenance
on page 10‑2.
The purpose of a regular tire
rotation is to achieve a uniform
wear for all tires on the vehicle.
This will ensure that the vehicle
continues to perform most like it
did when the tires were new. Any time you notice unusual
wear, rotate the tires as soon as
possible and check wheel
alignment. Also check for
damaged tires or wheels. See
When It Is Time for New Tires
on page 9‑60and
Wheel
Replacement
on page 9‑66.
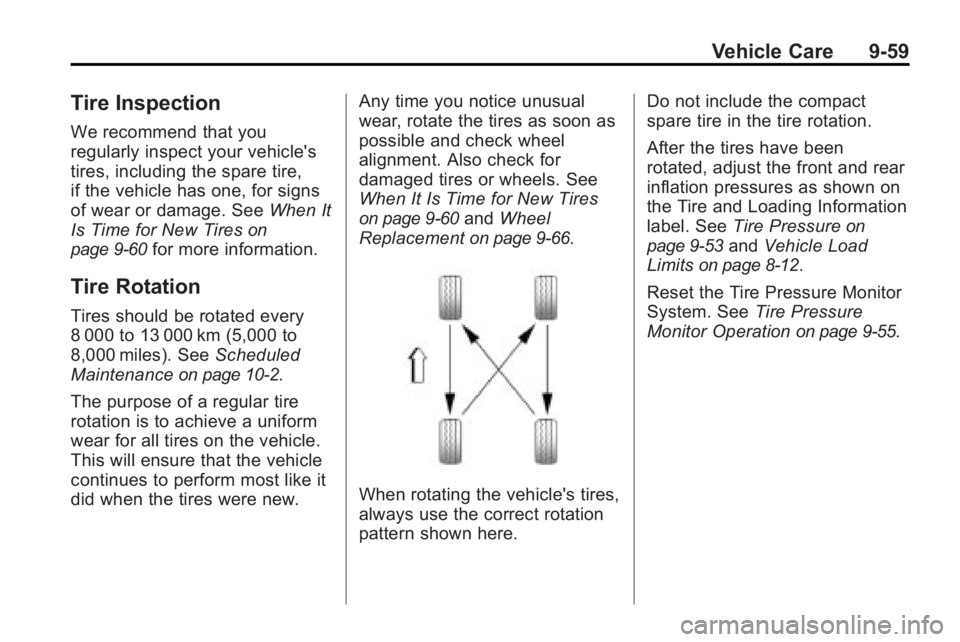
When rotating the vehicle's tires,
always use the correct rotation
pattern shown here. Do not include the compact
spare tire in the tire rotation.
After the tires have been
rotated, adjust the front and rear
inflation pressures as shown on
the Tire and Loading Information
label. See
Tire Pressure
on
page 9‑53
and Vehicle Load
Limits
on page 8‑12.
Reset the Tire Pressure Monitor
System. See Tire Pressure
Monitor Operation
on page 9‑55.
Page 344 of 414
9-62 Vehicle Care
GM recommends replacing tires
in sets of four. This is because
uniform tread depth on all tires
will help keep your vehicle
performing most like it did when
the tires were new. Replacing
less than a full set of tires can
affect the braking and handling
performance of your vehicle.
SeeTire Inspection
on page 9‑59
andTire Rotationon page 9‑59
for information on proper tire
rotation.
{WARNING
Mixing tires could cause you
to lose control while driving.
If you mix tires of different
sizes, brands, or types (radial
and bias-belted tires), the
vehicle may not handle
properly, and you could have
a crash. Using tires of different
sizes, brands, or types may
also cause damage to your
vehicle. Be sure to use the
correct size, brand, and type
of tires on all wheels. It is all
right to drive with your
compact spare temporarily, as
it was developed for use on
your vehicle. See Compact
Spare Tire
on page 9‑74.
{WARNING
If you use bias-ply tires on the
vehicle, the wheel rim flanges
could develop cracks after
many miles of driving. A tire
and/or wheel could fail
suddenly, causing a crash.
Use only radial-ply tires with
the wheels on the vehicle.
If you must replace your
vehicle's tires with those that do
not have a TPC Spec number,
make sure they are the same
size, load range, speed rating,
and construction type (radial and
bias-belted tires) as your
vehicle's original tires.
Page 351 of 414
Vehicle Care 9-69
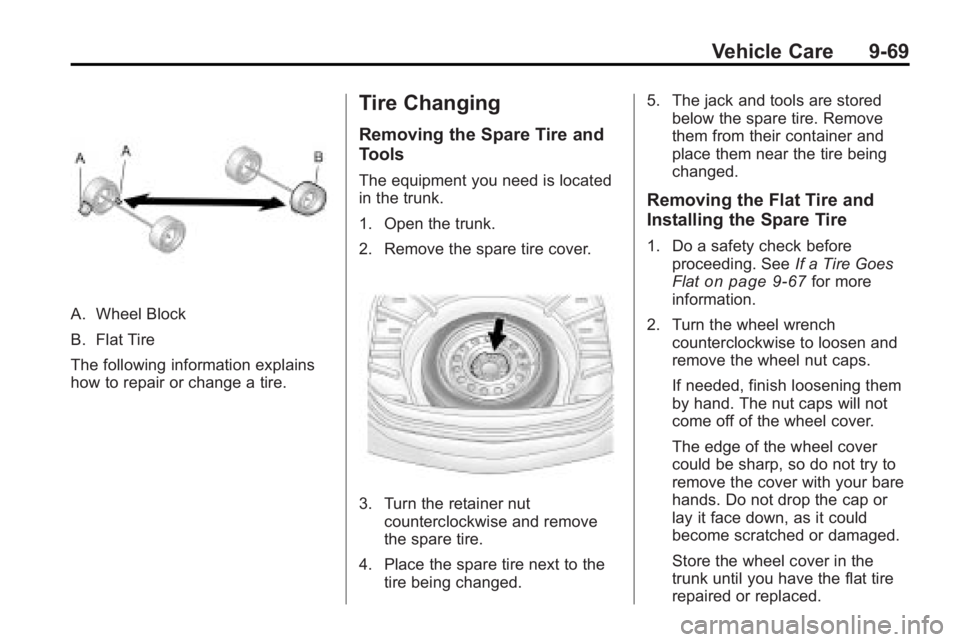
A. Wheel Block
B. Flat Tire
The following information explains
how to repair or change a tire.
Tire Changing
Removing the Spare Tire and
Tools
The equipment you need is located
in the trunk.
1. Open the trunk.
2. Remove the spare tire cover.
3. Turn the retainer nutcounterclockwise and remove
the spare tire.
4. Place the spare tire next to the tire being changed. 5. The jack and tools are stored
below the spare tire. Remove
them from their container and
place them near the tire being
changed.
Removing the Flat Tire and
Installing the Spare Tire
1. Do a safety check before
proceeding. See If a Tire Goes
Flat
on page 9‑67for more
information.
2. Turn the wheel wrench counterclockwise to loosen and
remove the wheel nut caps.
If needed, finish loosening them
by hand. The nut caps will not
come off of the wheel cover.
The edge of the wheel cover
could be sharp, so do not try to
remove the cover with your bare
hands. Do not drop the cap or
lay it face down, as it could
become scratched or damaged.
Store the wheel cover in the
trunk until you have the flat tire
repaired or replaced.
Page 353 of 414
Vehicle Care 9-71
{WARNING
Raising your vehicle with the jack
improperly positioned can
damage the vehicle and even
make the vehicle fall. To help
avoid personal injury and vehicle
damage, be sure to fit the jack lift
head into the proper location
before raising the vehicle.
{WARNING
Lifting a vehicle and getting under
it to do maintenance or repairs is
dangerous without the
appropriate safety equipment and
training. If a jack is provided with
the vehicle, it is designed only for
changing a flat tire. If it is used for
anything else, you or others could
be badly injured or killed if the
vehicle slips off the jack. If a jack
is provided with the vehicle, only
use it for changing a flat tire.
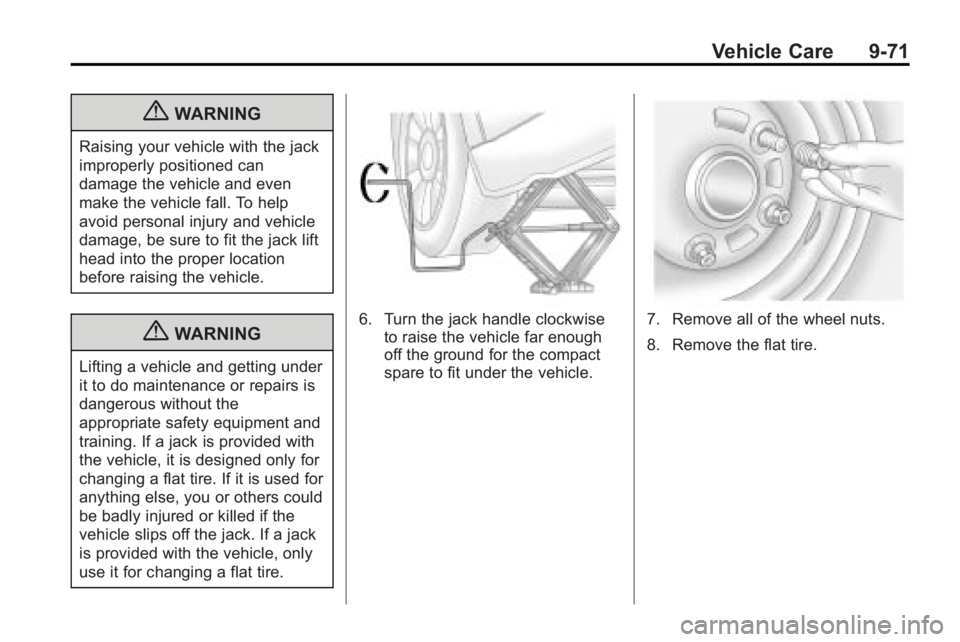
6. Turn the jack handle clockwiseto raise the vehicle far enough
off the ground for the compact
spare to fit under the vehicle.7. Remove all of the wheel nuts.
8. Remove the flat tire.
Page 354 of 414
9-72 Vehicle Care
{WARNING
Rust or dirt on a wheel, or on the
parts to which it is fastened, can
make wheel nuts become loose
after time. The wheel could come
off and cause an accident. When
changing a wheel, remove any
rust or dirt from places where the
wheel attaches to the vehicle. In
an emergency, use a cloth or a
paper towel to do this; but be sure
to use a scraper or wire brush
later, if needed, to get all the rust
or dirt off. SeeIf a Tire Goes Flat
on page 9‑67.
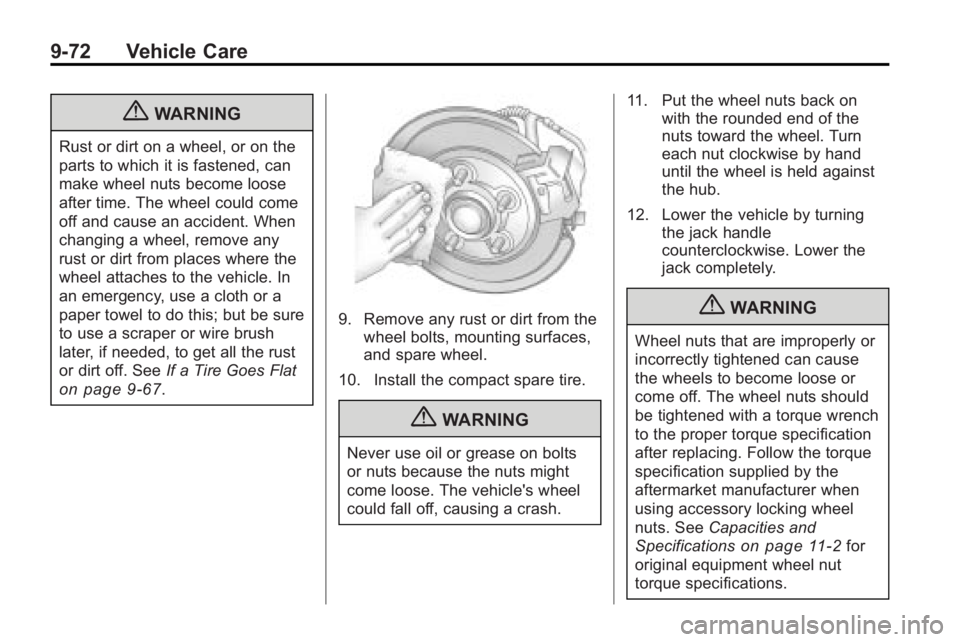
9. Remove any rust or dirt from the
wheel bolts, mounting surfaces,
and spare wheel.
10. Install the compact spare tire.
{WARNING
Never use oil or grease on bolts
or nuts because the nuts might
come loose. The vehicle's wheel
could fall off, causing a crash. 11. Put the wheel nuts back on
with the rounded end of the
nuts toward the wheel. Turn
each nut clockwise by hand
until the wheel is held against
the hub.
12. Lower the vehicle by turning the jack handle
counterclockwise. Lower the
jack completely.
{WARNING
Wheel nuts that are improperly or
incorrectly tightened can cause
the wheels to become loose or
come off. The wheel nuts should
be tightened with a torque wrench
to the proper torque specification
after replacing. Follow the torque
specification supplied by the
aftermarket manufacturer when
using accessory locking wheel
nuts. See Capacities and
Specifications
on page 11‑2for
original equipment wheel nut
torque specifications.