check engine BUICK LESABRE 1993 Owner's Manual
[x] Cancel search | Manufacturer: BUICK, Model Year: 1993, Model line: LESABRE, Model: BUICK LESABRE 1993Pages: 324, PDF Size: 17.02 MB
Page 245 of 324
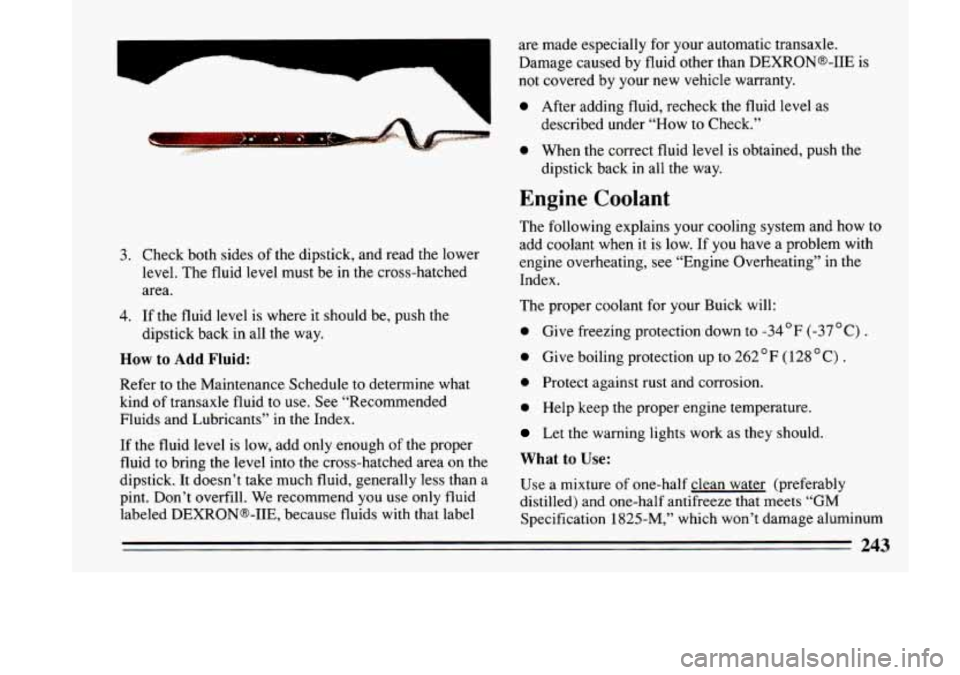
3.
4.
Check both sides of the dipstick, and read the lower
level. The fluid level must be in the cross-hatched
area.
If the fluid level is where it should be, push the
dipstick back in all the way.
How to Add Fluid:
Refer to the Maintenance Schedule to determine what
kind
of transaxle fluid to use. See “Recommended
Fluids and Lubricants” in the Index.
If the fluid level
is low, add only enough of the proper
fluid to bring the level into the cross-hatched area on the
dipstick. It doesn’t take much fluid, generally less than a
pint. Don’t overfill. We recommend you use only fluid
labeled DEXRONa-IIE, because fluids with that label are made especially for your automatic transaxle.
Damage caused by fluid other than DEXRONs-IIE
is
not covered by your new vehicle warranty.
0 After adding fluid, recheck the fluid level as
described under “How to Check.”
0 When the correct fluid level is obtained, push the
dipstick back in all the way.
Engine Coolant
The following explains your cooling system and how to
add coolant when it is low. If you have a problem with
engine overheating, see “Engine Overheating” in the
Index.
The proper coolant for your Buick will:
0 Give freezing protection down to -34OF (-37OC) .
0 Give boiling protection up to 262°F (128 “C) .
0 Protect against rust and corrosion.
0 Help keep the proper engine temperature.
Let the warning lights work as they should.
What to Use:
Use a mixture of one-half clean water (preferably
distilled) and one-half antifreeze that meets
“GM
Specification 1825-M,” which won’t damage aluminum
243
Page 247 of 324
To Check Coolant: When your engine is cold, the
coolant level should
be at “FULL COLD,’’ or a little
higher. When your engine is
warm, the level should be
up to “FULL HOT,” or a little higher.
To Add Coolant: If you need more coolant, add the
proper mix at the coolant recovery tank.
I
I
A CAUTION:
Turning the radiator pressure cap when the
engine and radiator are hot can
allow steam and
scaldlng
liquids to blow out and burn you badly.
With the coolant recovery tank, you will almost
never have
to add coolant at the radiator. Never
turn the radiator pressure cap -- even a little -
when the engine and radiator are hot.
Add coolant mix at the recovery tank, but be careful not
to spill
it.
A CAUTION: I
You can be burned if you spill coolant on hot
engine parts. Coolant contains ethylene glycol,
-..d
it will burn if the engine parts are hot
enough. Don’t spill coolant on a hot engine.
Radiator Pressure Cap
I Tour rar
I I.
cap IS a 13 PSI (105 kPa1
pressure-rype cap and must be tightly Insrawe
to prevent coolant loss and possible engine
damage from overheating. Be sure the arrows
o
I
the cap line up with
radiator filler neck. I
When you replace your radiator pressure cap, an AC@
cap is recommended.
245
Page 248 of 324
Thermostat
Engine coolant temperature is controlled by a thermostat
in the engine coolant system. The thermostat stops the
flow of coolant through the radiator until the coolant
reaches a preset temperature.
When
you replace your thermostat, an ACS thermostat
is recommended.
Power Steering Fluid
:i
How To Check Power Steering Fluid:
Unscrew the cap and wipe the dipstick with a clean rag.
Replace the cap and completely tighten it. Then remove
the cap again and look at the fluid level on the dipstick.
When the engine compartment is hot, the level
When the engine compartment is cool, the level
What to Add:
Refer to the Maintenance Schedule to determine what
kind
of fluid to use. See “Recommended Fluids and
Lubricants” in the Index.
should be
at the
“HOT” mark.
should be at the
“FULL COLD” mark.
When adding power steering fli or making a
complete fluid change, always use the proper
fluid. Failure
to use the proper fluid can cause
leaks and damage hoses and seals.
Page 271 of 324
Vehicle Identification Number (VIN)
ENGINE A3 f ASSEMBLY
~ CODE MODEL YEAR PLANT
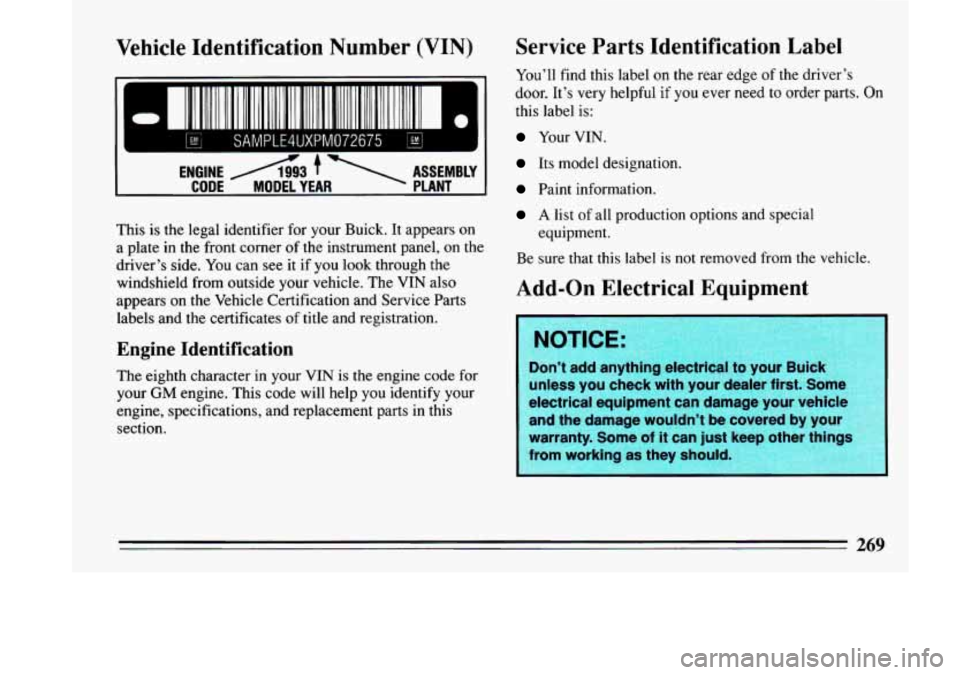
This is the legal identifier for your Buick. It appears on
a plate in the front corner
of the instrument panel, on the
driver’s side. You can see it if you look through the
windshield from outside your vehicle.
The VIN also
appears on the Vehicle Certification and Service Parts
labels and the certificates
of title and registration.
Engine Identification
The eighth character in your VIN is the engine code for
your
GM engine. This code will help you identify your
engine, specifications, and replacement parts in this
section.
Service Parts Identification Label
You’ll find this label on the rear edge of the driver’s
door.
It’s very helpful if you ever need to order parts. On
this label is:
Your VIN.
Its model designation.
Paint information.
A list of all production options and special
Be sure that this label is
not removed from the vehicle.
equipment.
Add-on
Electrical Equipment
unless you check with your dealer first. Some
electrical equipment can damage your vehicle
and the damage wouldn’t be covered by your
warranty. Some
of it can just kee
from working as they should.
Page 280 of 324
I IMPORTANT:
KEEP ENGINE OIL AT THE PROPER
LEVELANDCHANGEAS RECOMMENDED
1
Protection I
Plan I
Have you purchased the GM Protection Plan? The
Plan supplements your new vehicle warranties. See
your Buick dealer for details.
Introduction
A Word About Maintenance
We at General Motors want to help you keep your
vehicle in good working condition. But we don’t know
exactly
how you’ll drive it. You may drive very short
distances
only a few times a week. Or you may drive
long distances all the time in very hot, dusty weather.
You may use your vehicle in making deliveries. Or you
may drive it to work, to do errands or in many other
ways.
Because of all the different ways people
use their GM
vehicles, maintenance needs vary. You may even need
more frequent checks and replacements than you will
find in the schedules in this part.
So please read this part
and note how
you drive. If you have any questions on
how to keep your vehicle in good condition,
see your
Buick dealer, the place many GM owners choose to
have their maintenance work done. Your dealer can be
relied upon to
use proper parts and practices.
278
Page 288 of 324
Explanation of Scheduled Maintenance
Services
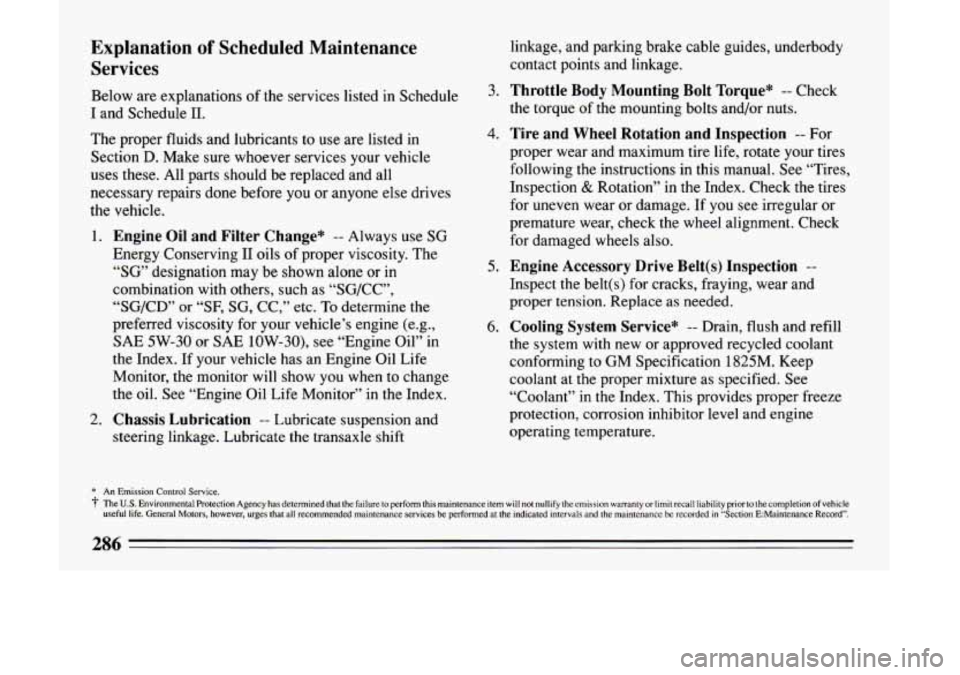
Below are explanations of the services listed in Schedule
I and Schedule 11.
The proper fluids and lubricants to use are listed in
Section
D. Make sure whoever services your vehicle
uses these. All parts should be replaced and all
necessary repairs done before
you or anyone else drives
the vehicle.
1. Engine Oil and Filter Change* -- Always use SG
Energy Conserving I1 oils of proper viscosity. The
“SG” designation may be shown alone or in
combination with others, such as “SG/CC”,
“SG/CD” or “SF, SG, CC,” etc. To determine the
preferred viscosity for your vehicle’s engine (e.g.,
SAE
5W-30 or SAE 10W-30), see “Engine Oil” in
the Index. If your vehicle has an Engine Oil Life
Monitor, the monitor will show
you when to change
the oil. See “Engine Oil Life Monitor” in the Index.
2. Chassis Lubrication -- Lubricate suspension and
steering linkage. Lubricate the transaxle shift linkage, and parking brake
cable guides, underbody
contact points and linkage.
3. Throttle Body Mounting Bolt Torque* -- Check
the torque of the mounting bolts and/or nuts.
4. Tire and Wheel Rotation and Inspection -- For
proper wear and maximum tire life, rotate your tires
following
the instructions in this manual. See “Tires,
Inspection
& Rotation” in the Index. Check the tires
for uneven wear or damage. If you see irregular or
premature wear, check the wheel alignment. Check
for damaged wheels also.
5. Engine Accessory Drive Belt(s) Inspection --
Inspect the belt(s) for cracks, fraying, wear and
proper tension. Replace as needed.
6. Cooling System Service” -- Drain, flush and refill
the system with new or approved recycled coolant
conforming to GM Specification 1825M. Keep
coolant at the proper mixture as specified. See
“Coolant” in
the Index. This provides proper freeze
protection, corrosion inhibitor level
and engine
operating temperature.
* An Emission Control Service.
3‘ The U.S. Environmental Protection Agency has determined that the failure to perfonn this maintenance item will not nullify the emission warranty or limit recall liability prior to thecompletion of vehicle
useful life. General Motors, however, urges that all recommended maintenance services be performed at the indicated intervals and the maintenance be recorded in “Section E:Maintenance Record”.
286
Page 290 of 324
Section B: Owner Checks and
Services
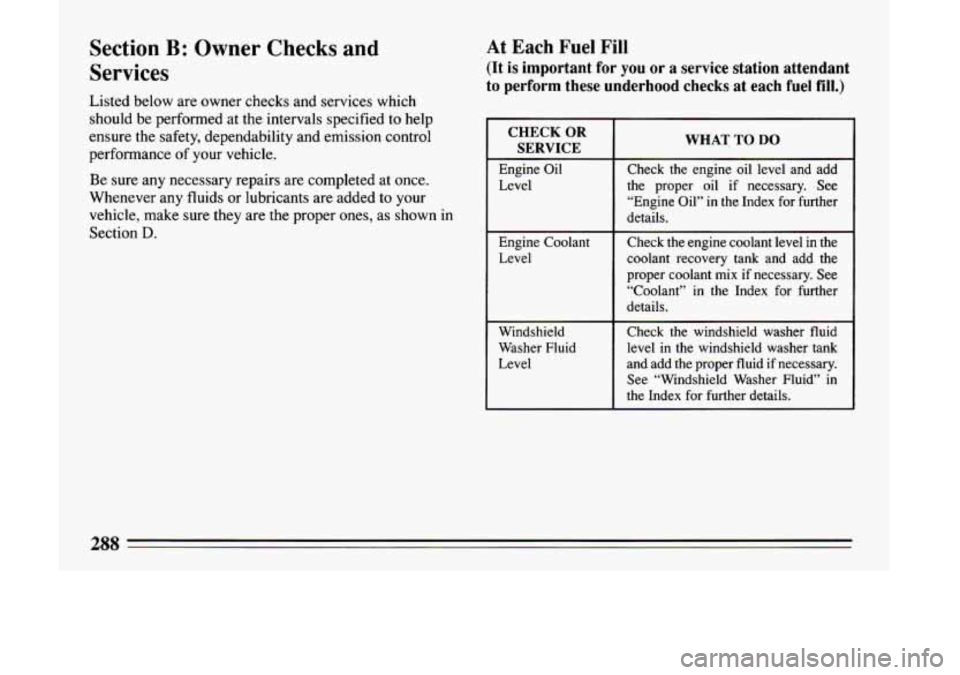
Listed below are owner checks and services which
should be performed
at the intervals specified to help
ensure the safety, dependability and emission control
performance
of your vehicle.
Be sure any necessary repairs are completed
at once.
Whenever any fluids or lubricants are added to your
vehicle, make sure they are the proper ones, as shown
in
Section D.
At Each Fuel Fill
(It is important for you or a service station attendant
to perform these underhood checks at each fuel fill.)
CHECK OR
SERVICE
Engine Oil
Level
Engine Coolant
Level
Windshield
Washer Fluid
Level
WHAT TO DO
Check the engine oil level and add
the proper oil if necessary. See
“Engine Oil” in the Index for further
details.
Check the engine coolant level in the
coolant recovery tank and add the
proper coolant mix if necessary. See
“Coolant” in the Index for further
details.
Check the windshield washer fluid
level in the windshield washer tank
and add the proper fluid if necessary.
See “Windshield Washer Fluid” in
the Index for further details.
moo
Page 291 of 324
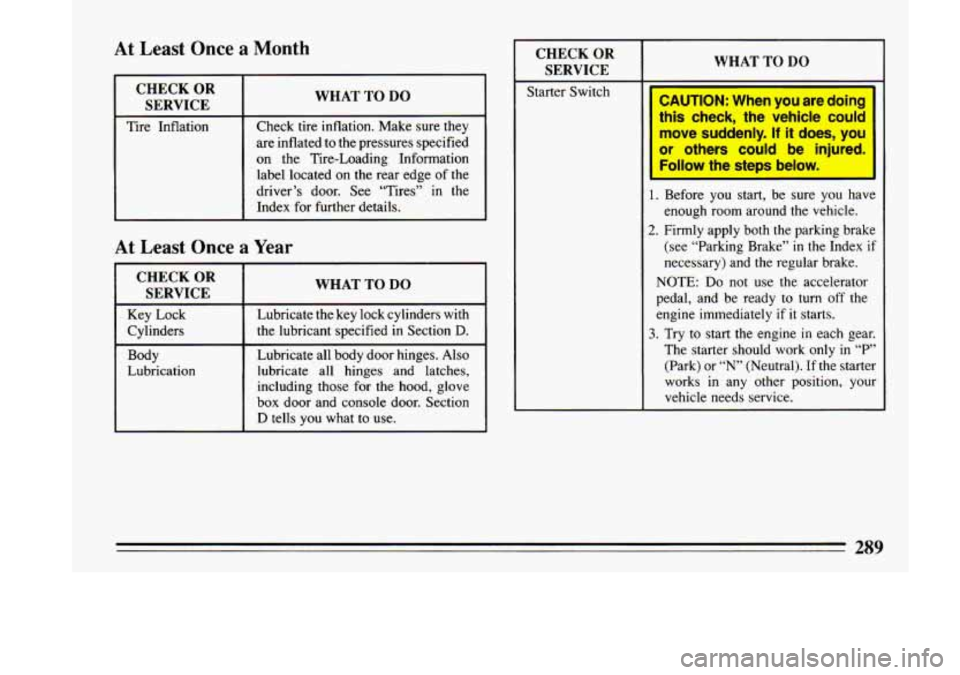
At Least Once a Month
1 CHECKOR SERVICE
I WHAT TO DO
~ ~~~
Tire Inflation Check tire inflation. Make sure
they
are inflated to the pressures specified
on the Tire-Loading Information label located on the rear edge of the
driver’s door. See “Tires”
in the
Index for further details.
At Least Once a Year
CHECK OR
SERVICE
Key Lock
Cylinders
Body
Lubrication
WHAT TO DO
Lubricate the key lock cylinders with
the lubricant specified in Section
D.
Lubricate all body door hinges. Also
lubricate all hinges and latches,
including those
for the hood, glove
box door and console door. Section
D tells you what to use.
CHECK OR
SERVICE
Starter Switch
L
WHAT TO DO
CAUTION: When you are doing
this check, the vehicle could move suddenly.
If it does, you
or others could be injured. Follow the steps below.
1. Before you start, be sure you have
enough room around
the vehicle.
2. Firmly apply both the parking brake
(see “Parking Brake” in
the Index if
necessary) and the regular brake.
NOTE:
Do not use the accelerator
pedal, and be ready to turn
off the
engine immediately
if it starts.
3. Try to start the engine in each gear.
The starter should work only
in “P’
(Park) or “N’ (Neutral). If the starter
works
in any other position, your
vehicle needs service.
Page 292 of 324
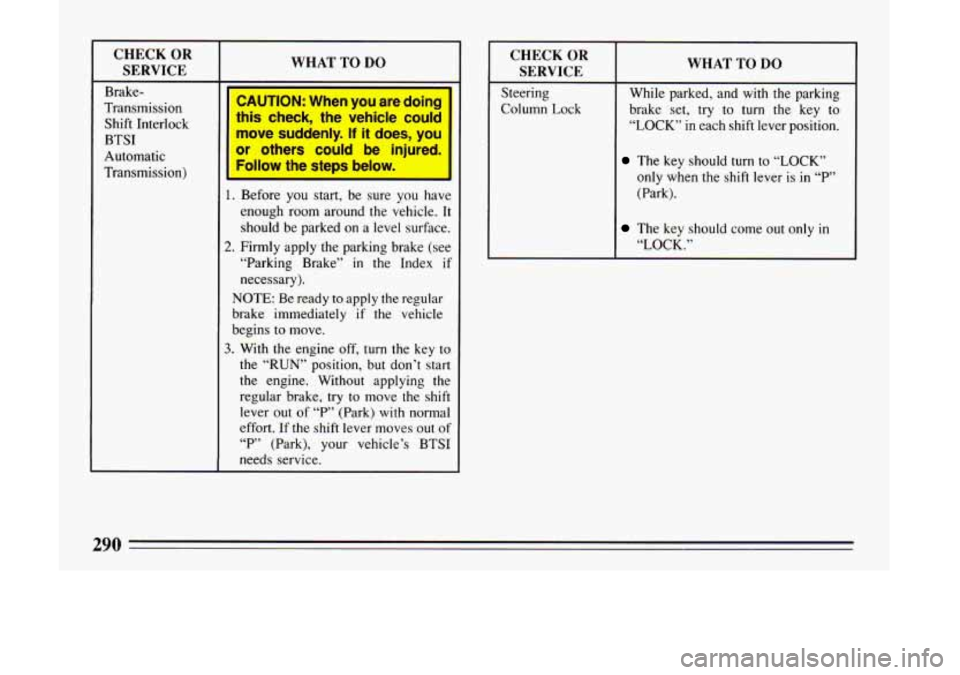
CHECK OR
SERVICE
Brake-
Transmission Shift Interlock
BTSI
Automatic
Transmission)
WHAT TO DO
CAUTION: When you are doing
this check, the vehicle could
I
move suddenly. If it does, you
or others could be injured.
Follow the steps below.
1. Before you start, be sure you have
enough
room around the vehicle. It
should be parked on a level surface.
2. Firmly apply the parking brake (see
“Parking Brake”
in the Index if
necessary).
NOTE: Be ready to apply the regular
brake immediately
if the vehicle
begins
to move.
3. With the engine off, turn the key to
the
“RUN” position, but don’t start
the engine. Without applying the
regular brake, try to move the shift
lever out of
“P’ (Park) with normal
effort. If the shift lever moves out of
“P’ (Park), your vehicle’s BTSI
needs service.
CHECK OR
I SERVICE I WHAT TO DO
Steering While parked, and with the parking
Column Lock brake set, try to
turn the key to
“LOCK” in each shift lever position.
The key should turn to “LOCK”
only
when the shift lever is in “P’
(Park).
The key should come out only in
“LOCK.”
290
Page 293 of 324
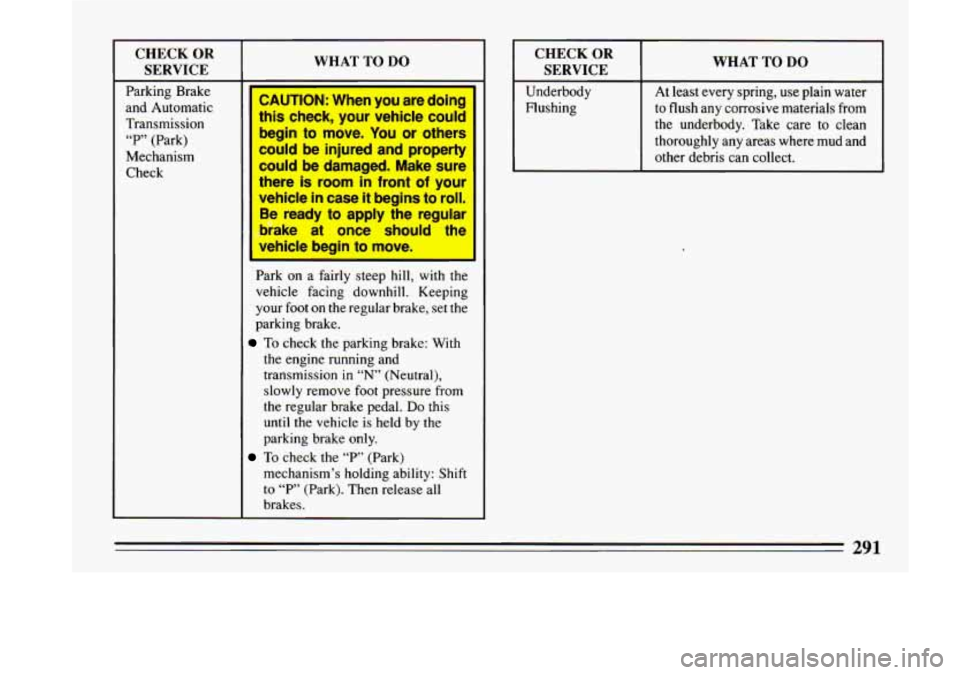
CHECK OR
SERVICE
Parking Brake
and Automatic
Transmission
“P” (Park)
Mechanism
Check
WHAT TO DO
CAUTION: When you are doing
this check, your vehicle could
begin
to move. You or others
could be injured and property
could be damaged. Make sure
there
is room in front of your
vehicle in case it begins to roll.
Be ready to apply the regular
brake at once should the
-
Park on a fairly steep hill, with the
vehicle facing downhill. Keeping
your foot on the regular brake, set the
parking brake.
To check the parking brake: With
the engine running and
transmission in
“N’ (Neutral),
slowly remove foot pressure from
the regular brake pedal. Do this
until the vehicle is held by the
parking brake only.
mechanism’s holding ability: Shift
to “P’ (Park). Then release all
brakes.
To check the “P” (Park)
CHECK OR
I SERVICE I WHAT TO DO
Underbody
Flushing At least every spring, use plain water
to flush
any corrosive materials from
the underbody. Take care to clean
thoroughly any areas where mud and
other debris can collect.