index BUICK LESABRE 2003 User Guide
[x] Cancel search | Manufacturer: BUICK, Model Year: 2003, Model line: LESABRE, Model: BUICK LESABRE 2003Pages: 380, PDF Size: 2.75 MB
Page 232 of 380
When You Are Ready to Leave After
Parking on a Hill
1. Apply your regular brakes and hold the pedal down
while you:
·start your engine,
·shift into a gear, and
·release the parking brake.
2. Let up on the brake pedal.
3. Drive slowly until the trailer is clear of the chocks.
4. Stop and have someone pick up and store the
chocks.
Maintenance When Trailer Towing
Your vehicle will need service more often when you're
pulling a trailer. See the Maintenance Schedule for more
on this. Things that are especially important in trailer
operation are automatic transaxle ¯uid (don't over®ll),
engine oil, drive belt, cooling system and brake system.
Each of these is covered in this manual, and the
Index will help you ®nd them quickly. If you're trailering,
it's a good idea to review this information before you
start your trip.
Check periodically to see that all hitch nuts and bolts
are tight.
Engine Cooling When Trailer Towing
Your cooling system may temporarily overheat during
severe operating conditions. SeeEngine Overheating on
page 5-26.
4-42
Page 241 of 380

When you put the fuel cap back on, turn it to the right
(clockwise) until you hear a clicking sound. Make
sure you fully install the cap. The diagnostic system can
determine if the fuel cap has been left off or improperly
installed. This would allow fuel to evaporate into the
atmosphere. See
Malfunction Indicator Lamp on
page 3-40.
The GAS CAP LOOSE-CHECK CAP message will be
displayed on the Driver Information Center (DIC) (if
equipped) if the fuel cap is not properly installed.
Notice:If you need a new fuel cap, be sure to get
the right type. Your dealer can get one for you.
If you get the wrong type, it may not ®t properly.
This may cause your malfunction indicator lamp to
light and may damage your fuel tank and emissions
system. See ªMalfunction Indicator Lampº in the
Index.
Filling a Portable Fuel Container
{CAUTION:
Never ®ll a portable fuel container while it is in
your vehicle. Static electricity discharge from
the container can ignite the gasoline vapor.
You can be badly burned and your vehicle
damaged if this occurs. To help avoid injury to
you and others:
·Dispense gasoline only into approved
containers.
·Do not ®ll a container while it is inside a
vehicle, in a vehicle's trunk, pickup bed or
on any surface other than the ground.
·Bring the ®ll nozzle in contact with the
inside of the ®ll opening before operating
the nozzle. Contact should be maintained
until the ®lling is complete.
·Don't smoke while pumping gasoline.
5-9
Page 249 of 380

When the system has calculated that oil life has been
diminished, it will indicate that an oil change is
necessary. A CHANGE ENGINE OIL SOON message
will come on. Change your oil as soon as possible within
the next two times you stop for fuel. It is possible that,
if you are driving under the best conditions, the oil
life system may not indicate that an oil change is
necessary for over a year. However, your engine oil and
®lter must be changed at least once a year and at
this time the system must be reset. Your dealer has
GM-trained service people who will perform this
work using genuine GM parts and reset the system. It is
also important to check your oil regularly and keep it
at the proper level.
If the system is ever reset accidentally, you must
change your oil at 3,000 miles (5 000 km) since your
last oil change. Remember to reset the oil life system
whenever the oil is changed.
How to Reset the Oil Life System
The GM Oil Life System calculates when to change
your engine oil and ®lter based on vehicle use. Anytime
your oil is changed, reset the system so it can
calculate when the next oil change is required. If a
situation occurs where you change your oil prior to a
CHANGE ENGINE OIL SOON message being
turned on, reset the system.To reset the Oil Life System, do the following:
1. Display the OIL LIFE INDEX on the DIC.
2. Press and hold the RESET button on the DIC for
more than ®ve seconds. The oil life will change
to 100%.
What to Do with Used Oil
Used engine oil contains certain elements that may be
unhealthy for your skin and could even cause cancer.
Don't let used oil stay on your skin for very long. Clean
your skin and nails with soap and water, or a good
hand cleaner. Wash or properly dispose of clothing or
rags containing used engine oil. See the manufacturer's
warnings about the use and disposal of oil products.
Used oil can be a threat to the environment. If you
change your own oil, be sure to drain all the oil from the
®lter before disposal. Never dispose of oil by putting it
in the trash, pouring it on the ground, into sewers, or into
streams or bodies of water. Instead, recycle it by
taking it to a place that collects used oil. If you have a
problem properly disposing of your used oil, ask
your dealer, a service station or a local recycling center
for help.
5-17
Page 271 of 380
·If you spill brake ¯uid on your vehicle's painted
surfaces, the paint ®nish can be damaged. Be
careful not to spill brake ¯uid on your vehicle. If
you do, wash it off immediately. See
ªAppearance Careº in the Index.
Brake Wear
Your vehicle has four-wheel disc brakes.
Disc brake pads have built-in wear indicators that make
a high-pitched warning sound when the brake pads
are worn and new pads are needed. The sound
may come and go or be heard all the time your vehicle
is moving (except when you are pushing on the
brake pedal ®rmly).
{CAUTION:
The brake wear warning sound means that
soon your brakes won't work well. That could
lead to an accident. When you hear the brake
wear warning sound, have your vehicle
serviced.
Notice:Continuing to drive with worn-out brake
pads could result in costly brake repair.Some driving conditions or climates may cause a brake
squeal when the brakes are ®rst applied or lightly
applied. This does not mean something is wrong with
your brakes.
Properly torqued wheel nuts are necessary to help
prevent brake pulsation. When tires are rotated, inspect
brake pads for wear and evenly tighten wheel nuts in
the proper sequence to GM torque speci®cations.
Brake linings should always be replaced as complete
axle sets.
See
Brake System Inspection on page 6-22.
Brake Pedal Travel
See your dealer if the brake pedal does not return to
normal height, or if there is a rapid increase in
pedal travel. This could be a sign of brake trouble.
Brake Adjustment
Every time you apply the brakes, with or without the
vehicle moving, your brakes adjust for wear.
5-39
Page 290 of 380

Tires
Your new vehicle comes with high-quality tires made by
a leading tire manufacturer. If you ever have questions
about your tire warranty and where to obtain service,
see your Buick Warranty booklet for details.
{CAUTION:
Poorly maintained and improperly used tires
are dangerous.
·Overloading your tires can cause
overheating as a result of too much
friction. You could have an air-out and a
serious accident. See ªLoading Your
Vehicleº in the Index.
·Underin¯ated tires pose the same danger
as overloaded tires. The resulting accident
could cause serious injury. Check all tires
frequently to maintain the recommended
pressure. Tire pressure should be checked
when your tires are cold.
CAUTION: (Continued)
CAUTION: (Continued)
·
Overin¯ated tires are more likely to be
cut, punctured or broken by a sudden
impact Ð such as when you hit a pothole.
Keep tires at the recommended pressure.
·Worn, old tires can cause accidents. If
your tread is badly worn, or if your tires
have been damaged, replace them.
In¯ation -- Tire Pressure
The Tire-Loading Information label, which is on the rear
edge of the driver's door, shows the correct in¯ation
pressures for your tires when they're cold. ªColdº means
your vehicle has been sitting for at least three hours
or driven no more than 1 mile (1.6 km).
5-58
Page 293 of 380
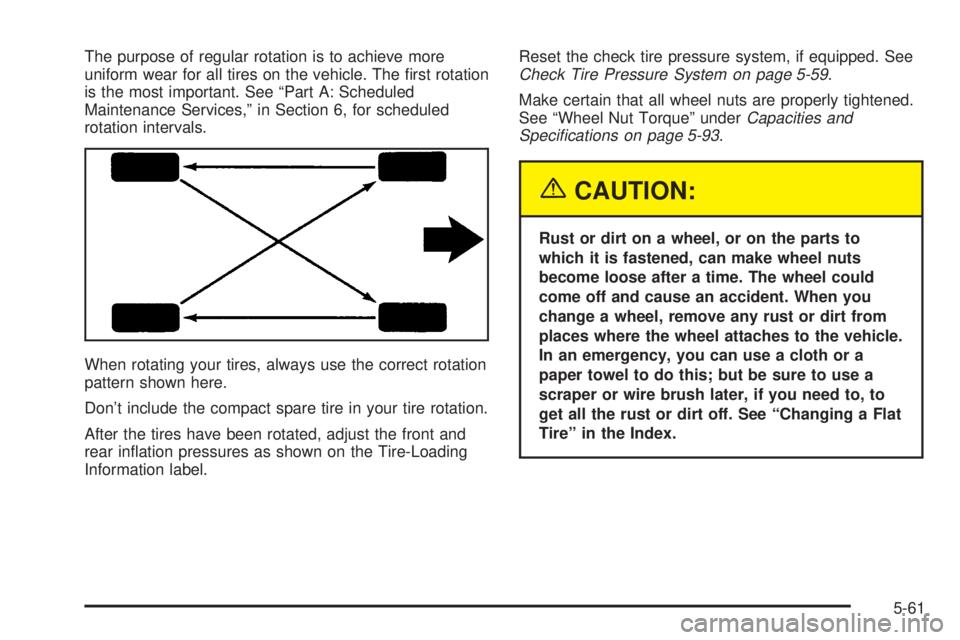
The purpose of regular rotation is to achieve more
uniform wear for all tires on the vehicle. The ®rst rotation
is the most important. See ªPart A: Scheduled
Maintenance Services,º in Section 6, for scheduled
rotation intervals.
When rotating your tires, always use the correct rotation
pattern shown here.
Don't include the compact spare tire in your tire rotation.
After the tires have been rotated, adjust the front and
rear in¯ation pressures as shown on the Tire-Loading
Information label.Reset the check tire pressure system, if equipped. SeeCheck Tire Pressure System on page 5-59.
Make certain that all wheel nuts are properly tightened.
See ªWheel Nut Torqueº under
Capacities and
Speci®cations on page 5-93.
{CAUTION:
Rust or dirt on a wheel, or on the parts to
which it is fastened, can make wheel nuts
become loose after a time. The wheel could
come off and cause an accident. When you
change a wheel, remove any rust or dirt from
places where the wheel attaches to the vehicle.
In an emergency, you can use a cloth or a
paper towel to do this; but be sure to use a
scraper or wire brush later, if you need to, to
get all the rust or dirt off. See ªChanging a Flat
Tireº in the Index.
5-61
Page 295 of 380
{CAUTION:
Mixing tires could cause you to lose control
while driving. If you mix tires of different sizes
or types (radial and bias-belted tires), the
vehicle may not handle properly, and you
could have a crash. Using tires of different
sizes may also cause damage to your vehicle.
Be sure to use the same size and type tires on
all wheels. It's all right to drive with your
compact spare temporarily, it was developed
for use on your vehicle. See ªCompact Spare
Tireº in the index.
{CAUTION:
If you use bias-ply tires on your vehicle, the
wheel rim ¯anges could develop cracks after
many miles of driving. A tire and/or wheel
could fail suddenly, causing a crash. Use only
radial-ply tires with the wheels on your vehicle.
Uniform Tire Quality Grading
Quality grades can be found where applicable on the
tire sidewall between tread shoulder and maximum
section width. For example:
Treadwear 200 Traction AA Temperature A
The following information relates to the system
developed by the United States National Highway
Traffic Safety Administration, which grades tires by
treadwear, traction and temperature performance. (This
applies only to vehicles sold in the United States.)
The grades are molded on the sidewalls of most
passenger car tires. The Uniform Tire Quality Grading
system does not apply to deep tread, winter-type
snow tires, space-saver or temporary use spare tires,
tires with nominal rim diameters of 10 to 12 inches
(25 to 30 cm), or to some limited-production tires.
While the tires available on General Motors passenger
cars and light trucks may vary with respect to these
grades, they must also conform to federal safety
requirements and additional General Motors Tire
Performance Criteria (TPC) standards.
5-63
Page 305 of 380
{CAUTION:
Never use oil or grease on studs or nuts. If
you do, the nuts might come loose. Your wheel
could fall off, causing a serious accident.
8. Place the compact spare tire on the wheel-mounting
surface.
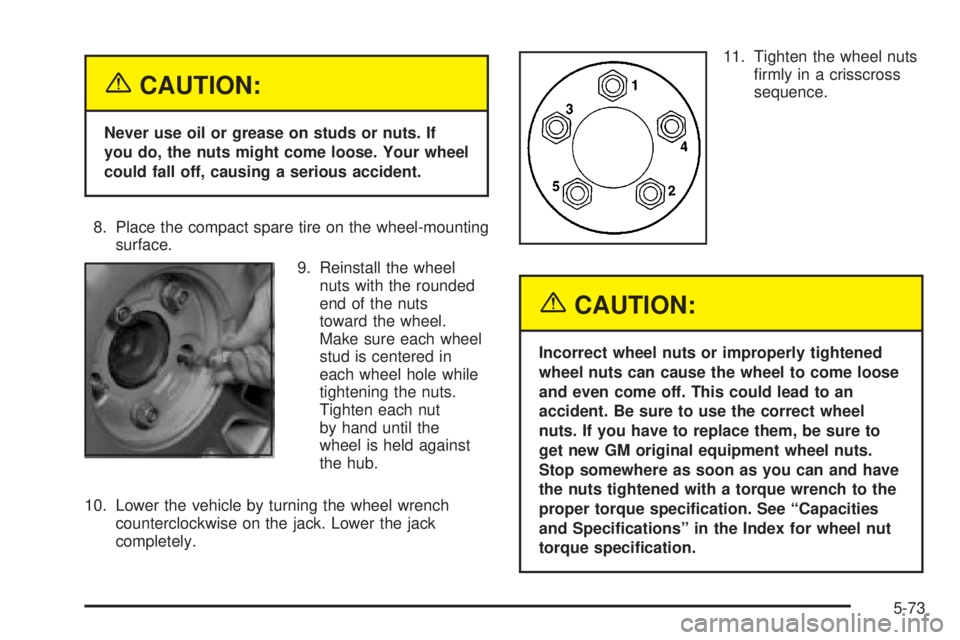
9. Reinstall the wheel
nuts with the rounded
end of the nuts
toward the wheel.
Make sure each wheel
stud is centered in
each wheel hole while
tightening the nuts.
Tighten each nut
by hand until the
wheel is held against
the hub.
10. Lower the vehicle by turning the wheel wrench
counterclockwise on the jack. Lower the jack
completely.11. Tighten the wheel nuts
®rmly in a crisscross
sequence.
{CAUTION:
Incorrect wheel nuts or improperly tightened
wheel nuts can cause the wheel to come loose
and even come off. This could lead to an
accident. Be sure to use the correct wheel
nuts. If you have to replace them, be sure to
get new GM original equipment wheel nuts.
Stop somewhere as soon as you can and have
the nuts tightened with a torque wrench to the
proper torque speci®cation. See ªCapacities
and Speci®cationsº in the Index for wheel nut
torque speci®cation.
5-73
Page 306 of 380
Notice:Improperly tightened wheel nuts can lead
to brake pulsation and rotor damage. To avoid
expensive brake repairs, evenly tighten the wheel
nuts in the proper sequence and to the proper
torque speci®cation. See ªCapacities and
Speci®cationsº in the index for the wheel nut torque
speci®cation.
Notice:Wheel covers won't ®t on your compact
spare. If you try to put a wheel cover on your
compact spare, you could damage the cover or the
spare.
Storing the Flat Tire and Tools
{CAUTION:
Storing a jack, a tire, or other equipment in the
passenger compartment of the vehicle could
cause injury. In a sudden stop or collision,
loose equipment could strike someone. Store
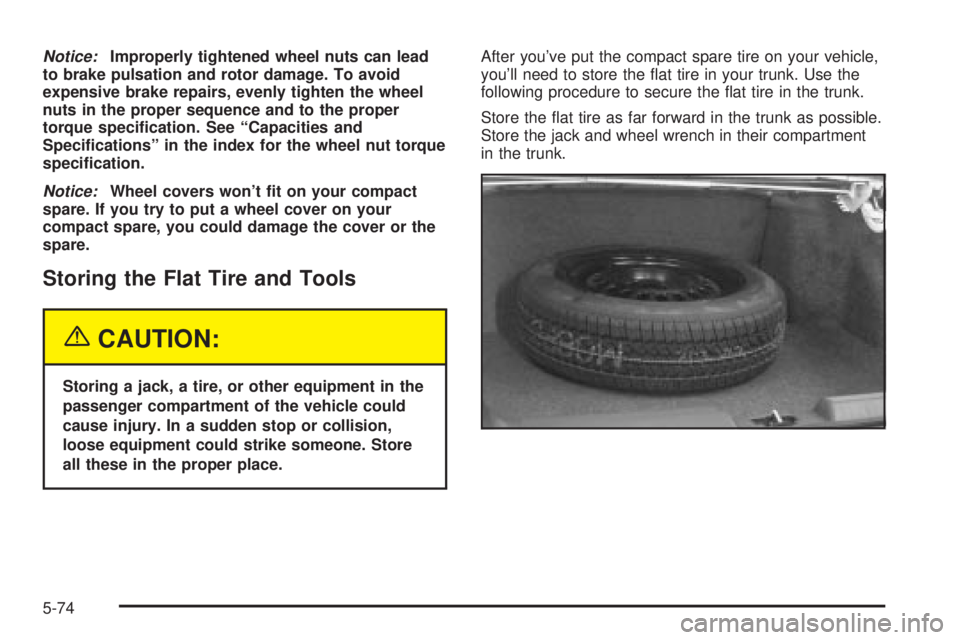
all these in the proper place.After you've put the compact spare tire on your vehicle,
you'll need to store the ¯at tire in your trunk. Use the
following procedure to secure the ¯at tire in the trunk.
Store the ¯at tire as far forward in the trunk as possible.
Store the jack and wheel wrench in their compartment
in the trunk.
5-74