Mph BUICK LESABRE 2003 Owner's Manual
[x] Cancel search | Manufacturer: BUICK, Model Year: 2003, Model line: LESABRE, Model: BUICK LESABRE 2003Pages: 380, PDF Size: 2.75 MB
Page 17 of 380
Questions and Answers About
Safety Belts
Q:Won't I be trapped in the vehicle after an
accident if I'm wearing a safety belt?
A:Youcouldbe ± whether you're wearing a safety
belt or not. But you can unbuckle a safety belt,
even if you're upside down. And your chance
of being conscious during and after an accident,
so you
canunbuckle and get out, ismuchgreater if
you are belted.
Q:If my vehicle has air bags, why should I have to
wear safety belts?
A:Air bags are in many vehicles today and will be in
most of them in the future. But they are
supplemental systems only; so they work
with
safety belts ± not instead of them. Every air bag
system ever offered for sale has required the
use of safety belts. Even if you're in a vehicle that
has air bags, you still have to buckle up to get
the most protection. That's true not only in frontal
collisions, but especially in side and other
collisions.
Q:If I'm a good driver, and I never drive far from
home, why should I wear safety belts?
A:You may be an excellent driver, but if you're in an
accident ± even one that isn't your fault ± you and
your passengers can be hurt. Being a good
driver doesn't protect you from things beyond your
control, such as bad drivers.
Most accidents occur within 25 miles (40 km) of
home. And the greatest number of serious injuries
and deaths occur at speeds of less than
40 mph (65 km/h).
Safety belts are for everyone.
How to Wear Safety Belts Properly
This part is only for people of adult size.
Be aware that there are special things to know about
safety belts and children. And there are different
rules for smaller children and babies. If a child will be
riding in your vehicle, see
Older Children on page 1-27orInfants and Young Children on page 1-29. Follow
those rules for everyone's protection.
First, you'll want to know which restraint systems your
vehicle has.
We'll start with the driver position.
1-11
Page 36 of 380
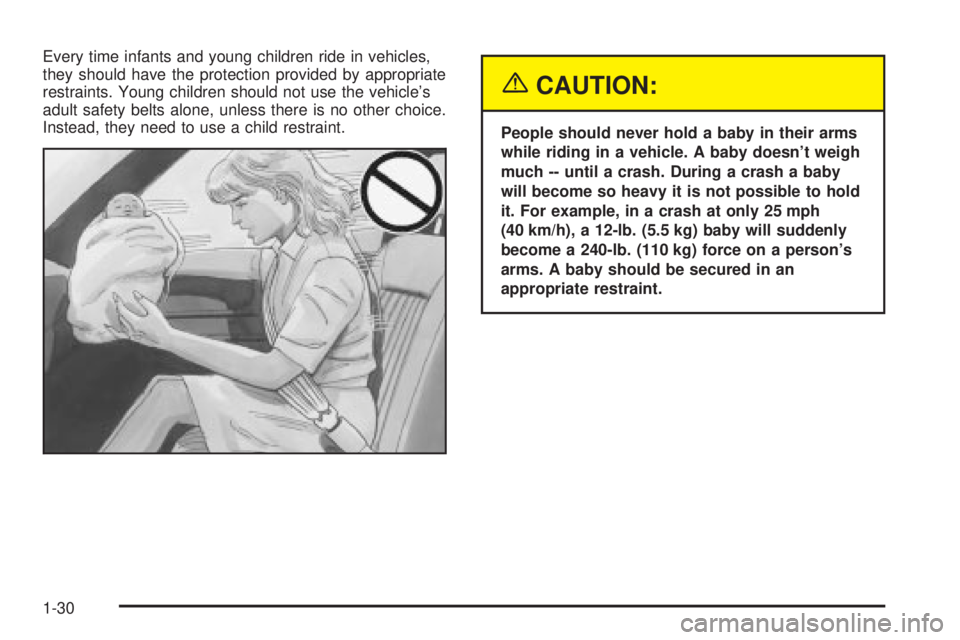
Every time infants and young children ride in vehicles,
they should have the protection provided by appropriate
restraints. Young children should not use the vehicle's
adult safety belts alone, unless there is no other choice.
Instead, they need to use a child restraint.
{CAUTION:
People should never hold a baby in their arms
while riding in a vehicle. A baby doesn't weigh
much -- until a crash. During a crash a baby
will become so heavy it is not possible to hold
it. For example, in a crash at only 25 mph
(40 km/h), a 12-lb. (5.5 kg) baby will suddenly
become a 240-lb. (110 kg) force on a person's
arms. A baby should be secured in an
appropriate restraint.
1-30
Page 57 of 380
In addition, your vehicle has ªdual stageº frontal air
bags, which adjust the amount of restraint according to
crash severity. For moderate frontal impacts, these
air bags in¯ate at a level less than full deployment. For
more severe frontal impacts, full deployment occurs.
If the front of your vehicle goes straight into a wall that
does not move or deform, the threshold level for the
reduced deployment is about 10 to 16 mph (18 to
26 km/h), and the threshold level for a full deployment is
about 18 to 24 mph (29 to 38.5 km/h). The threshold
level can vary, however, with speci®c vehicle design, so
that it can be somewhat above or below this range.
If your vehicle strikes something that will move or
deform, such as a parked car, the threshold level will be
higher. The driver's and right front passenger's frontal
air bags are not designed to in¯ate in rollovers, rear
impacts, or in many side impacts because in¯ation
would not help the occupant.
Your vehicle may or may not have a side impact air
bag. See
Air Bag Systems on page 1-46. Side impact air
bags are designed to in¯ate in moderate to severe
side crashes. A side impact air bag will in¯ate if
the crash severity is above the system's designed
ªthreshold level.º The threshold level can vary with
speci®c vehicle design. Side impact air bags are
not designed to in¯ate in frontal or near-frontal impacts,
rollovers or rear impacts, because in¯ation would not
help the occupant. A side impact air bag will only deploy
on the side of the vehicle that is struck.In any particular crash, no one can say whether an air
bag should have in¯ated simply because of the damage
to a vehicle or because of what the repair costs were.
For frontal air bags, in¯ation is determined by the angle
of the impact and how quickly the vehicle slows down
in frontal and near-frontal impacts. For side impact
air bags, in¯ation is determined by the location
and severity of the impact.
What Makes an Air Bag In¯ate?
In an impact of sufficient severity, the air bag sensing
system detects that the vehicle is in a crash. For
both frontal and side impact air bags, the sensing
system triggers a release of gas from the in¯ator, which
in¯ates the air bag. The in¯ator, the air bag and
related hardware are all part of the air bag modules.
Frontal air bag modules are located inside the steering
wheel and instrument panel. For vehicles with side
impact air bags, the air bag modules are located in the
seatback closest to the driver's and/or right front
passenger's door.
1-51
Page 88 of 380
REVERSE (R):Use this gear to back up.
Notice:Shifting to REVERSE (R) while your vehicle
is moving forward could damage your transaxle.
Shift to REVERSE (R) only after your vehicle is
stopped.
To rock your vehicle back and forth to get out of snow,
ice or sand without damaging your transaxle, see If
You Are Stuck: In Sand, Mud, Ice or Snow on
page 4-30.
NEUTRAL (N):In this position, your engine doesn't
connect with the wheels. To restart when you're already
moving, use NEUTRAL (N) only. Also, use
NEUTRAL (N) when your vehicle is being towed.
{CAUTION:
Shifting into a drive gear while your engine is
ªracingº (running at high speed) is dangerous.
Unless your foot is ®rmly on the brake pedal,
your vehicle could move very rapidly. You
could lose control and hit people or objects.
Do not shift into a drive gear while your engine
is racing.
Notice:Damage to your transaxle caused by
shifting into a drive gear with the engine running at
high speed isn't covered by your warranty.
AUTOMATIC OVERDRIVE (
X):This position is for
normal driving. If you need more power for passing, and
you're:
·Going less than about 35 mph (55 km/h), push your
accelerator pedal about halfway down.
·Going about 35 mph (55 km/h) or more, push the
accelerator all the way down.
You'll shift down to the next gear and have more power.
THIRD (3):This position is also used for normal
driving, however, it offers more power and lower fuel
economy than AUTOMATIC OVERDRIVE (
X).
Here are some times you might choose THIRD (3)
instead of AUTOMATIC OVERDRIVE (
X):
·When driving on hilly, winding roads.
·When towing a trailer, so there is less shifting
between gears.
·When going down a steep hill.
2-26
Page 89 of 380
SECOND (2):This position gives you more power but
lower fuel economy than THIRD (3). You can use
SECOND (2) on hills. It can help control your speed as
you go down steep mountain roads, but then you
would also want to use your brakes off and on.
Notice:Don't drive in SECOND (2) for more than
5 miles (8 km), or at speeds over 55 mph (90 km/h),
or you can damage your transaxle. Use AUTOMATIC
OVERDRIVE (
X) or THIRD (3) as much as possible.
Don't shift into SECOND (2) unless you are going
slower than 65 mph (105 km/h), or you can damage
your engine.
FIRST (1):This position gives you even more power
but lower fuel economy than SECOND (2). You can use
it on very steep hills, or in deep snow or mud. If the
shift lever is put in FIRST (1), the transaxle won't shift
into ®rst gear until the vehicle is going slowly enough.
Notice:If your front wheels won't turn, don't
try to drive. This might happen if you were stuck in
very deep sand or mud or were up against a solid
object. You could damage your transaxle. Also,
if you stop when going uphill, don't hold your
vehicle there with only the accelerator pedal. This
could overheat and damage the transaxle. Use your
brakes to hold your vehicle in position on a hill.
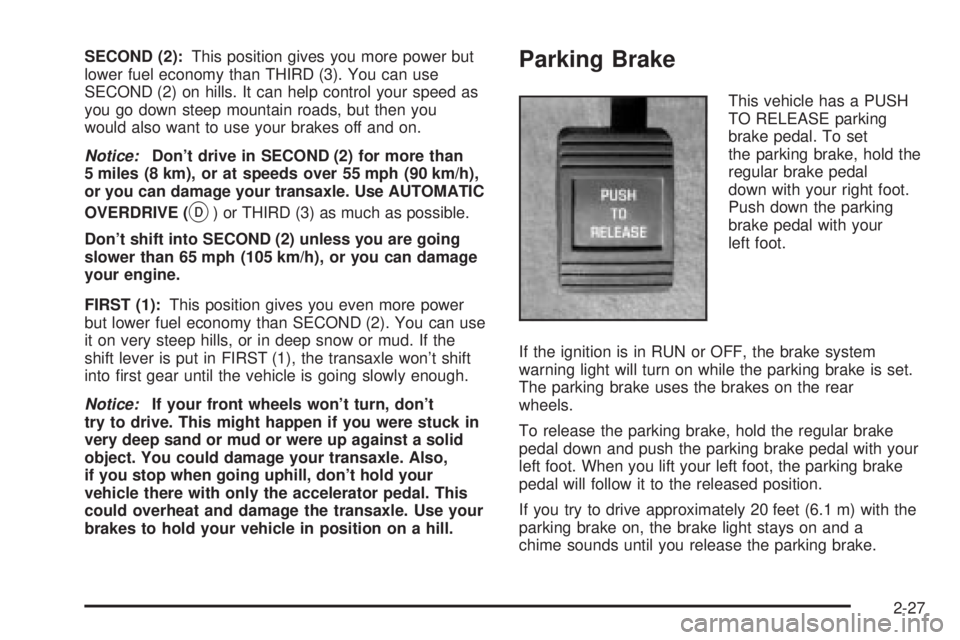
Parking Brake
This vehicle has a PUSH
TO RELEASE parking
brake pedal. To set
the parking brake, hold the
regular brake pedal
down with your right foot.
Push down the parking
brake pedal with your
left foot.
If the ignition is in RUN or OFF, the brake system
warning light will turn on while the parking brake is set.
The parking brake uses the brakes on the rear
wheels.
To release the parking brake, hold the regular brake
pedal down and push the parking brake pedal with your
left foot. When you lift your left foot, the parking brake
pedal will follow it to the released position.
If you try to drive approximately 20 feet (6.1 m) with the
parking brake on, the brake light stays on and a
chime sounds until you release the parking brake.
2-27
Page 96 of 380

Mirror Operation
MIRROR:Press this button to turn on the automatic
dimming feature. Press it again to turn off the automatic
dimming feature.
O(On/Off):For mirrors equipped with OnStarž
controls, press and hold this button for several seconds
to turn on the automatic dimming feature. Press and
hold it again to turn the automatic dimming feature off.
The green indicator light will come on when this
feature is active. The automatic dimming feature will be
active each time the vehicle is started.
Compass Operation
COMPASS:Press this button once to turn the compass
on or off.
O(On/Off):For mirrors equipped with OnStarž
controls, press this button once to turn the compass on
or off.
When the ignition and the compass feature are on, the
compass will show two character boxes for
approximately two seconds. After two seconds, the
mirror will display the compass heading.
Compass Calibration
When on, the compass automatically calibrates as the
vehicle is driven. If, after two seconds, the display
does not show a compass heading (N for North, forexample), there may be a strong magnetic ®eld
interfering with the compass. Such interference may be
caused by a magnetic antenna mount, magnetic
note pad holder or a similar magnetic item. If the letter
C should ever appear in the compass window, the
compass may need calibration.
The mirror can be calibrated by driving the vehicle in
circles at 5 mph (8 km/h) or less until the display reads a
direction.
Mirrors equipped with OnStar
žcontrols can be placed
in calibration mode by pressing and holding the
on/off button untilaCisshown in the compass display.
Compass Variance
Compass variance is the difference between earth's
magnetic north and true geographic north. The mirror is
set in zone eight upon leaving the factory. It will be
necessary to adjust the compass to compensate
for compass variance if you live outside zone eight.
Under certain circumstances, as during a long distance
cross-country trip, it will be necessary to adjust for
compass variance. If not adjusted to account for
compass variance, your compass could give false
readings.
To adjust for compass variance, do the following:
1. Find your current location and variance zone
number on the following zone map.
2-34
Page 119 of 380
Windshield Washer
At the top of the turn signal/multifunction lever, there's a
paddle with the word PUSH on it. To spray washer
¯uid on the windshield, push the paddle. The wipers will
clear the window and either stop or return to your
preset speed. For more washer cycles, push and hold
the paddle.
{CAUTION:
In freezing weather, don't use your washer
until the windshield is warmed. Otherwise the
washer ¯uid can form ice on the windshield,
blocking your vision.
Ice build up can block washer nozzles. Remove ice for
proper operation.
See
Windshield Washer Fluid on page 5-36for more
information.
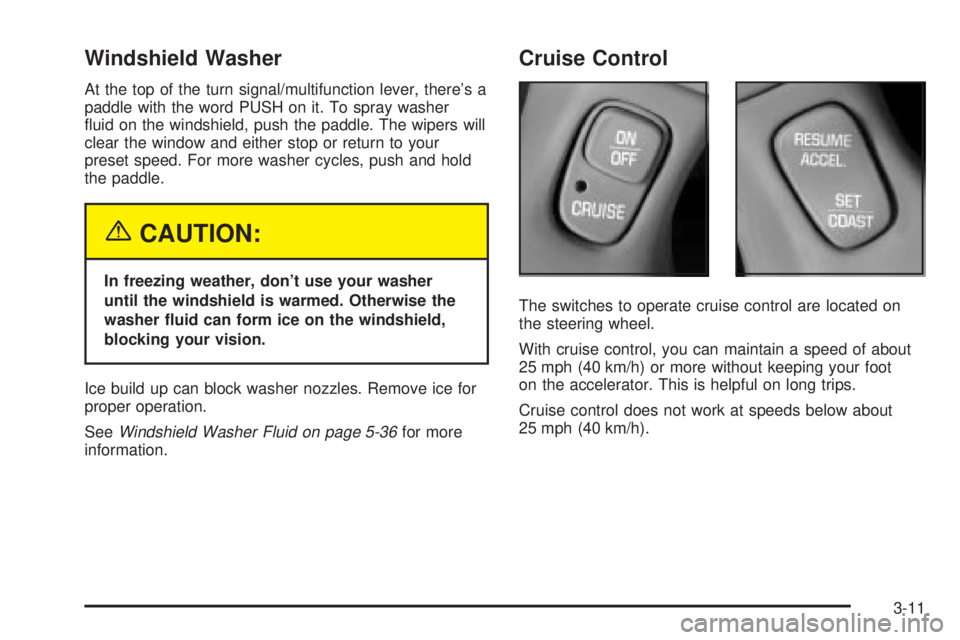
Cruise Control
The switches to operate cruise control are located on
the steering wheel.
With cruise control, you can maintain a speed of about
25 mph (40 km/h) or more without keeping your foot
on the accelerator. This is helpful on long trips.
Cruise control does not work at speeds below about
25 mph (40 km/h).
3-11
Page 121 of 380

Once you're going about 25 mph (40 km/h) or more, you
can brie¯y press the RESUME/ACCEL
(resume/accelerate) switch to return to your desired
preset speed.
You'll go right back up to your chosen speed and stay
there. If you press and hold the RESUME/ACCEL
switch, the vehicle will keep going faster until you
release the switch or apply the brake. So unless you
want to go faster, don't press and hold the
RESUME/ACCEL switch.
Increasing Speed While Using Cruise
Control
There are two ways to go to a higher speed:
·Use the accelerator pedal to get to the higher
speed. Press the SET/COAST switch, then release
it and the accelerator pedal. You'll now cruise at
the higher speed.
·Press the RESUME/ACCEL switch. Hold it there
until you get up to the speed you want, and then
release it. (To increase your speed in very
small amounts, brie¯y press the RESUME/ACCEL
switch and then release it. Each time you do
this, your vehicle will go about 1 mph (1.6 km/h)
faster.)
The accelerate feature will only work after you have set
the cruise control speed by pressing the SET/COAST
switch.
Reducing Speed While Using Cruise
Control
There are two ways to reduce your speed while using
cruise control:
·Press the SET/COAST switch until you reach the
lower speed you want, then release it.
·To slow down in very small amounts, push the
SET/COAST switch brie¯y. Each time you do
this, you'll go about 1 mph (1.6 km/h) slower.
Passing Another Vehicle While Using
Cruise Control
Use the accelerator pedal to increase your speed.
When you take your foot off the pedal, your vehicle will
slow down to the cruise control speed you set earlier.
Using Cruise Control on Hills
How well your cruise control will work on hills depends
upon your speed, load and the steepness of the
hills. When going up steep hills, you may have to step
on the accelerator pedal to maintain your speed.
When going downhill, you may have to brake or shift to
a lower gear to keep your speed down. Applying the
brake or shifting into a lower gear will take your vehicle
out of cruise control. If you need to apply the brake
or shift to a lower gear due to the grade of the downhill
slope, you may not want to attempt to use your
cruise control feature.
3-13
Page 134 of 380

1FRONT (Defrost):Pressing this button directs
most of the air to the windshield and the outboard outlets
(for the side windows), with some air directed to the
¯oor outlets. In this mode, the system will automatically
turn off recirculation and run the air conditioning
compressor, unless the outside temperature is at or
below freezing. Recirculation cannot be selected while
in the FRONT defrost mode. Do not drive the vehicle
until all the windows are clear.
Rear Window Defogger
The rear window defogger uses a warming grid to
remove fog or frost from the rear window.
=REAR:Press this button to turn the rear window
defogger on or off. Be sure to clear as much snow from
the rear window as possible.
At speeds above 35 mph (55 km/h), the defogger will
operate continuously until you press the REAR
button again. After 10 minutes of driving below 35 mph
(55 km/h), the defogger will turn off automatically. If
you need additional warming time, push the button
again. The system will then operate for ®ve minutes
before going off by itself.If your vehicle has heated outside rearview mirrors, the
mirrors will heat to help clear fog or frost from the
surface of the mirror when the rear window defogger
button is pressed.
Notice:Don't use a razor blade or something else
sharp on the inside of the rear window. If you
do, you could cut or damage the defogger and the
repairs would not be covered by your warranty.
Do not attach a temporary vehicle license, tape, a
decal or anything similar to the defogger grid.
Dual Automatic Climate Control
System
With this system you can control the heating, cooling
and ventilation for your vehicle.
3-26
Page 137 of 380
Sensors
The solar sensor on your vehicle monitors the solar
radiation and the air inside of your vehicle, then uses the
information to maintain the selected temperature by
initiating needed adjustments to the temperature, the fan
speed and the air delivery system. The system may
also supply cooler air to the side of the vehicle facing the
sun. The recirculation mode will also be activated, as
necessary. Do not cover the solar sensor located in the
center of the instrument panel, near the windshield,
or the system will not work properly.
Defogging and Defrosting
Fog on the inside of windows is a result of high humidity
(moisture) condensing on the cool window glass. This
can be minimized if the climate control system is
used properly.
1FRONT:Press the FRONT button to defrost the
windshield by directing air¯ow toward the windshield and
outboard outlets (for the side windows). To turn off
FRONT, press the AUTO or AIR FLOW buttons.
If the AIR FLOW up button is pressed while in the
FRONT defrost mode, the system will direct the
air toward the instrument panel outlets. If the AIR FLOW
down button is pressed while in the FRONT defrost
mode, the system will direct the air toward the ¯oor, and
the FRONT defrost mode will cancel. Do not drive the
vehicle until all the windows are clear.
Rear Window Defogger
The rear window defogger uses a warming grid to
remove fog or frost from the rear window.
=REAR:Press this button to turn the rear window
defogger on or off. Be sure to clear as much snow from
the rear window as possible.
At speeds above 35 mph (55 km/h), the defogger will
operate continuously until you press the REAR
button again. After 10 minutes of driving below 35 mph
(55 km/h), the defogger will turn off automatically. If
you need additional warming time, push the button
again. The system will then operate for ®ve minutes
before going off by itself.
If your vehicle has heated outside rearview mirrors, the
mirrors will heat to help clear fog or frost from the
surface of the mirror when the rear window defogger
button is pressed.
Notice:Don't use a razor blade or something else
sharp on the inside of the rear window. If you
do, you could cut or damage the defogger and the
repairs would not be covered by your warranty.
Do not attach a temporary vehicle license, tape, a
decal or anything similar to the defogger grid.
3-29