stop start BUICK LESABRE 2003 Owner's Manual
[x] Cancel search | Manufacturer: BUICK, Model Year: 2003, Model line: LESABRE, Model: BUICK LESABRE 2003Pages: 380, PDF Size: 2.75 MB
Page 80 of 380
Theft-Deterrent Systems
Vehicle theft is big business, especially in some cities.
Although your vehicle has a number of theft-deterrent
features, we know that nothing we put on it can make it
impossible to steal.
Content Theft-Deterrent
Your vehicle may have a
content theft-deterrent
alarm system. With
this system, the
SECURITY light will ¯ash
as you open the door
(if your ignition is off).
This light reminds you to activate the content
theft-deterrent system when leaving your vehicle.
To activate the system, do the following:
1. Open the door.
2. Lock the door with the power door lock switch or
with the remote keyless entry transmitter. The
SECURITY light should come on and stay on.
3. Close all doors. The SECURITY light should go off
after about 30 seconds. The alarm is not armed
until the SECURITY light goes off.If a door is opened without the key or remote keyless
entry transmitter, the alarm will go off. Your vehicle's
lamps will ¯ash and the horn will sound for 30 seconds.
The lamps and horn will then turn off to save
battery power.
Remember, the content theft-deterrent system won't
activate if you lock the doors with a key or use the
manual door lock. It activates only if you use a power
door lock switch with a door open, or with the remote
keyless entry transmitter. You should also remember
that you can start your vehicle with the correct ignition
key if the alarm has been set off.
Here's how to avoid setting off the alarm by accident:
·If you don't want to activate the theft-deterrent
system, the vehicle should be locked with the door
key
afterthe doors are closed.
·Always unlock a door with a key, or use the remote
keyless entry transmitter. Unlocking a door any
other way will set off the alarm.
If you set off the alarm by accident, unlock the driver's
door with your key. You can also turn off the alarm
by pressing the unlock button on the remote keyless
entry transmitter. The alarm won't stop if you try
to unlock a door any other way.
2-18
Page 82 of 380
PASS-KeyžIII Operation
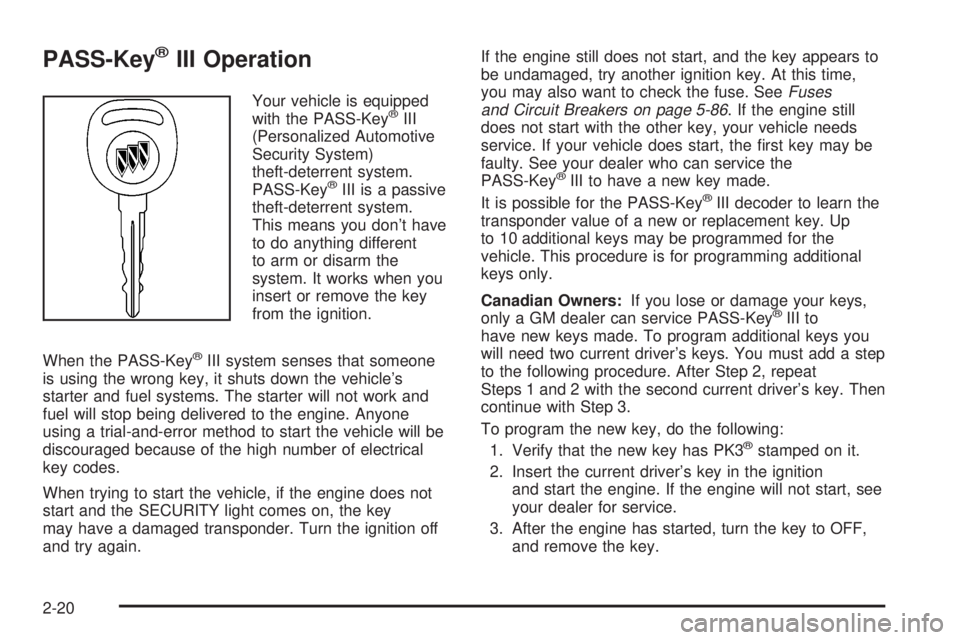
Your vehicle is equipped
with the PASS-KeyžIII
(Personalized Automotive
Security System)
theft-deterrent system.
PASS-Key
žIII is a passive
theft-deterrent system.
This means you don't have
to do anything different
to arm or disarm the
system. It works when you
insert or remove the key
from the ignition.
When the PASS-Key
žIII system senses that someone
is using the wrong key, it shuts down the vehicle's
starter and fuel systems. The starter will not work and
fuel will stop being delivered to the engine. Anyone
using a trial-and-error method to start the vehicle will be
discouraged because of the high number of electrical
key codes.
When trying to start the vehicle, if the engine does not
start and the SECURITY light comes on, the key
may have a damaged transponder. Turn the ignition off
and try again.If the engine still does not start, and the key appears to
be undamaged, try another ignition key. At this time,
you may also want to check the fuse. See
Fuses
and Circuit Breakers on page 5-86. If the engine still
does not start with the other key, your vehicle needs
service. If your vehicle does start, the ®rst key may be
faulty. See your dealer who can service the
PASS-Key
žIII to have a new key made.
It is possible for the PASS-KeyžIII decoder to learn the
transponder value of a new or replacement key. Up
to 10 additional keys may be programmed for the
vehicle. This procedure is for programming additional
keys only.
Canadian Owners:If you lose or damage your keys,
only a GM dealer can service PASS-Key
žIII to
have new keys made. To program additional keys you
will need two current driver's keys. You must add a step
to the following procedure. After Step 2, repeat
Steps 1 and 2 with the second current driver's key. Then
continue with Step 3.
To program the new key, do the following:
1. Verify that the new key has PK3
žstamped on it.
2. Insert the current driver's key in the ignition
and start the engine. If the engine will not start, see
your dealer for service.
3. After the engine has started, turn the key to OFF,
and remove the key.
2-20
Page 83 of 380
4. Insert the key to be programmed and turn it to RUN
within 10 seconds of removing the previous key.
5. The SECURITY telltale light will turn off once the
key has been programmed. It may not be apparent
that the SECURITY light went on due to how
quickly the key is programmed.
6. Repeat Steps 1 through 4 if additional keys are to
be programmed.
If you are ever driving and the SECURITY light comes
on and stays on, you will be able to restart your
engine if you turn it off. Your PASS-Key
žIII system,
however, is not working properly and must be serviced
by your dealer. Your vehicle is not protected by the
PASS-Key
žIII system at this time.
If you lose or damage a PASS-Key
žIII key, see your
dealer to have a new key made.
Starting and Operating Your
Vehicle
New Vehicle Break-In
Notice:Your vehicle doesn't need an elaborate
ªbreak-in.º But it will perform better in the long run
if you follow these guidelines:
·Don't drive at any one speed Ð fast or
slow Ð for the ®rst 500 miles (805 km). Don't
make full-throttle starts.
·Avoid making hard stops for the ®rst 200 miles
(322 km) or so. During this time your new
brake linings aren't yet broken in. Hard stops
with new linings can mean premature wear and
earlier replacement. Follow this breaking-in
guideline every time you get new brake linings.
·Don't tow a trailer during break-in. See ªTowing
a Trailerº in the Index for more information.
2-21
Page 85 of 380
Key Reminder Warning
If you leave your key in OFF, you will hear a warning
chime when you open the driver's door.
Always leave your key in LOCK while the engine is off.
If you leave it in any other position, you will drain
your battery power.
Retained Accessory Power (RAP)
After you turn the ignition off and remove the key, you
will still have power to such accessories as the
power windows, audio steering wheel controls (if
equipped), clock, sunroof (if equipped) and the radio for
up to 10 minutes. The instrument panel cluster lights
will stay on for a few seconds, then will go out. Once you
open a door, the power will shut off.
Starting Your Engine
Move your shift lever to PARK (P) or NEUTRAL (N).
Your engine won't start in any other position ± that's a
safety feature. To restart when you're already moving,
use NEUTRAL (N) only.
Notice:Don't try to shift to PARK (P) if your
vehicle is moving. If you do, you could damage the
transaxle. Shift to PARK (P) only when your
vehicle is stopped.
1. With your foot off the accelerator pedal, turn your
ignition key to START. When the engine starts, let
go of the key. The idle speed will go down as
your engine gets warm.
Notice:Holding your key in START for longer than
15 seconds at a time will cause your battery to
be drained much sooner. And the excessive heat
can damage your starter motor. Wait about 15
seconds between each try to help avoid draining
your battery or damaging your starter.
2. If it doesn't start within 10 seconds, hold your key in
START for about 10 seconds at a time until your
engine starts. Wait about 15 seconds between
each try.
3. If your engine still won't start (or starts but then
stops), it could be ¯ooded with too much gasoline.
Try pushing your accelerator pedal all the way to the
¯oor and holding it there as you hold the key in
START for about three seconds. If the vehicle starts
brie¯y but then stops again, do the same thing.
This time keep the pedal down for ®ve or six
seconds to clear the extra gasoline from the engine.
After waiting about 15 seconds, repeat the normal
starting procedure.
2-23
Page 88 of 380
REVERSE (R):Use this gear to back up.
Notice:Shifting to REVERSE (R) while your vehicle
is moving forward could damage your transaxle.
Shift to REVERSE (R) only after your vehicle is
stopped.
To rock your vehicle back and forth to get out of snow,
ice or sand without damaging your transaxle, see If
You Are Stuck: In Sand, Mud, Ice or Snow on
page 4-30.
NEUTRAL (N):In this position, your engine doesn't
connect with the wheels. To restart when you're already
moving, use NEUTRAL (N) only. Also, use
NEUTRAL (N) when your vehicle is being towed.
{CAUTION:
Shifting into a drive gear while your engine is
ªracingº (running at high speed) is dangerous.
Unless your foot is ®rmly on the brake pedal,
your vehicle could move very rapidly. You
could lose control and hit people or objects.
Do not shift into a drive gear while your engine
is racing.
Notice:Damage to your transaxle caused by
shifting into a drive gear with the engine running at
high speed isn't covered by your warranty.
AUTOMATIC OVERDRIVE (
X):This position is for
normal driving. If you need more power for passing, and
you're:
·Going less than about 35 mph (55 km/h), push your
accelerator pedal about halfway down.
·Going about 35 mph (55 km/h) or more, push the
accelerator all the way down.
You'll shift down to the next gear and have more power.
THIRD (3):This position is also used for normal
driving, however, it offers more power and lower fuel
economy than AUTOMATIC OVERDRIVE (
X).
Here are some times you might choose THIRD (3)
instead of AUTOMATIC OVERDRIVE (
X):
·When driving on hilly, winding roads.
·When towing a trailer, so there is less shifting
between gears.
·When going down a steep hill.
2-26
Page 105 of 380

Convenience Net
Your vehicle may have a convenience net. You'll see it
just inside the back wall of the trunk.
Put small loads, like grocery bags, behind the net. It can
help keep them from falling over during sharp turns or
quick starts and stops. For heavier loads, store
them in the trunk as far forward as you can.
You can unhook the net so that it will lie ¯at when
you're not using it.
Sunroof
Your vehicle may be equipped with a sunroof. The
sunroof has both manual and express features
for opening the glass panel and sunshade.The switch for the sunroof
is located on the headliner
between the sun visors.
The sunroof switch has four positions that control the
sunroof movement.
The switch will work only when the ignition is on or
when the RAP is active. See ªRetained Accessory
Power (RAP)º under
Ignition Positions on page 2-22.
Open:Press and hold the switch rearward to the
®rst position to open the glass panel and sunshade. The
sunshade can also be opened manually.
Comfort Stop:Press and release the switch rearward
to the second position to express open the glass
panel to the comfort stop position. The comfort stop
position is designed to help reduce noise and make
passengers more comfortable.
2-43
Page 107 of 380
2. Adjust the driver's seat and lumbar position to a
safe and comfortable driving position. Adjust both
outside mirrors to suit you. See
Outside Power
Mirrors on page 2-35.
3. Press and hold the MEMORY button (1 or 2)
corresponding with your DRIVER # displayed on the
DIC for longer than three seconds. You will hear
two beeps con®rming that the seat and mirror
positions have been entered into memory.
To set the seat and mirror positions for a second driver,
follow the previous steps, but start by pressing the
unlock button on the transmitter that displays the other
DRIVER # on the DIC. Be sure to use the MEMORY
button which corresponds to the DRIVER # identi®ed by
the second transmitter.
To recall your memory positions, your vehicle must be
in PARK (P). Push and release the MEMORY button
corresponding to the desired driving position. The seat
and mirrors will move to the position previously
stored for the identi®ed driver. You will hear one beep.
To store the exit position for an easy exit, use the
following procedure:
1. First identify the DRIVER # by pressing the
MEMORY button 1 or 2 or by pressing the unlock
button on the transmitter.
2. Adjust the driver's seat to the desired exit position.3. Press and hold the EXIT button for longer than
three seconds. You will hear two beeps con®rming
that the seat exit position has been entered into
memory.
To set the exit position for a second driver, follow the
previous steps, but start by pressing the unlock
button on the transmitter that displays the other
DRIVER # on the DIC. Be sure to use the MEMORY
button which corresponds to the DRIVER # identi®ed by
the other transmitter.
To recall the exit position, your vehicle must be in
PARK (P). Push and release the EXIT button and the
seat will move to the exit position previously stored
for the current identi®ed driver. You will hear one beep.
If an exit position has not been stored for the current
identi®ed driver, the seat will move all the way back.
To stop recall movement of the seat at any time, press
the driver's power seat control located on the outboard
side of the front seat.
Mirrors and lumbar positions will not be stored or
recalled for the exit position.
If you would like your stored driving or exit position to
be recalled when unlocking your vehicle with the
transmitter, see
DIC Vehicle Personalization on
page 3-50.
2-45
Page 118 of 380
MIST:For a single wiping cycle, turn the band to MIST.
Hold it there until the wipers start, then let go. The
wipers will stop after one cycle. If you want more cycles,
hold the band on MIST longer.
LO (Low Speed):Turn the band to LO for steady
wiping at a slow speed.
HI (High Speed):Turn the band to HI for steady wiping
at a high speed.
The wiper speed may be set for a long or short delay
between wipes. Turn the band to choose the delay time.
The closer to LO, the shorter the delay.
Heavy snow or ice can overload your wiper motor. A
circuit breaker will stop the motor until it cools.
Clear away snow or ice to prevent an overload.
Keep in mind that damaged wiper blades may prevent
you from seeing well enough to drive safely. To
avoid damage, be sure to clear ice and snow from the
wiper blades before using them. If your blades do
become damaged, get new blades or blade inserts.
RainsenseŸ II Wipers
If your vehicle has this feature, the moisture sensor is
mounted on the interior of the windshield below the
rearview mirror and is used to automatically operate the
wipers. This system operates by monitoring the
amount of moisture build-up on the windshield. Wipes
occur as needed to clear the windshield dependingon the driving conditions and the sensitivity setting. In
light rain or snow, fewer wipes will occur. In heavy
rain or snow, wipes will occur more frequently.
The system will operate in the delay, low speed and
high speed modes. If the system is left on for long
periods of time, occasional wipes may occur without any
moisture on the windshield. This is normal and
indicates that the RainsenseŸ system is active.
The RainsenseŸ system is activated by turning the
wiper control band to one of the ®ve sensitivity levels
within the delay area. The delay position closest to
OFF/MIST is the lowest sensitivity setting, level one. The
highest sensitivity setting, level ®ve, is closest to the
LO position. A single wipe will occur each time you turn
the wiper control band to a higher sensitivity level to
indicate that the sensitivity level has been increased.
Notice:The wipers must be turned off when going
through a car wash to avoid damage.
The MIST and wash cycles operate as normal and are
not affected by the RainsenseŸ function. The system
can be overridden at any time by manually changing the
wiper control to LO or HI speed.
Notice:Do not place stickers or other items on the
exterior glass surface directly in front of the
rainsensor. Doing this could cause the rainsensor
to malfunction.
3-10
Page 146 of 380

When the ignition is on, the brake system warning light
will also come on when you set your parking brake.
The light will stay on if your parking brake doesn't
release fully. If you try to drive off with the parking brake
set, a chime will also come on until you release the
parking brake. If the light stays on after your parking
brake is fully released, it means you have a brake
problem.
If the light comes on while you are driving, pull off the
road and stop carefully. You may notice that the pedal is
harder to push. Or, the pedal may go closer to the
¯oor. It may take longer to stop. If the light is still on,
have the vehicle towed for service. See
Towing
Your Vehicle on page 4-31.
{CAUTION:
Your brake system may not be working
properly if the brake system warning light is
on. Driving with the brake system warning light
on can lead to an accident. If the light is still
on after you've pulled off the road and stopped
carefully, have the vehicle towed for service.
Anti-Lock Brake System
Warning Light
With the anti-lock brake
system, the light(s) will
come on when your engine
is started and may stay
on for several seconds.
That's normal.
If the light stays on, turn the ignition to OFF. Or, if the
light comes on when you're driving, stop as soon
as possible and turn the ignition off. Then start the
engine again to reset the system. If the light still stays
on, or comes on again while you're driving, your vehicle
needs service. If the regular brake system warning
light isn't on, you still have brakes, but you don't have
anti-lock brakes. If the regular brake system warning
light is also on, you don't have anti-lock brakes
and there's a problem with your regular brakes. See
Brake System Warning Light on page 3-37.
The anti-lock brake system warning light will come on
brie¯y when you turn the ignition key to RUN. This
is normal. If the light doesn't come on then, have it ®xed
so it will be ready to warn you if there is a problem.
3-38
Page 149 of 380
Notice:Modi®cations made to the engine,
transaxle, exhaust, intake or fuel system of your
vehicle or the replacement of the original tires with
other than those of the same Tire Performance
Criteria (TPC) can affect your vehicle's emission
controls and may cause this light to come on.
Modi®cations to these systems could lead to costly
repairs not covered by your warranty. This may
also result in a failure to pass a required Emission
Inspection/Maintenance test.
This light should come on, as a check to show you it is
working, when the ignition is on and the engine is
not running. If the light doesn't come on, have it
repaired. This light will also come on during a
malfunction in one of two ways:
·Light FlashingÐ A mis®re condition has been
detected. A mis®re increases vehicle emissions
and may damage the emission control system on
your vehicle. Diagnosis and service may be
required.
·Light On SteadyÐ An emission control system
malfunction has been detected on your vehicle.
Diagnosis and service may be required.
If the Light Is Flashing
The following may prevent more serious damage to
your vehicle:
·Reducing vehicle speed.
·Avoiding hard accelerations.
·Avoiding steep uphill grades.
·If you are towing a trailer, reduce the amount of
cargo being hauled as soon as it is possible.
If the light stops ¯ashing and remains on steady, see ªIf
the Light Is On Steadyº following.
If the light continues to ¯ash, when it is safe to do so,
stop the vehicle.Find a safe place to park your vehicle.
Turn the key off, wait at least 10 seconds and restart
the engine. If the light remains on steady, see ªIf
the Light Is On Steadyº following. If the light is still
¯ashing, follow the previous steps, and see your dealer
for service as soon as possible.
3-41