key BUICK LUCERNE 2006 Owner's Manual
[x] Cancel search | Manufacturer: BUICK, Model Year: 2006, Model line: LUCERNE, Model: BUICK LUCERNE 2006Pages: 416, PDF Size: 2.6 MB
Page 1 of 416
Seats and Restraint Systems........................... 1-1
Front Seats
............................................... 1-2
Rear Seats
..............................................1-10
Safety Belts
.............................................1-10
Child Restraints
.......................................1-30
Airbag System
.........................................1-52
Restraint System Check
............................1-69
Features and Controls..................................... 2-1
Keys
........................................................ 2-3
Doors and Locks
......................................2-11
Windows
.................................................2-16
Theft-Deterrent Systems
............................2-18
Starting and Operating Your Vehicle
...........2-21
Mirrors
....................................................2-33
OnStar
®System
......................................2-38
Universal Home Remote System
................2-40
Storage Areas
.........................................2-44
Sunroof
..................................................2-46
Vehicle Personalization
.............................2-46
Instrument Panel............................................. 3-1
Instrument Panel Overview
.......................... 3-4
Climate Controls
......................................3-23
Warning Lights, Gages, and Indicators
........3-33Driver Information Center (DIC)
..................3-50
Audio System(s)
.......................................3-74
Driving Your Vehicle....................................... 4-1
Your Driving, the Road, and Your Vehicle
..... 4-2
Towing
...................................................4-34
Service and Appearance Care.......................... 5-1
Service
..................................................... 5-3
Fuel
......................................................... 5-5
Checking Things Under the Hood
...............5-10
Headlamp Aiming
.....................................5-49
Bulb Replacement
....................................5-52
Windshield Wiper Blade Replacement
.........5-55
Tires
......................................................5-56
Appearance Care
.....................................5-83
Vehicle Identi�cation
.................................5-92
Electrical System
......................................5-93
Capacities and Speci�cations
...................5-101
Maintenance Schedule..................................... 6-1
Maintenance Schedule
................................ 6-2
Customer Assistance and Information.............. 7-1
Customer Assistance and Information
........... 7-2
Reporting Safety Defects
...........................7-13
Index................................................................ 1
2006 Buick Lucerne Owner ManualM
Page 10 of 416
Heated Seats
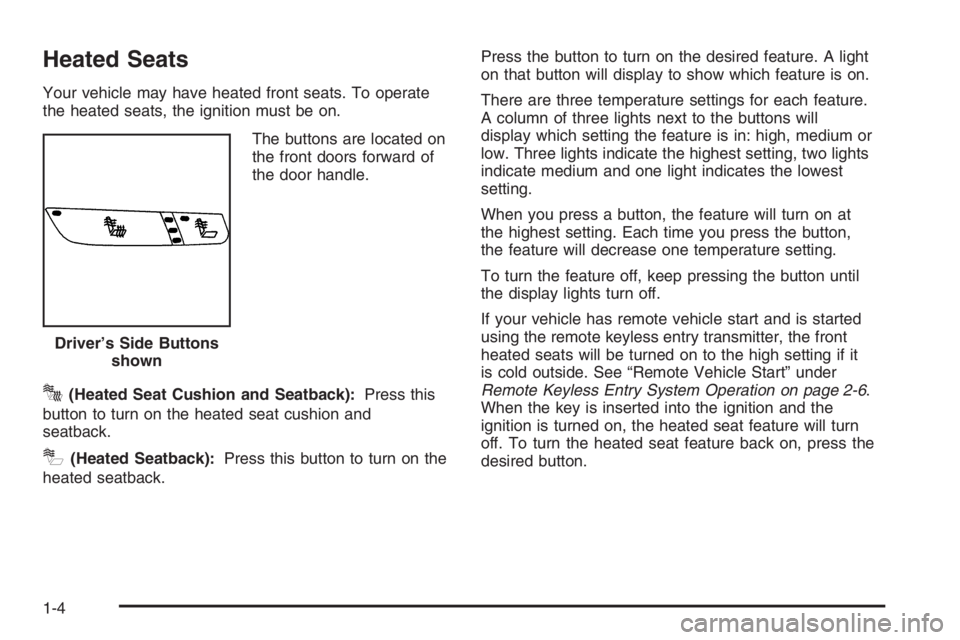
Your vehicle may have heated front seats. To operate
the heated seats, the ignition must be on.
The buttons are located on
the front doors forward of
the door handle.
J(Heated Seat Cushion and Seatback):Press this
button to turn on the heated seat cushion and
seatback.
I(Heated Seatback):Press this button to turn on the
heated seatback.Press the button to turn on the desired feature. A light
on that button will display to show which feature is on.
There are three temperature settings for each feature.
A column of three lights next to the buttons will
display which setting the feature is in: high, medium or
low. Three lights indicate the highest setting, two lights
indicate medium and one light indicates the lowest
setting.
When you press a button, the feature will turn on at
the highest setting. Each time you press the button,
the feature will decrease one temperature setting.
To turn the feature off, keep pressing the button until
the display lights turn off.
If your vehicle has remote vehicle start and is started
using the remote keyless entry transmitter, the front
heated seats will be turned on to the high setting if it
is cold outside. See “Remote Vehicle Start” under
Remote Keyless Entry System Operation on page 2-6.
When the key is inserted into the ignition and the
ignition is turned on, the heated seat feature will turn
off. To turn the heated seat feature back on, press the
desired button. Driver’s Side Buttons
shown
1-4
Page 11 of 416

Heated and Cooled Seats
The front seats may have the heated and cooled seat
feature. To heat or cool the seats, the ignition must
be on.
The buttons are located on
the front doors forward of
the door handle.
J(Heated Seat Cushion and Seatback):Press this
button to heat the seat cushion and seatback.
I(Heated Seatback):Press this button to heat the
seatback.
H(Cooled Seat Cushion and Seatback):Press this
button to cool the seat cushion and seatback.Press each button to turn on the desired feature. A light
on that button will display indicating which feature is on.
There are three temperature settings for each feature.
A column of three lights next to the buttons will
display which setting the feature is in: high, medium or
low. Three lights indicate the highest setting, two lights
indicate medium and one light indicates the lowest
setting.
When you press a button, the feature will turn on at
the highest setting. Each time you press the button,
the feature will decrease one temperature setting.
To turn the feature off, keep pressing the button until
the display lights turn off.
If your vehicle has remote vehicle start and is started
using the remote keyless entry transmitter, the front
heated seats will be turned on to the high setting if it
is cold outside. See “Remote Vehicle Start” under
Remote Keyless Entry System Operation on page 2-6.
When the key is inserted into the ignition and the
ignition is turned on, the heated seat feature will turn
off. To turn the heated seat feature back on, press the
desired button. Driver’s Side Buttons
shown
1-5
Page 29 of 416

Safety Belt Use During Pregnancy
Safety belts work for everyone, including pregnant
women. Like all occupants, they are more likely to be
seriously injured if they do not wear safety belts.
A pregnant woman should wear a lap-shoulder belt, and
the lap portion should be worn as low as possible,
below the rounding, throughout the pregnancy.
The best way to protect the fetus is to protect the mother.
When a safety belt is worn properly, it is more likely that
the fetus will not be hurt in a crash. For pregnant women,
as for anyone, the key to making safety belts effective is
wearing them properly.
Right Front Passenger Position
To learn how to wear the right front passenger’s safety
belt properly, seeDriver Position on page 1-16.
The right front passenger’s safety belt works the same
way as the driver’s safety belt — except for one thing.
If you ever pull the shoulder portion of the belt out all the
way, you will engage the child restraint locking feature.
If this happens, just let the belt go back all the way
and start again.
When the safety belt is not in use, slide the latch plate
up so that it is stored on the safety belt stitching,
near the guide loop.
If your vehicle has a center passenger position,
be sure to use the correct buckle when buckling your
lap-shoulder belt. If the latch plate will not go fully
into the buckle, see if you are using the buckle for the
center passenger position.
1-23
Page 57 of 416

5. Pull the rest of the shoulder belt all the way out of
the retractor to set the lock.6. To tighten the belt, push down on the child restraint,
pull the shoulder portion of the belt to tighten the
lap portion of the belt and feed the shoulder
belt back into the retractor. If you are using a
forward-facing child restraint, you may �nd it helpful
to use your knee to push down on the child
restraint as you tighten the belt. You should not be
able to pull more of the belt from the retractor
once the lock has been set.
7. Push and pull the child restraint in different
directions to be sure it is secure.
8. If the airbag is off, the off indicator will be lit and
stay lit on the instrument panel when the key is
turned to RUN or START.
1-51
Page 69 of 416

In many crashes severe enough to in�ate the airbag,
windshields are broken by vehicle deformation.
Additional windshield breakage may also occur from
the right front passenger airbag.
Airbags are designed to in�ate only once. After an
airbag in�ates, you will need some new parts for your
airbag system. If you do not get them, the airbag
system will not be there to help protect you in another
crash. A new system will include airbag modules and
possibly other parts. The service manual for your
vehicle covers the need to replace other parts.
Your vehicle is equipped with a crash sensing and
diagnostic module which records information after a
crash. SeeVehicle Data Collection and Event Data
Recorders on page 7-9.
Let only quali�ed technicians work on your airbag
system. Improper service can mean that an airbag
system will not work properly. See your dealer
for service.
Passenger Sensing System
Your vehicle has a passenger sensing system.
The passenger airbag status indicator on the overhead
console will be visible when you turn your ignition
key to RUN or START. The words ON and OFF or
the symbol for on and off, will be visible during
the system check. When the system check is
complete, either the word ON or the word OFF, or the
symbol for on or the symbol for off will be visible.
SeePassenger Airbag Status Indicator on page 3-37.
The passenger sensing system will turn off the right
front passenger’s frontal airbag and seat-mounted side
impact airbag under certain conditions. The driver’s
airbags are not part of the passenger sensing system.United States
Canada
1-63
Page 73 of 416
CAUTION: (Continued)
adult-size person sitting in the right front
passenger’s seat may not have the protection
of the frontal airbag. SeeAirbag Readiness
Light on page 3-36for more on this, including
important safety information.
Aftermarket equipment, such as seat covers, can affect
how well the passenger sensing system operates.
You may want to consider not using seat covers or other
aftermarket equipment if your vehicle has the passenger
sensing system. SeeAdding Equipment to Your
Airbag-Equipped Vehicle on page 1-68for more
information about modi�cations that can affect how the
system operates.
{CAUTION:
Stowing of articles under the passenger’s seat
or between the passenger’s seat cushion and
seatback may interfere with the proper
operation of the passenger sensing system.
Servicing Your Airbag-Equipped
Vehicle
Airbags affect how your vehicle should be serviced.
There are parts of the airbag system in several places
around your vehicle. You do not want the system to
in�ate while someone is working on your vehicle.
Your dealer and the service manual have information
about servicing your vehicle and the airbag system.
To purchase a service manual, seeService Publications
Ordering Information on page 7-14.
{CAUTION:
For up to 10 seconds after the ignition key is
turned off and the battery is disconnected, an
airbag can still in�ate during improper service.
You can be injured if you are close to an airbag
when it in�ates. Avoid yellow connectors.
They are probably part of the airbag system.
Be sure to follow proper service procedures,
and make sure the person performing work for
you is quali�ed to do so.
The airbag system does not need regular maintenance.
1-67
Page 77 of 416
Keys...............................................................2-3
Remote Keyless Entry System.........................2-5
Remote Keyless Entry System Operation...........2-6
Doors and Locks............................................2-11
Door Locks..................................................2-11
Power Door Locks........................................2-11
Delayed Locking...........................................2-12
Programmable Automatic Door Locks..............2-13
Rear Door Security Locks..............................2-13
Lockout Protection........................................2-14
Trunk..........................................................2-14
Windows........................................................2-16
Power Windows............................................2-17
Sun Visors...................................................2-18
Theft-Deterrent Systems..................................2-18
Content Theft-Deterrent.................................2-18
PASS-Key
®III+.............................................2-19
PASS-Key®III+ Operation..............................2-20
Starting and Operating Your Vehicle................2-21
New Vehicle Break-In....................................2-21
Ignition Positions..........................................2-22
Retained Accessory Power (RAP)...................2-22
Starting the Engine.......................................2-23Engine Coolant Heater..................................2-24
Automatic Transaxle Operation.......................2-25
Parking Brake..............................................2-28
Shifting Into Park (P).....................................2-29
Shifting Out of Park (P).................................2-30
Parking Over Things That Burn.......................2-31
Engine Exhaust............................................2-31
Running the Engine While Parked...................2-32
Mirrors...........................................................2-33
Manual Rearview Mirror.................................2-33
Automatic Dimming Rearview Mirror................2-33
Automatic Dimming Rearview Mirror with
Compass.................................................2-33
Outside Power Mirrors...................................2-36
Outside Curb View Assist Mirror.....................2-36
Outside Convex Mirror...................................2-37
Outside Automatic Dimming
Heated Mirror...........................................2-37
OnStar®System.............................................2-38
Universal Home Remote System......................2-40
Universal Home Remote
System Operation......................................2-41
Section 2 Features and Controls
2-1
Page 79 of 416
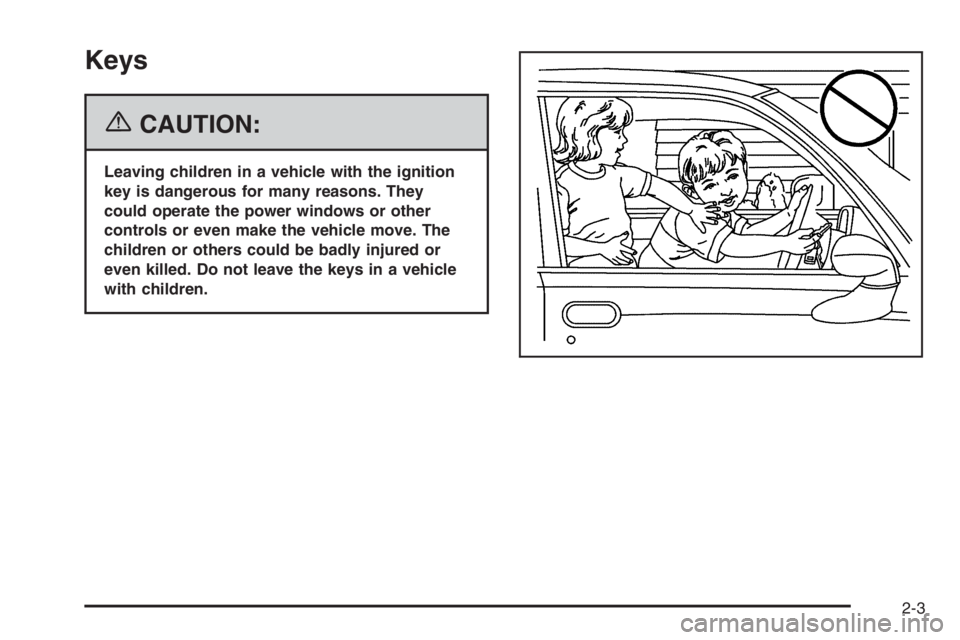
Keys
{CAUTION:
Leaving children in a vehicle with the ignition
key is dangerous for many reasons. They
could operate the power windows or other
controls or even make the vehicle move. The
children or others could be badly injured or
even killed. Do not leave the keys in a vehicle
with children.
2-3
Page 80 of 416

One key is used for the
ignition, the driver’s door
and the glovebox lock.
When a new vehicle is delivered, the dealer removes
the key tag from the key and gives it to the �rst owner.
Each tag has a code on it that tells your dealer or a
quali�ed locksmith how to make extra keys. Keep the
tag in a safe place. If you lose your key, you will be able
to have a new one made easily using the tag.If you need a new key, contact your dealer who can
obtain the correct key code. SeeRoadside Assistance
Program on page 7-6for more information.
Notice:If you ever lock your keys in your vehicle,
you may have to damage the vehicle to get in.
Be sure you have spare keys.
If your vehicle has the OnStar
®system with an active
subscription and you lock your keys inside the vehicle,
OnStar
®may be able to send a command to unlock
your vehicle. SeeOnStar®System on page 2-38
for more information.
2-4