remote start BUICK LUCERNE 2007 Owner's Manual
[x] Cancel search | Manufacturer: BUICK, Model Year: 2007, Model line: LUCERNE, Model: BUICK LUCERNE 2007Pages: 496, PDF Size: 2.77 MB
Page 1 of 496
Seats and Restraint Systems
........................ 7
Front Seats
.............................................. 9
Rear Seats
............................................. 19
Safety Belts
............................................ 19
Child Restraints
...................................... 43
Airbag System
........................................ 70
Restraint System Check
......................... 88
Features and Controls
................................. 91
Keys
....................................................... 93
Doors and Locks
.................................. 102
Windows
............................................... 108
Theft-Deterrent Systems
....................... 110
Starting and Operating Your Vehicle
..... 113
Mirrors
.................................................. 129
OnStar
®System
................................... 135
Universal Home Remote System
.......... 139
Storage Areas
...................................... 151
Sunroof
................................................ 153Instrument Panel
........................................ 155
Instrument Panel Overview
................... 158
Climate Controls
................................... 182
Warning Lights, Gages, and Indicators
.... 194
Driver Information Center (DIC)
............ 212
Audio System(s)
................................... 241
Driving Your Vehicle
.................................. 275
Your Driving, the Road, and
Your Vehicle
..................................... 276
Towing
................................................. 313
Service and Appearance Care
................... 323
Service
................................................. 325
Fuel
...................................................... 327
Checking Things Under the Hood
......... 332
Headlamp Aiming
................................. 377
Bulb Replacement
................................ 380
Windshield Wiper Blade Replacement
.... 383
2007 Buick Lucerne Owner ManualM
1
Page 11 of 496
Heated Seats
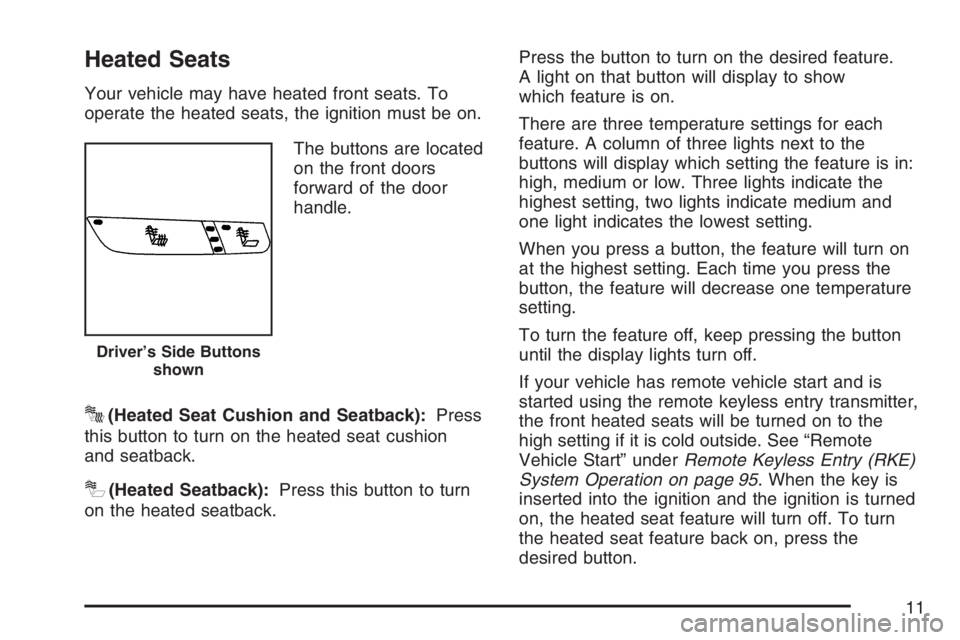
Your vehicle may have heated front seats. To
operate the heated seats, the ignition must be on.
The buttons are located
on the front doors
forward of the door
handle.
J(Heated Seat Cushion and Seatback):Press
this button to turn on the heated seat cushion
and seatback.
I(Heated Seatback):Press this button to turn
on the heated seatback.Press the button to turn on the desired feature.
A light on that button will display to show
which feature is on.
There are three temperature settings for each
feature. A column of three lights next to the
buttons will display which setting the feature is in:
high, medium or low. Three lights indicate the
highest setting, two lights indicate medium and
one light indicates the lowest setting.
When you press a button, the feature will turn on
at the highest setting. Each time you press the
button, the feature will decrease one temperature
setting.
To turn the feature off, keep pressing the button
until the display lights turn off.
If your vehicle has remote vehicle start and is
started using the remote keyless entry transmitter,
the front heated seats will be turned on to the
high setting if it is cold outside. See “Remote
Vehicle Start” underRemote Keyless Entry (RKE)
System Operation on page 95. When the key is
inserted into the ignition and the ignition is turned
on, the heated seat feature will turn off. To turn
the heated seat feature back on, press the
desired button.
Driver’s Side Buttons
shown
11
Page 12 of 496
Heated and Cooled Seats
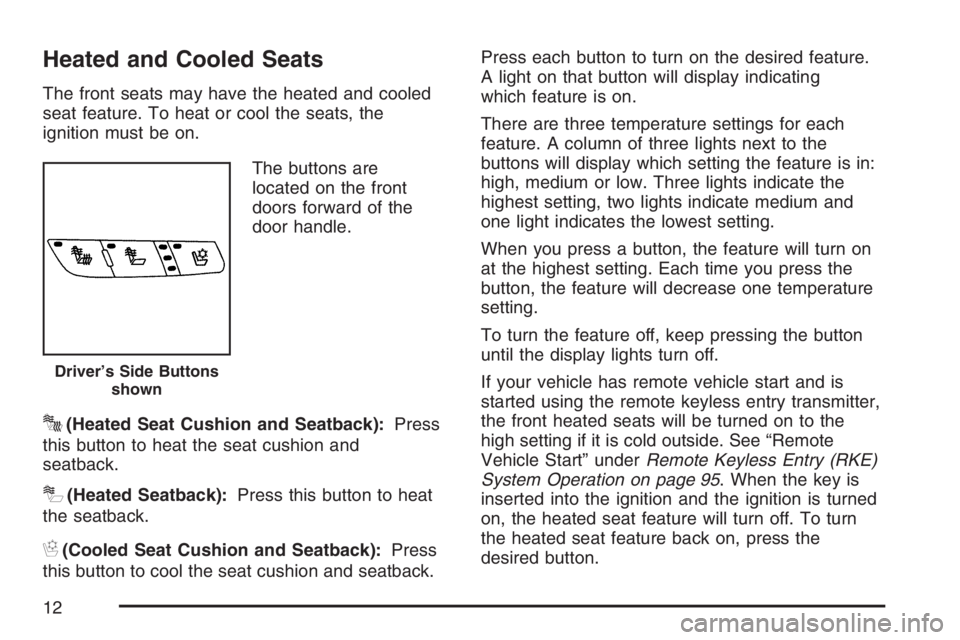
The front seats may have the heated and cooled
seat feature. To heat or cool the seats, the
ignition must be on.
The buttons are
located on the front
doors forward of the
door handle.
J(Heated Seat Cushion and Seatback):Press
this button to heat the seat cushion and
seatback.
I(Heated Seatback):Press this button to heat
the seatback.
H(Cooled Seat Cushion and Seatback):Press
this button to cool the seat cushion and seatback.Press each button to turn on the desired feature.
A light on that button will display indicating
which feature is on.
There are three temperature settings for each
feature. A column of three lights next to the
buttons will display which setting the feature is in:
high, medium or low. Three lights indicate the
highest setting, two lights indicate medium and
one light indicates the lowest setting.
When you press a button, the feature will turn on
at the highest setting. Each time you press the
button, the feature will decrease one temperature
setting.
To turn the feature off, keep pressing the button
until the display lights turn off.
If your vehicle has remote vehicle start and is
started using the remote keyless entry transmitter,
the front heated seats will be turned on to the
high setting if it is cold outside. See “Remote
Vehicle Start” underRemote Keyless Entry (RKE)
System Operation on page 95. When the key is
inserted into the ignition and the ignition is turned
on, the heated seat feature will turn off. To turn
the heated seat feature back on, press the
desired button.
Driver’s Side Buttons
shown
12
Page 91 of 496
Keys.............................................................. 93
Remote Keyless Entry (RKE) System.......... 94
Remote Keyless Entry (RKE) System
Operation................................................. 95
Doors and Locks........................................ 102
Door Locks................................................ 102
Power Door Locks..................................... 103
Delayed Locking........................................ 103
Programmable Automatic Door Locks........ 104
Rear Door Security Locks......................... 104
Lockout Protection..................................... 105
Trunk........................................................ 106
Windows...................................................... 108
Power Windows........................................ 109
Sun Visors................................................ 109
Theft-Deterrent Systems............................. 110
Content Theft-Deterrent............................. 110
PASS-Key
®III+......................................... 111
PASS-Key®III+ Operation......................... 112
Starting and Operating Your Vehicle......... 113
New Vehicle Break-In................................ 113
Ignition Positions....................................... 114
Retained Accessory Power (RAP)............. 115Starting the Engine.................................... 116
Engine Coolant Heater.............................. 117
Automatic Transaxle Operation.................. 119
Parking Brake........................................... 122
Shifting Into Park (P) ................................. 123
Shifting Out of Park (P)............................. 125
Parking Over Things That Burn................. 126
Engine Exhaust......................................... 127
Running the Engine While Parked............. 128
Mirrors......................................................... 129
Manual Rearview Mirror............................. 129
Manual Rearview Mirror with OnStar
®....... 129
Automatic Dimming Rearview Mirror
with OnStar
®.......................................... 129
Automatic Dimming Rearview Mirror with
OnStar
®and Compass........................... 130
Automatic Dimming Rearview Mirror
with Compass........................................ 132
Outside Power Mirrors............................... 133
Outside Curb View Assist Mirror................ 134
Outside Convex Mirror............................... 134
Outside Automatic Dimming
Heated Mirror......................................... 135
OnStar
®System.......................................... 135
Section 2 Features and Controls
91
Page 95 of 496
At times you may notice a decrease in operating
range. This is normal for any RKE system. If the
transmitter does not work or if you have to stand
closer to your vehicle for the transmitter to work,
try this:
Check the distance. You may be too far from
your vehicle. You may need to stand closer
during rainy or snowy weather.
Check the location. Other vehicles or objects
may be blocking the signal. Take a few steps to
the left or right, hold the transmitter higher, and
try again.
Check to determine if battery replacement is
necessary. See “Battery Replacement” under
Remote Keyless Entry (RKE) System
Operation on page 95.
If you are still having trouble, see your dealer or
a quali�ed technician for service.
Remote Keyless Entry (RKE)
System Operation
The vehicle’s doors can be locked and unlocked,
and the trunk can be unlatched from about
3 feet (1 m) up to 60 feet (18 m) away with the
Remote Keyless Entry (RKE) transmitter.
If your vehicle has the remote start feature you can
also start your vehicle with the RKE transmitter.
Your RKE transmitter, with the remote start button,
provides an increased range of 195 feet (60 m)
away. However, the range may be less while the
vehicle is running. As a result, you may need to be
closer to your vehicle to turn it off than you were to
turn it on.
There are other conditions which can affect the
performance of the transmitter. SeeRemote
Keyless Entry (RKE) System on page 94.
95
Page 96 of 496

The following functions may be available if your
vehicle has the RKE system:
/(Remote Vehicle Start):If your vehicle has
this feature, it may be started from outside the
vehicle using the RKE transmitter. See “Remote
Vehicle Start” following for more detailed
information.
Q(Lock):Press the lock button to lock all the
doors. If enabled through the Driver Information
Center (DIC), the parking lamps will �ash once to
indicate locking has occurred. If enabled through
the DIC, the horn will chirp when the lock button
is pressed again within �ve seconds of the
previous press of the lock button. SeeDIC
Vehicle Customization on page 231for additional
information. Pressing the lock button may arm
the content theft-deterrent system. SeeContent
Theft-Deterrent on page 110.
"(Unlock):Press the unlock button to unlock the
driver’s door. If the button is pressed again within
�ve seconds, all remaining doors will unlock.
The interior lamps will come on and stay on for
20 seconds or until the ignition is turned on. If
enabled through the DIC, the parking lamps will
�ash once to indicate unlocking has occurred. See
DIC Vehicle Customization on page 231. Pressing
the unlock button on the RKE transmitter will disarm
the content theft-deterrent system. SeeContent
Theft-Deterrent on page 110.RKE with Remote StartRKE without Remote
Start
96
Page 99 of 496
3. Slide the new battery into the transmitter with
the positive side of the battery facing down.
Use a type CR2032 battery, or equivalent
type. Make sure the cover is on tightly,
so water will not get in.
4. Snap the front and the back of the transmitter
together.
5. Test the operation of the transmitter with the
vehicle.
Remote Vehicle Start
Your vehicle may have a remote starting feature.
This feature allows you to start the engine from
outside the vehicle. It may also start the vehicle’s
heating or air conditioning systems, rear window
defogger, and heated seats. SeeHeated Seats on
page 11andHeated and Cooled Seats on page 12
for additional information. When the remote start
system is active, the climate control system will
heat or cool the inside of the vehicle at the setting
the vehicle was set to when the vehicle was last
turned off. The rear window defogger will be turned
on by the climate control system when it is cold
outside. If the vehicle has heated seats, they may
also turn on. Cooled seats are not activated during
a remote start. Normal operation of the system will
return after the key is turned to the RUN position.Laws in some communities may restrict the use of
remote starters. For example, some laws may
require a person using the remote start to have
the vehicle in view when doing so. Check local
regulations for any requirements on remote starting
of vehicles.
Do not use the remote start feature if your vehicle
is low on fuel. Your vehicle may run out of fuel.
If your vehicle has remote start, the RKE transmitter
provides, an increased range of operation.
However, the range may be less while the vehicle is
running. As a result, you may need to be closer to
your vehicle to turn it off, than you were to turn it on.
There are other conditions which can affect the
performance of the transmitter, seeRemote
Keyless Entry (RKE) System on page 94for
additional information.
/(Remote Start):If your vehicle has the remote
start feature, the RKE transmitter will have a
button with this symbol on it.
99
Page 100 of 496
To start the vehicle using the remote start feature,
do the following:
1. Aim the transmitter at the vehicle.
2. Press and release the transmitter’s lock
button, then immediately press and hold
the transmitter’s remote start button until the
turn signal lights �ash or if the vehicle’s
lights are not visible, press and hold the
remote start button for at least four seconds.
The vehicle’s doors will lock.
When the vehicle starts, the parking lamps will
turn on and remain on while the vehicle is
running.
3. If it is your �rst remote start since last driving,
repeat these steps while the engine is still
running for a 10 minute time extension.
Remote start can be extended one time.
When you enter the vehicle during a remote start,
and the engine is still running, turn the key to the
RUN position to drive the vehicle. If the vehicle
is left running it will automatically shut off after
10 minutes unless a time extension has been done.To manually shut off a remote start, do any of the
following:
Aim the RKE transmitter at the vehicle and
press the remote start button until the
parking lamps turn off.
Turn on the hazard warning �ashers.
Turn the ignition switch on and then off.
The vehicle can be started remotely two separate
times between driving sequences. The engine
will run for 10 minutes after each remote start.
Or, you can extend the engine run time by another
10 minutes within the �rst 10 minute remote
start time frame, and before the engine stops.
For example, if the lock button and then the
remote start buttons are pressed again after
the vehicle has been running for �ve minutes,
10 minutes are added, allowing the engine to run
for 15 minutes.
The additional 10 minutes are considered a
second remote vehicle start.
100
Page 101 of 496

Once two remote starts, or a single remote start
with one time extension have been done, the
vehicle must be started with the key.
After the key is removed from the ignition, another
remote start can be performed.
The vehicle cannot be started remotely if the key
is in the ignition, the hood is not closed, or if
there is an emission control system malfunction.Remote Start Ready
If your vehicle does not have the remote vehicle
start feature, it may have the remote start ready
feature. This feature allows your dealer to add the
manufacturer’s remote vehicle start feature.
If your vehicle has the remote start ready feature,
your RKE transmitter will have extended range
that will allow you to lock or unlock your vehicle
from about 195 feet (60 m) away.
See your dealer if you would like to add the
manufacturer’s remote vehicle start feature to
your vehicle.
101
Page 149 of 496
6. Locate in the garage, the garage door opener
receiver (motor-head unit). Locate the “Learn”
or “Smart” button. This can usually be
found where the hanging antenna wire is
attached to the motor-head unit.
7. Firmly press and release the “Learn” or
“Smart” button. The name and color of
the button may vary by manufacturer.
You will have 30 seconds to start Step 8.
8. Return to the vehicle. Firmly press and hold the
programmed Universal Home Remote button
for two seconds, then release it. Immediately
press and hold the same button a second time
for two seconds, then release it. Immediately,
press and hold the same button a third time for
two seconds, then release.
The Universal Home Remote should now
activate the rolling-code device.
To program the remaining two Universal
Home Remote buttons, begin with Step 2 of
“Programming Universal Home Remote.” Do not
repeat Step 1, as this will erase all previous
programming from the Universal Home Remote
buttons.Gate Operator and Canadian
Programming
Canadian radio-frequency laws require transmitter
signals to time out or quit after several seconds
of transmission. This may not be long enough
for Universal Home Remote to pick up the signal
during programming. Similarly, some U.S. gate
operators are manufactured to time out in
the same manner.
If you live in Canada, or you are having difficulty
programming a gate operator or garage door
opener by using the “Programming Universal
Home Remote” procedures, regardless of where
you live, replace Step 3 under “Programming
Universal Home Remote” with the following:
Continue to press and hold the Universal Home
Remote button while you press and release every
two seconds (cycle) the hand-held transmitter
button until the frequency signal has been
successfully accepted by the Universal Home
Remote. The Universal Home Remote indicator
light will �ash slowly at �rst and then rapidly.
Proceed with Step 4 under “Programming
Universal Home Remote” to complete.
149