3-1 BUICK LUCERNE 2008 Owner's Manual
[x] Cancel search | Manufacturer: BUICK, Model Year: 2008, Model line: LUCERNE, Model: BUICK LUCERNE 2008Pages: 434
Page 1 of 434
Seats and Restraint Systems........................... 1-1
Front Seats
............................................... 1-2
Rear Seats
..............................................1-11
Safety Belts
.............................................1-12
Child Restraints
.......................................1-33
Airbag System
.........................................1-58
Restraint System Check
............................1-74
Features and Controls..................................... 2-1
Keys
........................................................ 2-3
Doors and Locks
......................................2-10
Windows
.................................................2-15
Theft-Deterrent Systems
............................2-17
Starting and Operating Your Vehicle
...........2-20
Mirrors
....................................................2-34
Object Detection Systems
..........................2-39
OnStar
®System
......................................2-46
Universal Home Remote System
................2-49
Storage Areas
.........................................2-56
Sunroof
..................................................2-58
Instrument Panel............................................. 3-1
Instrument Panel Overview
.......................... 3-4
Climate Controls
......................................3-21
Warning Lights, Gages, and Indicators
........3-32
Driver Information Center (DIC)
..................3-48
Audio System(s)
.......................................3-75Driving Your Vehicle....................................... 4-1
Your Driving, the Road, and Your Vehicle
..... 4-2
Towing
...................................................4-25
Service and Appearance Care.......................... 5-1
Service
..................................................... 5-3
Fuel
......................................................... 5-5
Checking Things Under the Hood
...............5-10
Headlamp Aiming
.....................................5-53
Bulb Replacement
....................................5-56
Windshield Wiper Blade Replacement
.........5-59
Tires
......................................................5-60
Appearance Care
.....................................5-94
Vehicle Identi�cation
...............................5-104
Electrical System
....................................5-105
Capacities and Speci�cations
...................5-113
Maintenance Schedule..................................... 6-1
Maintenance Schedule
................................ 6-2
Customer Assistance Information.................... 7-1
Customer Assistance and Information
........... 7-2
Reporting Safety Defects
...........................7-15
Vehicle Data Recording and Privacy
...........7-17
Index................................................................ 1
2008 Buick Lucerne Owner ManualM
Page 102 of 434
Key In the Ignition
Never leave your vehicle with the keys inside, as it is an
easy target for joy riders or thieves. If you leave the
key in the ignition and park your vehicle, a chime
will sound, when you open the driver’s door. Always
remember to remove your key from the ignition and take
it with you. This will lock your ignition and transmission.
Also, always remember to lock the doors.
The battery could be drained if you leave the key in the
ignition while your vehicle is parked. You may not be
able to start your vehicle after it has been parked for an
extended period of time.
Retained Accessory Power (RAP)
The following accessories on your vehicle can be used
for up to 10 minutes after the engine is turned off.
Audio System
Audio Steering Wheel (if equipped)
Clock
Power Windows
Sunroof (if equipped)
Power to these accessories works up to 10 minutes or
until the driver’s door is opened.The instrument panel cluster lights stay on for a few
seconds, then will go out. Once the driver’s door
is opened, the power shuts off to these accessories.
Your vehicle has a feature designed to protect the
battery against drainage. For more information
seeInadvertent Power Battery Saver on page 3-19and
Electric Power Management on page 3-19.
Starting the Engine
Move your shift lever to PARK (P) or NEUTRAL (N).
Your engine will not start in any other position – this is a
safety feature. To restart when you are already
moving, use NEUTRAL (N) only.
Notice:Do not try to shift to PARK (P) if your
vehicle is moving. If you do, you could damage the
transmission. Shift to PARK (P) only when your
vehicle is stopped.
2-22
Page 139 of 434

Instrument Panel Overview...............................3-4
Hazard Warning Flashers................................3-6
Other Warning Devices...................................3-6
Horn.............................................................3-6
Tilt Wheel.....................................................3-6
Power Tilt Wheel and Telescopic Steering
Column......................................................3-7
Heated Steering Wheel...................................3-7
Turn Signal/Multifunction Lever.........................3-8
Turn and Lane-Change Signals........................3-8
Headlamp High/Low-Beam Changer..................3-9
Flash-to-Pass.................................................3-9
Windshield Wipers..........................................3-9
Rainsense™ II Wipers...................................3-10
Windshield Washer.......................................3-11
Cruise Control..............................................3-12
Exterior Lamps.............................................3-14
Wiper Activated Headlamps............................3-15
Headlamps on Reminder................................3-16
Daytime Running Lamps (DRL).......................3-16
Fog Lamps..................................................3-17
Cornering Lamps..........................................3-17
Exterior Lighting Battery Saver........................3-17
Instrument Panel Brightness...........................3-17
Courtesy Lamps...........................................3-17Entry Lighting...............................................3-18
Delayed Entry Lighting...................................3-18
Theater Dimming..........................................3-18
Delayed Exit Lighting.....................................3-18
Perimeter Lighting.........................................3-18
Front Reading Lamps....................................3-18
Electric Power Management...........................3-19
Inadvertent Power Battery Saver.....................3-19
Battery Run-Down Protection..........................3-20
Accessory Power Outlet(s)
.............................3-20
Ashtray(s)....................................................3-21
Climate Controls............................................3-21
Climate Control System.................................3-21
Dual Automatic Climate Control System...........3-24
Outlet Adjustment.........................................3-30
Passenger Compartment Air Filter...................3-30
Warning Lights, Gages, and Indicators............3-32
Instrument Panel Cluster................................3-33
Speedometer and Odometer...........................3-34
Trip Odometer..............................................3-34
Tachometer.................................................3-34
Safety Belt Reminders...................................3-34
Airbag Readiness Light..................................3-35
Passenger Airbag Status Indicator...................3-36
Section 3 Instrument Panel
3-1
Page 143 of 434

The main components of your instrument panel are the following:
A. Air Outlets. SeeOutlet Adjustment on page 3-30.
B. Driver Information Center (DIC) Buttons (If
Equipped). SeeDIC Operation and Displays on
page 3-49.
C. Turn Signal/Multifunction Lever. SeeTurn
Signal/Multifunction Lever on page 3-8.
D. Instrument Panel Cluster. SeeInstrument Panel
Cluster on page 3-33.
E. Hazard Warning Flashers. SeeHazard Warning
Flashers on page 3-6.
F. Audio System. SeeAudio System(s) on page 3-75.
G. Exterior Lamp Buttons. SeeExterior Lamps on
page 3-14.
H. Trunk Release. SeeTrunk on page 2-13.
I. Instrument Panel Brightness Control. SeeInstrument
Panel Brightness on page 3-17.
J. Hood Release. SeeHood Release on page 5-11.
K. Lane Departure Warning Button. SeeLane
Departure Warning on page 2-44.L. Cruise Controls. SeeCruise Control on page 3-12.
Heated Steering Wheel Button (If Equipped).
SeeHeated Steering Wheel on page 3-7.
M. Parking Brake. SeeParking Brake on page 2-27.
N. Audio Steering Wheel Controls. SeeAudio Steering
Wheel Controls on page 3-95.
O. Climate Controls. SeeClimate Control System on
page 3-21orDual Automatic Climate Control System
on page 3-24.
P. Traction Control/StabiliTrak
®Button. SeeTraction
Control System (TCS) on page 4-5andStabiliTrak®
System on page 4-6.
Q. Front Storage Area. SeeFront Storage Area on
page 2-56.
R. Shift Lever. SeeAutomatic Transmission Operation
on page 2-25.
S. Accessory Power Outlet. SeeAccessory Power
Outlet(s) on page 3-20.
T. Glove Box. SeeGlove Box on page 2-56.
3-5
Page 146 of 434

Turn Signal/Multifunction Lever
The lever on the left side of the steering column
includes the following:
GTurn and Lane-Change Signals. SeeTurn and
Lane-Change Signals on page 3-8.
23Headlamp High/Low-Beam Changer. See
Headlamp High/Low-Beam Changer on page 3-9.
Flash-To-Pass Feature. SeeFlash-to-Pass
on page 3-9.
NWindshield Wipers. SeeWindshield Wipers on
page 3-9.
LWindshield Washer. SeeWindshield Washer
on page 3-11.
_Heated Washer Fluid. SeeWindshield Washer
on page 3-11.
Turn and Lane-Change Signals
To signal a turn, move the lever on the left side of the
steering wheel all the way up or down. The lever returns
automatically when the turn is complete.
An arrow on the instrument
panel cluster will �ash in
the direction of the
turn or lane change.
You may also have an arrow in the outside mirror that
�ashes when the turn signal is used. SeeOutside Power
Mirrors on page 2-37for more information.
Raise or lower the lever until the arrow starts to �ash to
signal a lane change. Hold it there until the lane
change is complete. If you momentarily press and
release the lever, the turn signal will �ash three times.
If the arrows �ash very fast as you signal a turn or
a lane change, a signal bulb may be burned out and
other drivers will not see your turn signal. If a bulb
is burned out, replace it to help avoid an accident.
If the arrows do not go on at all when you signal a turn,
check the fuse. SeeFuses and Circuit Breakers on
page 5-105.
3-8
Page 148 of 434
1(High Speed):For high-speed wiping, turn the
band further, to the second solid band past the
delay settings.
9(Off):To stop the wipers, move the band to off.
Clear ice and snow from the wiper blades before using
them. If they are frozen to the windshield, carefully
loosen or thaw them. If the blades become worn
or damaged, replace with new blades or blade inserts.
Heavy snow or ice can overload the wiper motor. A
circuit breaker will stop the motor until it cools. Clear
away snow or ice to prevent an overload.
Your vehicle has wiper-activated headlamps. After the
windshield wipers have completed eight wipe cycles
within four minutes, the headlamps automatically
turn on. SeeWiper Activated Headlamps on page 3-15
for more information.
Rainsense™ II Wipers
If your vehicle has this feature, the moisture sensor is
mounted on the interior of the windshield beside the
rearview mirror and is used to automatically operate the
wipers. This system operates by monitoring the amount
of moisture build-up on the windshield. Wipes occur as
needed to clear the windshield depending on the driving
conditions and the sensitivity setting. In light rain or snow,
fewer wipes will occur. In heavy rain or snow, wipes willoccur more frequently. The system operates in the delay
mode. If the system is left on for long periods of time,
occasional wipes may occur without any moisture on the
windshield. This is normal and indicates that the
Rainsense™ system is active.
The Rainsense™ system is activated by turning the
wiper control band to one of the �ve sensitivity levels
within the delay area. The position closest to off is
the lowest sensitivity setting, level one. This allows more
rain or snow to collect on the windshield between
wipes. Turning the wiper band away from you to higher
sensitivity levels increases the sensitivity of the
system and frequency of wipes. The highest sensitivity
setting, level �ve is closest to low. A single wipe will
occur each time you turn the wiper stalk to a higher
sensitivity level to indicate that the sensitivity level has
been increased.
Notice:Going through an automatic car wash with
the wipers on can damage them. Turn the wipers
off when going through an automatic car wash.
The MIST and wash cycles operate as normal and are
not affected by the Rainsense™ function. The system
can be overridden at any time by manually changing the
wiper control to low or high speed.
Notice:Do not place stickers or other items on the
exterior glass surface directly in front of the rain
sensor. Doing this could cause the rain sensor
to malfunction.
3-10
Page 149 of 434

Windshield Washer
{CAUTION:
In freezing weather, do not use your washer
until the windshield is warmed. Otherwise the
washer �uid can form ice on the windshield,
blocking your vision.
J(Washer Fluid):Press and release this paddle,
located at the top of the turn signal/multifunction lever, to
spray washer �uid on the windshield. The wipers will
clear the windshield and either stop or return to
your preset speed. For more washer cycles, press and
hold the paddle.
_(Heated Washer Fluid):The heated windshield
washer �uid system, if your vehicle has this feature, may
be used to help clear ice, snow, tree sap, or bugs
from your windshield. Sliding the switch on the turn
signal/multifunction lever to this position and thenreleasing it will activate the heated windshield washer
�uid system. This activation will initiate four heated
wash/wipe cycles. The �rst heated wash/wipe cycle may
take up to 40 seconds to occur, depending on outside
temperature. After the �rst wash/wipe cycle, it may take
up to 20 seconds for each of the remaining cycles.
The heated windshield washer �uid system may
be turned off at any time by sliding the switch on the
turn signal/multifunction lever to this position again.
When the heated windshield washer �uid system
is activated under certain outside temperature
conditions, steam may �ow out of the washer nozzles
for a short period of time before washer �uid is sprayed.
This is a normal condition.
WASHER FLUID LOW ADD FLUID will be displayed on
the Driver Information Center (DIC) when the washer
�uid is low. SeeDIC Warnings and Messages on
page 3-56.
3-11
Page 150 of 434

Cruise Control
With cruise control, you can maintain a speed of about
25 mph (40 km/h) or more without keeping your foot
on the accelerator. This can really help on long
trips. Cruise control does not work at speeds below
about 25 mph (40 km/h).
{CAUTION:
Cruise control can be dangerous where you
cannot drive safely at a steady speed. So, do
not use your cruise control on winding roads
or in heavy traffic.
Cruise control can be dangerous on slippery
roads. On such roads, fast changes in tire
traction can cause excessive wheel slip, and
you could lose control. Do not use cruise
control on slippery roads.
If your vehicle has the Traction Control System (TCS)
and the cruise control is on, TCS will begin to limit wheel
spin and the cruise control automatically turns off.
SeeTraction Control System (TCS) on page 4-5. When
road conditions allow you to safely use it again, the
cruise control can be turned back on.The cruise control buttons
are located on outboard
side of the steering wheel.
T(On/Off):Press this button to turn cruise control
on and off. The indicator is lit when cruise control is on.
+ RES (Resume/Accelerate):Press this button to
make the vehicle accelerate or resume to a previously
set speed.
SET–:Press this button to set the speed or make the
vehicle decelerate.
[(Cancel):Press this button to cancel cruise control.
3-12
Page 151 of 434
Setting Cruise Control
Cruise control will not work if the parking brake is set, or
if the master cylinder brake �uid level is low.
The cruise control light on the instrument panel cluster
comes on after the cruise control has been set to
the desired speed. SeeInstrument Panel Cluster on
page 3-33.
{CAUTION:
If you leave your cruise control on when you
are not using cruise, you might hit a button
and go into cruise when you do not want to.
You could be startled and even lose control.
Keep the cruise control switch off until you
want to use cruise control.
1. Press the cruise control on/off button.
2. Get up to the desired speed.
3. Press and release the SET– button located on the
steering wheel.
4. Take your foot off the accelerator.
Resuming a Set Speed
If cruise control is set at a desired speed and the
brakes are applied, this shuts off the cruise control.
However, it does not need to be reset.
Once your vehicle reaches a speed of about 25 mph
(40 km/h) or more, press the +RES button on the
steering wheel. The vehicle goes back to the previously
selected speed and stays there.
Increasing Speed While Using Cruise
Control
To increase the cruise speed while using cruise control:
Press and hold the +RES button on the steering
wheel until you reach your new desired speed,
then release it.
To increase vehicle speed in small increments,
press the +RES button. Each time this is done,
the vehicle will go about 1 mph (1.6 km/h) faster.
3-13
Page 152 of 434
Reducing Speed While Using Cruise
Control
To reduce your speed while using cruise control:
Press and hold the SET– button on the steering
wheel until you reach the desired lower speed,
then release it.
To slow down in very small amounts, press the
SET– button on the steering wheel brie�y. Each
time this is done, the vehicle will go about 1 mph
(1.6 km/h) slower.
Passing Another Vehicle While Using
Cruise Control
Use the accelerator pedal to increase vehicle speed.
When you take your foot off the pedal, the vehicle
will slow down to the cruise speed you set earlier.
Using Cruise Control on Hills
How well the cruise control will work on hills depends
upon the vehicle speed, load and the steepness of
the hills. When going up steep hills, you might have to
step on the accelerator pedal to maintain your speed.
When going downhill, you might have to brake or shift to
a lower gear to keep your speed down. If the brakes
are applied the cruise control will turn off. Many drivers
�nd this to be too much trouble and do not use
cruise control on steep hills.
Ending Cruise Control
There are three ways to end cruise control:
Step lightly on the brake pedal.
Press the[button on the steering wheel.
Press theTbutton on the steering wheel.
Erasing Speed Memory
The cruise control set speed memory is erased by
turning off the cruise control or the ignition.
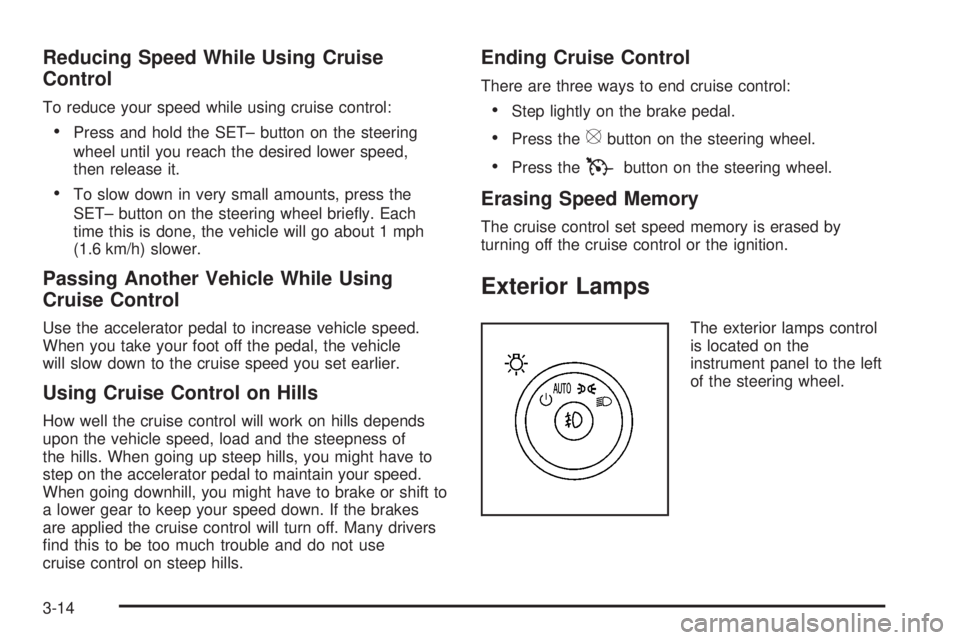
Exterior Lamps
The exterior lamps control
is located on the
instrument panel to the left
of the steering wheel.
3-14