keyless BUICK LUCERNE 2010 User Guide
[x] Cancel search | Manufacturer: BUICK, Model Year: 2010, Model line: LUCERNE, Model: BUICK LUCERNE 2010Pages: 474
Page 119 of 474
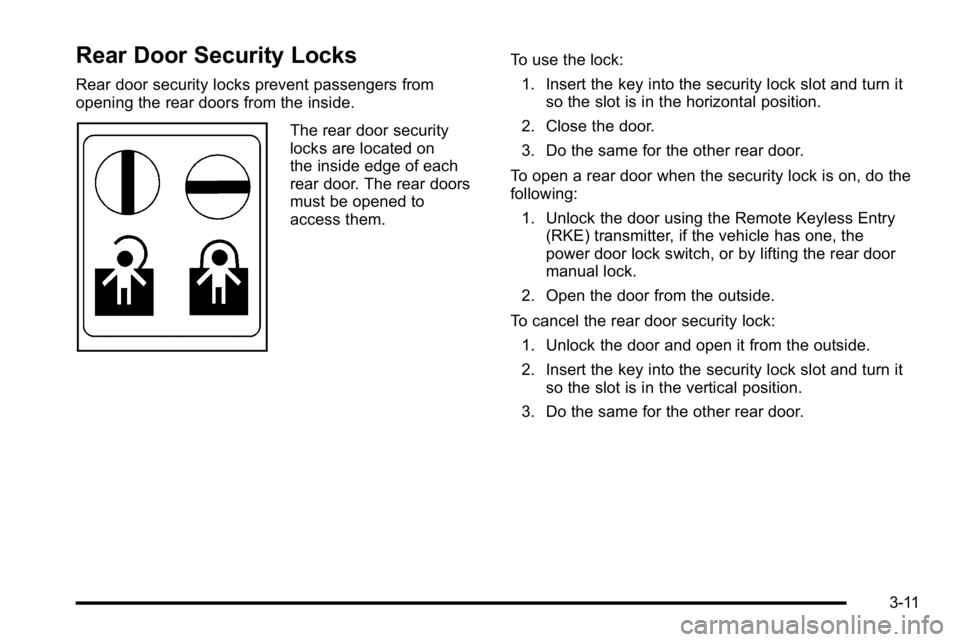
Rear Door Security Locks
Rear door security locks prevent passengers from
opening the rear doors from the inside.
The rear door security
locks are located on
the inside edge of each
rear door. The rear doors
must be opened to
access them.To use the lock:
1. Insert the key into the security lock slot and turn it so the slot is in the horizontal position.
2. Close the door.
3. Do the same for the other rear door.
To open a rear door when the security lock is on, do the
following: 1. Unlock the door using the Remote Keyless Entry (RKE) transmitter, if the vehicle has one, the
power door lock switch, or by lifting the rear door
manual lock.
2. Open the door from the outside.
To cancel the rear door security lock: 1. Unlock the door and open it from the outside.
2. Insert the key into the security lock slot and turn it so the slot is in the vertical position.
3. Do the same for the other rear door.
3-11
Page 121 of 474
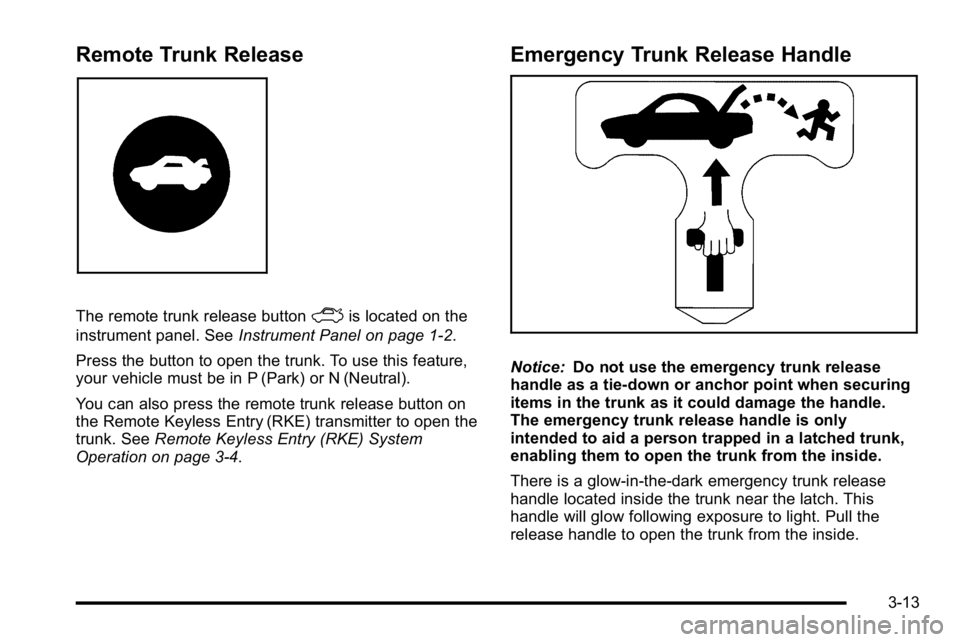
Remote Trunk Release
The remote trunk release buttonFis located on the
instrument panel. See Instrument Panel on page 1‑2.
Press the button to open the trunk. To use this feature,
your vehicle must be in P (Park) or N (Neutral).
You can also press the remote trunk release button on
the Remote Keyless Entry (RKE) transmitter to open the
trunk. See Remote Keyless Entry (RKE) System
Operation on page 3‑4.
Emergency Trunk Release Handle
Notice: Do not use the emergency trunk release
handle as a tie-down or anchor point when securing
items in the trunk as it could damage the handle.
The emergency trunk release handle is only
intended to aid a person trapped in a latched trunk,
enabling them to open the trunk from the inside.
There is a glow-in-the-dark emergency trunk release
handle located inside the trunk near the latch. This
handle will glow following exposure to light. Pull the
release handle to open the trunk from the inside.
3-13
Page 124 of 474

Express-Down Window
This feature is on the front windows. Press the switch
to the second position to activate the express-down
feature. To stop the window as it is lowering, press
down briefly on the switch again.
Window Lockout
o(Window Lockout): The rear window lockout button
is located on the driver's door armrest near the window
switches.
Press the right side of this button to disable the rear
window controls. The light on the button will come on,
indicating the feature is in use. The rear windows still
can be raised or lowered using the driver's window
switches when the lockout feature is active.
To restore power to the rear windows, press the button
again. The light on the button will go out.
Sun Visors
Pull the visor toward you, or move to the side to help
reduce glare.
On vehicles with a lighted vanity mirror, lift the attached
cover to use.
Theft-Deterrent Systems
Vehicle theft is big business, especially in some cities.
This vehicle has theft-deterrent features, however, they
do not make it impossible to steal.
Content Theft-Deterrent
Your vehicle may have the optional content
theft-deterrent alarm system.
To activate the theft-deterrent system:
1. Open the door.
2. Lock the door with the power door lock switch or the Remote Keyless Entry (RKE) transmitter. If you
are using the RKE transmitter, the door does not
need to be open.
3. Close all doors.
Once armed, the alarm will go off if someone tries to
enter the vehicle without using the RKE transmitter or a
key or turns the ignition on with an incorrect key. The
horn will sound and the turn signal lamps will flash for
about 30 seconds.
When the alarm is armed, the trunk may be opened with
the RKE transmitter. The power door lock switches are
disabled and the doors remain locked. You must use
your RKE transmitter or your key to unlock the doors
when the system is armed.
3-16
Page 175 of 474
Courtesy Lamps
When any door is opened, several lamps turn on
making it easier for you to enter and exit the vehicle.
Turn the instrument panel brightness control completely
clockwise to manually turn on these lamps.
Entry Lighting
If it is dark enough outside when you press the unlock
button on the remote keyless entry transmitter, the
interior courtesy lamps will turn on and stay on for about
40 seconds. The lamps can be turned off immediately
by pressing the lock button on the remote keyless entry
transmitter, turning the ignition key to ON/RUN or
activating the power door locks.
Delayed Entry Lighting
The interior lamps will turn on if you open the door
when it is dark enough outside. When you close the
door with the ignition off, the interior lamps will stay on
for up to 25 seconds or until the ignition is turned to an
on position. When the lamps turn off as a result of the
25 second timer or the ignition switch being turned on,
the lighting will deactivate by way of the theater
dimming effect. Locking the doors will override the
delayed entry lighting feature and the lamps will turn off
right away.
Theater Dimming
This feature allows for a three to five second fade out of
the courtesy lamps instead of immediate turn off.
Delayed Exit Lighting
If it is dark enough outside when you remove the key
from the ignition, the interior lamps will turn on and stay
on for about 25 seconds. This will give you time to find
the door pull handle or lock switches. Once the key
is inserted into the ignition, the exit lighting will be
cancelled and the lighting will fade out.
Perimeter Lighting
If it is dark enough outside when the unlock button on
the remote keyless entry transmitter is pressed, the
DRL, parking lamps and back-up lamps will come on.
This feature can be programmed on for various
amounts of time in seconds for each transmitter.
SeeDIC Vehicle Customization
on page 4‑65for
information on programming.
Front Reading Lamps
The front reading lamps are located on the headliner.
Press the button near each lamp to turn them on or off.
4-15
Page 178 of 474
Ashtray(s)
Notice:If papers, pins, or other flammable items are
put in the ashtray, hot cigarettes or other smoking
materials could ignite them and possibly damage
the vehicle. Never put flammable items in the
ashtray.
For vehicles without the floor console, pull the tray
located below the climate controls to reveal the ashtray.
The ashtray can be removed by pulling on the ledge
located at the top of the ashtray.
The vehicles with a full floor console do not have an
ashtray. There is a storage bin below the climate control
system. For more information, see Front Storage Area
on page 3‑51.
Climate Controls
Climate Control System
The heating, cooling, and ventilation for the vehicle can
be controlled with this system.
For vehicles with the remote start feature, when
activated, the climate control system heats or cools the
inside of the vehicle with the settings used before the
vehicle was turned off. The heated seats, if the vehicle
has them, and the rear window defogger will also be
turned on when it is cold outside. The cooled seat
setting is not activated during a remote start. Normal
operation of the system will return after the key is
turned to the ON/RUN position. See Remote Keyless
Entry (RKE) System Operation
on page 3‑4for more
information.
4-18
Page 182 of 474

Dual Automatic Climate Control
System
The heating, cooling, and ventilation for the vehicle can
be controlled with this system.
For vehicles with the remote start feature and it is
activated, the climate control system heats or cools the
inside of the vehicle, with the settings used before the
vehicle was turned off. The heated seats, if the vehicle
has them, and the rear window defogger will be turned
on by the climate control system when it is cold outside.
The cooled seat setting is not activated during a remote
start. Normal operation of the system will return after
the key is turned to the ON/RUN position. SeeRemote
Keyless Entry (RKE) System Operation
on page 3‑4for more information.
A. Driver and Passenger
Temperature Controls
B. Fan Control
C. Display
D. Air Delivery Mode Control E. Air Conditioning
F. Outside Air
G. Recirculation
H. PASS I. Rear Window Defogger
4-22
Page 207 of 474
Driver Information Center (DIC)
Your vehicle has a Driver Information Center (DIC).
All messages will appear in the DIC display located
below the speedometer in the instrument panel cluster.
The DIC buttons are located on the instrument panel, to
the left of the instrument panel cluster.
The DIC comes on when the ignition is on. After a short
delay, the DIC will display the information that was last
displayed before the engine was turned off.
The DIC displays trip, fuel, and vehicle system
information, and warning messages if a system problem
is detected. The bottom line of the DIC shows the shift
lever position indicator. SeeAutomatic Transmission
Operation
on page 3‑24for more information.
If your vehicle's DIC has these features, the compass
direction and the outside air temperature may also
display on the DIC when viewing the trip and fuel
information. The compass direction appears on the
top right corner of the DIC display. The outside air
temperature automatically appears in the bottom right
corner of the DIC display. If there is a problem with the
system that controls the temperature display, the
numbers will be replaced with dashes. If this occurs,
have the vehicle serviced by your dealer.
The DIC also allows some features to be customized.
See DIC Vehicle Customization
on page 4‑65for more
information.
DIC Operation and Displays
The DIC has different displays which can be accessed
by pressing the DIC buttons located on the instrument
panel, to the left of the instrument panel cluster.
DIC Buttons
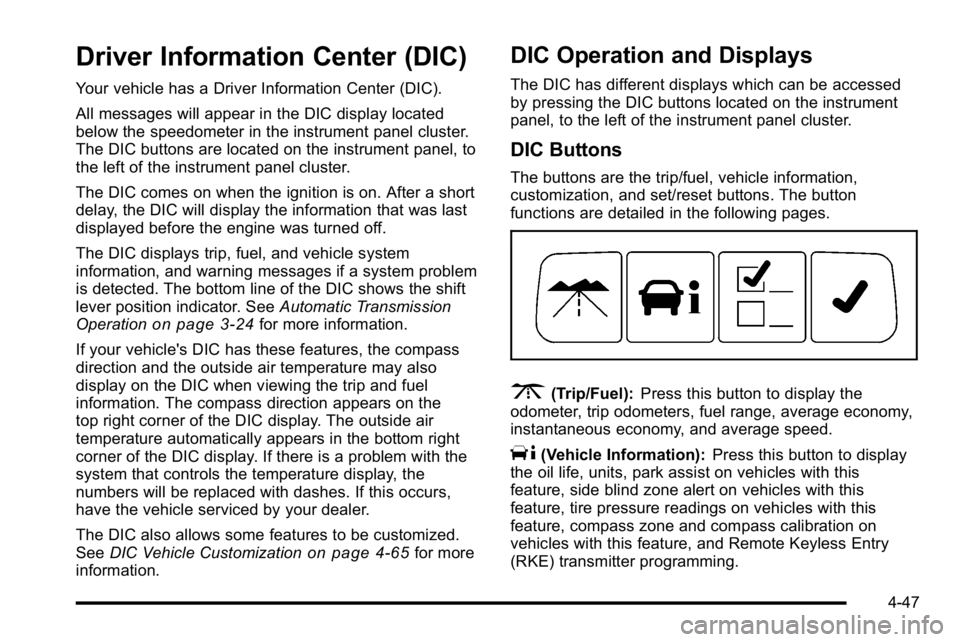
The buttons are the trip/fuel, vehicle information,
customization, and set/reset buttons. The button
functions are detailed in the following pages.
3(Trip/Fuel): Press this button to display the
odometer, trip odometers, fuel range, average economy,
instantaneous economy, and average speed.
T(Vehicle Information): Press this button to display
the oil life, units, park assist on vehicles with this
feature, side blind zone alert on vehicles with this
feature, tire pressure readings on vehicles with this
feature, compass zone and compass calibration on
vehicles with this feature, and Remote Keyless Entry
(RKE) transmitter programming.
4-47
Page 212 of 474

Relearn Remote Key
To access this display, the vehicle must be in PARK (P).
This display allows you to match Remote Keyless Entry
(RKE) transmitters to your vehicle. This procedure will
erase all previously learned transmitters. Therefore,
they must be relearned as additional transmitters.
To match an RKE transmitter to your vehicle:1. Press the vehicle information button until PRESS
VTO RELEARN REMOTE KEY displays.
2. Press the set/reset button until REMOTE KEY LEARNING ACTIVE is displayed.
3. Press and hold the lock and unlock buttons on the first transmitter at the same time for about
15 seconds.
On vehicles with memory recall seats, the first
transmitter learned will match driver 1 and the
second will match driver 2.
A chime will sound indicating that the transmitter is
matched. 4. To match additional transmitters at this time, repeat
Step 3.
Each vehicle can have a maximum of eight
transmitters matched to it.
5. To exit the programming mode, you must cycle the key to LOCK/OFF.
Blank Display
This display shows no information.
Customization Menu Items
U
(Customization): Press this button to enter the
feature settings menu. This display allows you to
customize the feature settings on your vehicle. See DIC
Vehicle Customization
on page 4‑65for more
information.
4-52
Page 218 of 474

OIL PRESSURE LOW STOP ENGINE
Notice:If you drive your vehicle while the engine oil
pressure is low, severe engine damage may occur.
If a low oil pressure warning appears on the
instrument panel cluster and/or DIC, stop the
vehicle as soon as possible. Do not drive the
vehicle until the cause of the low oil pressure is
corrected. See Engine Oil
on page 6‑17for more
information.
This message displays when the vehicle's engine oil
pressure is low. The oil pressure light also appears on
the instrument panel cluster. See Oil Pressure Light
on
page 4‑44.
Stop the vehicle immediately, as engine damage can
result from driving a vehicle with low oil pressure. Have
the vehicle serviced by your dealer as soon as possible
when this message is displayed.
PARK ASSIST OFF
If your vehicle has this feature, after the vehicle has
been started, this message will reminder the driver
that the Ultrasonic Rear Parking Assist (URPA) system
has been turned off. Press the set/reset button to
acknowledge this message and clear it from the DIC
display. To turn the URPA system back on, see “Park
Assist” underDIC Operation and Displays
on
page 4‑47. See Ultrasonic Rear Parking Assist (URPA)on page 3‑37for more information.
PASSENGER DOOR OPEN
This message displays when the front passenger door
is not closed properly. Make sure that the door is closed
completely.
REMOTE KEY LEARNING ACTIVE
This message displays while you are matching a
Remote Keyless Entry (RKE) transmitter to your
vehicle. See “Matching Transmitter(s) to Your Vehicle”
under Remote Keyless Entry (RKE) System Operation
on page 3‑4andDIC Operation and Displayson
page 4‑47for more information.
4-58
Page 219 of 474
REPLACE BATTERY IN REMOTE KEY
This message displays when the battery in the Remote
Keyless Entry (RKE) transmitter needs to be replaced.
To replace the battery, see“Battery Replacement”under
Remote Keyless Entry (RKE) System Operation
on
page 3‑4.
RIGHT REAR DOOR OPEN
This message displays when the passenger side rear
door is not closed properly. Make sure that the door is
closed completely.
SERVICE A/C (Air Conditioning)
SYSTEM
This message displays when the electronic sensors
that control the air conditioning and heating systems are
no longer working. Have the climate control system
serviced by your dealer if you notice a drop in heating
and air conditioning efficiency.
SERVICE AIR BAG
This message displays when there is a problem with the
airbag system. Have your vehicle serviced by your
dealer immediately. See Airbag Readiness Light
on
page 4‑33for more information.
SERVICE BATTERY CHARGING
SYSTEM
This message displays when there is a problem with the
generator and battery charging systems. Driving with
this problem could drain the battery. Turn off all
unnecessary accessories. Stop and turn off the vehicle
as soon as it is safe to do so. Have the electrical
system checked by your dealer immediately.
SERVICE BRAKE ASSIST
This message displays if there is a problem with the
brake system. The brake system warning light and the
antilock brake system warning light may also be
displayed on the instrument panel cluster. See Brake
System Warning Light
on page 4‑36and Antilock
Brake System (ABS) Warning Lighton page 4‑37for
more information. If this happens, stop as soon as
possible and turn off the vehicle. Restart the vehicle
and check for the message on the DIC display. If the
message is displayed or appears again when you begin
driving, the brake system needs service. See your
dealer as soon as possible. See Brakes
on page 6‑40for more information.
4-59