auto level control BUICK LUCERNE 2010 Owner's Manual
[x] Cancel search | Manufacturer: BUICK, Model Year: 2010, Model line: LUCERNE, Model: BUICK LUCERNE 2010Pages: 474
Page 132 of 474
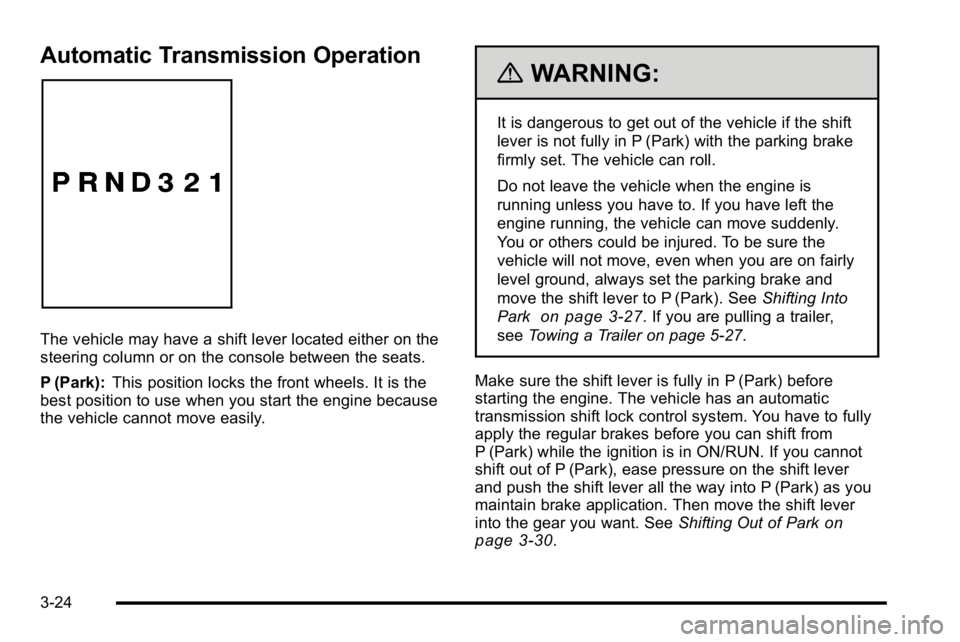
Automatic Transmission Operation
The vehicle may have a shift lever located either on the
steering column or on the console between the seats.
P (Park):This position locks the front wheels. It is the
best position to use when you start the engine because
the vehicle cannot move easily.
{WARNING:
It is dangerous to get out of the vehicle if the shift
lever is not fully in P (Park) with the parking brake
firmly set. The vehicle can roll.
Do not leave the vehicle when the engine is
running unless you have to. If you have left the
engine running, the vehicle can move suddenly.
You or others could be injured. To be sure the
vehicle will not move, even when you are on fairly
level ground, always set the parking brake and
move the shift lever to P (Park). See Shifting Into
Park
on page 3‑27. If you are pulling a trailer,
see Towing a Trailer on page 5‑27.
Make sure the shift lever is fully in P (Park) before
starting the engine. The vehicle has an automatic
transmission shift lock control system. You have to fully
apply the regular brakes before you can shift from
P (Park) while the ignition is in ON/RUN. If you cannot
shift out of P (Park), ease pressure on the shift lever
and push the shift lever all the way into P (Park) as you
maintain brake application. Then move the shift lever
into the gear you want. See Shifting Out of Park
on
page 3‑30.
3-24
Page 168 of 474
The Rainsense™system is activated by turning the
wiper control band to one of the five sensitivity levels
within the delay area. The position closest to off is the
lowest sensitivity setting, level one. This allows more
rain or snow to collect on the windshield between
wipes. Turning the wiper band away from you to higher
sensitivity levels increases the sensitivity of the system
and frequency of wipes. The highest sensitivity setting,
level five is closest to low. A single wipe will occur each
time you turn the wiper stalk to a higher sensitivity level
to indicate that the sensitivity level has been increased.
Notice: Going through an automatic car wash with
the wipers on can damage them. Turn the wipers off
when going through an automatic car wash.
The MIST and wash cycles operate as normal and are
not affected by the Rainsense™ function. The system
can be overridden at any time by manually changing the
wiper control to low or high speed.
Notice: Do not place stickers or other items on the
exterior glass surface directly in front of the rain
sensor. Doing this could cause the rain sensor to
malfunction.Windshield Washer
{WARNING:
In freezing weather, do not use your washer until
the windshield is warmed. Otherwise the washer
fluid can form ice on the windshield, blocking your
vision.
J(Washer Fluid): Press and release this paddle,
located at the top of the turn signal/multifunction lever,
to spray washer fluid on the windshield. The wipers will
clear the windshield and either stop or return to the
preset speed. For more washer cycles, press and hold
the paddle.
4-8
Page 173 of 474
Wiper Activated Headlamps
This feature activates the headlamps and parking lamps
after the windshield wipers are turned on and have
completed eight wipe cycles within four minutes.
When the ignition is turned to LOCK/OFF, the
wiper-activated headlamps immediately turn off. The
wiper-activated headlamps also turn off if the windshield
wipers are turned off.
Headlamps on Reminder
If you leave the exterior lamp buttons for the headlamps
or parking lamps on, remove the key from the ignition
and open the driver's door, you will hear a continuous
warning chime. The chime will turn off when the lamps
are turned off.
Daytime Running Lamps (DRL)
Daytime Running Lamps (DRL) can make it easier for
others to see the front of your vehicle during the day.
Fully functional daytime running lamps are required on
all vehicles first sold in Canada.
A light sensor on top of the instrument panel monitors
the exterior light level for the operation of DRL, so be
sure it is not covered.The DRL system makes the low-beam headlamps turn
on at reduced brightness in daylight when the following
conditions are met:
.The ignition is on.
.The exterior lamp button for the headlamps is off.
.The automatic transmission is not in P (Park).
When the DRL are on, only the low-beam headlamps
will be on. The parking lamps, taillamps, sidemarker
and other lamps will not be on.
When it is dark enough outside, the low-beam
headlamps will come on. The other lamps that turn on
with the headlamps will also turn on. When it is bright
enough outside, the regular lamps will go off, and the
low-beam headlamps change to the reduced brightness
of DRL.
To turn off all exterior lighting at night when the
vehicle is parked, turn the exterior lamp control to
the off position. The exterior lamps will turn back on
automatically when the transmission is moved out of
P (Park). See Exterior Lamps
on page 4‑12for more
information.
The regular headlamp system should be turned on
when needed.
4-13
Page 176 of 474
Electric Power Management
The vehicle has Electric Power Management (EPM) that
estimates the battery's temperature and state of charge.
It then adjusts the voltage for best performance and
extended life of the battery.
When the battery's state of charge is low, the voltage is
raised slightly to quickly bring the charge back up.
When the state of charge is high, the voltage is lowered
slightly to prevent overcharging. If the vehicle has a
voltmeter gauge or a voltage display on the Driver
Information Center (DIC), you may see the voltage
move up or down. This is normal. If there is a problem,
an alert will be displayed.
The battery can be discharged at idle if the electrical
loads are very high. This is true for all vehicles. This is
because the generator (alternator) may not be spinning
fast enough at idle to produce all the power that is
needed for very high electrical loads.
A high electrical load occurs when several of the
following are on, such as: headlamps, high beams, fog
lamps, rear window defogger, climate control fan at high
speed, heated seats, engine cooling fans, trailer loads,
and loads plugged into accessory power outlets.EPM works to prevent excessive discharge of the
battery. It does this by balancing the generator's output
and the vehicle's electrical needs. It can increase
engine idle speed to generate more power, whenever
needed. It can temporarily reduce the power demands
of some accessories.
Normally, these actions occur in steps or levels, without
being noticeable. In rare cases at the highest levels of
corrective action, this action may be noticeable to the
driver. If so, a Driver Information Center (DIC) message
might be displayed, such as BATTERY SAVER
ACTIVE, BATTERY VOLTAGE LOW, or LOW
BATTERY. If this message is displayed, it is
recommended that the driver reduce the electrical loads
as much as possible. See
DIC Warnings and Messages
on page 4‑55.
Inadvertent Power Battery Saver
This feature is designed to protect your vehicle's battery
against drainage from the interior lamps, or garage
door opener. When the ignition is turned off, the power
to these features will automatically turn off after
10 minutes. Power will be restored for an additional
10 minutes if any door is opened, the trunk is opened or
the courtesy lamp switch is turned on.
4-16
Page 184 of 474
h(Auto Recirculation) :If AUTO is selected on
either the fan or mode control, the system automatically
controls the supply of fresh outside air or recirculates
the interior air to cool the car faster. The indicator light
on the recirculation button will light whenever the
system switches to recirculation. You may force outside
air by pressing the outside air button. The next time
AUTO fan or mode is selected, it will reset back to
AUTO operation.
Manual Operation
9(Off): Turns the climate control system off. Outside
air still enters the vehicle and is directed to the floor.
The airflow direction and temperature can be adjusted.
If the temperature is adjusted while the system is off,
the display will light to show the current settings.
w x(Driver Temperature Controls): Press these
buttons next to the fan control to increase or decrease
the temperature inside the vehicle.
w x(Passenger Temperature Controls): Press
these buttons next to the mode control to increase or
decrease the temperature for the front passenger. If the
passenger climate control system is off, pressing one of
these buttons turns it on.
9(Fan Control): Turn clockwise or counterclockwise
to increase or decrease the fan speed. Turning this
control completely counterclockwise turns on the
automatic fan operation.
If the airflow seems low when the fan speed is at the
highest setting, the passenger compartment air filter
may need to be replaced. For more information, see
Passenger Compartment Air Filter
on page 4‑28and
Scheduled Maintenance on page 7‑3.
Air Delivery Mode Control: Turn clockwise or
counterclockwise to change the direction of the airflow
in the vehicle.
To change the current mode, select one of the following:
F(Vent): Air is directed to the instrument panel outlets.
*(Bi-Level): Air is divided between the instrument
panel outlets and the floor outlets. In automatic
operation, cooler air is directed to the upper outlets and
warmer air to the floor outlets.
7(Floor): Air is directed to the floor outlets, with some
air directed to the windshield and side window outlets.
If recirculation is selected while in this mode, it stays on
for three minutes to reduce windshield fogging.
4-24
Page 215 of 474

DIC Warnings and Messages
Messages are displayed on the DIC to notify the driver
that the status of the vehicle has changed and that
some action may be needed by the driver to correct the
condition. Multiple messages may appear one after
another. Some messages may not require immediate
action, but you can press the set/reset button to
acknowledge that you received the message and clear
it from the DIC display. Pressing any of the DIC buttons
also acknowledges and clears any messages. Some
messages cannot be cleared from the DIC display
because they are more urgent. These messages require
action before they can be cleared. You should take any
messages that appear on the display seriously and
remember that clearing the messages will only make
the messages disappear, not correct the problem. The
following are the possible messages that can be
displayed and some information about them.
AUTOMATIC LIGHT CONTROL OFF
This message displays when the automatic headlamps
are turned off. SeeExterior Lampson page 4‑12for
more information.
AUTOMATIC LIGHT CONTROL ON
This message displays when the automatic headlamps
are turned on. See Exterior Lampson page 4‑12for
more information.
BATTERY SAVER ACTIVE
This message displays when the system detects that
the battery voltage is dropping beyond a reasonable
level. The battery saver system starts reducing certain
features of the vehicle that you may be able to notice.
At the point that the features are disabled, this message
is displayed. It means that the vehicle is trying to save
the charge in the battery.
Turn off all unnecessary accessories to allow the
battery to recharge.
The normal battery voltage range is 11.5 to 15.5 volts.
CHANGE ENGINE OIL SOON
This message displays when service is required for the
vehicle. See your dealer. See Engine Oilon page 6‑17andScheduled Maintenanceon page 7‑3for more
information.
Acknowledging the CHANGE ENGINE OIL SOON
message will not reset the OIL LIFE REMAINING. That
must be done at the OIL LIFE screen under the vehicle
information menu. See “Oil Life”underDIC Operation
and Displays
on page 4‑47and Engine Oil Life Systemon page 6‑20.
4-55
Page 222 of 474

SERVICE TRACTION CONTROL
This message displays when the Traction Control
System (TCS) is not functioning properly. A warning
light also appears on the instrument panel cluster. See
Traction Control System (TCS) Warning Light
on
page 4‑38. See Traction Control System (TCS)on
page 5‑6for more information. Have the TCS serviced
by your dealer as soon as possible.
SERVICE TRANSMISSION
This message displays when there is a problem with the
transmission. See your dealer for service.
SERVICE VEHICLE SOON
This message displays when a non-emissions related
malfunction occurs. Have the vehicle serviced by your
dealer as soon as possible.
SIDE BLIND ZONE ALERT
SYSTEM OFF
If your vehicle has the Side Blind Zone Alert (SBZA)
system, this message displays when the SBZA system
has been turned off. See Side Blind Zone Alert (SBZA)
on page 3‑39andDIC Operation and Displayson
page 4‑47for more information.
SIDE BLIND ZONE SYS. UNAVAILABLE
If your vehicle has the Side Blind Zone Alert (SBZA)
system, this message displays when the SBZA system
is disabled because the sensor is blocked and cannot
detect vehicles in your blind zone. The sensor may be
blocked by mud, dirt, snow, ice, or slush. This message
may also display during heavy rain or due to road spray.
It may also come on when driving in isolated areas
with no guardrails, trees, or road signs and light traffic.
Your vehicle does not need service. For cleaning
instructions, see Washing Your Vehicle
on page 6‑104.
See Side Blind Zone Alert (SBZA)on page 3‑39for
more information.
SPEED LIMITED TO XXX MPH (km/h)
This message displays when your vehicle speed is
limited to 128 km/h (80 mph) because the vehicle
detects a problem in the speed variable assist steering,
magnetic ride control, or automatic leveling control
systems. Have your vehicle serviced by your dealer.
STABILITRAK NOT READY
If your vehicle has StabiliTrak, this message may
display and the Traction Control System and StabiliTrak
Warning Light on the instrument panel cluster may be
on after first driving the vehicle and exceeding 30 km/h
(19 mph) for 30 seconds. The StabiliTrak system is not
functional until the light has turned off. See StabiliTrak
®
Systemon page 5‑6for more information.
4-62
Page 254 of 474
Audio System
When using the in‐vehicle Bluetooth system, sound
comes through the vehicle's front audio system
speakers and overrides the audio system. Use the
audio system volume knob, during a call, to change the
volume level. The adjusted volume level remains in
memory for later calls. To prevent missed calls, a
minimum volume level is used if the volume is turned
down too low.
Bluetooth Controls
Use the buttons located on the steering wheel to
operate the in‐vehicle Bluetooth system. SeeAudio
Steering Wheel Controls
on page 4‑105for more
information.
b g(Push To Talk) : Press to answer incoming calls,
to confirm system information, and to start speech
recognition.
c x(Phone On Hook): Press to end a call, reject a
call, or to cancel an operation.
Pairing
A Bluetooth enabled cell phone must be paired to the
in‐vehicle Bluetooth system first and then connected
to the vehicle before it can be used. See the cell
phone manufacturers user guide for Bluetooth functions
before pairing the cell phone. If a Bluetooth phone is
not connected, calls will be made using OnStar
®
Hands‐Free Calling, if available. Refer to the OnStar
owner's guide for more information.
Pairing Information:
.Up to five cell phones can be paired to the
in‐vehicle Bluetooth system.
.The pairing process is disabled when the vehicle is
moving.
.The in‐vehicle Bluetooth system automatically links
with the first available paired cell phone in the
order the phone was paired.
.Only one paired cell phone can be connected to
the in‐vehicle Bluetooth system at a time.
.Pairing should only need to be completed once,
unless changes to the pairing information have
been made or the phone is deleted.
To link to a different paired phone, see Linking to a
Different Phone later in this section.
4-94
Page 427 of 474
Additional Required Services
At Each Fuel Stop
.Engine oil level check. SeeEngine Oilon
page 6‑17.
.Engine coolant level check. See Engine Coolant
(4.6L Engine)on page 6‑27or Engine Coolant
(3.9L Engine) on page 6‑31.
.Windshield washer fluid level check. See
Windshield Washer Fluid on page 6‑39.
Once a Month
.Tire inflation check. See Inflation - Tire Pressureon page 6‑65.
.Tire wear inspection. See Tire Inspection and
Rotation on page 6‑71.
Once a Year
.Starter switch check. See Owner Checks and
Services on page 7‑8.
.Parking brake and automatic transmission P (Park)
mechanism check. See Owner Checks and
Services on page 7‑8.
.Automatic transmission shiftlock control system
check. See Owner Checks and Serviceson
page 7‑8.
.Ignition transmission lock check. See Owner
Checks and Services on page 7‑8.
.Engine cooling system and pressure cap pressure
check. Radiator and air conditioning condenser
outside cleaning. See Cooling System
on
page 6‑26.
.Exhaust system and nearby heat shields
inspection for loose or damaged components.
.Accelerator pedal check for damage, high effort,
or binding. Replace if needed.
.If the vehicle has a Tire Sealant and Compressor
Kit, check the sealant expiration date printed on
the instruction label of the kit. See Tire Sealant and
Compressor Kit on page 6‑82.
7-5
Page 430 of 474
Owner Checks and Services
Starter Switch Check
{WARNING:
When you are doing this inspection, the vehicle
could move suddenly. If the vehicle moves, you or
others could be injured.
1. Before starting this check, be sure there is enough room around the vehicle.
2. Firmly apply both the parking brake and the regular brake. See Parking Brake on page 3‑26.
Do not use the accelerator pedal, and be ready to
turn off the engine immediately if it starts.
3. Try to start the engine in each gear. The vehicle should start only in P (Park) or N (Neutral). If the
vehicle starts in any other position, contact your
dealer for service.
Automatic Transmission Shift Lock
Control System Check
{WARNING:
When you are doing this inspection, the vehicle
could move suddenly. If the vehicle moves, you or
others could be injured.
1. Before starting this check, be sure there is enough room around the vehicle. It should be parked on a
level surface.
2. Firmly apply the parking brake. See Parking Brake
on page 3‑26.
Be ready to apply the regular brake immediately if
the vehicle begins to move.
3. With the engine off, turn the ignition to ON/RUN, but do not start the engine. Without applying the
regular brake, try to move the shift lever out of
P (Park) with normal effort. If the shift lever moves
out of P (Park), contact your dealer for service.
7-8