stop start BUICK LUCERNE 2011 Owner's Guide
[x] Cancel search | Manufacturer: BUICK, Model Year: 2011, Model line: LUCERNE, Model: BUICK LUCERNE 2011Pages: 450, PDF Size: 3.63 MB
Page 259 of 450
Black plate (5,1)Buick Lucerne Owner Manual - 2011
ABS can change the brake pressure to each wheel, as
required, faster than any driver could. This can help the
driver steer around the obstacle while braking hard.
As the brakes are applied, the computer keeps
receiving updates on wheel speed and controls
braking pressure accordingly.
Remember: ABS does not change the time needed to
get a foot up to the brake pedal or always decrease
stopping distance. If you get too close to the vehicle in
front of you, there will not be enough time to apply the
brakes if that vehicle suddenly slows or stops. Always
leave enough room up ahead to stop, even with ABS.
Using ABS
Do not pump the brakes. Just hold the brake pedal
down firmly and let antilock work. The antilock pump or
motor operating might be heard and the brake pedal
might be felt to pulsate, but this is normal.
Braking in Emergencies
ABS allows the driver to steer and brake at the same
time. In many emergencies, steering can help more
than even the very best braking.
Brake Assist
This vehicle has a Brake Assist feature designed to
assist the driver in stopping or decreasing vehicle
speed in emergency driving conditions. This feature
uses the stability system hydraulic brake control module
to supplement the power brake system under conditions
where the driver has quickly and forcefully applied the
brake pedal in an attempt to quickly stop or slow down
the vehicle. The stability system hydraulic brake control
module increases brake pressure at each corner of
the vehicle until the ABS activates. Minor brake pedal
pulsations or pedal movement during this time is normal
and the driver should continue to apply the brake pedal
as the driving situation dictates The Brake Assist
feature will automatically disengage when the brake
pedal is released or brake pedal pressure is quickly
decreased.
StabiliTrak®System
The vehicle has a StabiliTrak system which combines
antilock brake, traction and stability control systems
and helps the driver maintain directional control of the
vehicle in most driving conditions. This is accomplished
by selectively applying any one of the vehicle's brakes
and reducing engine power.
The StabiliTrak system comes on automatically
whenever the vehicle is started. The system cannot be
turned off.
5-5
Page 264 of 450
Black plate (10,1)Buick Lucerne Owner Manual - 2011
Passing
Passing another vehicle on a two-lane road can be
dangerous. To reduce the risk of danger while passing:
.Look down the road, to the sides, and to
crossroads for situations that might affect a
successful pass. If in doubt, wait.
.Watch for traffic signs, pavement markings, and
lines that could indicate a turn or an intersection.
Never cross a solid or double‐solid line on your
side of the lane.
.Do not get too close to the vehicle you want to
pass. Doing so can reduce your visibility.
.Wait your turn to pass a slow vehicle.
.When you are being passed, ease to the right.
Loss of Control
Let us review what driving experts say about what
happens when the three control systems—brakes,
steering, and acceleration —do not have enough
friction where the tires meet the road to do what the
driver has asked.
In any emergency, do not give up. Keep trying to steer
and constantly seek an escape route or area of less
danger.
Skidding
In a skid, a driver can lose control of the vehicle.
Defensive drivers avoid most skids by taking
reasonable care suited to existing conditions, and by
not overdriving those conditions. But skids are always
possible.
The three types of skids correspond to the vehicle's
three control systems. In the braking skid, the wheels
are not rolling. In the steering or cornering skid, too
much speed or steering in a curve causes tires to slip
and lose cornering force. And in the acceleration skid,
too much throttle causes the driving wheels to spin.
Remember: Any traction control system helps avoid
only the acceleration skid. If the traction control system
is off, then an acceleration skid is best handled by
easing your foot off the accelerator pedal.
If the vehicle starts to slide, ease your foot off the
accelerator pedal and quickly steer the way you want
the vehicle to go. If you start steering quickly enough,
the vehicle may straighten out. Always be ready for a
second skid if it occurs.
Of course, traction is reduced when water, snow, ice,
gravel, or other material is on the road. For safety, slow
down and adjust your driving to these conditions. It is
important to slow down on slippery surfaces because
stopping distance will be longer and vehicle control
more limited.
5-10
Page 271 of 450
Black plate (17,1)Buick Lucerne Owner Manual - 2011
To save fuel, run the engine for only short periods as
needed to warm the vehicle and then shut the engine
off and close the window most of the way to save heat.
Repeat this until help arrives but only when you feel
really uncomfortable from the cold. Moving about to
keep warm also helps.
If it takes some time for help to arrive, now and then
when you run the engine, push the accelerator pedal
slightly so the engine runs faster than the idle speed.
This keeps the battery charged to restart the vehicle
and to signal for help with the headlamps. Do this as
little as possible to save fuel.
If Your Vehicle is Stuck in Sand,
Mud, Ice, or Snow
Slowly and cautiously spin the wheels to free the
vehicle when stuck in sand, mud, ice, or snow. See
Rocking Your Vehicle to Get It Out on page 5‑17.
If the vehicle has a traction system, it can often help
to free a stuck vehicle. Refer to the vehicle's traction
system in the Index. If stuck too severely for the traction
system to free the vehicle, turn the traction system off
and use the rocking method.
{WARNING:
If the vehicle's tires spin at high speed, they can
explode, and you or others could be injured.
The vehicle can overheat, causing an engine
compartment fire or other damage. Spin the
wheels as little as possible and avoid going above
55 km/h (35 mph).
For information about using tire chains on the vehicle,
see Tire Chains on page 6‑78.
Rocking Your Vehicle to Get It Out
Turn the steering wheel left and right to clear the area
around the front wheels. Turn off any traction or stability
system. Shift back and forth between R (Reverse) and a
forward gear, spinning the wheels as little as possible.
To prevent transmission wear, wait until the wheels stop
spinning before shifting gears. Release the accelerator
pedal while shifting, and press lightly on the accelerator
pedal when the transmission is in gear. Slowly spinning
the wheels in the forward and reverse directions causes
a rocking motion that could free the vehicle. If that does
not get the vehicle out after a few tries, it might need to
be towed out. If the vehicle does need to be towed out,
seeTowing Your Vehicle on page 5‑23.
5-17
Page 284 of 450
Black plate (30,1)Buick Lucerne Owner Manual - 2011
Turn Signals When Towing a Trailer
The arrows on the instrument panel flash whenever
signaling a turn or lane change. Properly hooked up,
the trailer lamps also flash, telling other drivers the
vehicle is turning, changing lanes or stopping.
When towing a trailer, the arrows on the instrument
panel flash for turns even if the bulbs on the trailer are
burned out. For this reason you may think other drivers
are seeing the signal when they are not. It is important
to check occasionally to be sure the trailer bulbs are still
working.
Driving on Grades
Notice:Do not tow on steep continuous grades
exceeding 9.6 km (6 miles). Extended, higher than
normal engine and transmission temperatures may
result and damage the vehicle. Frequent stops are
very important to allow the engine and transmission
to cool.
Reduce speed and shift to a lower gear beforestarting
down a long or steep downgrade. If the transmission is
not shifted down, the brakes might have to be used so
much that they would get hot and no longer work well.
On a long uphill grade, shift down and reduce the
vehicle's speed to around 45 mph (70 km/h) to reduce
the possibility of the engine and the transmission
overheating. If the engine does overheat, see Engine
Overheating on page 6‑35.
Parking on Hills
{WARNING:
Parking the vehicle on a hill with the trailer
attached can be dangerous. If something goes
wrong, the rig could start to move. People can be
injured, and both the vehicle and the trailer can be
damaged. When possible, always park the rig on
a flat surface.
If parking the rig on a hill: 1. Press the brake pedal, but do not shift into P (Park) yet. Turn the wheels into the curb if facing downhill
or into traffic if facing uphill.
2. Have someone place chocks under the trailer wheels.
3. When the wheel chocks are in place, release the brake pedal until the chocks absorb the load.
4. Reapply the brake pedal. Then apply the parking brake and shift the transmission into P (Park).
5. Release the brake pedal.
5-30
Page 285 of 450
Black plate (31,1)Buick Lucerne Owner Manual - 2011
Leaving After Parking on a Hill
1. Apply and hold the brake pedal while you:
.start the engine,
.shift into a gear, and
.release the parking brake.
2. Let up on the brake pedal.
3. Drive slowly until the trailer is clear of the chocks.
4. Stop and have someone pick up and store the chocks.
Maintenance When Trailer Towing
The vehicle needs service more often when pulling a
trailer. See Scheduled Maintenanceon page 7‑3for
more information. Things that are especially important
in trailer operation are automatic transmission fluid,
engine oil, belts, cooling system and brake system. It is
a good idea to inspect these before and during the trip.
Check periodically to see that all hitch nuts and bolts
are tight.
Engine Cooling When Trailer Towing
The cooling system may temporarily overheat during
severe operating conditions. See Engine Overheating
on page 6‑35.
Changing a Tire When Trailer Towing
If the vehicle gets a flat tire while towing a trailer, be
sure to secure the trailer and disconnect it from the
vehicle before changing the tire.
5-31
Page 287 of 450
Black plate (1,1)Buick Lucerne Owner Manual - 2011
Section 6 Service and Appearance Care
Service. . . . . . . . . . . . . . . . . . . . . . . . . . . . . . . . . . . . . . . . . . . . . 6-3
Accessories and Modifications . . . . . . . . . . . . . . . . . . 6-3
California Proposition 65 Warning . . . . . . . . . . . . . . . 6-4
California Perchlorate Materials Requirements . . . . . . . . . . . . . . . . . . . . . . . . . . . . . . . . . 6-4
Doing Your Own Service Work . . . . . . . . . . . . . . . . . . 6-4
Adding Equipment to the Outside of the Vehicle . . . . . . . . . . . . . . . . . . . . . . . . . . . . . . . . . . . . . . . . 6-5
Fuel . . . . . . . . . . . . . . . . . . . . . . . . . . . . . . . . . . . . . . . . . . . . . . . . . 6-5
Gasoline Octane . . . . . . . . . . . . . . . . . . . . . . . . . . . . . . . . 6-6
Gasoline Specifications (U.S. and Canada Only) . . . . . . . . . . . . . . . . . . . . . . . . . . . . . . . . . 6-6
California Fuel . . . . . . . . . . . . . . . . . . . . . . . . . . . . . . . . . . 6-6
Additives . . . . . . . . . . . . . . . . . . . . . . . . . . . . . . . . . . . . . . . . 6-7
Fuel E85 (85% Ethanol) . . . . . . . . . . . . . . . . . . . . . . . . . 6-7
Fuels in Foreign Countries . . . . . . . . . . . . . . . . . . . . . . 6-9
Filling the Tank . . . . . . . . . . . . . . . . . . . . . . . . . . . . . . . . . . 6-9
Filling a Portable Fuel Container . . . . . . . . . . . . . . . 6-11
Checking Things Under the Hood . . . . . . . . . . . . . . .6-12
Hood Release . . . . . . . . . . . . . . . . . . . . . . . . . . . . . . . . . 6-13
Engine Compartment Overview . . . . . . . . . . . . . . . . 6-14
Engine Oil . . . . . . . . . . . . . . . . . . . . . . . . . . . . . . . . . . . . . 6-18
Engine Oil Life System . . . . . . . . . . . . . . . . . . . . . . . . 6-22
Engine Air Cleaner/Filter . . . . . . . . . . . . . . . . . . . . . . . 6-23
Automatic Transmission Fluid . . . . . . . . . . . . . . . . . . 6-24
Cooling System . . . . . . . . . . . . . . . . . . . . . . . . . . . . . . . . 6-27 Engine Coolant (4.6L Engine) . . . . . . . . . . . . . . . . . . 6-28
Engine Coolant (3.9L Engine) . . . . . . . . . . . . . . . . . . 6-31
Engine Overheating . . . . . . . . . . . . . . . . . . . . . . . . . . . 6-35
Overheated Engine Protection
Operating Mode . . . . . . . . . . . . . . . . . . . . . . . . . . . . . 6-37
Power Steering Fluid . . . . . . . . . . . . . . . . . . . . . . . . . . 6-37
Windshield Washer Fluid . . . . . . . . . . . . . . . . . . . . . . 6-38
Brakes . . . . . . . . . . . . . . . . . . . . . . . . . . . . . . . . . . . . . . . . . 6-39
Battery . . . . . . . . . . . . . . . . . . . . . . . . . . . . . . . . . . . . . . . . . 6-42
Jump Starting . . . . . . . . . . . . . . . . . . . . . . . . . . . . . . . . . . 6-44
Headlamp Aiming . . . . . . . . . . . . . . . . . . . . . . . . . . . . . . . . 6-49
Bulb Replacement . . . . . . . . . . . . . . . . . . . . . . . . . . . . . . . . 6-52
Halogen Bulbs . . . . . . . . . . . . . . . . . . . . . . . . . . . . . . . . . 6-52
Taillamps, Turn Signal, Stoplamps and Sidemarker Lamps . . . . . . . . . . . . . . . . . . . . . . . . . . 6-52
Taillamps and Back-Up Lamps . . . . . . . . . . . . . . . . . 6-54
License Plate Lamp . . . . . . . . . . . . . . . . . . . . . . . . . . . . 6-55
Replacement Bulbs . . . . . . . . . . . . . . . . . . . . . . . . . . . . 6-55
Windshield Wiper Blade Replacement . . . . . . . . . . .6-55
Tires . . . . . . . . . . . . . . . . . . . . . . . . . . . . . . . . . . . . . . . . . . . . . . . 6-57
Tire Sidewall Labeling . . . . . . . . . . . . . . . . . . . . . . . . . 6-58
Tire Terminology and Definitions . . . . . . . . . . . . . . . 6-61
Inflation - Tire Pressure . . . . . . . . . . . . . . . . . . . . . . . . 6-64
Tire Pressure Monitor System . . . . . . . . . . . . . . . . . 6-65
Tire Pressure Monitor Operation . . . . . . . . . . . . . . . 6-66
6-1
Page 296 of 450
Black plate (10,1)Buick Lucerne Owner Manual - 2011
While refueling, hang the tethered fuel cap from the
hook on the fuel door.
{WARNING:
Fuel can spray out on you if you open the fuel cap
too quickly. If you spill fuel and then something
ignites it, you could be badly burned. This spray
can happen if the tank is nearly full, and is more
likely in hot weather. Open the fuel cap slowly and
wait for any hiss noise to stop. Then unscrew the
cap all the way.
Be careful not to spill fuel. Do not top off or overfill the
tank and wait a few seconds after you have finished
pumping before removing the nozzle. Clean fuel from
painted surfaces as soon as possible. See Washing
Your Vehicle on page 6‑102.
When replacing the fuel cap, turn it to the right
(clockwise) until it clicks. Make sure the cap is fully
installed. The diagnostic system can determine if the
fuel cap has been left off or improperly installed. This
would allow fuel to evaporate into the atmosphere. See
Malfunction Indicator Lamp on page 4‑37. The TIGHTEN GAS CAP message displays on the
Driver Information Center (DIC) if the fuel cap is not
properly installed.
{WARNING:
If a fire starts while you are refueling, do not
remove the nozzle. Shut off the flow of fuel by
shutting off the pump or by notifying the station
attendant. Leave the area immediately.
Notice: If you need a new fuel cap, be sure to get
the right type. Your dealer can get one for you.
If you get the wrong type, it may not fit properly.
This may cause the malfunction indicator lamp to
light and may damage the fuel tank and emissions
system. See Malfunction Indicator Lamp
on
page 4‑37.
6-10
Page 310 of 450
Black plate (24,1)Buick Lucerne Owner Manual - 2011
To reinstall the cover:1. Align the two hinges located on the inboard side of the cover.
2. Push the cover slightly down and towards the engine to engage the tabs in the hinges and align
the two screws.
3. Tighten the two screws on the top of the engine air cleaner/filter cover.
{WARNING:
Operating the engine with the air cleaner/filter off
can cause you or others to be burned. The air
cleaner not only cleans the air; it helps to stop
flames if the engine backfires. Use caution when
working on the engine and do not drive with the
air cleaner/filter off.
Notice: If the air cleaner/filter is off, dirt can easily
get into the engine, which could damage it. Always
have the air cleaner/filter in place when you are
driving.
Automatic Transmission Fluid
When to Check and Change Automatic
Transmission Fluid
A good time to check the automatic transmission fluid
level is when the engine oil is changed.
Change the fluid and filter at the intervals listed in
Scheduled Maintenance
on page 7‑3and be sure
to use the transmission fluid listed in Recommended
Fluids and Lubricants on page 7‑8.
How to Check Automatic Transmission
Fluid (3.9L Engine)
Because this operation can be a little difficult, you
may choose to have this done at the dealer service
department.
If you do it yourself, be sure to follow all the instructions
here, or you could get a false reading on the dipstick.
Notice: Too much or too little fluid can damage
the transmission. Too much can mean that some
of the fluid could come out and fall on hot engine
parts or exhaust system parts, starting a fire. Too
little fluid could cause the transmission to overheat.
Be sure to get an accurate reading if checking the
transmission fluid.
6-24
Page 317 of 450
Black plate (31,1)Buick Lucerne Owner Manual - 2011
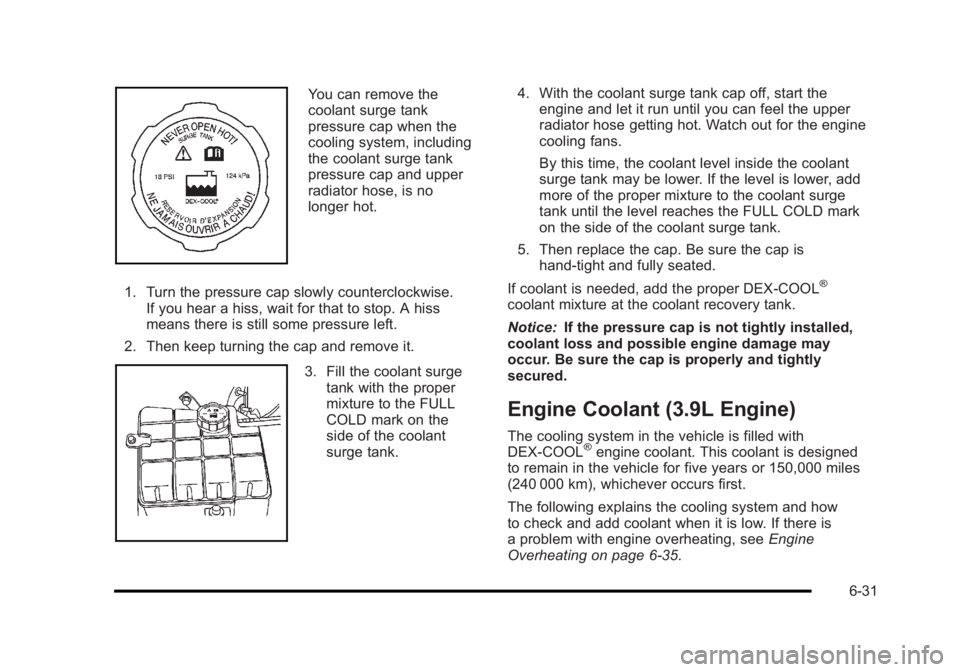
You can remove the
coolant surge tank
pressure cap when the
cooling system, including
the coolant surge tank
pressure cap and upper
radiator hose, is no
longer hot.
1. Turn the pressure cap slowly counterclockwise. If you hear a hiss, wait for that to stop. A hiss
means there is still some pressure left.
2. Then keep turning the cap and remove it.
3. Fill the coolant surge tank with the proper
mixture to the FULL
COLD mark on the
side of the coolant
surge tank. 4. With the coolant surge tank cap off, start the
engine and let it run until you can feel the upper
radiator hose getting hot. Watch out for the engine
cooling fans.
By this time, the coolant level inside the coolant
surge tank may be lower. If the level is lower, add
more of the proper mixture to the coolant surge
tank until the level reaches the FULL COLD mark
on the side of the coolant surge tank.
5. Then replace the cap. Be sure the cap is hand‐tight and fully seated.
If coolant is needed, add the proper DEX-COOL
®
coolant mixture at the coolant recovery tank.
Notice: If the pressure cap is not tightly installed,
coolant loss and possible engine damage may
occur. Be sure the cap is properly and tightly
secured.
Engine Coolant (3.9L Engine)
The cooling system in the vehicle is filled with
DEX-COOL®engine coolant. This coolant is designed
to remain in the vehicle for five years or 150,000 miles
(240 000 km), whichever occurs first.
The following explains the cooling system and how
to check and add coolant when it is low. If there is
a problem with engine overheating, see Engine
Overheating on page 6‑35.
6-31
Page 320 of 450
Black plate (34,1)Buick Lucerne Owner Manual - 2011
How to Add Coolant to the Radiator
{WARNING:
An electric engine cooling fan under the hood can
start up even when the engine is not running and
can cause injury. Keep hands, clothing, and tools
away from any underhood electric fan.
{WARNING:
Steam and scalding liquids from a hot cooling
system can blow out and burn you badly. They
are under pressure, and if you turn the surge tank
pressure cap—even a little —they can come
out at high speed. Never turn the cap when the
cooling system, including the surge tank pressure
cap, is hot. Wait for the cooling system and surge
tank pressure cap to cool if you ever have to turn
the pressure cap. If coolant is needed, add the proper mixture directly to
the radiator, but be sure the cooling system is cool
before this is done.
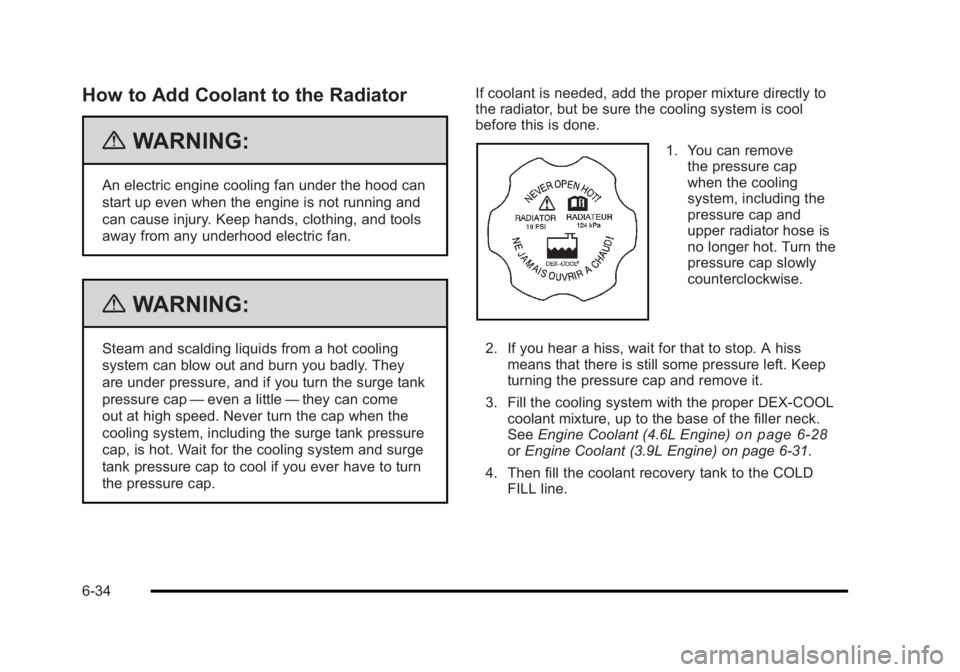
1. You can remove
the pressure cap
when the cooling
system, including the
pressure cap and
upper radiator hose is
no longer hot. Turn the
pressure cap slowly
counterclockwise.
2. If you hear a hiss, wait for that to stop. A hiss means that there is still some pressure left. Keep
turning the pressure cap and remove it.
3. Fill the cooling system with the proper DEX-COOL coolant mixture, up to the base of the filler neck.
See Engine Coolant (4.6L Engine)
on page 6‑28orEngine Coolant (3.9L Engine) on page 6‑31.
4. Then fill the coolant recovery tank to the COLD FILL line.
6-34