ABS BUICK PARK AVENUE 1994 Owners Manual
[x] Cancel search | Manufacturer: BUICK, Model Year: 1994, Model line: PARK AVENUE, Model: BUICK PARK AVENUE 1994Pages: 324, PDF Size: 17.01 MB
Page 116 of 324
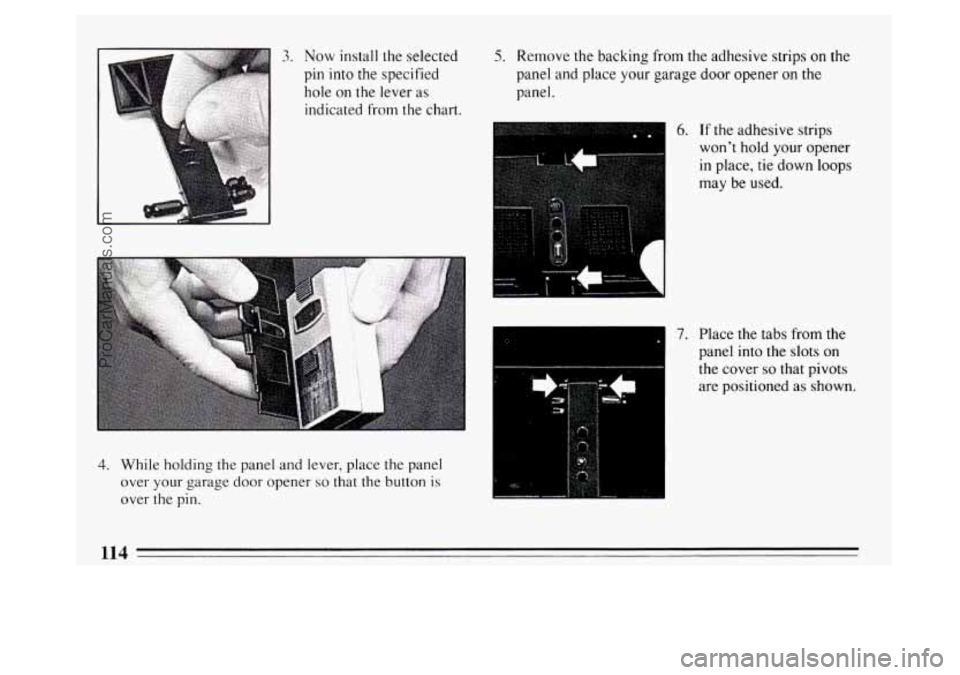
3. Now install the selected
pin into the specified
hole on the lever as
indicated from the chart.
4. While holding the panel and lever, place the panel
over your garage door opener
so that the button is
over the pin.
5. Remove the backing from the adhesive strips on the
panel and place your garage door opener on the
panel.
6. If the adhesive strips
won't hold your opener
in place, tie down loops
may be used.
7. Place the tabs from the
panel into the slots on
the cover
so that pivots
are positioned
as shown.
114
ProCarManuals.com
Page 169 of 324
Anti-Lock Brakes (ABS)
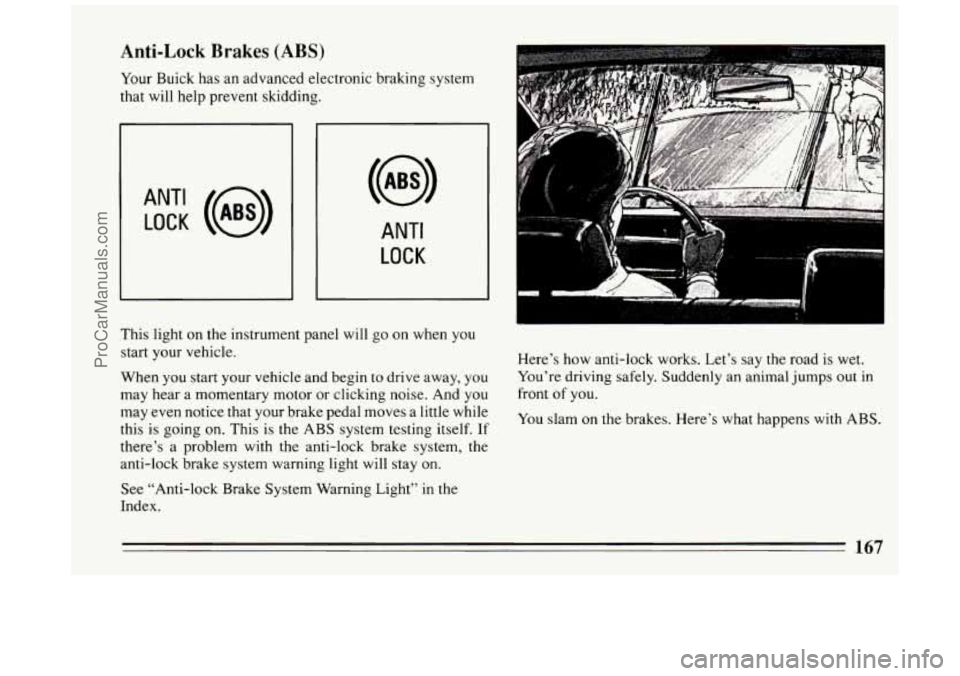
Your Buick has an advanced electronic braking system
that will help prevent skidding.
ANT‘ LOCK (@)
ANTI
LOCK
This light on the instrument panel will go on when you
start your vehicle.
When you start your vehicle and begin to drive away, you
may hear a momentary motor or clicking noise. And you
may even notice that your brake pedal moves a little while
this is going
on. This is the ABS system testing itself. If
there’s a problem with the anti-lock brake system, the
anti-lock brake system warning light will stay on.
See “Anti-lock Brake System Warning Light”
in the
Index. Here’s how
anti-lock works. Let’s say the road is wet.
You’re driving safely. Suddenly an animal jumps out in
front of you.
You slam
on the brakes. Here’s what happens with ABS.
167
ProCarManuals.com
Page 176 of 324
Skidding
In a skid, a driver can lose control of the vehicle.
Defensive drivers avoid most skids by taking reasonable
care suited to existing conditions, and by not
“overdriving” those conditions. But skids are always
possible.
The three types
of skids correspond to your Buick’s
three control systems. In the braking skid your wheels
aren’t rolling. In the steering or cornering skid, too
much speed or steering in a curve causes tires
to slip and
lose cornering force. And in the acceleration skid too
much throttle causes the driving wheels to spin.
A cornering skid is best handled by easing your foot off”
the accelerator pedal.
If you have the traction control system, remember: It
helps avoid only the acceleration skid.
If you do not have traction control, or if the system is
off, then an acceleration skid is also best handled by
easing your foot off the accelerator pedal.
If your vehicle starts
to slide, ease your foot off the
accelerator pedal and quickly steer the way you want the
vehicle
to go. If you start steering quickly enough, your
vehicle may straighten out. Always be ready for a
second skid if it occurs. Of
course, traction is reduced when water, snow, ice,
gravel, or other material is on the road. For safety, you’ll
want to slow down and adjust your driving
to these
conditions. It is important to slow down on slippery
surfaces because stopping distance will be longer and
vehicle control more limited.
While driving
on a surface with reduced traction, try
your best to avoid sudden steering, acceleration, or
braking (including engine braking by shifting to a lower
gear). Any sudden changes could c’ause the tires to slide.
You may not realize the surface is slippery until
your
vehicle is skidding. Learn to recognize warning clues --
such as enough water, ice or packed snow on the road to
make a “mirrored surface”
-- and slow down when you
have any doubt.
Remember: Any anti-lock braking system
(ABS) helps
avoid only the braking skid.
174
ProCarManuals.com
Page 195 of 324
Turn Signals When Towing a Trailer
When you tow a trailer, your vehicle has to have a
different turn signal flasher and extra wiring. The green
arrows on your instrument panel
will flash whenever
you signal a turn or lane change. Properly hooked up,
the trailer lights
will also flash, telling other drivers
you’re about to turn, change lanes or stop.
When towing a trailer, the green arrows on your
instrument panel will flash for turns even
if the bulbs on
the trailer are burned out. Thus, you may
think drivers
behind you are seeing your signal when they are not. It’s
important to check occasionally to be sure the trailer
bulbs are still working.
Your vehicle has bulb warning lights. When you plug
trailer lights into your vehicle’s lighting system, its bulb
warning lights may not
let you know if one of your
lights goes out.
So, when you have trailer lights plugged
in, be sure to check your vehicle and trailer lights from
time to time to be sure they’re all working. Once you
disconnect the trailer lights, the bulb warning lights
again can tell you
if one of your vehicle lights is out.
Driving On Grades
Reduce speed and shift to a lower gear before you start
down a long or steep downgrade. If you don’t shift down,
you might have to use your brakes
so much that
they would get hot and no longer work well.
On a long uphill grade, shift down to “D or 3” (Drive)
and reduce your speed to around
45 mph (70 km/h) to
reduce the possibility of engine and transaxle
overheating.
Parking on Hills
You really should not park your vehicle, with a trailer
attached,
on a hill. If something goes wrong, your rig
could start to move. People can be injured, and both
your vehicle and the trailer can be damaged.
But
if you ever have to park your rig on a hill, here’s
how
to do it:
1. Apply your regular brakes, but don’t shift into “P”
(Park) yet.
2. Have someone place chocks under the trailer wheels.
3. When the wheel chocks are in place, release the
regular brakes until the chocks absorb the load.
4. Reapply the regular brakes. Then apply your parking
brake, and the shift to
“P” (Park).
5. Release the regular brakes.
193
ProCarManuals.com
Page 260 of 324
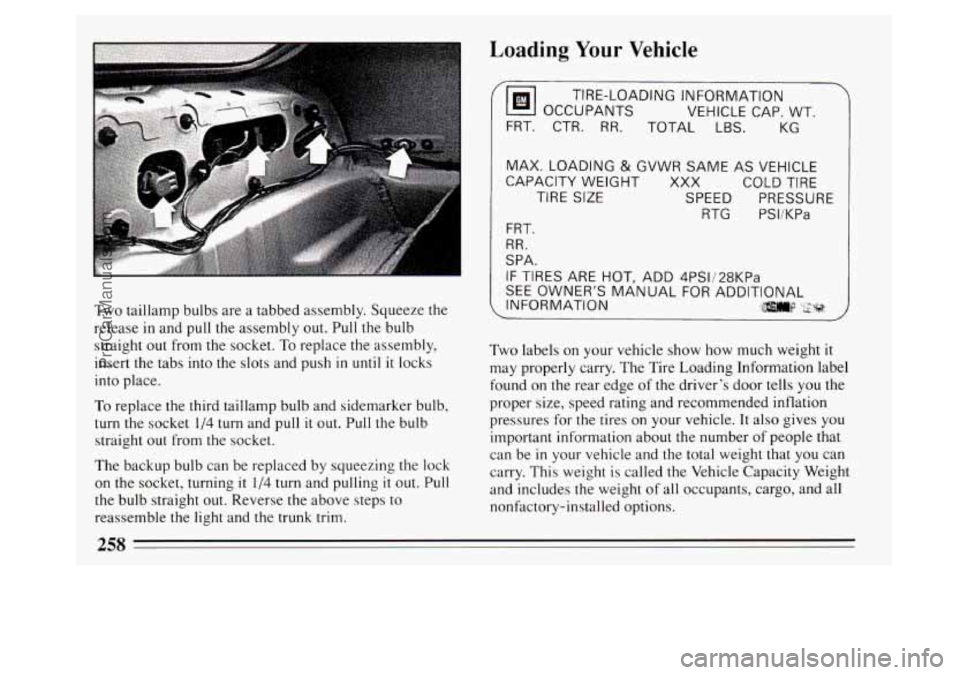
Two taillamp bulbs are a tabbed assembly. Squeeze the
release
in and pull the assembly out. Pull the bulb
straight out from the socket. To replace the assembly,
insert the tabs into the slots and push
in until it locks
into place.
To replace the third taillamp bulb and sidemarker bulb,
turn the socket 1/4 turn and pull it out. Pull the bulb
straight out from the socket.
The backup bulb can be replaced by squeezing the lock
on the socket, turning it
1/4 turn and pulling it out. Pull
the bulb straight out. Reverse the above steps to
reassemble the light and the trunk trim.
Loading Your Vehicle
%I OCCUPANTS
VEHICLE CAP. WT.
TIRE-LOADING INFORMATION
FRT. CTR.
RR. TOTAL LBS. KG
MAX. LOADING
& GVWR SAME AS VEHICLE
CAPACITY WEIGHT XXX
COLD TIRE
TIRE
SIZE SPEED PRESSURE
RTG PSliKPa
FRT.
RR.
SPA.
IF TIRES ARE HOT, ADD 4PS1/28KPa
SEE OWNER'S MANUAL FOR ADDITIONAL
( INFORMATION \]]!mlp ,j;;f&ip
Two labels on your vehicle show how much weight it
may properly carry. The Tire Loading Information label
found on the rear edge of the driver's door tells
you the
proper size, speed rating and recommended inflation
pressures for the tires on your vehicle.
It also gives you
important information about the number of people that
can be
in your vehicle and the total weight that you can
carry. This weight is called the Vehicle Capacity Weight
and includes the weight
of all occupants, cargo, and all
nonfactory-installed options.
ProCarManuals.com
Page 279 of 324
Your vehicle has an air bag system. Before attempting to
add anything electrical to your Buick, see “Servicing
Your Air Bag-Equipped Buick” in the Index.
Fuses and Circuit Breakers
The wiring circuits in your car are protected from short
circuits by a combination of fuses, circuit breakers and
fusible thermal links in the wiring itself.
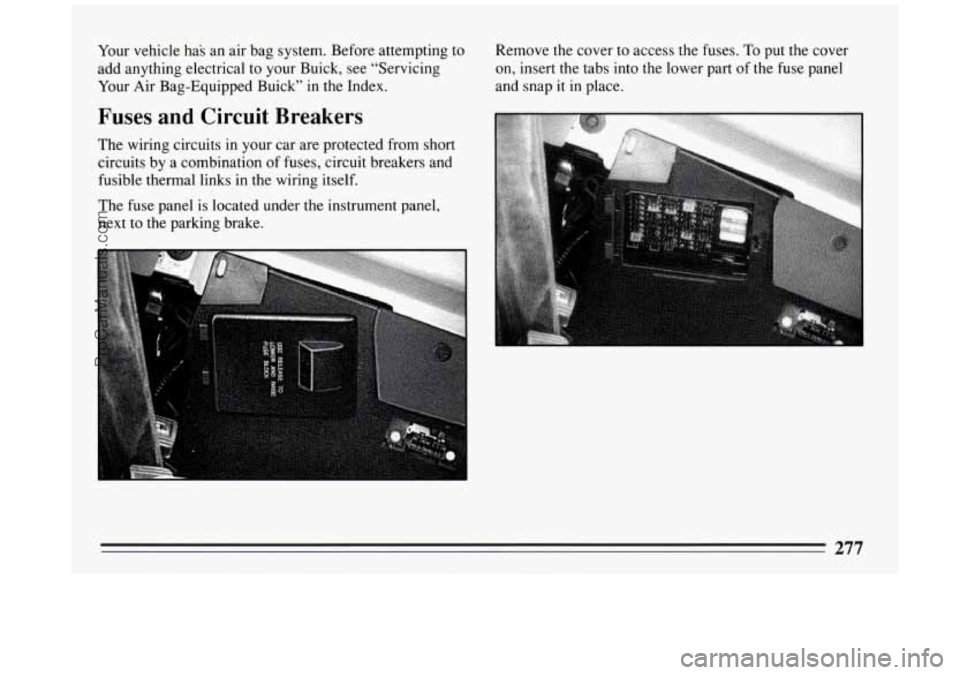
The fuse panel is located under the instrument panel,
next to the parking brake.
L
Remove the cover to access the fuses. To put the cover
on, insert the tabs into the lower part of the fuse panel
and snap it in place.
277
ProCarManuals.com
Page 281 of 324
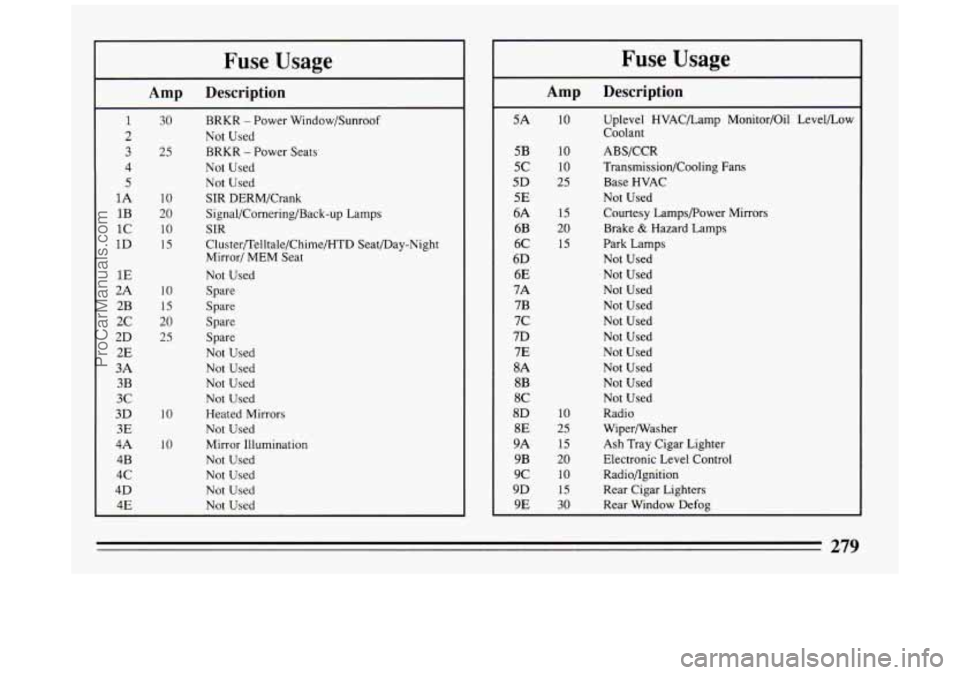
Fuse Usage
Amp Description
1
2
3
4
5
1A
1B
1c
1D
1E
2A
2B
2c
2D 2E
3A 3B
3c
3D 3E
4A 4B
4c
4D
4E
10
20
10
30 BRKR - Power Window/Sunroof
25 BRKR
- Power Seats
Not Used
Not Used
Not Used
SIR DERM/Crank
Signal/Cornering/Back-up Lamps
SIR
15
10
15
20
25
10
10
:ht Cluster/Telltale/Chime/HTD Seat/Day-Nig
Mirror/ MEM Seat
Not Used
Spare
Spare
Spare
Spare
Not Used
Not Used
Not Used
Not Used
Heated Mirrors
Not Used
Mirror Illumination
Not Used
Not Used
Not Used
Not Used
Amp Description
5A
5B
5c
5D 5E
6A
6B
6C
6D
6E
7A
7B
7c
7D
7E
8A 8B
8C
8D
8E
9A
9B
9c
9D
9E
10
10
10
25
15
20
15
10
25
15
20
10
15
30
Uplevel HVAC/Lamp Monitor/Oil Level/Low
Coolant
ABS/CCR
Transmission/Cooling Fans
Base HVAC
Not Used
Courtesy Lamps/Power Mirrors
Brake
& Hazard Lamps
Park Lamps
Not Used
Not Used
Not Used Not Used
Not Used
Not Used Not Used
Not Used
Not Used
Not Used Radio
Wipermasher
Ash Tray Cigar Lighter
Electronic Level Control
Radiohgnition
Rear Cigar Lighters
Rear Window Defog
279
ProCarManuals.com