spare tire BUICK PARK AVENUE 1997 Owners Manual
[x] Cancel search | Manufacturer: BUICK, Model Year: 1997, Model line: PARK AVENUE, Model: BUICK PARK AVENUE 1997Pages: 420, PDF Size: 21.93 MB
Page 229 of 420
Section 5 Problems on the Road
Here you’ll find what to do about some problems that can occur on the road.
5-2 Hazard Warning Flashers
5-2 Other Warning Devices
5-3 Jump Starting
5-7 Towing Your Vehicle
5- 12 Engine Overheating
5-22
5-22
5-32
5-33 If a Tire Goes Flat
Changing a Flat Tire
Compact Spare Tire
If You’re Stuck: In Sand, Mud, Ice or Snow
ProCarManuals.com
Page 251 of 420
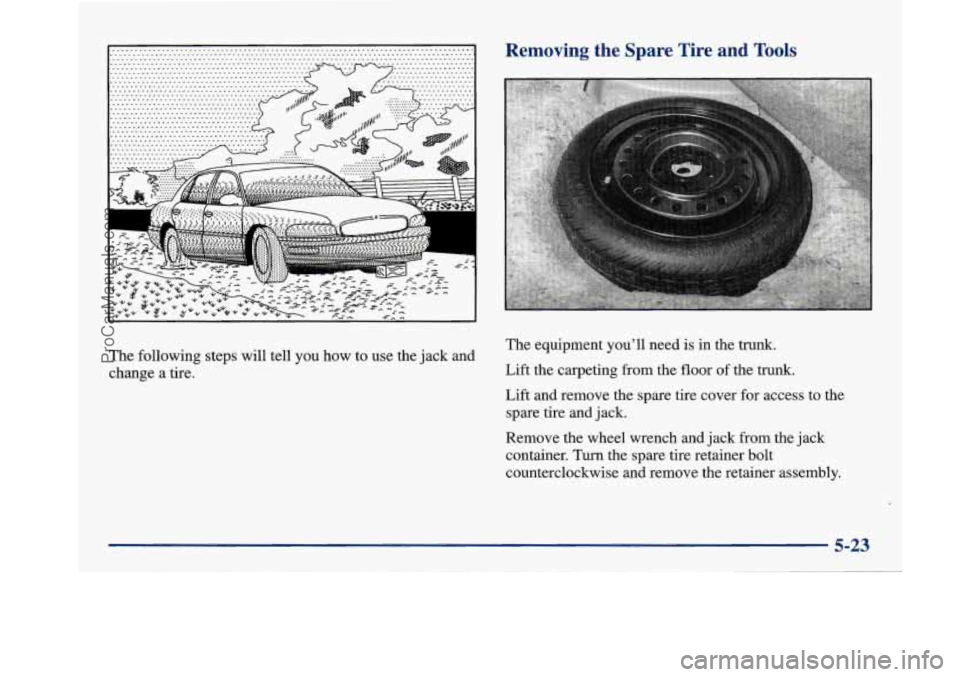
The following steps will tell you how to use the jack and
change a tire.
Removing the Spare Tire and Tools
The equipment you’ll need is in the trunk.
Lift the carpeting from the floor of the trunk.
Lift and remove the spare tire cover for access to the
spare tire and jack.
Remove the wheel wrench and jack from the jack
container. Turn the spare tire retainer bolt
counterclockwise and remove the retainer assembly.
5-23
ProCarManuals.com
Page 252 of 420
I
A
Remove the spare tire from the trunk. See “Compact
Spare Tire” later in this section for more information
about the compact spare.
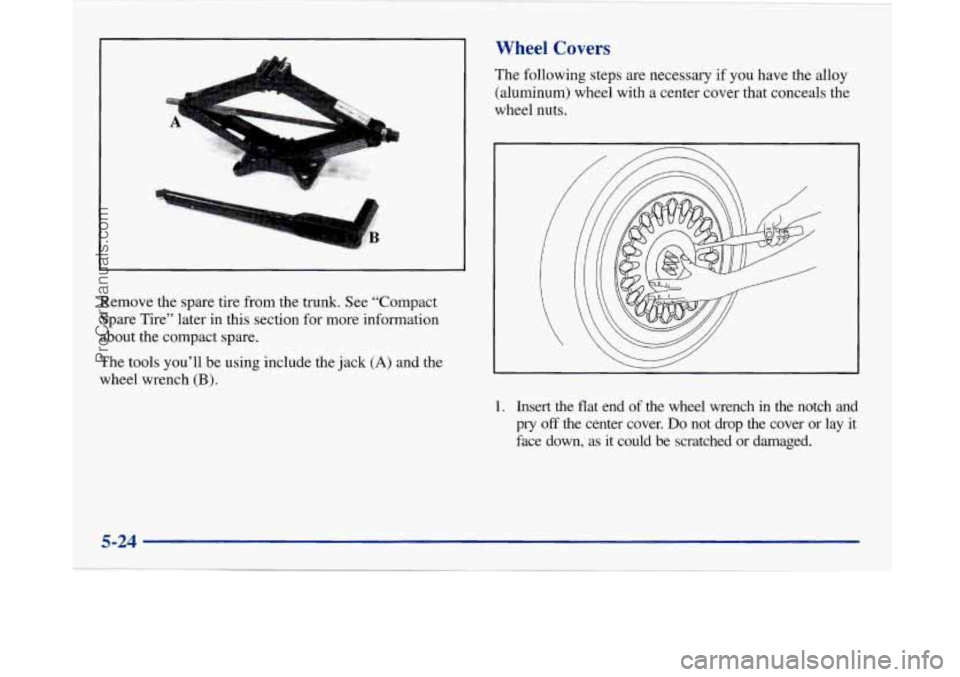
The tools you’ll be using include the jack
(A) and the
wheel wrench
(B).
Wheel Covers
The following steps are necessary if you have the alloy
(aluminum) wheel with a center cover that conceals the
wheel nuts.
1. Insert the flat end of the wheel wrench in the notch and
pry
off the center cover. Do not drop the cover or lay it
face down, as it could be scratched or damaged.
5-24
ProCarManuals.com
Page 253 of 420
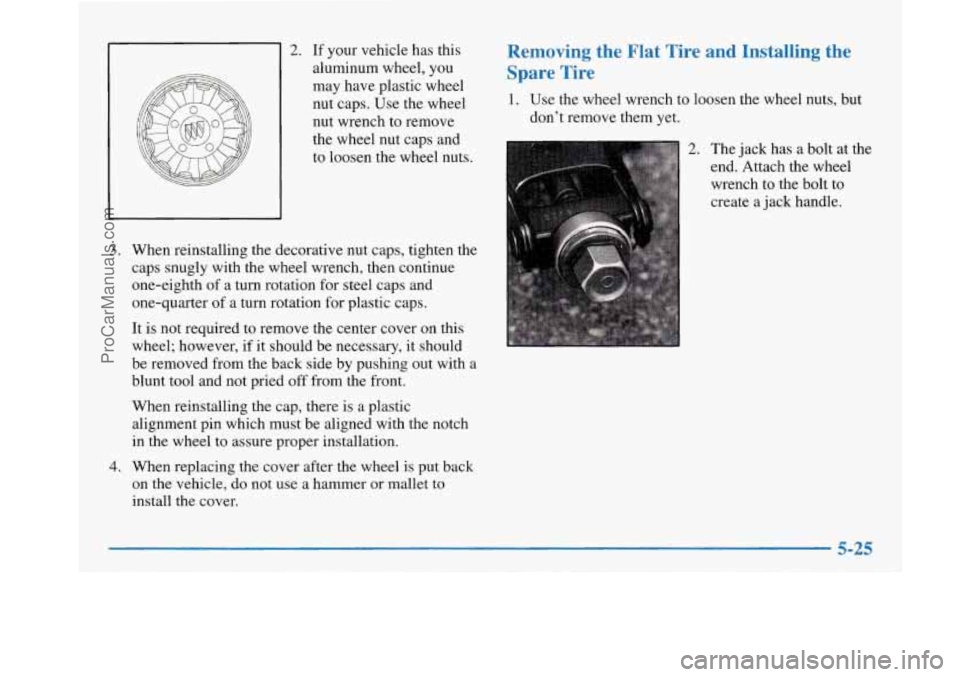
2. If your vehicle has this
aluminum wheel, you
may have plastic wheel
nut caps. Use the wheel
nut wrench to remove
the wheel nut caps and
to loosen the wheel nuts.
3. When reinstalling the decorative nut caps, tighten the
caps snugly with the wheel wrench, then continue
one-eighth
of a turn rotation for steel caps and
one-quarter of a turn rotation for plastic caps.
It
is not required to remove the center cover on this
wheel; however, if it should be necessary, it should
be removed from the back side by pushing out with a
blunt tool and not pried
off from the front.
When reinstalling the cap, there
is a plastic
alignment pin which must be aligned with the notch
in the wheel to assure proper installation.
4. When replacing the cover after the wheel is put back
on the vehicle, do not use
a hammer or mallet to
install the cover.
Removing the Flat Tire and Installing the
Spare Tire
1. Use the wheel wrench to loosen the wheel nuts, but
don’t remove them yet.
2. The jack has a bolt at the
end. Attach the wheel
wrench to the bolt to
create a jack handle.
5-25
ProCarManuals.com
Page 254 of 420
(28 CM) A I
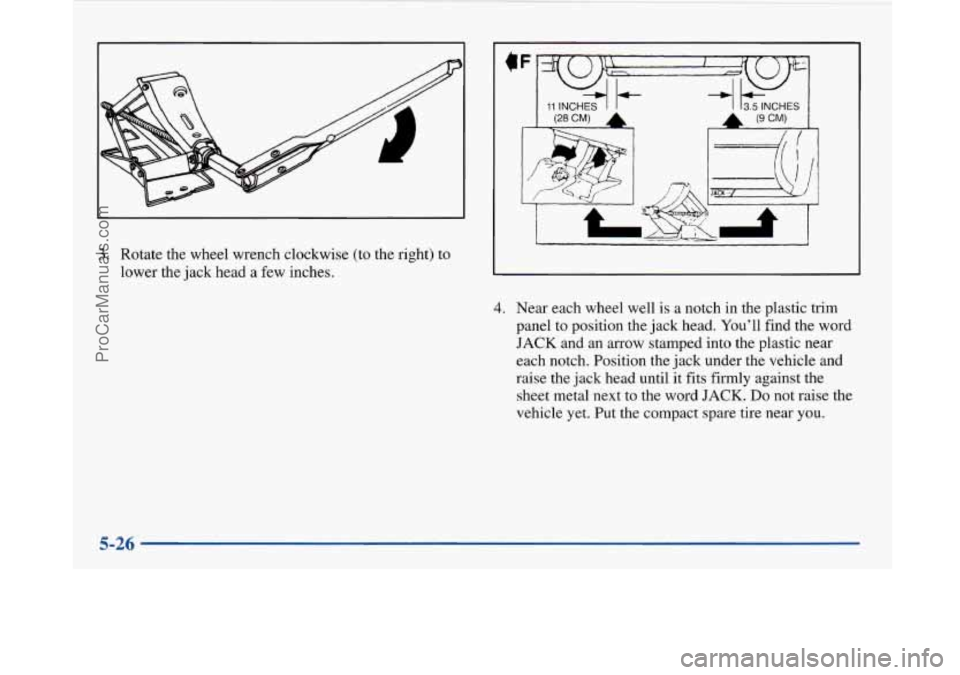
3. Rotate the wheel wrench clockwise (to the right) to
lower the jack head a few inches.
4. Near each wheel well is a notch in the plastic trim
panel to position the jack head. You’ll find the word
JACK and an arrow stamped into the plastic near
each notch. Position the jack under the vehicle and
raise the jack head until it fits firmly against the
sheet metal next to the word
JACK. Do not raise the
vehicle yet. Put the compact spare tire near
you.
5-26
ProCarManuals.com
Page 255 of 420
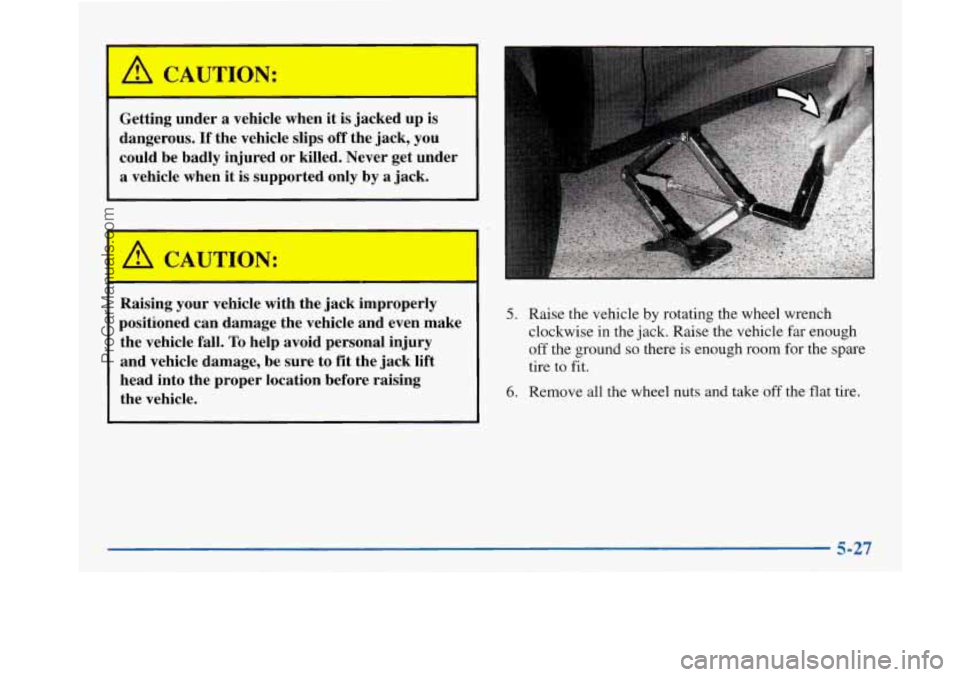
Getting under a vehicle when it is jacked up is
dangerous.
If the vehicle slips off the jack, you
could be badly injured
or killed. Never get under
a vehicle when it is supported only by a jack.
Raising
your vehicle with the jack improperly
positioned can damage the vehicle and even make
the vehicle fall.
To help avoid personal injury
and vehicle damage, be sure to
fit the jack lift
head into the proper location before raising
the vehicle.
5. Raise the vehicle by rotating the wheel wrench
clockwise in the jack. Raise the vehicle
far enough
off the ground
so there is enough room for the spare
tire to fit.
6. Remove all the wheel nuts and take off the flat tire.
5-27
ProCarManuals.com
Page 258 of 420
NOTICE:
Improperly tightened wheel nuts can lead to
brake pulsation and rotor damage.
To avoid
expensive brake repairs, evenly tighten the wheel
nuts in the proper sequence and to the proper
torque specification.
Don’t try to put a wheel cover on your compact spare
tire. It won’t fit. Store the wheel cover
in the trunk
until you have the flat tire repaired or replaced.
NOTICE:
Wheel covers won’t fit on your compact spare. If
you try to put a wheel cover on your compact
spare, you could damage the cover or the spare.
Storing the Flat Tire and Tools
L!b, CAUTION: I
Storing a jack, a tire or other equipment in the
passenger compartment
of the vehicle could
cause injury. In
a sudden stop or collision, loose
equipment could strike someone. Store all these
in the proper place.
After you’ve put the compact spare tire on your vehicle,
you’ll need
to store the flat tire in your trunk. Use the
following procedure to secure the flat tire in the trunk.
5-30
~
ProCarManuals.com
Page 259 of 420
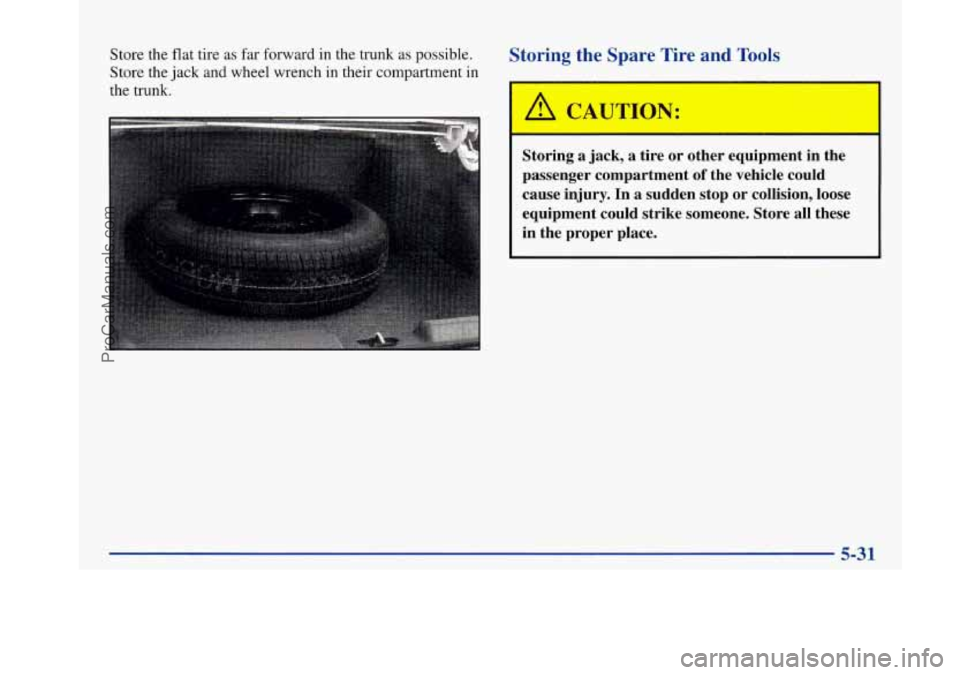
Store the flat tire as far forward in the trunk as possible.
Store the jack and wheel wrench in their compartment in
the trunk. Storing the Spare Tire and Tools
A CAUTION:
Storing a jack, a tire or other equipment in the
passenger compartment
of the vehicle could
cause injury. In a sudden stop or collision,
loose
equipment could strike someone. Store all these
in the proper place.
ProCarManuals.com
Page 260 of 420
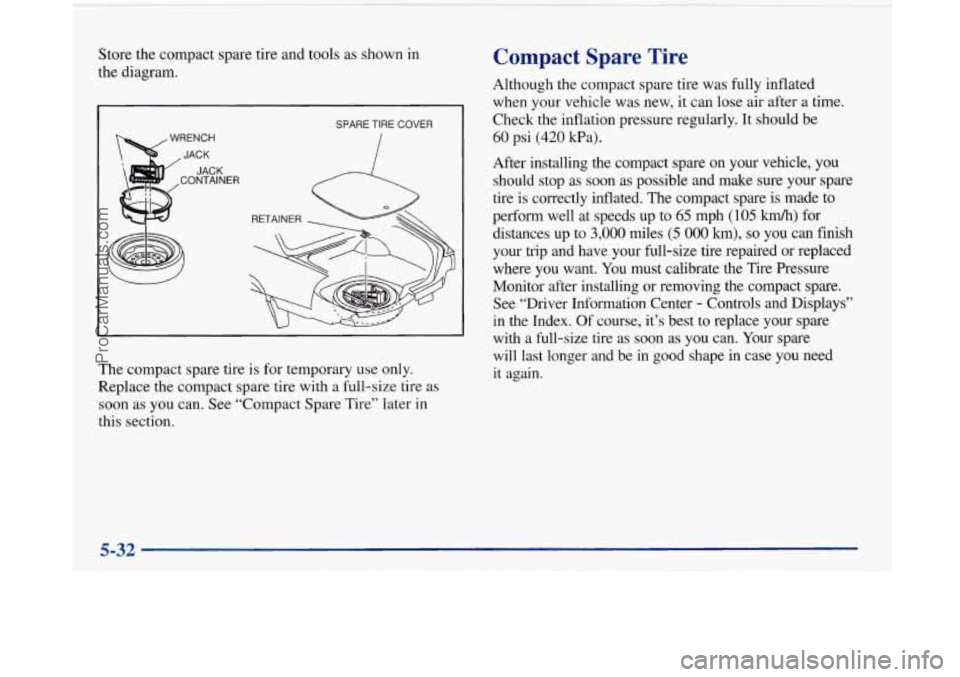
Store the compact spare tire and tools as shown in
the diagram.
A
SPARE TIRE COVER
The compact spare tire is for temporary use only.
Replace the compact spare tire with a full-size tire as
soon as you can. See “Compact Spare Tire” later in
this section.
Compact Spare Tire
Although the compact spare tire was fully inflated
when your vehicle was new,
it can lose air after a time.
Check the inflation pressure regularly. It should be
60 psi (420 Wa).
After installing the compact spare on your vehicle, you
should stop as soon as possible and make sure your spare
tire
is correctly inflated. The compact spare is made to
perform well at speeds up to
65 mph (105 km/h) for
distances up to
3,000 miles (5 000 km), so you can finish
your trip and have your full-size tire repaired or replaced
where you want. You must calibrate the Tire Pressure
Monitor after installing or removing the compact spare.
See “Driver Information Center
- Controls and Displays”
in the Index. Of course, it’s best to replace your spare
with a full-size tire as soon as you can. Your spare
will last longer and be in good shape
in case you need
it again.
5-32
ProCarManuals.com
Page 261 of 420
NOTICE:
When the compact spare is installed, don’t take
your vehicle through an automatic car wash with
guide rails. The compact spare can get caught on
the rails. That can damage the tire and wheel,
and maybe other parts
of your vehicle.
Don’t use your compact spare on other vehicles.
And don’t mix your compact spare tire or wheel with
other wheels or tires. They won’t fit. Keep your spare
tire and its wheel together.
If You’re Stuck: In Sand, Mud, Ice
or
Snow
What you don’t want to do when your vehicle is stuck is
to spin your wheels too fast. The method known as
“rocking” can help you get out when you’re stuck, but
you must use caution.
I NOTICE: I
Tire chains won’t fit your compact spare. Using
them can damage your vehicle and can damage
the chains too. Don’t use tire chains on your
compact spare.
If you let your tires spin at high speed, they can
explode, and you or others could be injured. And,
the transaxle or other parts
of the vehicle can
overheat. That could cause an engine
compartment fire or other damage. When you’re
stuck, spin the wheels as little as possible. Don’t
spin the wheels above
35 mph (55 km/h) as shown
on the speedometer.
ProCarManuals.com