horn BUICK PARK AVENUE 2003 Owner's Manual
[x] Cancel search | Manufacturer: BUICK, Model Year: 2003, Model line: PARK AVENUE, Model: BUICK PARK AVENUE 2003Pages: 372, PDF Size: 2.8 MB
Page 70 of 372
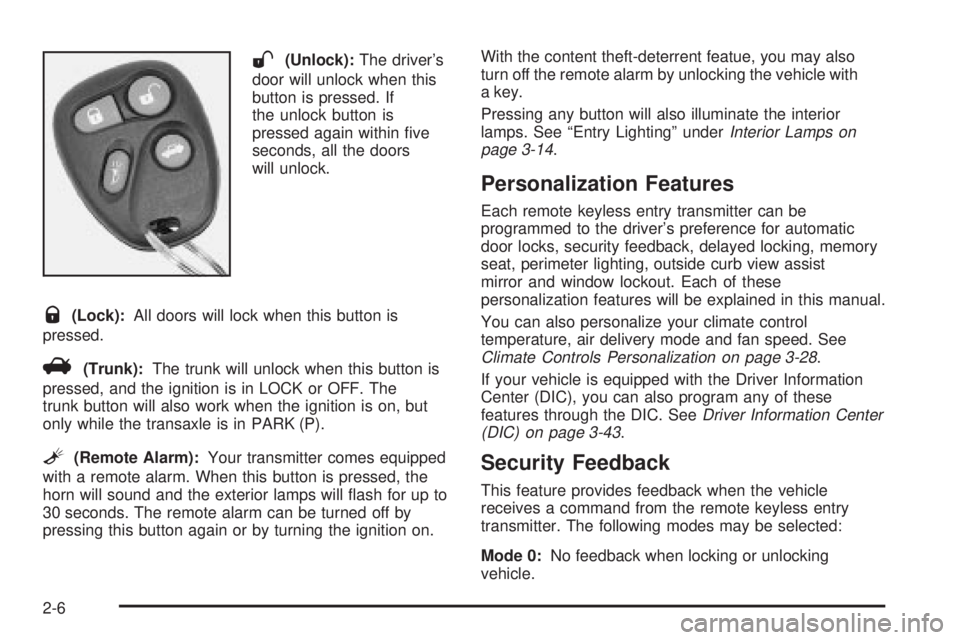
W(Unlock):The driver's
door will unlock when this
button is pressed. If
the unlock button is
pressed again within ®ve
seconds, all the doors
will unlock.
Q(Lock):All doors will lock when this button is
pressed.
V(Trunk):The trunk will unlock when this button is
pressed, and the ignition is in LOCK or OFF. The
trunk button will also work when the ignition is on, but
only while the transaxle is in PARK (P).
L(Remote Alarm):Your transmitter comes equipped
with a remote alarm. When this button is pressed, the
horn will sound and the exterior lamps will ¯ash for up to
30 seconds. The remote alarm can be turned off by
pressing this button again or by turning the ignition on.With the content theft-deterrent featue, you may also
turn off the remote alarm by unlocking the vehicle with
a key.
Pressing any button will also illuminate the interior
lamps. See ªEntry Lightingº under
Interior Lamps on
page 3-14.
Personalization Features
Each remote keyless entry transmitter can be
programmed to the driver's preference for automatic
door locks, security feedback, delayed locking, memory
seat, perimeter lighting, outside curb view assist
mirror and window lockout. Each of these
personalization features will be explained in this manual.
You can also personalize your climate control
temperature, air delivery mode and fan speed. See
Climate Controls Personalization on page 3-28.
If your vehicle is equipped with the Driver Information
Center (DIC), you can also program any of these
features through the DIC. See
Driver Information Center
(DIC) on page 3-43.
Security Feedback
This feature provides feedback when the vehicle
receives a command from the remote keyless entry
transmitter. The following modes may be selected:
Mode 0:No feedback when locking or unlocking
vehicle.
2-6
Page 71 of 372
Mode 1:No feedback when locking; exterior lamps
¯ash when unlocking vehicle.
Mode 2:Exterior lamps ¯ash when locking; no feedback
when unlocking vehicle.
Mode 3:Exterior lamps ¯ash when locking and when
unlocking vehicle.
Mode 4:Exterior lamps ¯ash and horn chirps when
locking; no feedback when unlocking vehicle.
Mode 5:Exterior lamps ¯ash and horn chirps when
locking; exterior lamps ¯ash when unlocking vehicle.
Each remote keyless entry transmitter can be
programmed to a different mode according to the user's
preference. To change to another mode do the
following:
1. Press and hold LOCK on the power door lock
switch on the driver's door throughout the
procedure.
2. Press the trunk button on the transmitter. The horn
will chirp and the transmitter will remain in its
current mode.
3. Press the trunk button again. Each time the trunk
button is pressed, the horn will chirp and the
transmitter will advance to the next mode.
4. Release the power door lock switch.If your vehicle is equipped with the Driver Information
Center (DIC), you can also program these features
through the DIC. See
Driver Information Center (DIC)
on page 3-43.
Theft-Deterrent System
The remote keyless entry transmitter will arm the
theft-deterrent system whenever the doors are closed
and you push the lock button when the ignition is off. It
will disarm the system when you push the unlock
button.
Matching Transmitter(s) to Your
Vehicle
Each remote keyless entry transmitter is coded to
prevent another transmitter from unlocking your vehicle.
If a transmitter is lost or stolen, a replacement can
be purchased through your dealer. Remember to bring
any remaining transmitters with you when you go to
your dealer. When the dealer matches the replacement
transmitter to your vehicle, any remaining transmitters
must also be matched. Once your dealer has coded the
new transmitter, the lost transmitter will not unlock
your vehicle. Each vehicle can have a maximum of four
transmitters matched to it.
See your dealer to match additional transmitters to your
vehicle.
2-7
Page 72 of 372
Battery Replacement
Under normal use, the battery in your remote keyless
entry transmitter should last about four years.
You can tell the battery is weak if the transmitter won't
work at the normal range in any location. If you have
to get close to your vehicle before the transmitter works,
it's probably time to change the battery.
Notice:When replacing the battery, use care not to
touch any of the circuitry. Static from your body
transferred to these surfaces may damage the
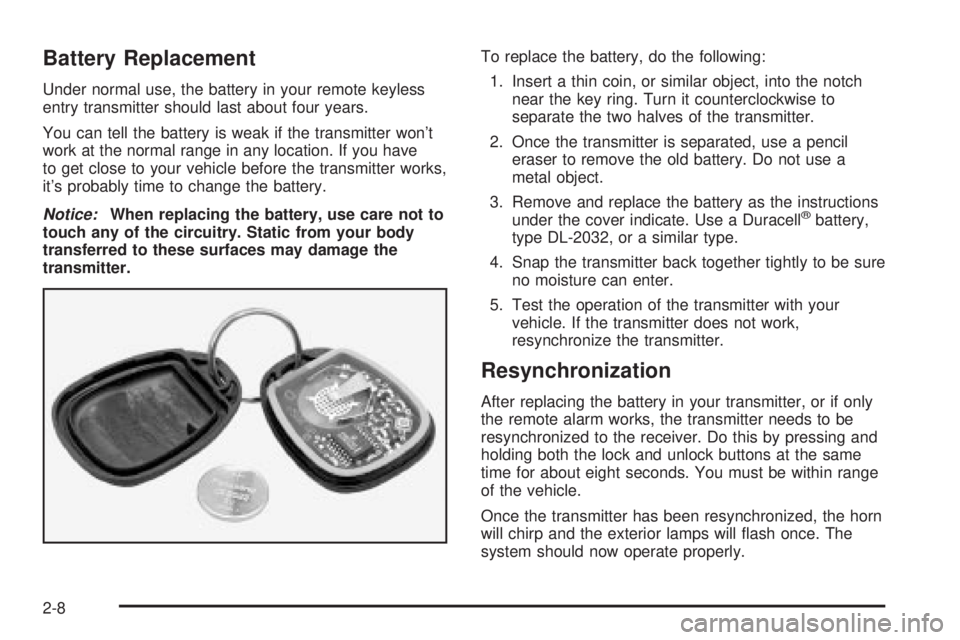
transmitter.To replace the battery, do the following:
1. Insert a thin coin, or similar object, into the notch
near the key ring. Turn it counterclockwise to
separate the two halves of the transmitter.
2. Once the transmitter is separated, use a pencil
eraser to remove the old battery. Do not use a
metal object.
3. Remove and replace the battery as the instructions
under the cover indicate. Use a Duracellžbattery,
type DL-2032, or a similar type.
4. Snap the transmitter back together tightly to be sure
no moisture can enter.
5. Test the operation of the transmitter with your
vehicle. If the transmitter does not work,
resynchronize the transmitter.
Resynchronization
After replacing the battery in your transmitter, or if only
the remote alarm works, the transmitter needs to be
resynchronized to the receiver. Do this by pressing and
holding both the lock and unlock buttons at the same
time for about eight seconds. You must be within range
of the vehicle.
Once the transmitter has been resynchronized, the horn
will chirp and the exterior lamps will ¯ash once. The
system should now operate properly.
2-8
Page 81 of 372
Sun Visors
Lighted Visor Vanity Mirror
If your vehicle has this feature, when you open the visor
vanity mirrors, the lamps turn on.
To block out glare, swing down the visors. The larger
sun visor can be removed from the center mount
and moved to the side, while the auxiliary sun visor
remains to block glare from the front.
The front side of the driver's sun visor also contains a
pocket for map storage.
Theft-Deterrent Systems
Vehicle theft is big business, especially in some cities.
Although your vehicle has a number of theft-deterrent
features, we know that nothing we put on it can make it
impossible to steal.
Content Theft-Deterrent
Your vehicle is equipped with a content theft-deterrent
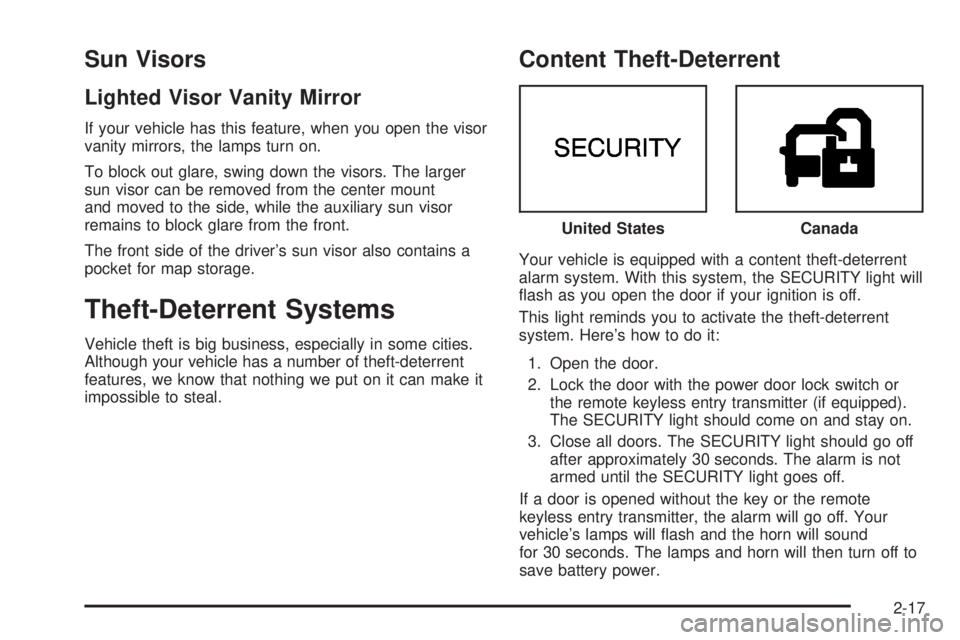
alarm system. With this system, the SECURITY light will
¯ash as you open the door if your ignition is off.
This light reminds you to activate the theft-deterrent
system. Here's how to do it:
1. Open the door.
2. Lock the door with the power door lock switch or
the remote keyless entry transmitter (if equipped).
The SECURITY light should come on and stay on.
3. Close all doors. The SECURITY light should go off
after approximately 30 seconds. The alarm is not
armed until the SECURITY light goes off.
If a door is opened without the key or the remote
keyless entry transmitter, the alarm will go off. Your
vehicle's lamps will ¯ash and the horn will sound
for 30 seconds. The lamps and horn will then turn off to
save battery power.United States
Canada
2-17
Page 82 of 372
Remember, the theft-deterrent system won't activate if
you lock the doors with a key or use the manual
door lock. It activates only if you use a power door lock
switch with the door open, or with the remote keyless
entry transmitter. You should also remember that
you can start your vehicle with the correct ignition key if
the alarm has been set off.
Here's how to avoid setting off the alarm by accident:
·If you don't want to activate the theft-deterrent
system, the vehicle should be locked with the door
key
afterthe doors are closed.
·Always unlock a door with a key, or use the remote
keyless entry transmitter. Unlocking a door any
other way will set off the alarm.
If you set off the alarm by accident, unlock any door
with your key. You can also turn off the alarm by
pressing the unlock button on the remote keyless entry
transmitter. The alarm won't stop if you try to unlock
a door any other way.
Testing the Alarm
The alarm can be tested by following these steps:
1. From inside the vehicle, roll down the driver's
window and open the driver's door.
2. Activate the system by locking the doors using the
power door lock switch while the door is open, or
using the remote keyless entry transmitter.
3. Get out of the car, close the door and wait for the
SECURITY light to go out.
4. Then reach in through the window, unlock the door
with the manual door lock and open the door. This
should set off the alarm.
If the alarm does not sound when it should, but the
vehicle's lamps ¯ash, check to see if the horn works.
The horn fuse may be blown. To replace the fuse,
see
Fuses and Circuit Breakers on page 5-87.
If the alarm does not sound or the vehicle's lamps do
not ¯ash, the vehicle should be serviced by an
authorized service center.
2-18
Page 113 of 372
Instrument Panel Overview...............................3-2
Hazard Warning Flashers................................3-4
Other Warning Devices...................................3-4
Horn.............................................................3-5
Tilt Wheel.....................................................3-5
Turn Signal/Multifunction Lever.........................3-5
Exterior Lamps.............................................3-12
Interior Lamps..............................................3-14
Head-Up Display (HUD).................................3-17
Ultrasonic Rear Parking Assist (URPA)............3-19
Accessory Power Outlets...............................3-21
Ashtrays and Cigarette Lighter........................3-22
Climate Controls............................................3-22
Dual Automatic Climate Control System...........3-22
Outlet Adjustment.........................................3-26
Passenger Compartment Air Filter...................3-27
Steering Wheel Climate Controls.....................3-28
Climate Controls Personalization.....................3-28
Warning Lights, Gages and Indicators.............3-29
Instrument Panel Cluster................................3-30
Speedometer and Odometer...........................3-32
Tachometer.................................................3-32
Safety Belt Reminder Light.............................3-33
Air Bag Readiness Light................................3-33
Battery Warning Light....................................3-34
Brake System Warning Light..........................3-34Anti-Lock Brake System Warning Light.............3-36
Traction Control System (TCS) Warning Light . . .3-36
Engine Coolant Temperature Gage..................3-37
Malfunction Indicator Lamp.............................3-37
Oil Pressure Light.........................................3-40
Security Light...............................................3-41
Cruise Control Light......................................3-41
Service Vehicle Soon Light............................3-41
Fuel Gage...................................................3-42
Driver Information Center (DIC).......................3-43
DIC Controls and Displays.............................3-43
DIC Warnings and Messages.........................3-45
DIC Vehicle Personalization............................3-46
Audio System(s).............................................3-51
Setting the Time...........................................3-52
Radio with Cassette......................................3-52
Radio with Cassette and CD..........................3-56
Trunk-Mounted CD Changer...........................3-62
Personal Choice Radio Controls......................3-65
Theft-Deterrent Feature..................................3-66
Audio Steering Wheel Controls.......................3-68
Understanding Radio Reception......................3-68
Care of Your Cassette Tape Player.................3-69
Care of Your CDs.........................................3-70
Care of Your CD Player................................3-70
Heated Backlite Antenna................................3-70
Section 3 Instrument Panel
3-1
Page 117 of 372
Horn
Press on the center area of the steering wheel to sound
the horn.
Tilt Wheel
A tilt wheel allows you to adjust the steering wheel
before you drive. You can also raise it to the highest
level to give your legs more room when you exit
and enter the vehicle.
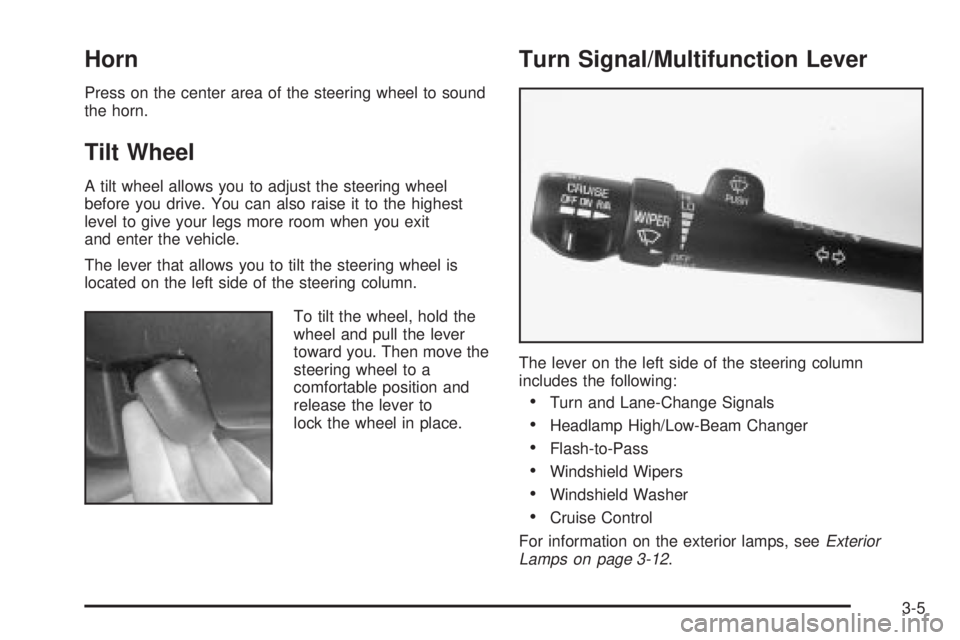
The lever that allows you to tilt the steering wheel is
located on the left side of the steering column.
To tilt the wheel, hold the
wheel and pull the lever
toward you. Then move the
steering wheel to a
comfortable position and
release the lever to
lock the wheel in place.
Turn Signal/Multifunction Lever
The lever on the left side of the steering column
includes the following:
·Turn and Lane-Change Signals
·Headlamp High/Low-Beam Changer
·Flash-to-Pass
·Windshield Wipers
·Windshield Washer
·Cruise Control
For information on the exterior lamps, see
Exterior
Lamps on page 3-12.
3-5
Page 127 of 372
Delayed Entry Lighting
When you open the door, the interior lamps will come on.
When you close the door with the ignition off, the interior
lamps will stay on for 25 seconds or until the ignition is
turned to an on position. Locking the doors with the power
door lock switch will override the delayed entry lighting
feature and the lamps will turn off right away.
Using the remote keyless entry transmitter to lock the
door will not cancel delayed lighting.
Theater Dimming
This feature allows for a three to ®ve-second fade out of
the courtesy lamps instead of immediate turn off.
Delayed Exit Lighting
With this feature, the interior lamps will come on for
25 seconds after you remove the key from the ignition.
This will give you time to ®nd the door handle or
lock switches.
Parade Dimming
This feature prohibits the dimming of your instrument
panel displays during daylight while your headlamps are
on. This feature operates with the light sensor for the
Twilight Sentinel
žand is fully automatic. When the light
sensor reads darkness outside, you will be able to
dim your instrument panel displays once again.
Perimeter Lighting
When the button with the unlock symbol on the remote
keyless entry transmitter is pressed, the DRL, parking
lamps and back-up lamps will come on if it is dark
enough outside.
This feature will only be activated when the security
feedback feature is programmed to be in Modes 1, 3
or 5 on the transmitter. Modes 0, 2 and 4 do not respond
with exterior lights ¯ashing when unlocking the vehicle
so perimeter lighting will not be active.
This feature can be programmed on or off for each
transmitter.
To turn the feature off do the following:
1. Press and hold LOCK on the driver's door
lock switch throughout this procedure. All doors will
lock.
2. Press the remote alarm button on the transmitter to
enter the programming mode. Perimeter lighting
remains on at this time and the horn will chirp two
times.
3. Press the remote alarm button on the transmitter
again. Perimeter lighting is disabled and the horn
will chirp one time.
4. Release the door lock switch. The perimeter lighting
feature is now off.
3-15
Page 128 of 372
To turn the feature on do the following:
1. Press and hold LOCK on the driver's door lock
switch throughout this procedure. All doors will
lock.
2. Press the remote alarm button on the transmitter to
enter the programming mode. Perimeter lighting
remains off at this time and the horn will chirp
one time.
3. Press the remote alarm button on the transmitter
again. Perimeter lighting is now enabled and the
horn will chirp two times.
4. Release the door lock switch. The perimeter lighting
feature is now on.
Perimeter lighting can also be activated through the
DIC. See
DIC Vehicle Personalization on page 3-46orDriver Information Center (DIC) on page 3-43.
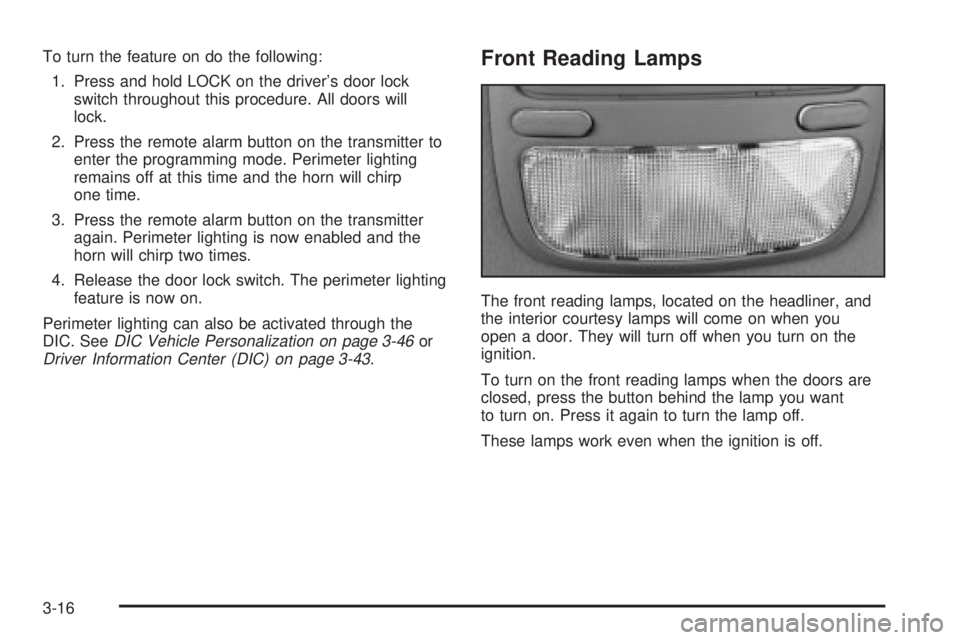
Front Reading Lamps
The front reading lamps, located on the headliner, and
the interior courtesy lamps will come on when you
open a door. They will turn off when you turn on the
ignition.
To turn on the front reading lamps when the doors are
closed, press the button behind the lamp you want
to turn on. Press it again to turn the lamp off.
These lamps work even when the ignition is off.
3-16
Page 160 of 372
4. Scroll through the following messages and feature
options:
·PARALLEL PARK ± OFF/ON
·AUTO DOOR LOCKS ± OFF/ON
·UNLOCK IN PARK ± OFF/ON
·WHICH DOORS ± ALL/DRIVER
·DELAYED LOCKING ± OFF/ON
·LOCK FEEDBACK ± OFF/ON
·LOCK FEEDBACK ± LIGHTS/LIGHTS + HORN
·UNLOCK FEEDBACK ± OFF/LIGHTS
·PERIMETER LIGHTS ± OFF/ON
·SEAT RECALL ± OFF/ON
·RECALL POSITION ± MEMORY/EXIT
·WINDOW LOCKOUT ± ALL PASS/REAR
If you would like to exit the selection mode without
moving through each of the personal choice features,
simply press a different button on the DIC or turn off the
ignition. However, personal choices you made may
not be retained.
If you happen to move past a selection you would like to
make a personal choice for, press the unlock button on
your transmitter or press the appropriate driver number
on the seat control. This will return you to the beginning of
the option feature programming mode.
A description of each feature programmable through the
DIC follows.
Outside Curb View Assist Mirror
The outside curb view assist mirror, which tilts the
passenger mirror while the vehicle is in REVERSE (R),
can be made active or inactive through the DIC.
When PARALLEL PARK-OFF-ON appears on the
display, use the ENG/MET button to toggle the arrow
between OFF and ON. When you have made your
choice, press the RESET button to record your
selection. For more information on this feature, see
Outside Curb View Assist Mirror on page 2-36.
Programmable Automatic Door Locks
The automatic door lock modes, when shifting in and out
of PARK (P), can be changed through the DIC. You
can change these modes using different selections from
the following DIC displays:
·AUTO DOOR LOCKS Ð OFF/ON
·UNLOCK IN PARK ÐOFF/ON
If you choose OFF for AUTO DOOR LOCKS, your door
locks will operate normally with no automatic feature.
If you choose ON for AUTO DOOR LOCKS, and ON for
UNLOCK IN PARK, your doors will lock every time
you shift out of PARK (P), and the doors will unlock
every time you stop and shift into PARK (P).
3-48