radio controls BUICK PARK AVENUE 2003 Owner's Manual
[x] Cancel search | Manufacturer: BUICK, Model Year: 2003, Model line: PARK AVENUE, Model: BUICK PARK AVENUE 2003Pages: 372, PDF Size: 2.8 MB
Page 113 of 372
Instrument Panel Overview...............................3-2
Hazard Warning Flashers................................3-4
Other Warning Devices...................................3-4
Horn.............................................................3-5
Tilt Wheel.....................................................3-5
Turn Signal/Multifunction Lever.........................3-5
Exterior Lamps.............................................3-12
Interior Lamps..............................................3-14
Head-Up Display (HUD).................................3-17
Ultrasonic Rear Parking Assist (URPA)............3-19
Accessory Power Outlets...............................3-21
Ashtrays and Cigarette Lighter........................3-22
Climate Controls............................................3-22
Dual Automatic Climate Control System...........3-22
Outlet Adjustment.........................................3-26
Passenger Compartment Air Filter...................3-27
Steering Wheel Climate Controls.....................3-28
Climate Controls Personalization.....................3-28
Warning Lights, Gages and Indicators.............3-29
Instrument Panel Cluster................................3-30
Speedometer and Odometer...........................3-32
Tachometer.................................................3-32
Safety Belt Reminder Light.............................3-33
Air Bag Readiness Light................................3-33
Battery Warning Light....................................3-34
Brake System Warning Light..........................3-34Anti-Lock Brake System Warning Light.............3-36
Traction Control System (TCS) Warning Light . . .3-36
Engine Coolant Temperature Gage..................3-37
Malfunction Indicator Lamp.............................3-37
Oil Pressure Light.........................................3-40
Security Light...............................................3-41
Cruise Control Light......................................3-41
Service Vehicle Soon Light............................3-41
Fuel Gage...................................................3-42
Driver Information Center (DIC).......................3-43
DIC Controls and Displays.............................3-43
DIC Warnings and Messages.........................3-45
DIC Vehicle Personalization............................3-46
Audio System(s).............................................3-51
Setting the Time...........................................3-52
Radio with Cassette......................................3-52
Radio with Cassette and CD..........................3-56
Trunk-Mounted CD Changer...........................3-62
Personal Choice Radio Controls......................3-65
Theft-Deterrent Feature..................................3-66
Audio Steering Wheel Controls.......................3-68
Understanding Radio Reception......................3-68
Care of Your Cassette Tape Player.................3-69
Care of Your CDs.........................................3-70
Care of Your CD Player................................3-70
Heated Backlite Antenna................................3-70
Section 3 Instrument Panel
3-1
Page 159 of 372
After you press the unlock button on your transmitter
with the ignition in RUN, the DIC will automatically
display the identi®ed driver number. The vehicle
will recall the personal choice settings that were last
made to correspond to your transmitter, including your
radio and climate control settings. See
Climate
Controls Personalization on page 3-28.
If you unlock the vehicle using your door key instead of
your transmitter, the DIC will not change drivers and
will recall the information from the last transmitter used
or the last driver using one of the MEMORY buttons.
If this happens and you were not the last driver of
the vehicle, simply press your correct driver number on
the appropriate MEMORY button or press the unlock
button on your transmitter.
The DIC can be used to program the following personal
choice features available with your vehicle:
·Memory Seat Recall
·Programmable Automatic Door Locks
·Security Feedback
·Delayed Locking
·Perimeter Lighting
·Outside Curb View Assist Mirror
·Window Lock OutSee the following steps for personalization programming
instructions.
1. Turn the ignition on and keep the transaxle in
PARK (P).
2. Inform the DIC which driver you are by pressing the
unlock button on your transmitter or the appropriate
memory seat control.
3. Press and hold the ENG/MET button for ®ve
seconds. WELCOME TO BUICK OPTION
FEATURE will appear in the display.
The next display will be your driver number and the
message ARMREST BUTTON CHANGES
DRIVER #. Follow the instructions in the display.
You are now in the selection mode and the DIC is
ready to program your personal choices in
memory.
The selections you make for the personal choice
features will be saved after the display reads
FEATURE OPTION SELECTION DONE.
Each feature that can be personalized will appear in
the display. Once you have made a selection for
a feature, the DIC will move on to the next personal
choice feature.
3-47
Page 164 of 372
Your audio system has been designed to operate easily
and to give years of listening pleasure. You will get
the most enjoyment out of it if you acquaint yourself with
it ®rst. Figure out which radio you have in your vehicle,
®nd out what your audio system can do and how to
operate all of its controls to be sure you're getting the
most out of the advanced engineering that went into it.
Your vehicle may have a feature called Retained
Accessory Power (RAP). With RAP, you can play your
audio system even after the ignition is turned off.
See ªRetained Accessory Power (RAP)º under
Ignition
Positions on page 2-21.
Setting the Time
Press the HRS knob lightly so it extends. Turn the knob
until the correct hour appears on the display. Press
the MIN knob lightly so it extends. Turn the knob until
the correct minute also appears.
Return these knobs to their stored positions when
you're not using them.
You may set the time with the ignition off if you
press RECALL ®rst and follow the same procedure
described above.
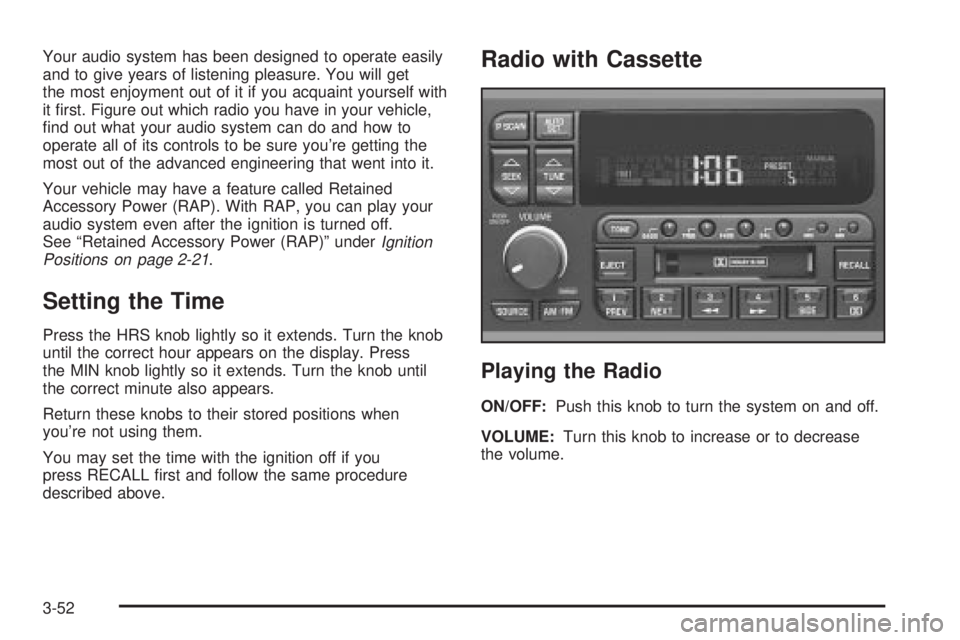
Radio with Cassette
Playing the Radio
ON/OFF:Push this knob to turn the system on and off.
VOLUME:Turn this knob to increase or to decrease
the volume.
3-52
Page 166 of 372
Setting the Tone (Bass/Treble)
BASS:Press this knob lightly so it extends. Turn the
knob to increase or to decrease bass.
TREB (Treble):Press this knob lightly so it extends.
Turn the knob to increase or to decrease treble. If
a station is weak or noisy, you may want to decrease
the treble.
Return these knobs to their stored positions when
you're not using them.
TONE:Press this button to choose bass and treble
equalization settings designed for country/western, jazz,
talk, pop, and classical stations.
To return the bass and treble to the manual mode,
press either TONE, BASS, or TREB until MANUAL
appears. See ªSetting Preset Stationsº listed previously
to program the auto tone feature.
Adjusting the Speakers (Balance/Fade)
BAL (Balance):Press this knob lightly so it extends.
Turn the knob to move the sound toward the left or the
right speakers. The middle position balances the
sound between the speakers.FADE:Press this knob lightly so it extends. Turn the
knob to move the sound toward the front or the
rear speakers. The middle position balances the sound
between the speakers.
Return these knobs to their stored positions when
you're not using them.
Playing a Cassette Tape
The longer side with the tape visible should face to the
right. If the ignition and the radio are on, the tape
can be inserted and will begin playing. If you hear
nothing or hear a garbled sound, the tape may not be in
squarely. Press EJECT to remove the tape and start
over.
While the tape is playing, use the VOLUME, SEEK,
FADE, BAL, BASS and TREB controls just as you do for
the radio. Other controls may have different functions
when a tape is inserted. The display will show an arrow
to show which side of the tape is playing.
If you want to insert a tape while the ignition or radio is
off, ®rst press EJECT or RECALL. Cassette tape
adapter kits for portable compact disc players will work
in your cassette tape player.
Your tape bias is set automatically.
3-54
Page 170 of 372

Setting the Tone (Bass/Treble)
BASS:Press this knob lightly so it extends. Turn the
knob to increase or to decrease bass.
TREB (Treble):Press this knob lightly so it extends.
Turn the knob to increase or to decrease treble. If
a station is weak or noisy, you may want to decrease
the treble.
Return these knobs to their stored positions when
you're not using them.
TONE:Press this button to choose bass and treble
equalization settings designed for country/western, jazz,
talk, pop and classical stations.
To return the bass and treble to the manual mode,
press either TONE until MANUAL appears or press and
release the BASS or TREB knob and turn it until the
display goes blank. See ªSetting Preset Stationsº listed
previously to program the auto tone feature.
Adjusting the Speakers (Balance/Fade)
BAL (Balance):Press this knob lightly so it extends.
Turn the knob to move the sound toward the left or the
right speakers. The middle position balances the
sound between the speakers.FADE:Press this knob lightly so it extends. Turn the
knob to move the sound toward the front or the
rear speakers. The middle position balances the sound
between the speakers.
Return these knobs to their stored positions when
you're not using them.
Playing a Cassette Tape
The longer side with the tape visible should face to the
right. If the ignition and the radio are on, the tape
can be inserted and will begin playing. If you hear
nothing or hear a garbled sound, the tape may not be
in squarely. Press EJECT to remove the tape and
start over.
While the tape is playing, use the VOLUME, SEEK,
FADE, BAL, BASS and TREB controls just as you do for
the radio. Other controls may have different functions
when a tape is inserted. The display will show an arrow
to show which side of the tape is playing.
If you want to insert a tape while the ignition or radio is
off, ®rst press EJECT or RECALL.
Your tape bias is set automatically.
3-58
Page 177 of 372
Compact Disc Changer Errors
E (Error):If this message and a number appear on the
display, an error has occurred and the compact disc
temporarily cannot play.
The CD changer will send an error message to the
receiver to indicate:
·E30:Disc Loaded Incorrectly (Label Side Up)
·E34:CD Changer Door Open (Completely close the
door to restore normal operation.)
·E35:CD Changer Cartridge Empty (Try the
magazine again with a disc loaded on one of
the trays.)
If the error occurred while trying to play a CD in the
compact disc player or changer, the following conditions
may have caused the error:
·You're driving on a very rough road. When the road
becomes smoother, the disc should play.
·The disc is dirty, scratched, wet or upside down.
·The air is very humid. If so, wait about an hour and
try again.
If any error occurs repeatedly or if an error cannot be
corrected, contact your dealership. If your radio displays
an error number other than the error codes listed
previously, write it down and provide it to your dealership
when reporting the problem.
Personal Choice Radio Controls
If your vehicle has this feature it will enable two drivers
to store and recall personal settings for radio presets,
last tuned station, volume, tone, and audio source
(radio, cassette, or CD).
The memory buttons 1 and 2 for this feature are located
on the driver's door panel and correspond to the
numbers 1 and 2 found on the back of each remote
keyless entry transmitter.
To recall audio sources, press the unlock button on the
remote keyless entry transmitter and turn the ignition
on. The source last listened to will be recalled for
the identi®ed driver 1 or 2.
To program this feature, do the following:
1. Set all radio preferences. For more information see
ªSetting Preset Stationsº and ªSetting the Toneº
listed for your particular radio.
2. Locate the memory buttons on the driver's door
panel.
3. Press one of the memory buttons 1 or 2 until you
hear two beeps. The beeps con®rm that your
selection has been saved and can now be recalled.
Follow these steps each time you want to change the
stored settings.
3-65
Page 180 of 372
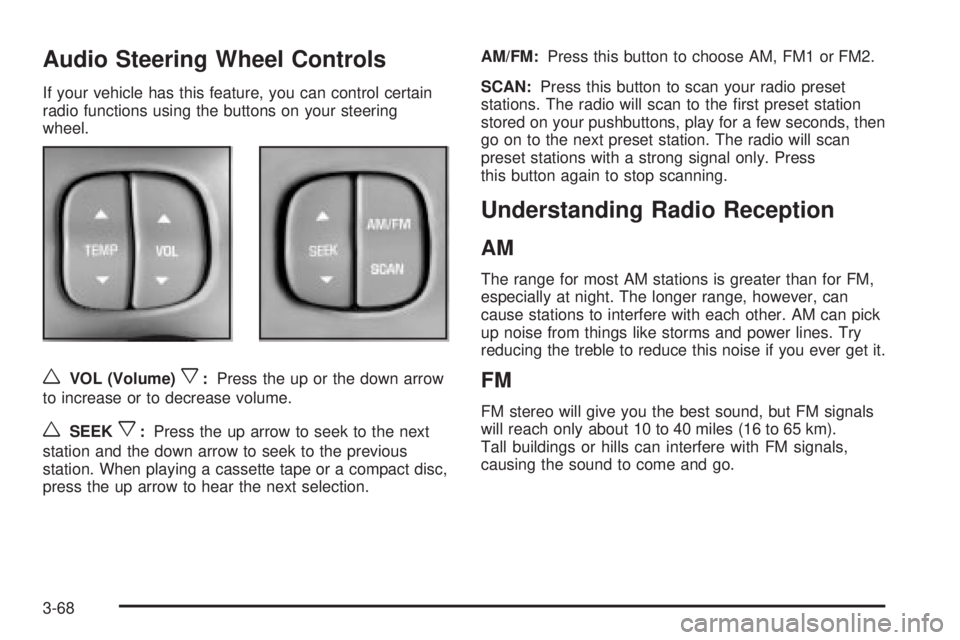
Audio Steering Wheel Controls
If your vehicle has this feature, you can control certain
radio functions using the buttons on your steering
wheel.
wVOL (Volume)x:Press the up or the down arrow
to increase or to decrease volume.
wSEEKx:Press the up arrow to seek to the next
station and the down arrow to seek to the previous
station. When playing a cassette tape or a compact disc,
press the up arrow to hear the next selection.AM/FM:Press this button to choose AM, FM1 or FM2.
SCAN:Press this button to scan your radio preset
stations. The radio will scan to the ®rst preset station
stored on your pushbuttons, play for a few seconds, then
go on to the next preset station. The radio will scan
preset stations with a strong signal only. Press
this button again to stop scanning.
Understanding Radio Reception
AM
The range for most AM stations is greater than for FM,
especially at night. The longer range, however, can
cause stations to interfere with each other. AM can pick
up noise from things like storms and power lines. Try
reducing the treble to reduce this noise if you ever get it.
FM
FM stereo will give you the best sound, but FM signals
will reach only about 10 to 40 miles (16 to 65 km).
Tall buildings or hills can interfere with FM signals,
causing the sound to come and go.
3-68
Page 357 of 372
A
Accessory Power Outlets.................................3-21
Activating the Theft-Deterrent Feature................3-66
Adding Washer Fluid.......................................5-39
Additional Program Information........................... 7-8
Additives, Fuel................................................. 5-6
Add-On Electrical Equipment............................5-86
Adjusting the Speakers (Balance/Fade)......3-54, 3-58
Air Bag Systems.............................................1-48
How Does an Air Bag Restrain?....................1-54
Servicing Your Air Bag-Equipped Vehicle.........1-56
What Makes an Air Bag In¯ate?....................1-54
What Will You See After an
Air Bag In¯ates?......................................1-54
When Should an Air Bag In¯ate?...................1-53
Where Are the Air Bags?..............................1-51
Air Bag .........................................................3-33
Readiness Light..........................................3-33
Air Cleaner/Filter, Engine.................................5-20
AM ...............................................................3-68
Antenna, Heated Backlite.................................3-70
Anti-lock Brake System (ABS)............................ 4-7
Anti-Lock Brake, System Warning Light..............3-36
Appearance Care............................................5-78
Care of Safety Belts....................................5-81
Chemical Paint Spotting...............................5-84
Cleaning the Inside of Your Vehicle................5-79
Cleaning the Outside of Your Vehicle..............5-82
Finish Damage............................................5-84Appearance Care (cont.)
Sheet Metal Damage...................................5-83
Underbody Maintenance...............................5-84
Vehicle Care/Appearance Materials................5-84
Weatherstrips..............................................5-81
Ashtrays........................................................3-22
Assist Handles...............................................2-44
Audio System(s).............................................3-51
Audio Steering Wheel Controls......................3-68
Care of Your Cassette Tape Player................3-69
Care of Your CD Player...............................3-70
Care of Your CDs........................................3-70
Heated Backlite Antenna...............................3-70
Personal Choice Radio Controls....................3-65
Radio with Cassette and CD.........................3-56
Radio with Cassette.....................................3-52
Setting the Time..........................................3-52
Theft-Deterrent Feature................................3-66
Trunk-Mounted CD Changer..........................3-62
Understanding Radio Reception.....................3-68
Automatic Level Control...................................4-32
Automatic Operation........................................3-23
Automatic Transaxle Check..............................6-20
Automatic Transaxle Shift Lock Control
System Check.............................................6-21
Automatic Transaxle........................................5-22
Fluid..........................................................5-22
Operation...................................................2-24
Auxiliary Instrument Panel Fuse Block...............5-89
1
Page 367 of 372
P
Parade Dimming.............................................3-15
Park Aid........................................................3-19
Park(P).........................................................2-28
Shifting Into................................................2-28
Shifting Out of............................................2-30
Parking Brake and Automatic Transaxle Park (P)
Mechanism Check.......................................6-22
Parking on Hills..............................................4-37
Parking.........................................................3-19
Assist........................................................3-19
Brake........................................................2-27
Over Things That Burn.................................2-31
Part A - Scheduled Maintenance Services............ 6-4
Part B - Owner Checks and Services................6-19
Part C - Periodic MaintenanceInspections..........6-23
Part D - Recommended Fluids and Lubricants....6-25
Part E - Maintenance Record...........................6-26
Passenger Compartment Air Filter.....................3-27
Passenger Temperature Control........................3-26
Passing.................................................4-12, 4-36
PASS-Key
žIII Operation..................................2-19
PASS-KeyžIII ................................................2-19
Perimeter Lighting...................................3-15, 3-50
Personal Choice Radio Controls........................3-65
Personalization, Climate Controls......................3-28
Personalization Features.................................... 2-6
Plan Ahead When Possible................................ 7-7
Playing a Cassette Tape..........................3-54, 3-58Playing a Compact Disc..........................3-60, 3-64
Playing the Radio...................................3-52, 3-56
Power Steering...............................................4-10
Power...........................................................3-21
Accessory Outlets........................................3-21
Door Locks.................................................2-10
Lumbar Controls........................................... 1-3
Seat............................................................ 1-2
Steering Fluid.............................................5-38
Windows....................................................2-16
Programmable Automatic Door Locks.........2-11, 3-48
Programming the HomeLink Transmitter.............2-39
Q
Questions and Answers About Safety Belts.........1-10
R
Radiator Pressure Cap....................................5-27
Radios..........................................................3-51
Care of Your Cassette Tape Player................3-69
Care of Your CD Player...............................3-70
Care of Your CDs........................................3-70
Personal Choice Radio Controls....................3-65
Radio with Cassette and CD.........................3-56
Radio with Cassette.....................................3-52
Setting the Time..........................................3-52
Theft-Deterrent............................................3-66
11
Page 370 of 372
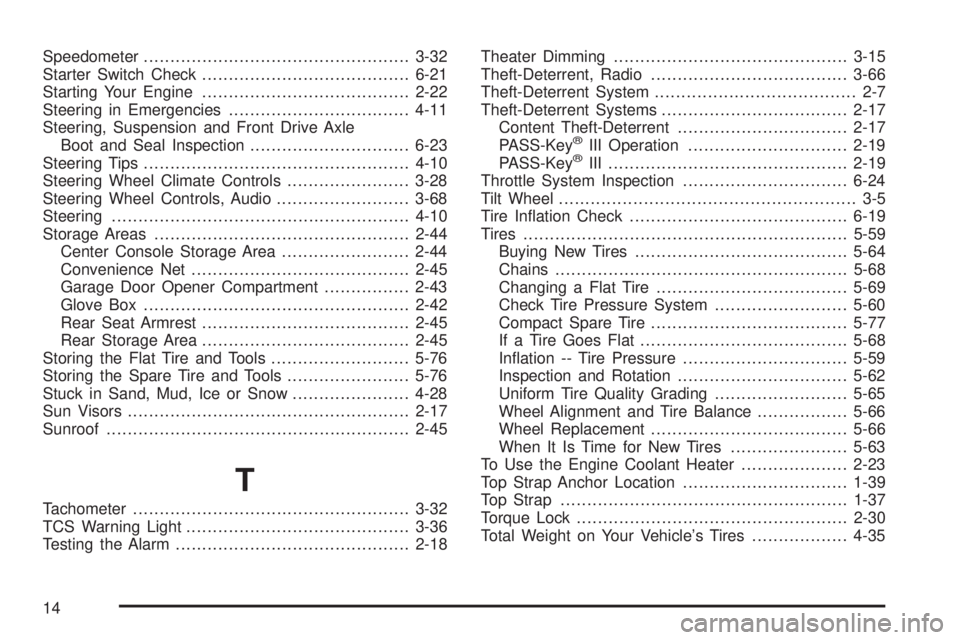
Speedometer..................................................3-32
Starter Switch Check.......................................6-21
Starting Your Engine.......................................2-22
Steering in Emergencies..................................4-11
Steering, Suspension and Front Drive Axle
Boot and Seal Inspection..............................6-23
Steering Tips..................................................4-10
Steering Wheel Climate Controls.......................3-28
Steering Wheel Controls, Audio.........................3-68
Steering........................................................4-10
Storage Areas................................................2-44
Center Console Storage Area........................2-44
Convenience Net.........................................2-45
Garage Door Opener Compartment................2-43
Glove Box..................................................2-42
Rear Seat Armrest.......................................2-45
Rear Storage Area.......................................2-45
Storing the Flat Tire and Tools..........................5-76
Storing the Spare Tire and Tools.......................5-76
Stuck in Sand, Mud, Ice or Snow......................4-28
Sun Visors.....................................................2-17
Sunroof.........................................................2-45
T
Tachometer....................................................3-32
TCS Warning Light..........................................3-36
Testing the Alarm............................................2-18Theater Dimming............................................3-15
Theft-Deterrent, Radio.....................................3-66
Theft-Deterrent System...................................... 2-7
Theft-Deterrent Systems...................................2-17
Content Theft-Deterrent................................2-17
PASS-Key
žIII Operation..............................2-19
PASS-KeyžIII .............................................2-19
Throttle System Inspection...............................6-24
Tilt Wheel........................................................ 3-5
Tire In¯ation Check.........................................6-19
Tires.............................................................5-59
Buying New Tires........................................5-64
Chains.......................................................5-68
Changing a Flat Tire....................................5-69
Check Tire Pressure System.........................5-60
Compact Spare Tire.....................................5-77
If a Tire Goes Flat.......................................5-68
In¯ation -- Tire Pressure...............................5-59
Inspection and Rotation................................5-62
Uniform Tire Quality Grading.........................5-65
Wheel Alignment and Tire Balance.................5-66
Wheel Replacement.....................................5-66
When It Is Time for New Tires......................5-63
To Use the Engine Coolant Heater....................2-23
Top Strap Anchor Location...............................1-39
Top Strap......................................................1-37
Torque Lock...................................................2-30
Total Weight on Your Vehicle's Tires..................4-35
14