sunroof BUICK PARK AVENUE 2003 Owner's Manual
[x] Cancel search | Manufacturer: BUICK, Model Year: 2003, Model line: PARK AVENUE, Model: BUICK PARK AVENUE 2003Pages: 372, PDF Size: 2.8 MB
Page 1 of 372
Seats and Restraint Systems........................... 1-1
Front Seats
............................................... 1-2
Safety Belts
.............................................. 1-6
Child Restraints
.......................................1-27
Air Bag Systems
......................................1-48
Restraint System Check
............................1-56
Features and Controls..................................... 2-1
Keys
........................................................ 2-3
Doors and Locks
....................................... 2-9
Windows
.................................................2-15
Theft-Deterrent Systems
............................2-17
Starting and Operating Your Vehicle
...........2-21
Mirrors
....................................................2-33
OnStar
žSystem
......................................2-37
HomeLinkžTransmitter
.............................2-39
Storage Areas
.........................................2-42
Sunroof
..................................................2-45
Vehicle Personalization
.............................2-46
Instrument Panel............................................. 3-1
Instrument Panel Overview
.......................... 3-2
Climate Controls
......................................3-22
Warning Lights, Gages and Indicators
.........3-29
Driver Information Center (DIC)
..................3-43
Audio System(s)
.......................................3-51Driving Your Vehicle....................................... 4-1
Your Driving, the Road, and Your Vehicle
..... 4-2
Towing
...................................................4-29
Service and Appearance Care.......................... 5-1
Service
..................................................... 5-3
Fuel
......................................................... 5-4
Checking Things Under the Hood
...............5-10
Headlamp Aiming
.....................................5-47
Bulb Replacement
....................................5-49
Windshield Wiper Blade Replacement
.........5-58
Tires
......................................................5-59
Appearance Care
.....................................5-78
Vehicle Identi®cation
.................................5-86
Electrical System
......................................5-86
Capacities and Speci®cations
.....................5-96
Normal Maintenance Replacement Parts
......5-97
Maintenance Schedule..................................... 6-1
Maintenance Schedule
................................ 6-2
Customer Assistance Information.................... 7-1
Customer Assistance Information
.................. 7-2
Reporting Safety Defects
............................ 7-8
Index................................................................ 1
2003 Buick Park Avenue Owner ManualM
Page 66 of 372
OnStaržSystem.............................................2-37
HomeLinkžTransmitter...................................2-39
Programming the HomeLinkžTransmitter.........2-39
Storage Areas................................................2-42
Glove Box...................................................2-42
Garage Door Opener Compartment.................2-43
Center Console Storage Area.........................2-44
Assist Handles.............................................2-44Rear Storage Area........................................2-45
Rear Seat Armrest........................................2-45
Rear Seat Pass Through...............................2-45
Convenience Net..........................................2-45
Sunroof.........................................................2-45
Vehicle Personalization...................................2-46
Memory Seat and Mirrors..............................2-46
Section 2 Features and Controls
2-2
Page 86 of 372
Notice:If your key seems stuck in LOCK and you
can't turn it, be sure you are using the correct key; if
so, is it all the way in? If it is, then turn the steering
wheel left and right while you turn the key hard.
Turn the key only with your hand. Using a tool
to force it could break the key or the ignition switch.
If none of these works, then your vehicle needs
service.
C (OFF):This position lets you turn off the engine but
still turn the steering wheel. It doesn't lock the
steering wheel like LOCK and it doesn't send any power
to the accessories. The instrument panel cluster will
remain powered in OFF to illuminate the gear shift
indicator. The cluster will also activate the parking brake
light when the parking brake is set. Use OFF if you
must have your vehicle in motion while the engine is not
running.
D (RUN):This is the position that the switch returns to
after you start your engine and release the ignition
key. This is the position for driving. Even when
the engine is not running, you can use RUN to operate
your electrical accessories and to display some
instrument panel warning lights.
E (START):This position starts your engine. When the
engine starts, release the ignition key. The switch
will return to RUN for normal driving.Key Reminder Warning
If you leave your key in the ignition, with the engine off,
you will hear a warning chime when you open the
driver's door.
Retained Accessory Power (RAP)
After you turn the ignition off and remove the key, you
will still have power to such accessories as the
radio, sunroof (option) and power windows for up to
10 minutes. Power is stopped if you open a door.
Starting Your Engine
Move your shift lever to PARK (P) or NEUTRAL (N).
Your engine won't start in any other position ± that's a
safety feature. To restart when you're already moving,
use NEUTRAL (N) only.
Notice:Don't try to shift to PARK (P) if your
vehicle is moving. If you do, you could damage the
transaxle. Shift to PARK (P) only when your
vehicle is stopped.
1. With your foot off the accelerator pedal, turn your
ignition key to START. When the engine starts, let
go of the key. The idle speed will go down as
your engine gets warm.
2-22
Page 109 of 372
Rear Storage Area
If your vehicle has this feature, the rear storage armrest
contains two cupholders. To access the cupholders,
pull the armrest down from the rear seatback.
This armrest also includes a storage area inside the
armrest. To open it, pull up on the lever at the front edge
of the armrest.
Rear Seat Armrest
Your vehicle's rear seat armrest contains two
cupholders. To access the cupholders, pull the armrest
down from the rear seatback.
Rear Seat Pass Through
Your vehicle is equipped with a rear storage armrest
with a pass-through feature that allows for trunk access.
Pull the rear armrest down, then push down on the
trunk access panel latch to open the panel. To close,
push the access panel until it latches.
Convenience Net
Your vehicle may have a convenience net. You'll see it
just inside the back wall of the trunk.
Put small loads, like grocery bags, behind the net. It can
help keep them from falling over during sharp turns or
quick starts and stops.The net isn't for larger, heavier loads. Store them in the
trunk as far forward as you can.
You can unhook the net so that it will lie ¯at when
you're not using it.
Sunroof
Your vehicle may be equipped with a sunroof. The
sunroof has both manual and express features
for opening the glass panel and sunshade.
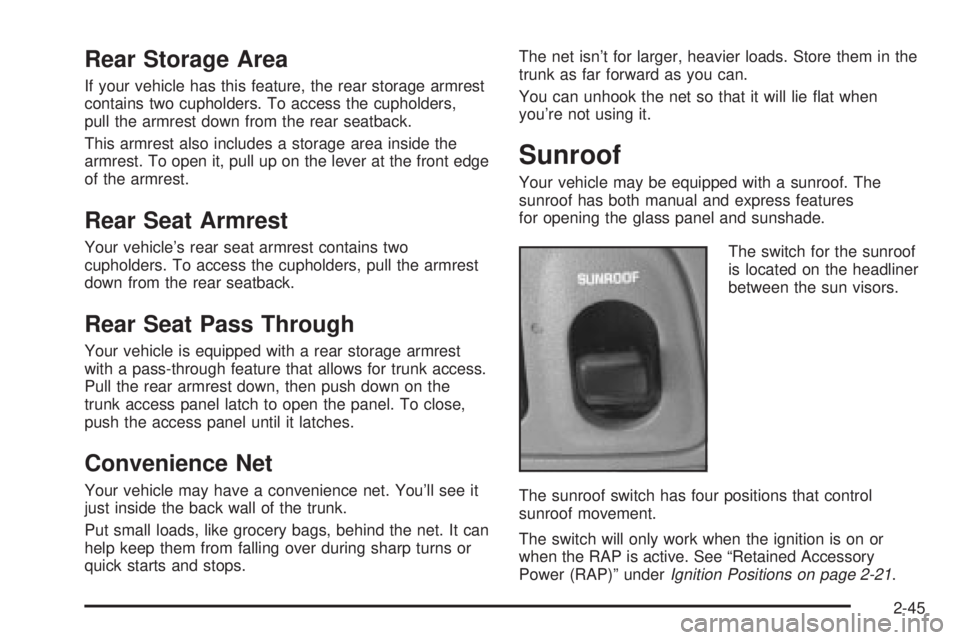
The switch for the sunroof
is located on the headliner
between the sun visors.
The sunroof switch has four positions that control
sunroof movement.
The switch will only work when the ignition is on or
when the RAP is active. See ªRetained Accessory
Power (RAP)º under
Ignition Positions on page 2-21.
2-45
Page 110 of 372
Open:Press and hold the switch rearward to the ®rst
position to open the glass panel and sunshade. The
sunshade can also be opened manually.
Comfort Stop:Press and release the switch rearward
to the second position to express open the glass
panel to the comfort stop position. The comfort stop
position is designed to help reduce noise and make
passengers more comfortable.
Express Open:When the glass panel is express
opening, pressing the switch in any direction will stop it
in a partially-opened position. The glass panel may
be fully opened by pressing the switch rearward again.
If you press and hold the switch in the express open
position for more than one and a half seconds, the
express open operation will be overridden and
the sunroof will operate manually.
Close:To close the glass panel, press and hold the
switch forward. As the glass panel reaches the closed
position, it will open slightly toward the vent position and
then drop down to the closed position to provide a
better seal. The sunshade must be closed manually.
Vent:Once the sunroof is closed, it can be opened to
the vent position by pushing the switch upward. To
close the glass panel, pull the switch downward. The
sunshade must be opened and closed manually for vent
operation.Vehicle Personalization
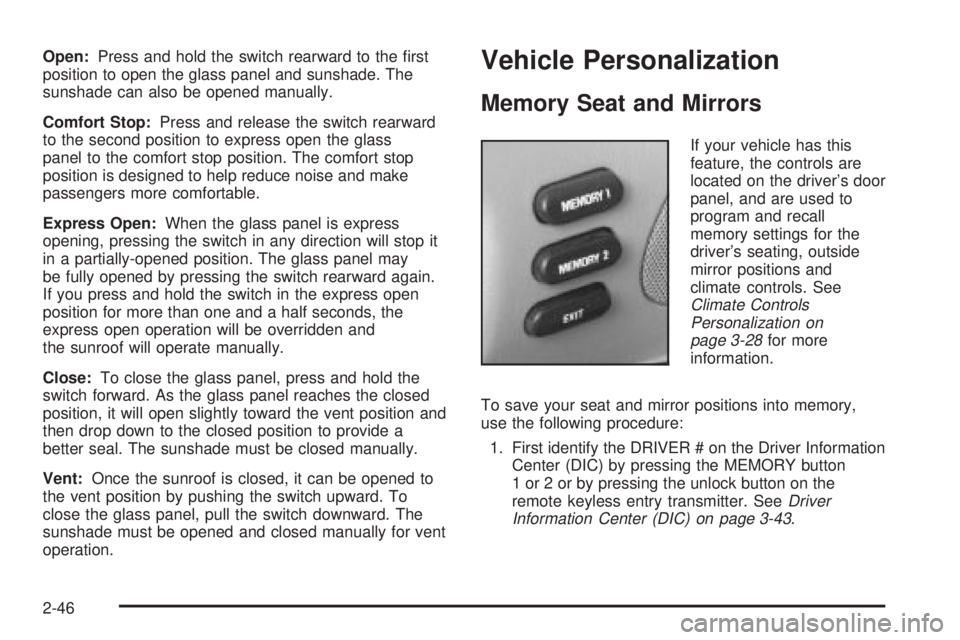
Memory Seat and Mirrors
If your vehicle has this
feature, the controls are
located on the driver's door
panel, and are used to
program and recall
memory settings for the
driver's seating, outside
mirror positions and
climate controls. See
Climate Controls
Personalization on
page 3-28
for more
information.
To save your seat and mirror positions into memory,
use the following procedure:
1. First identify the DRIVER # on the Driver Information
Center (DIC) by pressing the MEMORY button
1 or 2 or by pressing the unlock button on the
remote keyless entry transmitter. See
Driver
Information Center (DIC) on page 3-43.
2-46
Page 315 of 372
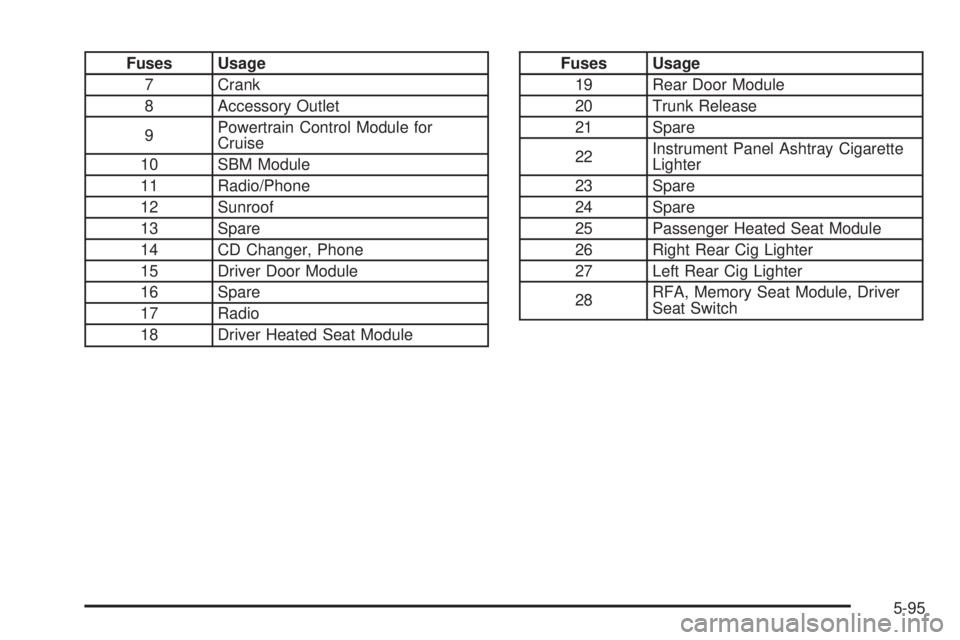
Fuses Usage
7 Crank
8 Accessory Outlet
9Powertrain Control Module for
Cruise
10 SBM Module
11 Radio/Phone
12 Sunroof
13 Spare
14 CD Changer, Phone
15 Driver Door Module
16 Spare
17 Radio
18 Driver Heated Seat ModuleFuses Usage
19 Rear Door Module
20 Trunk Release
21 Spare
22Instrument Panel Ashtray Cigarette
Lighter
23 Spare
24 Spare
25 Passenger Heated Seat Module
26 Right Rear Cig Lighter
27 Left Rear Cig Lighter
28RFA, Memory Seat Module, Driver
Seat Switch
5-95
Page 370 of 372
Speedometer..................................................3-32
Starter Switch Check.......................................6-21
Starting Your Engine.......................................2-22
Steering in Emergencies..................................4-11
Steering, Suspension and Front Drive Axle
Boot and Seal Inspection..............................6-23
Steering Tips..................................................4-10
Steering Wheel Climate Controls.......................3-28
Steering Wheel Controls, Audio.........................3-68
Steering........................................................4-10
Storage Areas................................................2-44
Center Console Storage Area........................2-44
Convenience Net.........................................2-45
Garage Door Opener Compartment................2-43
Glove Box..................................................2-42
Rear Seat Armrest.......................................2-45
Rear Storage Area.......................................2-45
Storing the Flat Tire and Tools..........................5-76
Storing the Spare Tire and Tools.......................5-76
Stuck in Sand, Mud, Ice or Snow......................4-28
Sun Visors.....................................................2-17
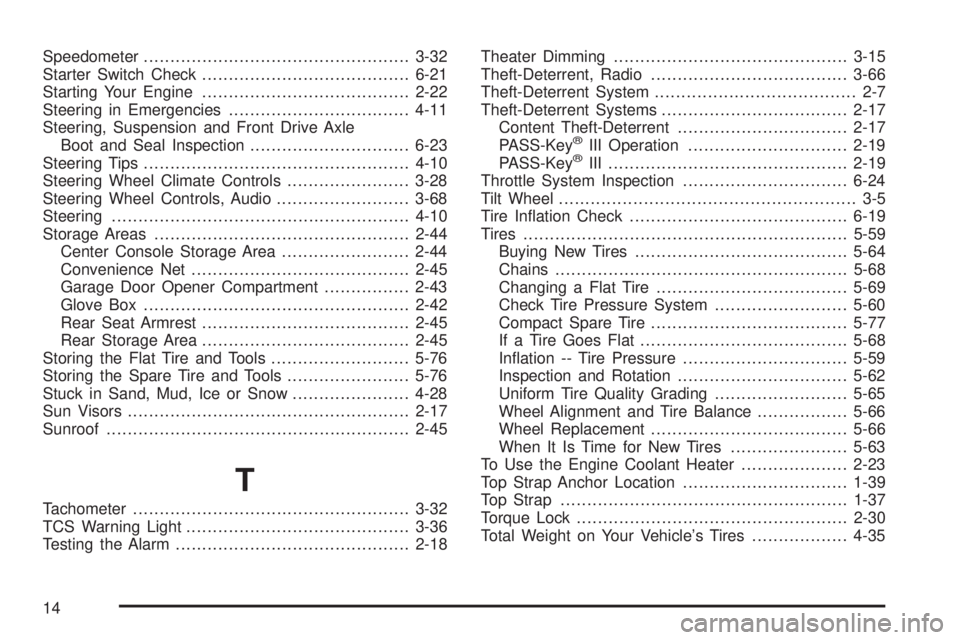
Sunroof.........................................................2-45
T
Tachometer....................................................3-32
TCS Warning Light..........................................3-36
Testing the Alarm............................................2-18Theater Dimming............................................3-15
Theft-Deterrent, Radio.....................................3-66
Theft-Deterrent System...................................... 2-7
Theft-Deterrent Systems...................................2-17
Content Theft-Deterrent................................2-17
PASS-Key
žIII Operation..............................2-19
PASS-KeyžIII .............................................2-19
Throttle System Inspection...............................6-24
Tilt Wheel........................................................ 3-5
Tire In¯ation Check.........................................6-19
Tires.............................................................5-59
Buying New Tires........................................5-64
Chains.......................................................5-68
Changing a Flat Tire....................................5-69
Check Tire Pressure System.........................5-60
Compact Spare Tire.....................................5-77
If a Tire Goes Flat.......................................5-68
In¯ation -- Tire Pressure...............................5-59
Inspection and Rotation................................5-62
Uniform Tire Quality Grading.........................5-65
Wheel Alignment and Tire Balance.................5-66
Wheel Replacement.....................................5-66
When It Is Time for New Tires......................5-63
To Use the Engine Coolant Heater....................2-23
Top Strap Anchor Location...............................1-39
Top Strap......................................................1-37
Torque Lock...................................................2-30
Total Weight on Your Vehicle's Tires..................4-35
14