turn signal bulb BUICK PARK AVENUE 2003 Owner's Manual
[x] Cancel search | Manufacturer: BUICK, Model Year: 2003, Model line: PARK AVENUE, Model: BUICK PARK AVENUE 2003Pages: 372, PDF Size: 2.8 MB
Page 118 of 372
Turn and Lane-Change Signals
The turn signal has two upward (for right) and two
downward (for left) positions. These positions allow you
to signal a turn or a lane change.
To signal a turn, move the lever all the way up or down.
When the turn is ®nished, the lever will return
automatically.
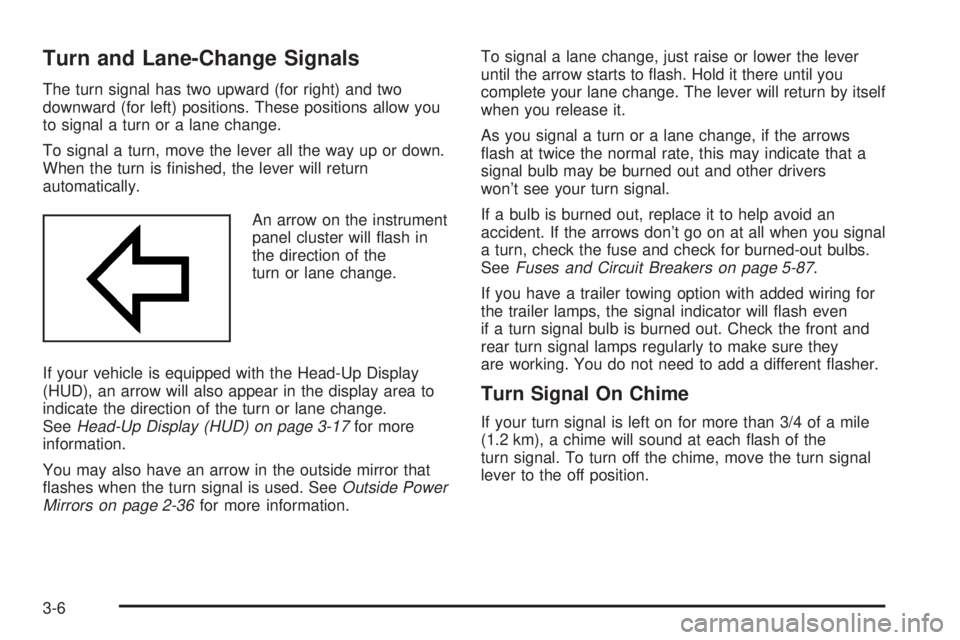
An arrow on the instrument
panel cluster will ¯ash in
the direction of the
turn or lane change.
If your vehicle is equipped with the Head-Up Display
(HUD), an arrow will also appear in the display area to
indicate the direction of the turn or lane change.
See
Head-Up Display (HUD) on page 3-17for more
information.
You may also have an arrow in the outside mirror that
¯ashes when the turn signal is used. See
Outside Power
Mirrors on page 2-36for more information.To signal a lane change, just raise or lower the lever
until the arrow starts to ¯ash. Hold it there until you
complete your lane change. The lever will return by itself
when you release it.
As you signal a turn or a lane change, if the arrows
¯ash at twice the normal rate, this may indicate that a
signal bulb may be burned out and other drivers
won't see your turn signal.
If a bulb is burned out, replace it to help avoid an
accident. If the arrows don't go on at all when you signal
a turn, check the fuse and check for burned-out bulbs.
See
Fuses and Circuit Breakers on page 5-87.
If you have a trailer towing option with added wiring for
the trailer lamps, the signal indicator will ¯ash even
if a turn signal bulb is burned out. Check the front and
rear turn signal lamps regularly to make sure they
are working. You do not need to add a different ¯asher.
Turn Signal On Chime
If your turn signal is left on for more than 3/4 of a mile
(1.2 km), a chime will sound at each ¯ash of the
turn signal. To turn off the chime, move the turn signal
lever to the off position.
3-6
Page 218 of 372
Before you start, check the trailer hitch and platform
(and attachments), safety chains, electrical connector,
lamps, tires and mirror adjustment. If the trailer has
electric brakes, start your vehicle and trailer moving and
then apply the trailer brake controller by hand to be
sure the brakes are working. This lets you check your
electrical connection at the same time.
During your trip, check occasionally to be sure that the
load is secure, and that the lamps and any trailer
brakes are still working.
Following Distance
Stay at least twice as far behind the vehicle ahead as
you would when driving your vehicle without a trailer.
This can help you avoid situations that require
heavy braking and sudden turns.
Passing
You'll need more passing distance up ahead when
you're towing a trailer. And, because you're a good deal
longer, you'll need to go much farther beyond the
passed vehicle before you can return to your lane.
Backing Up
Hold the bottom of the steering wheel with one hand.
Then, to move the trailer to the left, just move that hand
to the left. To move the trailer to the right, move your
hand to the right. Always back up slowly and, if possible,
have someone guide you.
Making Turns
Notice:Making very sharp turns while trailering
could cause the trailer to come in contact with the
vehicle. Your vehicle could be damaged. Avoid
making very sharp turns while trailering.
When you're turning with a trailer, make wider turns
than normal. Do this so your trailer won't strike
soft shoulders, curbs, road signs, trees or other objects.
Avoid jerky or sudden maneuvers. Signal well in
advance.
Turn Signals When Towing a Trailer
When you tow a trailer, your vehicle may need a
different turn signal ¯asher and/or extra wiring. Check
with your dealer. The arrows on your instrument
panel will ¯ash whenever you signal a turn or lane
change. Properly hooked up, the trailer lamps will also
¯ash, telling other drivers you're about to turn,
change lanes or stop.
When towing a trailer, the arrows on your instrument
panel will ¯ash for turns even if the bulbs on the trailer
are burned out. Thus, you may think drivers behind
you are seeing your signal when they are not. It's
important to check occasionally to be sure the trailer
bulbs are still working.
4-36
Page 221 of 372
Service............................................................5-3
Doing Your Own Service Work.........................5-3
Adding Equipment to the Outside of
Your Vehicle..............................................5-4
Fuel................................................................5-4
Gasoline Octane............................................5-4
Gasoline Speci®cations....................................5-5
California Fuel...............................................5-5
Additives.......................................................5-6
Fuels in Foreign Countries...............................5-6
Filling Your Tank............................................5-7
Filling a Portable Fuel Container.......................5-9
Checking Things Under
the Hood....................................................5-10
Hood Release..............................................5-10
Engine Compartment Overview.......................5-12
Engine Oil...................................................5-14
Supercharger Oil..........................................5-19
Engine Air Cleaner/Filter................................5-20
Automatic Transaxle Fluid..............................5-22
Engine Coolant.............................................5-24
Radiator Pressure Cap..................................5-27
Engine Overheating.......................................5-27
Cooling System............................................5-30
Power Steering Fluid.....................................5-38Windshield Washer Fluid................................5-38
Brakes........................................................5-40
Battery........................................................5-42
Jump Starting...............................................5-43
Headlamp Aiming...........................................5-47
Bulb Replacement..........................................5-49
Halogen Bulbs..............................................5-49
Headlamps..................................................5-50
Front Turn Signal Lamps...............................5-52
Rear Turn Signal, Stoplamps and
Back-Up Lamps........................................5-52
Rear Quarter Panel Turn Signal and
Stoplamps................................................5-56
Replacement Bulbs.......................................5-57
Windshield Wiper Blade Replacement..............5-58
Tires..............................................................5-59
In¯ation Ð Tire Pressure...............................5-59
Check Tire Pressure System..........................5-60
Tire Inspection and Rotation...........................5-62
When It Is Time for New Tires.......................5-63
Buying New Tires.........................................5-64
Uniform Tire Quality Grading..........................5-65
Wheel Alignment and Tire Balance..................5-66
Wheel Replacement......................................5-66
Section 5 Service and Appearance Care
5-1
Page 272 of 372
Front Turn Signal Lamps
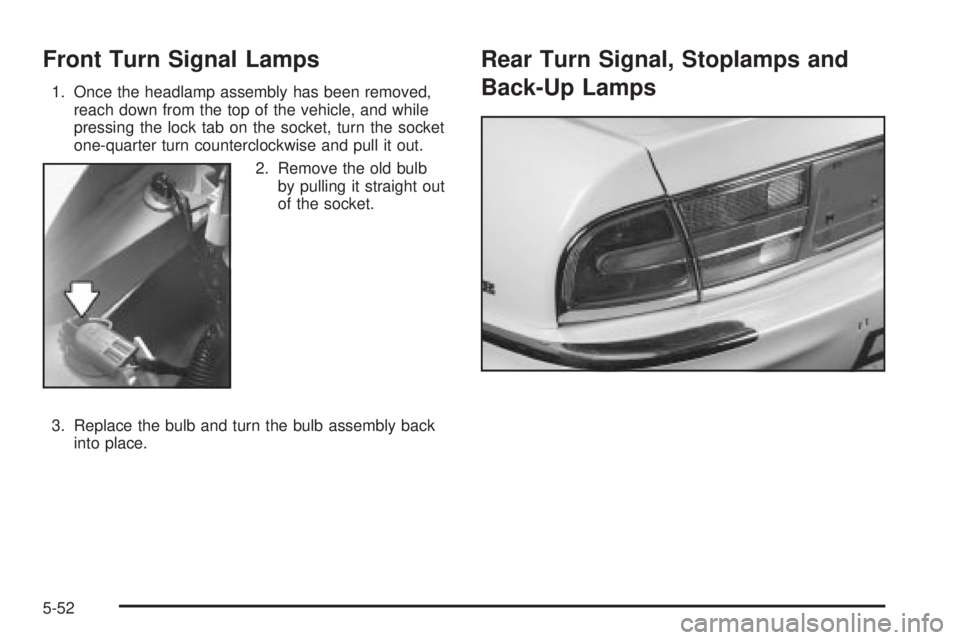
1. Once the headlamp assembly has been removed,
reach down from the top of the vehicle, and while
pressing the lock tab on the socket, turn the socket
one-quarter turn counterclockwise and pull it out.
2. Remove the old bulb
by pulling it straight out
of the socket.
3. Replace the bulb and turn the bulb assembly back
into place.
Rear Turn Signal, Stoplamps and
Back-Up Lamps
5-52
Page 276 of 372
9. Replace it with a new bulb.
10. Reverse Steps 1 through 8 to reinstall the taillamp
assembly.
Rear Quarter Panel Turn Signal and
Stoplamps
1. Open the trunk.
2. On either side of the rear of the trunk is a plastic
retainer that holds the cargo net and taillamp
assembly in place. Unhook the cargo net from the
cargo net retainer and remove the retainer by
turning it counterclockwise.
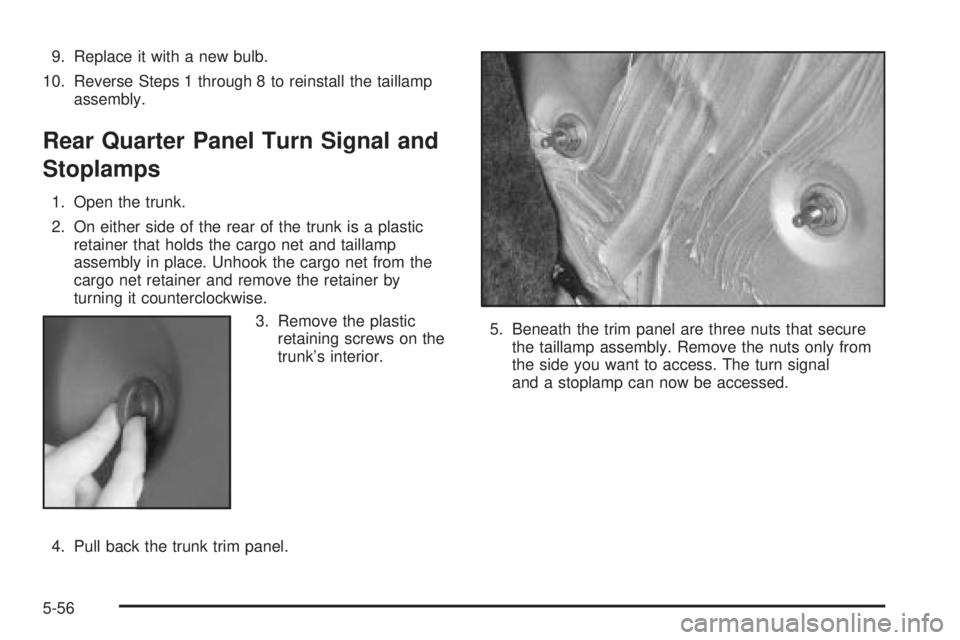
3. Remove the plastic
retaining screws on the
trunk's interior.
4. Pull back the trunk trim panel.5. Beneath the trim panel are three nuts that secure
the taillamp assembly. Remove the nuts only from
the side you want to access. The turn signal
and a stoplamp can now be accessed.
5-56
Page 358 of 372
B
Backing Up....................................................4-36
Battery Replacement......................................... 2-8
Battery Rundown Protection.............................3-17
Battery Warning Light......................................3-34
Battery..........................................................5-42
Before Leaving on a Long Trip.........................4-21
Body Lubrication Service..................................6-20
Brake Fluid....................................................5-40
Brake Wear...................................................5-41
Brake............................................................2-27
Parking......................................................2-27
System Inspection.......................................6-24
System Warning Light..................................3-34
Brakes..........................................................5-40
Braking in Emergencies..................................... 4-8
Braking........................................................... 4-6
Break-In, New Vehicle.....................................2-21
Bulb Replacement...........................................5-49
Front Turn Signal Lamps..............................5-52
Halogen Bulbs............................................5-49
Headlamp Aiming........................................5-47
Headlamps.................................................5-50
Rear Quarter Panel Turn Signal and
Stoplamps...............................................5-56Bulb Replacement (cont.)
Rear Turn Signal, Stoplamps and Back-Up
Lamps....................................................5-52
Replacement Bulbs......................................5-57
Buying New Tires...........................................5-64
C
California Fuel.................................................. 5-5
Canada ± Customer Assistance.......................... 7-4
Canadian Owners................................................ ii
Canadian Roadside Assistance........................... 7-6
Capacities and Speci®cations............................5-96
Carbon Monoxide...................4-24, 4-32, 2-13, 2-31
Care of the HUD............................................3-19
Care of.........................................................5-81
Safety Belts................................................5-81
Your Cassette Tape Player............................3-69
Your CD Player...........................................3-70
Your CDs ...................................................3-70
Cassette Tape Messages.........................3-56, 3-60
Cassette Tape Player Service...........................6-19
CD Changer, Trunk-Mounted............................3-62
Center Console Storage Area...........................2-44
Center Passenger Position, Safety Belts.............1-19
2
Page 363 of 372
H
Hazard Warning Flashers................................... 3-4
Head Restraints............................................... 1-5
Headlamp High/Low-Beam Changer.................... 3-7
Headlamp......................................................5-47
Aiming.......................................................5-47
Headlamps On Reminder.................................3-12
Headlamps....................................................5-50
Bulb Replacement.......................................5-49
Front Turn Signal Lamps..............................5-52
Halogen Bulbs............................................5-49
Head-Up Display (HUD)...................................3-17
Heated Backlite Antenna..................................3-70
Heated Seats................................................... 1-3
Highway Hypnosis...........................................4-22
Hill and Mountain Roads..................................4-22
Hitches..........................................................4-35
HomeLink Transmitter, Programming..................2-39
HomeLink
žTransmitter....................................2-39
Hood............................................................5-10
Checking Things Under................................5-10
Release.....................................................5-10
Horn............................................................... 3-5
How the System Works...................................3-20
How to Add Coolant to the Coolant
Recovery Tank............................................5-32How to Add Coolant to the Radiator..................5-34
How to Add Fluid............................................5-24
How to Check and Add Oil...............................5-19
How to Check Power Steering Fluid..................5-38
How to Check........................................5-22, 5-60
How to Inspect the Engine Air
Cleaner/Filter..............................................5-20
How to Use This Manual...................................... ii
How to Wear Safety Belts Properly...................1-11
Hydroplaning..................................................4-17
I
If No Steam Is Coming From Your Engine..........5-29
If Steam Is Coming From Your Engine...............5-28
If the Light Is Flashing.....................................3-38
If the Light Is On Steady.................................3-38
If You Are Stuck in Sand, Mud, Ice or Snow.......4-28
If You Can't See The HUD Image When the
Ignition is On..............................................3-19
If You Do Decide To Pull A Trailer.....................4-33
If You're Caught in a Blizzard...........................4-26
Ignition Positions.............................................2-21
Ignition Transaxle Lock Check..........................6-22
Infants and Young Children, Restraints...............1-29
In¯ation -- Tire Pressure..................................5-59
7
Page 368 of 372
Radios (cont.)
Trunk-Mounted CD Changer..........................3-62
Understanding Reception..............................3-68
RainsenseŸ II Wipers....................................... 3-8
Rear Compartment Fuse Block.........................5-94
Rear Door Security Locks................................2-12
Rear Quarter Panel Turn Signal and
Stoplamps..................................................5-56
Rear Reading Lamps......................................3-17
Rear Safety Belt Comfort Guides......................1-24
Rear Seat Armrest..........................................2-45
Rear Seat Outside Passenger Positions.............1-21
Rear Seat Pass Through.................................2-45
Rear Seat Passengers, Safety Belts..................1-21
Rear Storage Area..........................................2-45
Rear Turn Signal, Stoplamps and
Back-Up Lamps...........................................5-52
Rear Window Defogger....................................3-25
Rearview Mirror, Automatic Dimming
with Compass.............................................2-33
Rearview Mirror, Automatic Dimming..................2-33
Rearview Mirrors.............................................2-33
Reclining Seatbacks.......................................... 1-4
Recreational Vehicle Towing.............................4-29
Remote Keyless Entry System, Operation............ 2-5
Remote Keyless Entry System............................ 2-5
Remote Trunk Release Lockout........................2-14
Remote Trunk Release....................................2-14Removing the Flat Tire and Installing the
Spare Tire..................................................5-72
Removing the Spare Tire and Tools...................5-70
Removing the Wheel Covers and Wheel
Nut Caps...................................................5-71
Replacement Bulbs.........................................5-57
Replacing Brake System Parts..........................5-42
Replacing Restraint System Parts
After a Crash..............................................1-57
Reporting Safety Defects................................... 7-9
Canadian Government................................... 7-9
General Motors............................................. 7-9
United States Government.............................. 7-8
Reprogramming a Single HomeLink
žButton.......2-42
Resetting Defaults...........................................2-42
Restraint System Check...................................6-20
Checking Your Restraint Systems...................1-56
Replacing Restraint System Parts After a
Crash.....................................................1-57
Restraint Systems...........................................1-56
Checking....................................................1-56
Replacing Parts...........................................1-57
Resynchronization............................................. 2-8
Retained Accessory Power (RAP)......................2-22
Right Front Passenger Position, Safety Belts......1-19
Roadside......................................................... 7-5
Assistance Program....................................... 7-5
Rocking Your Vehicle To Get It Out...................4-28
Running Your Engine While You Are Parked.......2-32
12