overheating BUICK PARK AVENUE 2004 Owner's Manual
[x] Cancel search | Manufacturer: BUICK, Model Year: 2004, Model line: PARK AVENUE, Model: BUICK PARK AVENUE 2004Pages: 410, PDF Size: 4.45 MB
Page 141 of 410
Certain electrical accessories may not be compatible to
the accessory power outlet and could result in blown
vehicle or adapter fuses. If you experience a problem
see your dealer for additional information on accessory
power outlets.
Notice:Adding any electrical equipment to your
vehicle may damage it or keep other components
from working as they should. The repairs would not
be covered by your warranty. Check with your
dealer before adding electrical equipment.
When adding electrical equipment, be sure to follow
the proper installation instructions included with
the equipment.
Notice:Improper use of the power outlet can cause
damage not covered by your warranty. Do not
hang any type of accessory or accessory bracket
from the plug because the power outlets are
designed for accessory power plugs only.Ashtrays and Cigarette Lighter
The front ashtray is located under the climate control
panel on the center console. Press on the door to
release the ashtray. To close, press on the door again.
To empty the ashtray, remove it from the center
console by gripping the edges and pulling straight out.
To reinstall, push the tray back into place.
The rear ashtrays are located on each rear door panel.
To remove a rear ashtray, open the lid and ease the
ashtray upward until the edge can be grasped to pull the
ashtray up and out.
Notice:If you put papers or other �ammable items
in the ashtray, hot cigarettes or other smoking
materials could ignite them and possibly damage
your vehicle. Never put �ammable items in the
ashtray.
There is a cigarette lighter near the front ashtray.
To use it, push it in all the way and let go. When it’s
ready, it will pop back out by itself.
Notice:Holding a cigarette lighter in while it is
heating will not allow the lighter to back away from
the heating element when it is hot. Damage from
overheating may occur to the lighter or heating
element, or a fuse could be blown. Do not hold a
cigarette lighter in while it is heating.
3-23
Page 166 of 410
ODO/TRIP (Odometer/Trip)
When this button is pressed, the display will show the
total mileage, and TRIP 1 or TRIP 2 miles. TRIP 1 and
TRIP 2 will display the miles traveled since the last reset.
To reset the trip odometer, press the ODO/TRIP button
until the trip miles are shown in the DIC display, then
press the RESET button. The trip odometer will now
accumulate miles until the next reset.
FUEL INFO (Information)
Fuel Used:Press the FUEL INFO button until the
display shows FUEL USED. This display will show you
how much fuel has been used since the last reset.
To learn how much fuel is used from a new starting
point, press the RESET button while the fuel used
is displayed in the DIC.
Fuel Range:Press the FUEL INFO button until the
display shows FUEL RANGE. The fuel range will
calculate the remaining distance you can drive without
refueling. This calculation is based on the average
fuel economy for the last 25 miles (40.25 km) driven,
and the fuel remaining in the fuel tank. The RESET
button does not function in this mode.Instantaneous Fuel Economy:Press the FUEL INFO
button until the display shows FUEL ECONOMY
INST. Instantaneous fuel economy varies with your
driving conditions, such as acceleration, braking and the
grade of the road being traveled. The RESET button
does not function in this mode.
Average Fuel Economy:Press the FUEL INFO button
until the display shows FUEL ECONOMY AVERAGE.
Average fuel economy is viewed as a long term
approximation of your overall driving conditions.
To learn the average fuel economy from a new starting
point, press the RESET button while the average
fuel economy is displayed in the DIC.
GAGE INFO (Information)
Coolant Temperature:Press the GAGE INFO button
until COOLANT TEMP appears in the display. If there are
no problems detected with the temperature, COOLANT
TEMP NORMAL will appear in the display. If the
temperature is too high, COOLANT TEMP HOT will
appear in the display. If you see the COOLANT TEMP
HOT message, your engine is overheated. You should
pull off the road, stop your vehicle and turn off your
engine as soon as possible. This manual explains what to
do. SeeEngine Overheating on page 5-28.
3-48
Page 242 of 410
Your vehicle has bulb warning lights. When you plug
a trailer lighting system into your vehicle’s lighting
system, its bulb warning lights may not let you know if
one of your lamps goes out. So, when you have a trailer
lighting system plugged in, be sure to check your
vehicle and trailer lamps from time to time to be sure
they are all working. Once you disconnect the trailer
lamps, the bulb warning lights again can tell you if one
of your vehicle lamps is out.
Driving On Grades
Reduce speed and shift to a lower gearbeforeyou start
down a long or steep downgrade. If you do not shift
down, you might have to use your brakes so much that
they would get hot and no longer work well.
On a long uphill grade, shift to THIRD (3) and reduce
your speed to around 45 mph (70 km/h) to reduce
the possibility of engine and transaxle overheating.
Parking on Hills
{CAUTION:
You really should not park your vehicle, with a
trailer attached, on a hill. If something goes
wrong, your rig could start to move. People
can be injured, and both your vehicle and the
trailer can be damaged.
But if you ever have to park your rig on a hill, here is
how to do it:
1. Apply your regular brakes, but do not shift into
PARK (P) yet.
2. Have someone place chocks behind the trailer
wheels.
3. When the wheel chocks are in place, release the
regular brakes until the chocks absorb the load.
4. Reapply the regular brakes. Then apply your
parking brake, and then shift to PARK (P).
5. Release the regular brakes.
4-44
Page 243 of 410
When You Are Ready to Leave After
Parking on a Hill
1. Apply your regular brakes and hold the pedal down
while you:
Start your engine.
Shift into a gear.
Release the parking brake.
2. Let up on the brake pedal.
3. Drive slowly until the trailer is clear of the chocks.
4. Stop and have someone pick up and store the
chocks.
Maintenance When Trailer Towing
Your vehicle will need service more often when you are
pulling a trailer. See the Maintenance Schedule for
more on this. Things that are especially important in
trailer operation are automatic transaxle �uid (do not
over�ll), engine oil, drive belt, cooling system and brake
system. Each of these is covered in this manual, and
the Index will help you �nd them quickly. If you are
trailering, it is a good idea to review this information
before you start your trip.
Check periodically to see that all hitch nuts and bolts
are tight.
Engine Cooling When Trailer Towing
Your cooling system may temporarily overheat during
severe operating conditions. SeeEngine Overheating on
page 5-28.
4-45
Page 245 of 410
Service............................................................5-3
Doing Your Own Service Work.........................5-3
Adding Equipment to the Outside of
Your Vehicle..............................................5-4
Fuel................................................................5-4
Gasoline Octane............................................5-4
Gasoline Speci�cations....................................5-5
California Fuel...............................................5-5
Additives.......................................................5-5
Fuels in Foreign Countries...............................5-6
Filling Your Tank............................................5-6
Filling a Portable Fuel Container.......................5-9
Checking Things Under the Hood....................5-10
Hood Release..............................................5-10
Engine Compartment Overview.......................5-12
Engine Oil...................................................5-14
Supercharger Oil..........................................5-19
Engine Air Cleaner/Filter................................5-20
Automatic Transaxle Fluid..............................5-23
Engine Coolant.............................................5-25Radiator Pressure Cap..................................5-27
Engine Overheating.......................................5-28
Cooling System............................................5-30
Power Steering Fluid.....................................5-38
Windshield Washer Fluid................................5-39
Brakes........................................................5-40
Battery........................................................5-43
Jump Starting...............................................5-44
Headlamp Aiming...........................................5-49
Bulb Replacement..........................................5-51
Halogen Bulbs..............................................5-51
Headlamps..................................................5-51
Front Turn Signal Lamps...............................5-54
Rear Turn Signal, Stoplamps and
Back-Up Lamps........................................5-54
Rear Quarter Panel Turn Signal and
Stoplamps................................................5-58
Replacement Bulbs.......................................5-60
Windshield Wiper Blade Replacement..............5-61
Section 5 Service and Appearance Care
5-1
Page 269 of 410
How to Add Fluid
Refer to the Maintenance Schedule to determine what
kind of transaxle �uid to use. SeePart D: Recommended
Fluids and Lubricants on page 6-25.
If the �uid level is low, add only enough of the proper
�uid to bring the level into the cross-hatched area on the
dipstick.
1. Pull out the dipstick.
2. Using a long-neck funnel, add enough �uid at the
dipstick hole to bring it to the proper level.
It does not take much �uid, generally less than
one pint (0.5 L).Do not over�ll.
Notice:We recommend you use only �uid labeled
DEXRON
®-III, because �uid with that label is
made especially for your automatic transmission.
Damage caused by �uid other than DEXRON
®-III is
not covered by your new vehicle warranty.
3. After adding �uid, recheck the �uid level as
described under “How to Check,” earlier in this
section.
4. When the correct �uid level is obtained, push the
dipstick back in all the way.
Engine Coolant
The cooling system in your vehicle is �lled with
DEX-COOL®engine coolant. This coolant is designed
to remain in your vehicle for 5 years or 150,000 miles
(240 000 km), whichever occurs �rst, if you add
only DEX-COOL
®extended life coolant.
The following explains your cooling system and how to
add coolant when it is low. If you have a problem
with engine overheating, seeEngine Overheating on
page 5-28.
A 50/50 mixture of clean, drinkable water and
DEX-COOL
®will:
Give freezing protection down to−34°F (−37°C).
Give boiling protection up to 265°F (129°C).
Protect against rust and corrosion.
Help keep the proper engine temperature.
Let the warning lights and gages work as they
should.
Notice:Using coolant other than DEX-COOL
®may
cause premature engine, heater core or radiator
corrosion. In addition, the engine coolant may
require changing sooner, at 30,000 miles (50 000 km)
or 24 months, whichever occurs �rst. Any repairs
would not be covered by your warranty. Always use
DEX-COOL
®(silicate-free) coolant in your vehicle.
5-25
Page 271 of 410
The vehicle must be on a level surface. When your
engine is cold, the coolant level should be at FULL
COLD or a little higher. When your engine is warm,
the level should be up to FULL HOT or a little higher.
Adding Coolant
If you need more coolant, add the proper DEX-COOL®
coolant mixtureat the coolant recovery tank,but be
careful not to spill it.
{CAUTION:
Turning the radiator pressure cap when the
engine and radiator are hot can allow steam
and scalding liquids to blow out and burn you
badly. With the coolant recovery tank, you will
almost never have to add coolant at the
radiator. Never turn the radiator pressure
cap — even a little — when the engine and
radiator are hot.
{CAUTION:
You can be burned if you spill coolant on hot
engine parts. Coolant contains ethylene glycol,
and it will burn if the engine parts are hot
enough. Don’t spill coolant on a hot engine.
Occasionally check the coolant level in the radiator.
For information on how to add coolant to the radiator,
seeCooling System on page 5-30.
Radiator Pressure Cap
Notice:The radiator cap on your vehicle is a
pressure-type cap and must be tightly installed to
prevent coolant loss and possible engine damage
from overheating. Be sure the arrows on the cap line
up with the over�ow tube on the radiator �ller neck.
SeeEngine Compartment Overview on page 5-12for
more information on location.
5-27
Page 272 of 410
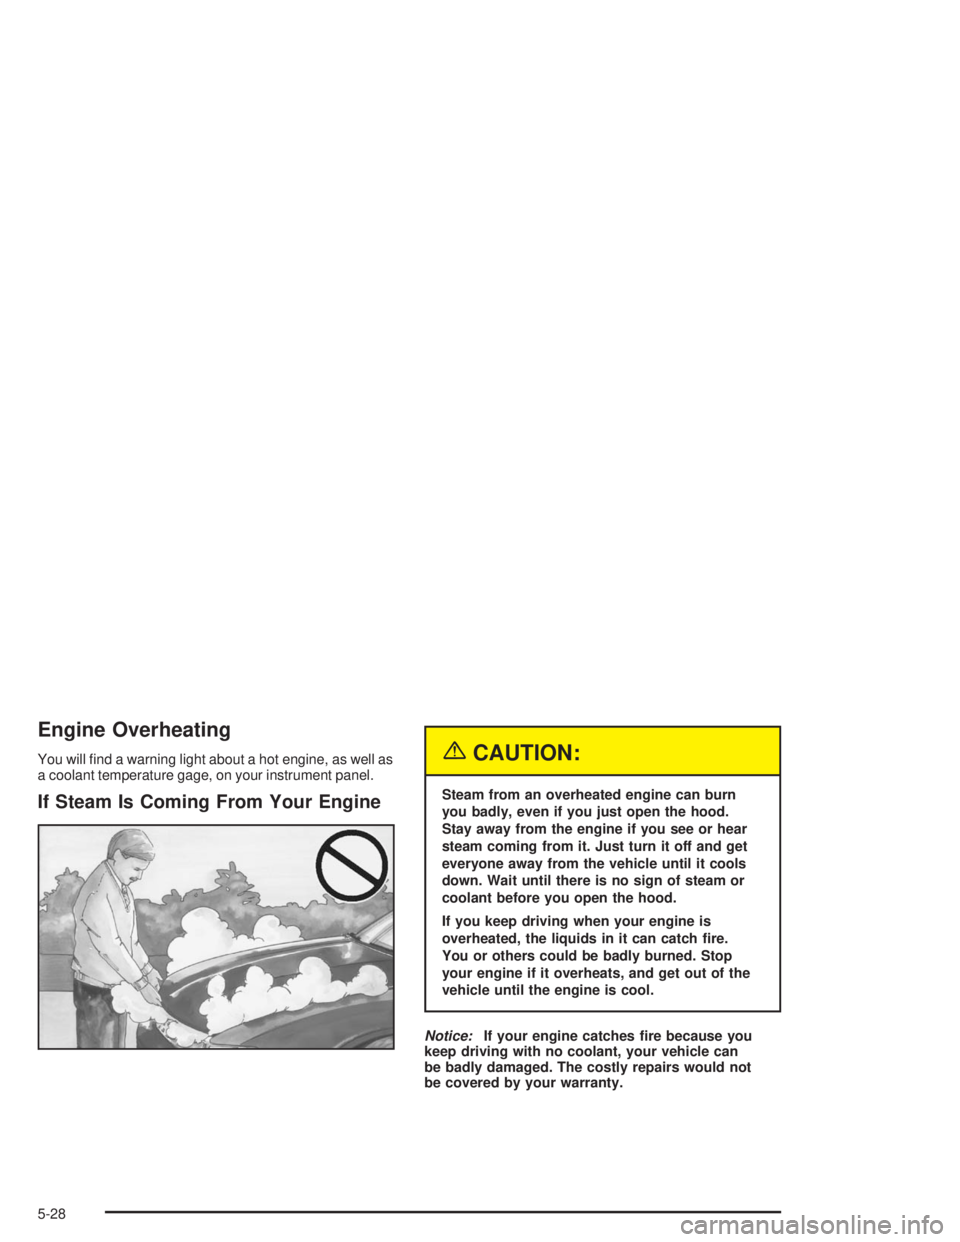
Engine Overheating
You will �nd a warning light about a hot engine, as well as
a coolant temperature gage, on your instrument panel.
If Steam Is Coming From Your Engine
{CAUTION:
Steam from an overheated engine can burn
you badly, even if you just open the hood.
Stay away from the engine if you see or hear
steam coming from it. Just turn it off and get
everyone away from the vehicle until it cools
down. Wait until there is no sign of steam or
coolant before you open the hood.
If you keep driving when your engine is
overheated, the liquids in it can catch �re.
You or others could be badly burned. Stop
your engine if it overheats, and get out of the
vehicle until the engine is cool.
Notice:If your engine catches �re because you
keep driving with no coolant, your vehicle can
be badly damaged. The costly repairs would not
be covered by your warranty.
5-28
Page 275 of 410
SeeEngine Compartment Overview on page 5-12for
more information on location.
The coolant level should be at or above the FULL
COLD mark. If it is not, you may have a leak at the
pressure cap or in the radiator hoses, heater hoses,
radiator, water pump or somewhere else in the cooling
system.
{CAUTION:
Heater and radiator hoses, and other engine
parts, can be very hot. Do not touch them.
If you do, you can be burned.
Do not run the engine if there is a leak. If you
run the engine, it could lose all coolant. That
could cause an engine �re, and you could be
burned. Get any leak �xed before you drive the
vehicle.If there seems to be no leak, with the engine on, check
to see if the electric engine cooling fans are running.
If the engine is overheating, both fans should be
running. If they are not, your vehicle needs service.
Notice:Engine damage from running your engine
without coolant isn’t covered by your warranty.
Notice:Using coolant other than DEX-COOL
®may
cause premature engine, heater core or radiator
corrosion. In addition, the engine coolant may
require changing sooner, at 30,000 miles (50 000 km)
or 24 months, whichever occurs �rst. Any repairs
would not be covered by your warranty. Always use
DEX-COOL
®(silicate-free) coolant in your vehicle.
5-31
Page 306 of 410
Tires
Your new vehicle comes with high-quality tires made by
a leading tire manufacturer. If you ever have questions
about your tire warranty and where to obtain service,
see your GM Warranty booklet for details. For additional
information refer to the tire manufacturer’s booklet
included with your vehicle’s Owner’s Manual.
{CAUTION:
Poorly maintained and improperly used tires
are dangerous.
Overloading your tires can cause
overheating as a result of too much
friction. You could have an air-out and a
serious accident. See “Loading Your
Vehicle” in the Index.
CAUTION: (Continued)
CAUTION: (Continued)
Underin�ated tires pose the same danger
as overloaded tires. The resulting accident
could cause serious injury. Check all tires
frequently to maintain the recommended
pressure. Tire pressure should be checked
when your tires are cold.
Overin�ated tires are more likely to be
cut, punctured or broken by a sudden
impact — such as when you hit a pothole.
Keep tires at the recommended pressure.
Worn, old tires can cause accidents.
If your tread is badly worn, or if your
tires have been damaged, replace them.
Tire Sidewall Labeling
Useful information about a tire is molded into its sidewall.
The examples below show a typical passenger car tire
and a compact spare tire sidewall.
5-62