trunk BUICK PARK AVENUE 2005 Owner's Guide
[x] Cancel search | Manufacturer: BUICK, Model Year: 2005, Model line: PARK AVENUE, Model: BUICK PARK AVENUE 2005Pages: 388, PDF Size: 2.55 MB
Page 284 of 388
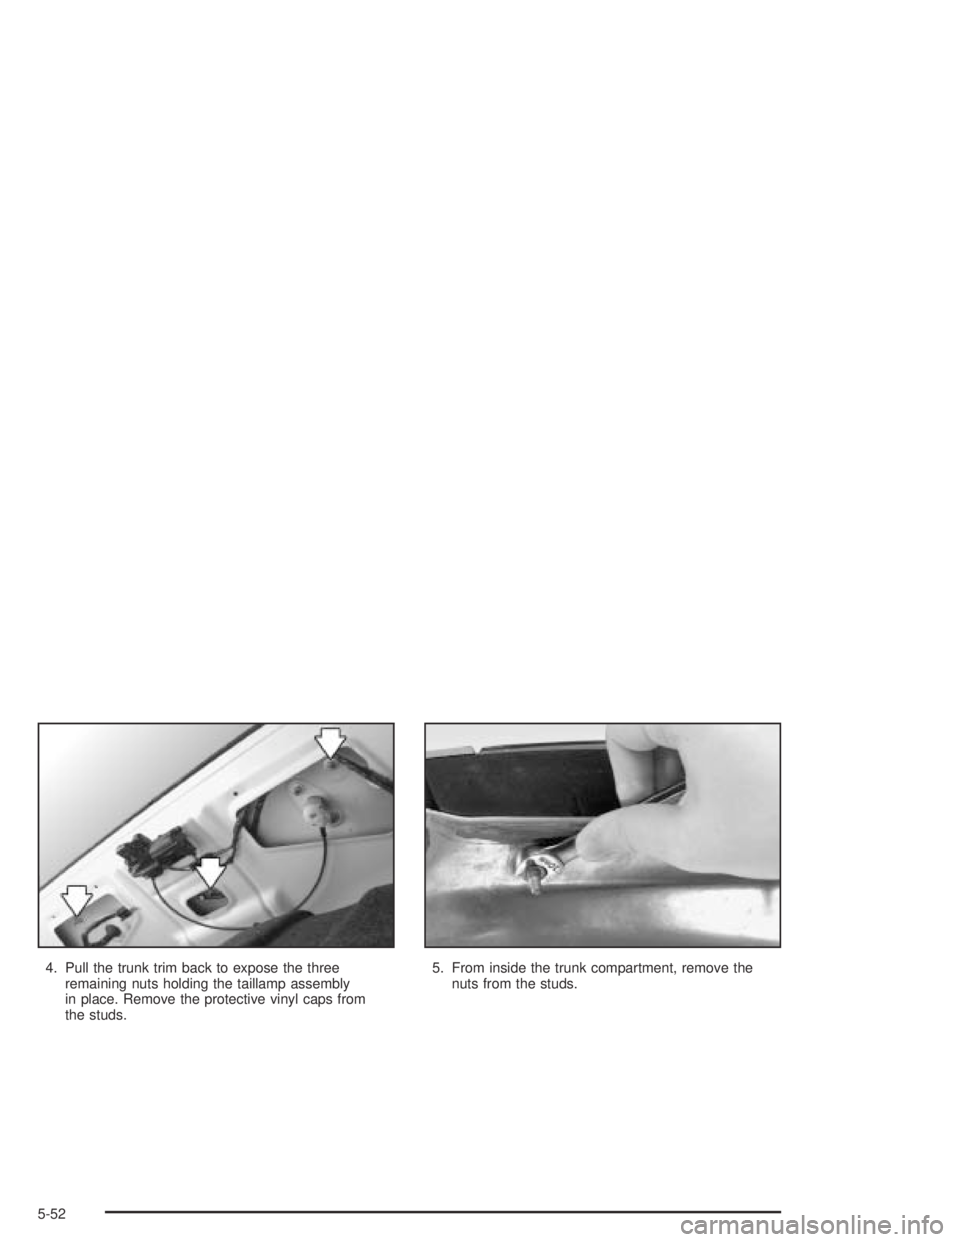
4. Pull the trunk trim back to expose the three
remaining nuts holding the taillamp assembly
in place. Remove the protective vinyl caps from
the studs.5. From inside the trunk compartment, remove the
nuts from the studs.
5-52
Page 285 of 388
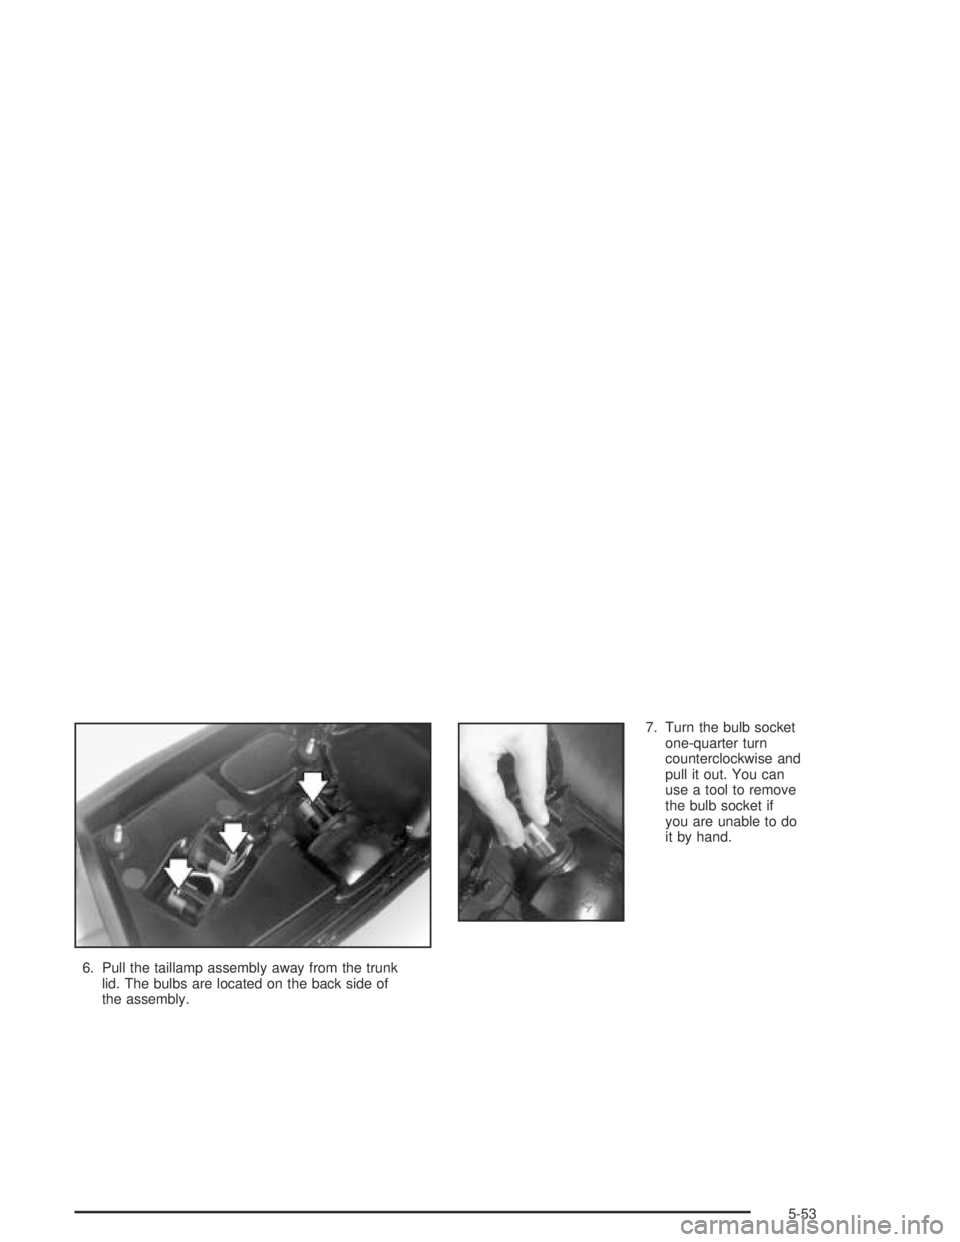
6. Pull the taillamp assembly away from the trunk
lid. The bulbs are located on the back side of
the assembly.7. Turn the bulb socket
one-quarter turn
counterclockwise and
pull it out. You can
use a tool to remove
the bulb socket if
you are unable to do
it by hand.
5-53
Page 286 of 388
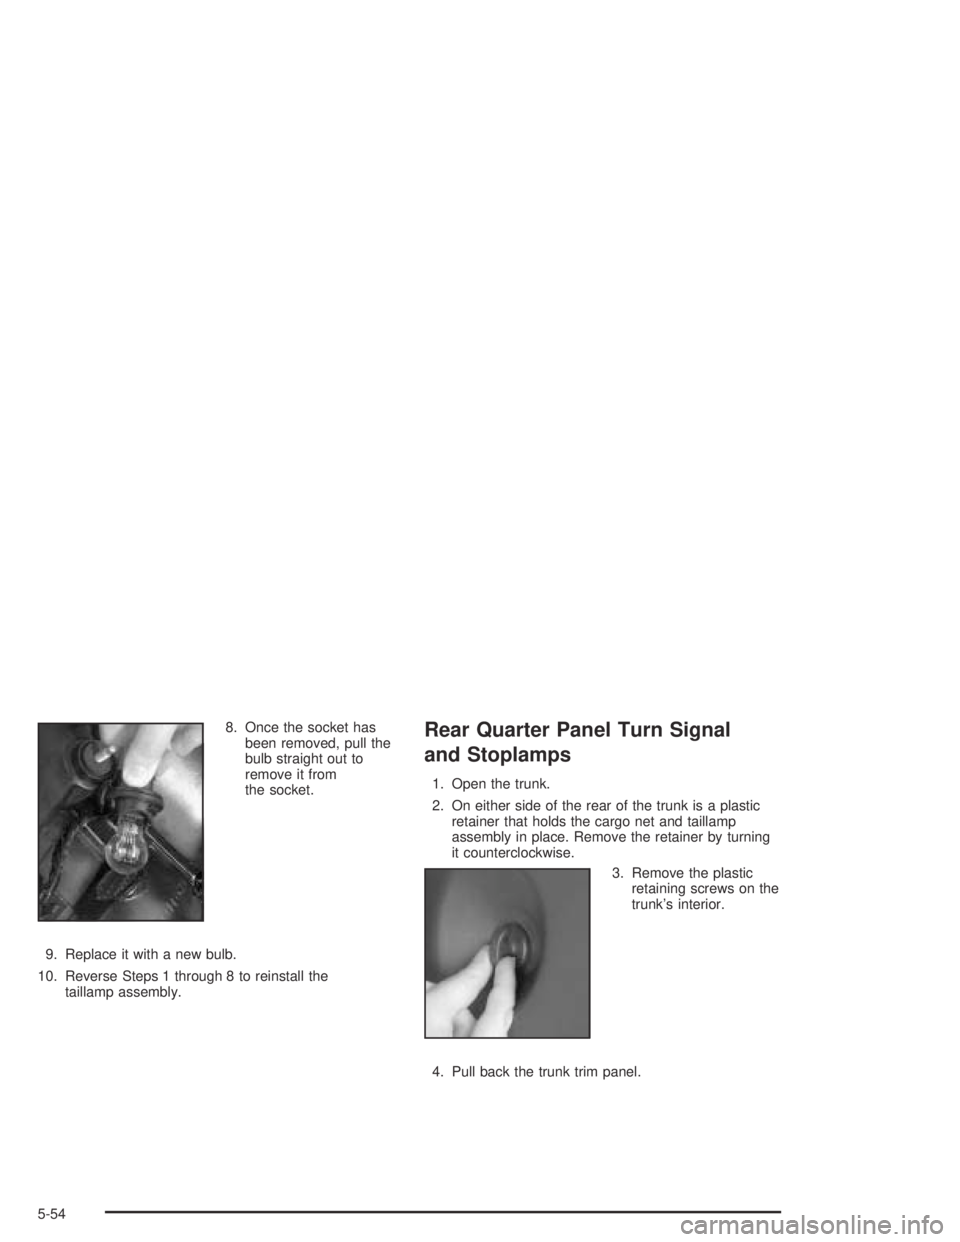
8. Once the socket has
been removed, pull the
bulb straight out to
remove it from
the socket.
9. Replace it with a new bulb.
10. Reverse Steps 1 through 8 to reinstall the
taillamp assembly.Rear Quarter Panel Turn Signal
and Stoplamps
1. Open the trunk.
2. On either side of the rear of the trunk is a plastic
retainer that holds the cargo net and taillamp
assembly in place. Remove the retainer by turning
it counterclockwise.
3. Remove the plastic
retaining screws on the
trunk’s interior.
4. Pull back the trunk trim panel.
5-54
Page 307 of 388
Removing the Spare Tire and Tools
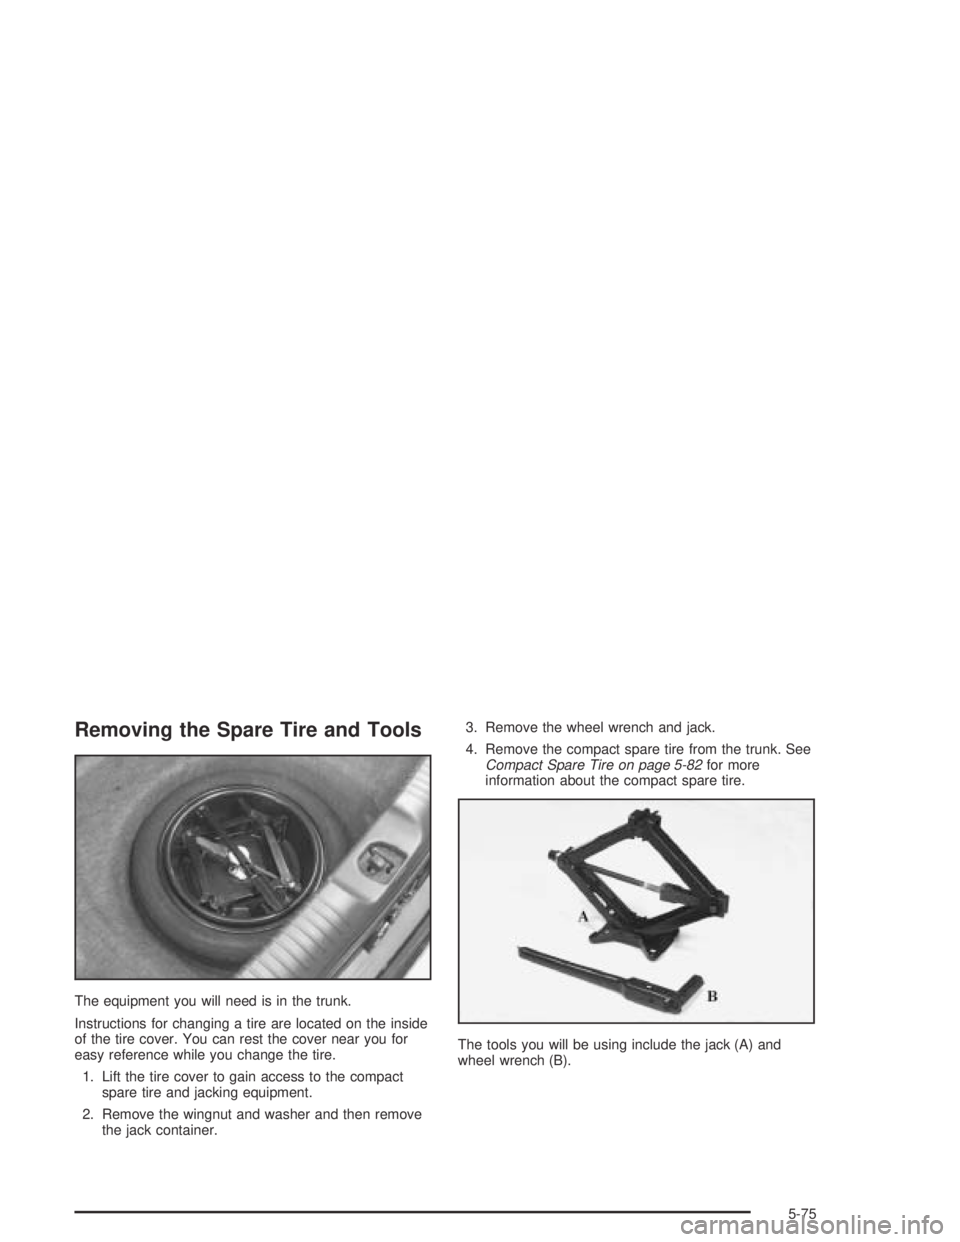
The equipment you will need is in the trunk.
Instructions for changing a tire are located on the inside
of the tire cover. You can rest the cover near you for
easy reference while you change the tire.
1. Lift the tire cover to gain access to the compact
spare tire and jacking equipment.
2. Remove the wingnut and washer and then remove
the jack container.3. Remove the wheel wrench and jack.
4. Remove the compact spare tire from the trunk. See
Compact Spare Tire on page 5-82for more
information about the compact spare tire.
The tools you will be using include the jack (A) and
wheel wrench (B).
5-75
Page 312 of 388
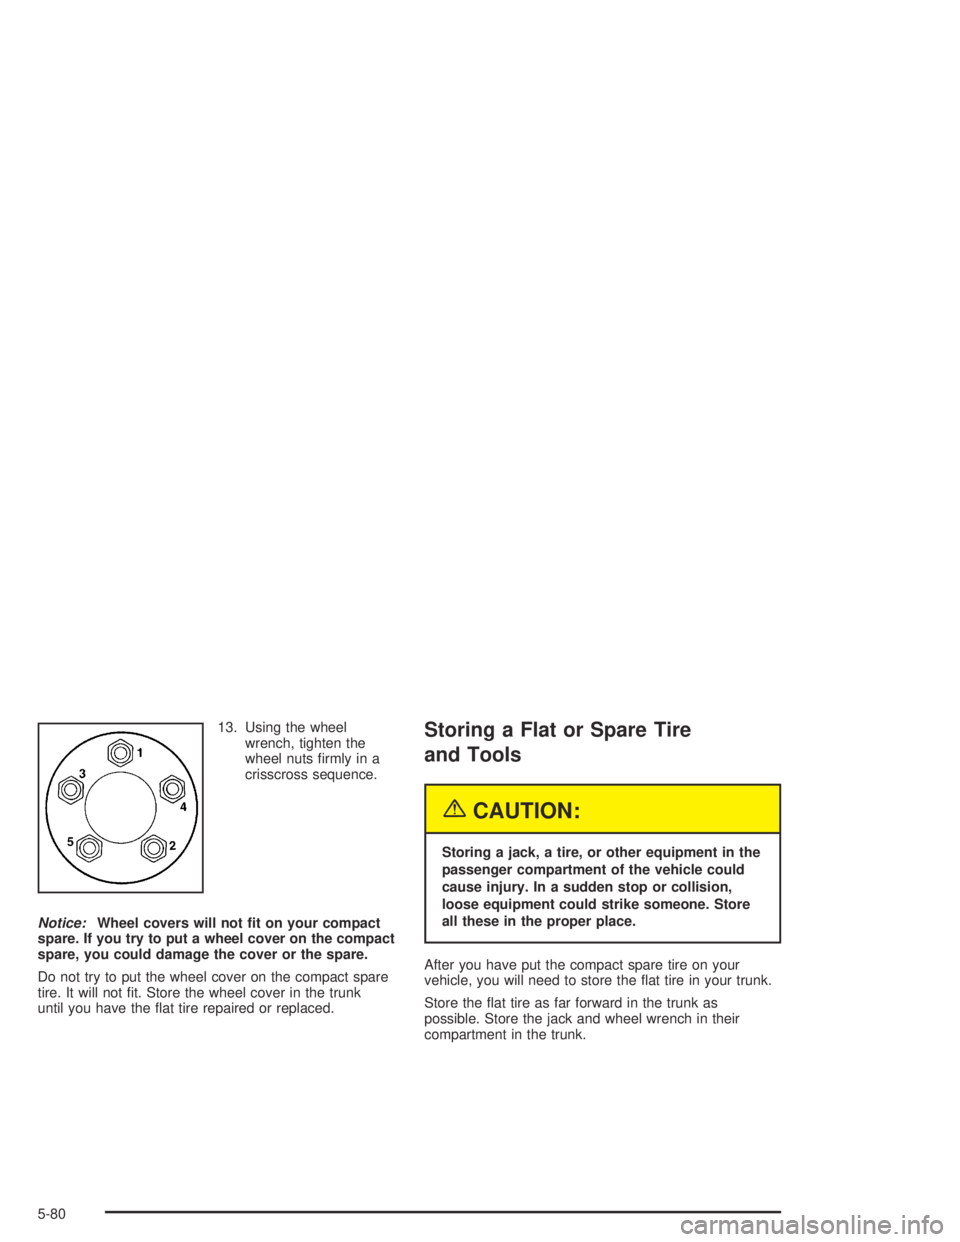
13. Using the wheel
wrench, tighten the
wheel nuts �rmly in a
crisscross sequence.
Notice:Wheel covers will not �t on your compact
spare. If you try to put a wheel cover on the compact
spare, you could damage the cover or the spare.
Do not try to put the wheel cover on the compact spare
tire. It will not �t. Store the wheel cover in the trunk
until you have the �at tire repaired or replaced.Storing a Flat or Spare Tire
and Tools
{CAUTION:
Storing a jack, a tire, or other equipment in the
passenger compartment of the vehicle could
cause injury. In a sudden stop or collision,
loose equipment could strike someone. Store
all these in the proper place.
After you have put the compact spare tire on your
vehicle, you will need to store the �at tire in your trunk.
Store the �at tire as far forward in the trunk as
possible. Store the jack and wheel wrench in their
compartment in the trunk.
5-80
Page 329 of 388
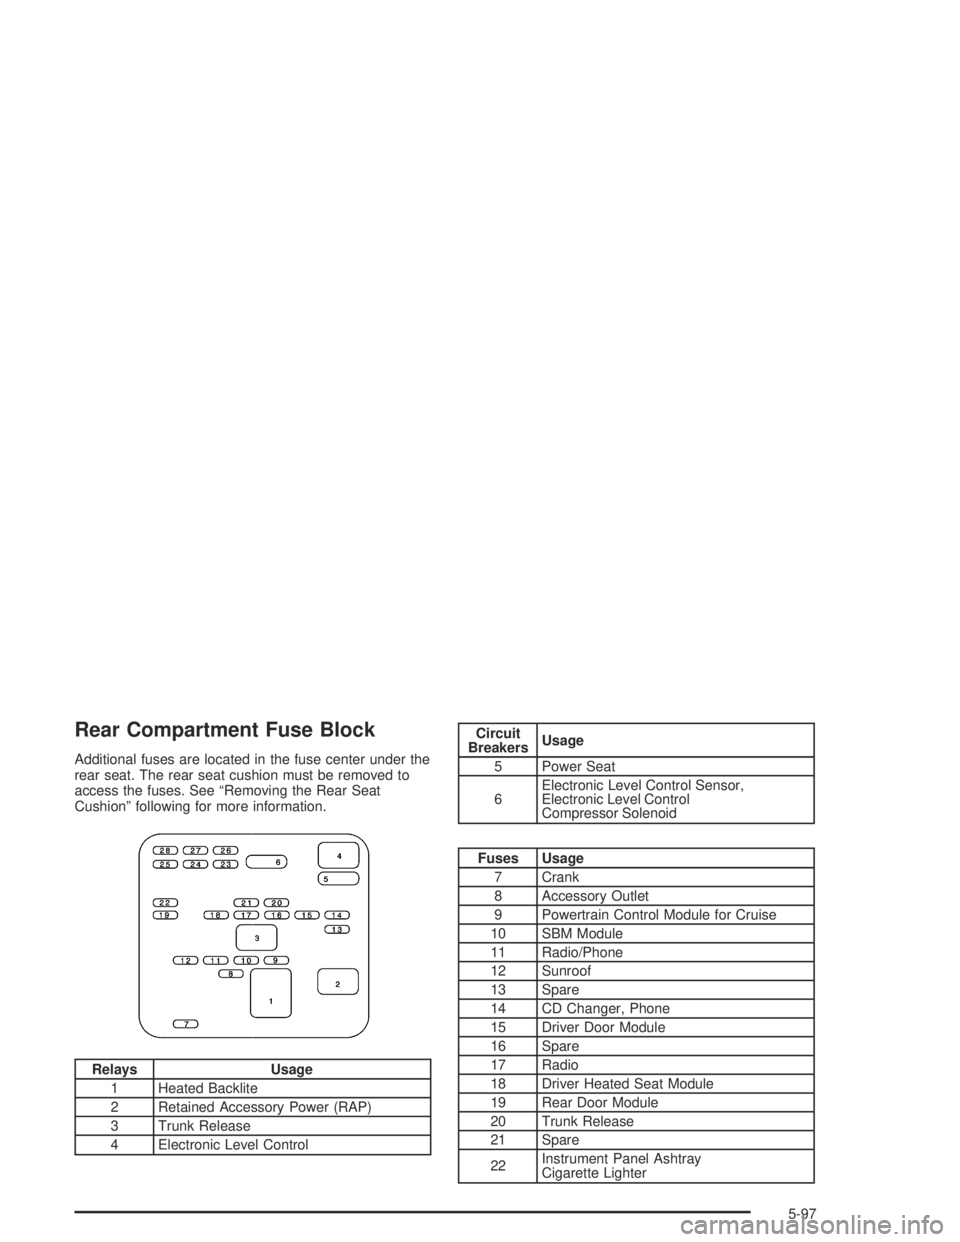
Rear Compartment Fuse Block
Additional fuses are located in the fuse center under the
rear seat. The rear seat cushion must be removed to
access the fuses. See “Removing the Rear Seat
Cushion” following for more information.
Relays Usage
1 Heated Backlite
2 Retained Accessory Power (RAP)
3 Trunk Release
4 Electronic Level Control
Circuit
BreakersUsage
5 Power Seat
6Electronic Level Control Sensor,
Electronic Level Control
Compressor Solenoid
Fuses Usage
7 Crank
8 Accessory Outlet
9 Powertrain Control Module for Cruise
10 SBM Module
11 Radio/Phone
12 Sunroof
13 Spare
14 CD Changer, Phone
15 Driver Door Module
16 Spare
17 Radio
18 Driver Heated Seat Module
19 Rear Door Module
20 Trunk Release
21 Spare
22Instrument Panel Ashtray
Cigarette Lighter
5-97
Page 376 of 388
Audio System(s) (cont.)
Trunk-Mounted CD Changer..........................3-66
Understanding Radio Reception.....................3-72
Automatic Transaxle
Fluid..........................................................5-22
Operation...................................................2-26
B
Battery..........................................................5-40
Run-Down Protection...................................3-19
Battery Warning Light......................................3-37
Before Leaving on a Long Trip.........................4-22
Brake
Anti-Lock Brake System (ABS)........................ 4-7
Emergencies................................................ 4-9
Parking......................................................2-29
System Inspection.......................................6-24
System Warning Light..................................3-38
Brakes..........................................................5-37
Braking........................................................... 4-6
Braking in Emergencies..................................... 4-9
Break-In, New Vehicle.....................................2-22
Bulb Replacement...........................................5-47
Front Turn Signal Lamps..............................5-50
Halogen Bulbs............................................5-47
Headlamp Aiming........................................5-45
Headlamps.................................................5-47Bulb Replacement (cont.)
Rear Quarter Panel Turn Signal and
Stoplamps...............................................5-54
Rear Turn Signal, Stoplamps and
Back-Up Lamps.......................................5-50
Replacement Bulbs......................................5-56
Buying New Tires...........................................5-68C
California Fuel.................................................. 5-5
Canadian Owners................................................ ii
Capacities and Speci�cations..........................5-100
Carbon Monoxide...................2-14, 2-32, 4-25, 4-37
Care of
Safety Belts................................................5-86
Your Cassette Tape Player............................3-73
Your CD Player...........................................3-74
Your CDs ...................................................3-74
CD Changer, Trunk-Mounted............................3-66
Center Console Storage Area...........................2-46
Center Passenger Position, Safety Belts.............1-19
Chains, Tire...................................................5-72
Check
Engine Light...............................................3-40
Tire Pressure System...................................5-65
Checking Things Under the Hood......................5-10
Chemical Paint Spotting...................................5-89
2
Page 381 of 388
I
If You Are Stuck in Sand, Mud, Ice or Snow.......4-29
Ignition Positions.............................................2-22
Infants and Young Children, Restraints...............1-29
In�ation -- Tire Pressure..................................5-64
Inspection
Brake System.............................................6-24
Engine Cooling System................................6-24
Exhaust System..........................................6-23
Fuel System...............................................6-23
Part C - Periodic Maintenance.......................6-23
Steering, Suspension and Front Drive Axle
Boot and Seal.........................................6-23
Throttle System...........................................6-24
Instrument Panel
Brightness..................................................3-16
Cluster.......................................................3-33
Overview..................................................... 3-4
J
Jump Starting.................................................5-41
K
Keyless Entry System....................................... 2-5
Keys............................................................... 2-3
L
Labelling, Tire Sidewall....................................5-59
Lamps
Battery Run-Down Protection.........................3-19
Cornering...................................................3-15
Courtesy....................................................3-16
Exterior......................................................3-14
Front Reading.............................................3-18
Glove Box..................................................3-18
Rear Reading.............................................3-19
Trunk.........................................................3-19
Twilight Sentinel
®........................................3-16
LATCH System
Child Restraints...........................................1-40
Securing a Child Restraint Designed
for the LATCH System..............................1-42
Leaving Your Vehicle.......................................2-13
Light
Airbag Readiness........................................3-36
Anti-Lock Brake System Warning...................3-39
Battery Warning..........................................3-37
Brake System Warning.................................3-38
Cruise Control.............................................3-44
Malfunction Indicator....................................3-40
Oil Pressure...............................................3-43
Safety Belt Reminder...................................3-36
Security.....................................................3-44
7
Page 384 of 388
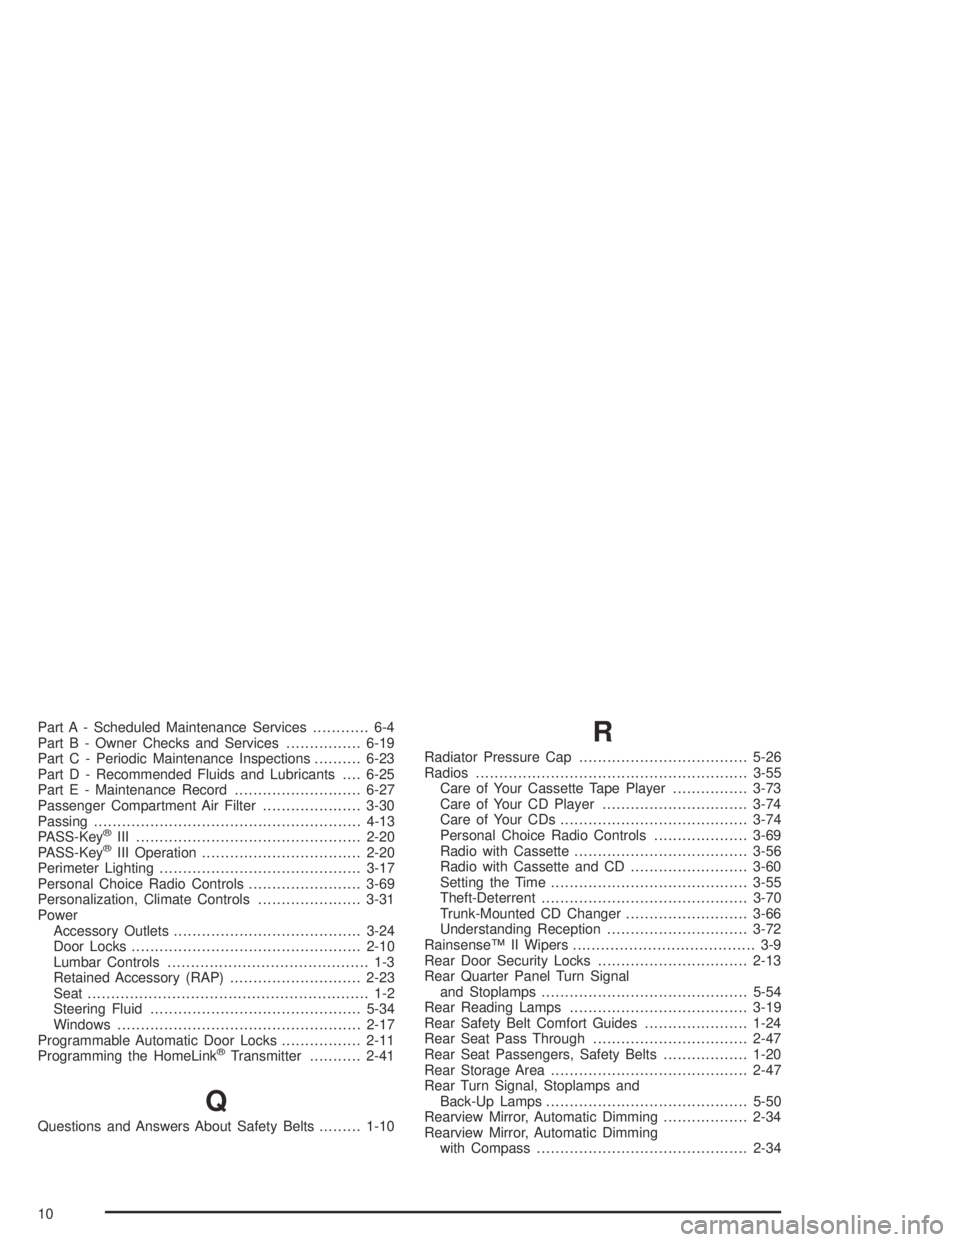
Part A - Scheduled Maintenance Services............ 6-4
Part B - Owner Checks and Services................6-19
Part C - Periodic Maintenance Inspections..........6-23
Part D - Recommended Fluids and Lubricants....6-25
Part E - Maintenance Record...........................6-27
Passenger Compartment Air Filter.....................3-30
Passing.........................................................4-13
PASS-Key
®III ................................................2-20
PASS-Key®III Operation..................................2-20
Perimeter Lighting...........................................3-17
Personal Choice Radio Controls........................3-69
Personalization, Climate Controls......................3-31
Power
Accessory Outlets........................................3-24
Door Locks.................................................2-10
Lumbar Controls........................................... 1-3
Retained Accessory (RAP)............................2-23
Seat............................................................ 1-2
Steering Fluid.............................................5-34
Windows....................................................2-17
Programmable Automatic Door Locks.................2-11
Programming the HomeLink
®Transmitter...........2-41
Q
Questions and Answers About Safety Belts.........1-10
R
Radiator Pressure Cap....................................5-26
Radios..........................................................3-55
Care of Your Cassette Tape Player................3-73
Care of Your CD Player...............................3-74
Care of Your CDs........................................3-74
Personal Choice Radio Controls....................3-69
Radio with Cassette.....................................3-56
Radio with Cassette and CD.........................3-60
Setting the Time..........................................3-55
Theft-Deterrent............................................3-70
Trunk-Mounted CD Changer..........................3-66
Understanding Reception..............................3-72
Rainsense™ II Wipers....................................... 3-9
Rear Door Security Locks................................2-13
Rear Quarter Panel Turn Signal
and Stoplamps............................................5-54
Rear Reading Lamps......................................3-19
Rear Safety Belt Comfort Guides......................1-24
Rear Seat Pass Through.................................2-47
Rear Seat Passengers, Safety Belts..................1-20
Rear Storage Area..........................................2-47
Rear Turn Signal, Stoplamps and
Back-Up Lamps...........................................5-50
Rearview Mirror, Automatic Dimming..................2-34
Rearview Mirror, Automatic Dimming
with Compass.............................................2-34
10
Page 387 of 388
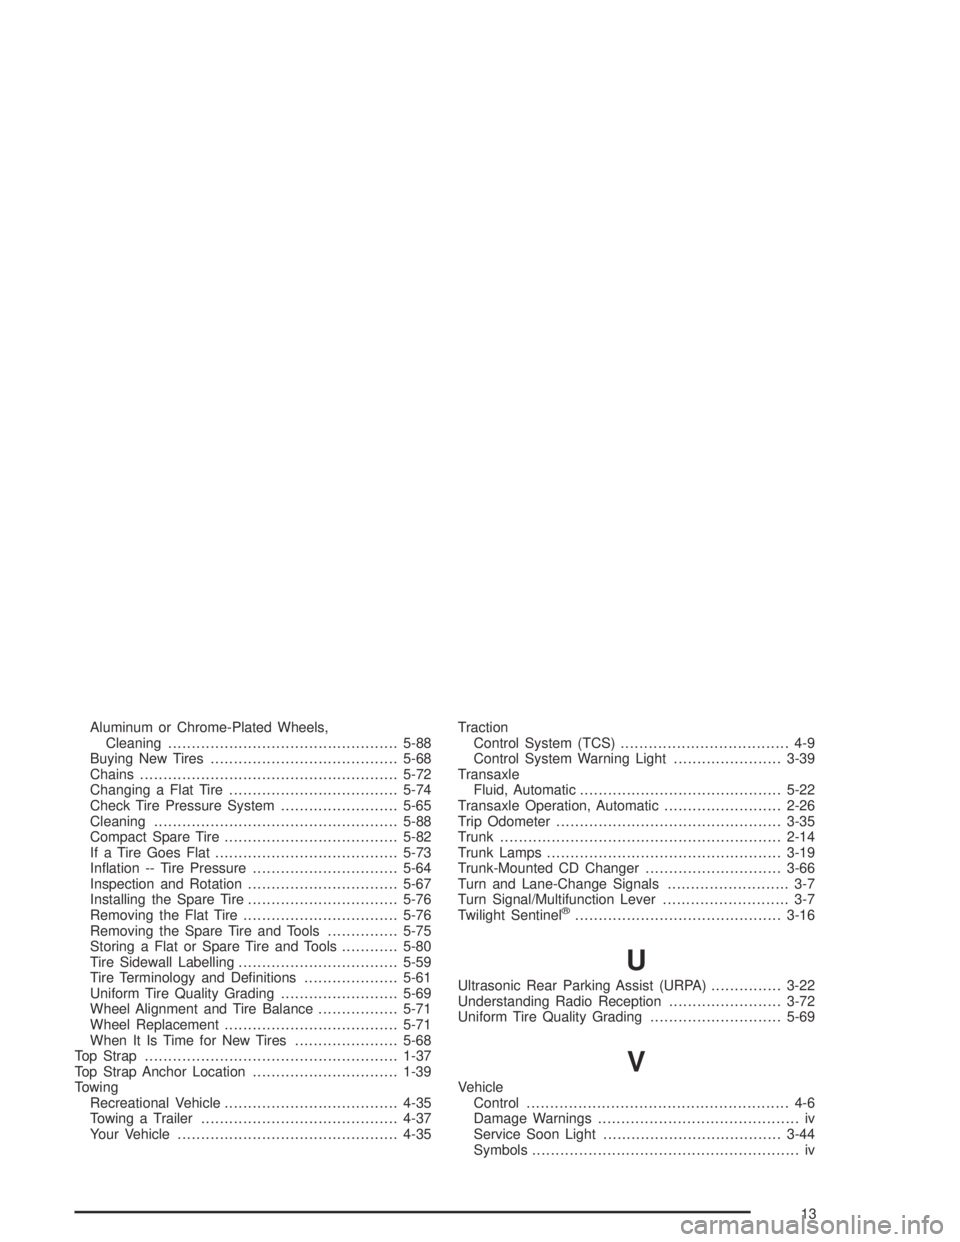
Aluminum or Chrome-Plated Wheels,
Cleaning.................................................5-88
Buying New Tires........................................5-68
Chains.......................................................5-72
Changing a Flat Tire....................................5-74
Check Tire Pressure System.........................5-65
Cleaning....................................................5-88
Compact Spare Tire.....................................5-82
If a Tire Goes Flat.......................................5-73
In�ation -- Tire Pressure...............................5-64
Inspection and Rotation................................5-67
Installing the Spare Tire................................5-76
Removing the Flat Tire.................................5-76
Removing the Spare Tire and Tools...............5-75
Storing a Flat or Spare Tire and Tools............5-80
Tire Sidewall Labelling..................................5-59
Tire Terminology and De�nitions....................5-61
Uniform Tire Quality Grading.........................5-69
Wheel Alignment and Tire Balance.................5-71
Wheel Replacement.....................................5-71
When It Is Time for New Tires......................5-68
Top Strap......................................................1-37
Top Strap Anchor Location...............................1-39
Towing
Recreational Vehicle.....................................4-35
Towing a Trailer..........................................4-37
Your Vehicle...............................................4-35Traction
Control System (TCS).................................... 4-9
Control System Warning Light.......................3-39
Transaxle
Fluid, Automatic...........................................5-22
Transaxle Operation, Automatic.........................2-26
Trip Odometer................................................3-35
Trunk............................................................2-14
Trunk Lamps..................................................3-19
Trunk-Mounted CD Changer.............................3-66
Turn and Lane-Change Signals.......................... 3-7
Turn Signal/Multifunction Lever........................... 3-7
Twilight Sentinel
®............................................3-16
U
Ultrasonic Rear Parking Assist (URPA)...............3-22
Understanding Radio Reception........................3-72
Uniform Tire Quality Grading............................5-69
V
Vehicle
Control........................................................ 4-6
Damage Warnings........................................... iv
Service Soon Light......................................3-44
Symbols......................................................... iv
13