CD changer BUICK PARK AVENUE 2005 Owner's Manual
[x] Cancel search | Manufacturer: BUICK, Model Year: 2005, Model line: PARK AVENUE, Model: BUICK PARK AVENUE 2005Pages: 388, PDF Size: 2.55 MB
Page 115 of 388

Instrument Panel Overview...............................3-4
Hazard Warning Flashers................................3-6
Other Warning Devices...................................3-6
Horn.............................................................3-6
Tilt Wheel.....................................................3-6
Turn Signal/Multifunction Lever.........................3-7
Turn and Lane-Change Signals........................3-7
Headlamp High/Low-Beam Changer..................3-8
Flash-to-Pass.................................................3-9
Windshield Wipers..........................................3-9
Rainsense™ II Wipers.....................................3-9
Windshield Washer.......................................3-10
Cruise Control..............................................3-10
Exterior Lamps.............................................3-14
Headlamps on Reminder................................3-14
Daytime Running Lamps................................3-15
Cornering Lamps..........................................3-15
Twilight Sentinel
®..........................................3-16
Instrument Panel Brightness...........................3-16
Courtesy Lamps...........................................3-16
Entry Lighting...............................................3-16
Delayed Entry Lighting...................................3-17
Theater Dimming..........................................3-17
Delayed Exit Lighting.....................................3-17
Perimeter Lighting.........................................3-17
Parade Dimming...........................................3-18Glove Box Lamp...........................................3-18
Front Reading Lamps....................................3-18
Rear Reading Lamps....................................3-19
Trunk Lamp.................................................3-19
Battery Run-Down Protection..........................3-19
Head-Up Display (HUD).................................3-19
Ultrasonic Rear Parking Assist (URPA)............3-22
Accessory Power Outlets...............................3-24
Ashtrays and Cigarette Lighter........................3-25
Climate Controls............................................3-25
Dual Automatic Climate Control System...........3-25
Outlet Adjustment.........................................3-30
Passenger Compartment Air Filter...................3-30
Steering Wheel Climate Controls.....................3-31
Climate Controls Personalization.....................3-31
Warning Lights, Gages, and Indicators............3-32
Instrument Panel Cluster................................3-33
Speedometer and Odometer...........................3-35
Trip Odometer..............................................3-35
Tachometer.................................................3-35
Safety Belt Reminder Light.............................3-36
Airbag Readiness Light..................................3-36
Battery Warning Light....................................3-37
Brake System Warning Light..........................3-38
Section 3 Instrument Panel
3-1
Page 116 of 388
Anti-Lock Brake System Warning Light.............3-39
Traction Control System (TCS) Warning Light......3-39
Engine Coolant Temperature Gage..................3-40
Malfunction Indicator Lamp.............................3-40
Oil Pressure Light.........................................3-43
Security Light...............................................3-44
Cruise Control Light......................................3-44
Service Vehicle Soon Light............................3-44
Fuel Gage...................................................3-45
Driver Information Center (DIC).......................3-46
DIC Controls and Displays.............................3-46
DIC Warnings and Messages.........................3-49
DIC Vehicle Personalization............................3-50Audio System(s).............................................3-55
Setting the Time...........................................3-55
Radio with Cassette......................................3-56
Radio with Cassette and CD..........................3-60
Trunk-Mounted CD Changer...........................3-66
Personal Choice Radio Controls......................3-69
Theft-Deterrent Feature..................................3-70
Audio Steering Wheel Controls.......................3-72
Radio Reception...........................................3-72
Care of Your Cassette Tape Player.................3-73
Care of Your CDs.........................................3-74
Care of Your CD Player................................3-74
Heated Backlite Antenna................................3-74
Section 3 Instrument Panel
3-2
Page 121 of 388

Turn Signal/Multifunction Lever
The lever on the left side of the steering column
includes the following:
Turn and Lane-Change Signals. SeeTurn and
Lane-Change Signals on page 3-7.
Headlamp High/Low-Beam Changer. SeeHeadlamp
High/Low-Beam Changer on page 3-8.
Flash-to-Pass. SeeFlash-to-Pass on page 3-9.
Windshield Wipers. SeeWindshield Wipers on
page 3-9.
Windshield Washer. SeeWindshield Washer on
page 3-10.
Cruise Control. SeeCruise Control on page 3-10.
For information on the exterior lamps, seeExterior
Lamps on page 3-14.
Turn and Lane-Change Signals
The turn signal has two upward (for right) and two
downward (for left) positions. These positions allow you
to signal a turn or a lane change.
To signal a turn, move the lever all the way up
or down. When the turn is �nished, the lever will
return automatically.
An arrow on the instrument
panel cluster will �ash in
the direction of the
turn or lane change.
3-7
Page 122 of 388

If your vehicle is equipped with the Head-Up Display
(HUD), an arrow will also appear in the display area to
indicate the direction of the turn or lane change.
SeeHead-Up Display (HUD) on page 3-19for
more information.
You may also have an arrow in the outside mirror that
�ashes when the turn signal is used. SeeOutside Power
Mirrors on page 2-37for more information.
To signal a lane change, just raise or lower the lever
until the arrow starts to �ash. Hold it there until you
complete your lane change. The lever will return by itself
when you release it.
As you signal a turn or a lane change, if the arrows
�ash at twice the normal rate, this may indicate that a
signal bulb may be burned out and other drivers will not
see your turn signal. If a bulb is burned out, replace
it to help avoid an accident.
If the arrows do not go on at all when you signal a turn,
check the fuse and check for burned-out bulbs. See
Fuses and Circuit Breakers on page 5-92.
If you have a trailer towing option with added wiring for
the trailer lamps, the signal indicator will �ash even
if a turn signal bulb is burned out. Check the front and
rear turn signal lamps regularly to make sure they
are working. You do not need to add a different �asher.Turn Signal On Chime
If your turn signal is left on for more than three-quarters
of a mile (1.2 km), a chime will sound at each �ash
of the turn signal. To turn off the chime, move the turn
signal lever to the off position.
Headlamp High/Low-Beam Changer
To change the headlamps from low beam to high
beam or high beam to low beam, pull the turn signal
lever toward you and release it.
While the high beams are
on, this light located on the
instrument panel cluster
will also be on.
If your vehicle is equipped with the Head-Up
Display (HUD), this symbol will also appear in the
display area to indicate the high beams are on.
SeeHead-Up Display (HUD) on page 3-19for
more information.
3-8
Page 180 of 388
Trunk-Mounted CD Changer
If your vehicle has the CD changer, you can play up to
12 CDs continuously. Normal size CDs may be
played using the trays supplied in the magazine. The
small 3 inch (8 cm) CDs can be played only with
specially designed trays.
Notice:Placing heavy objects, which may shift or
slide while driving, in the trunk could damage
the CD changer. If your vehicle has the optional CD
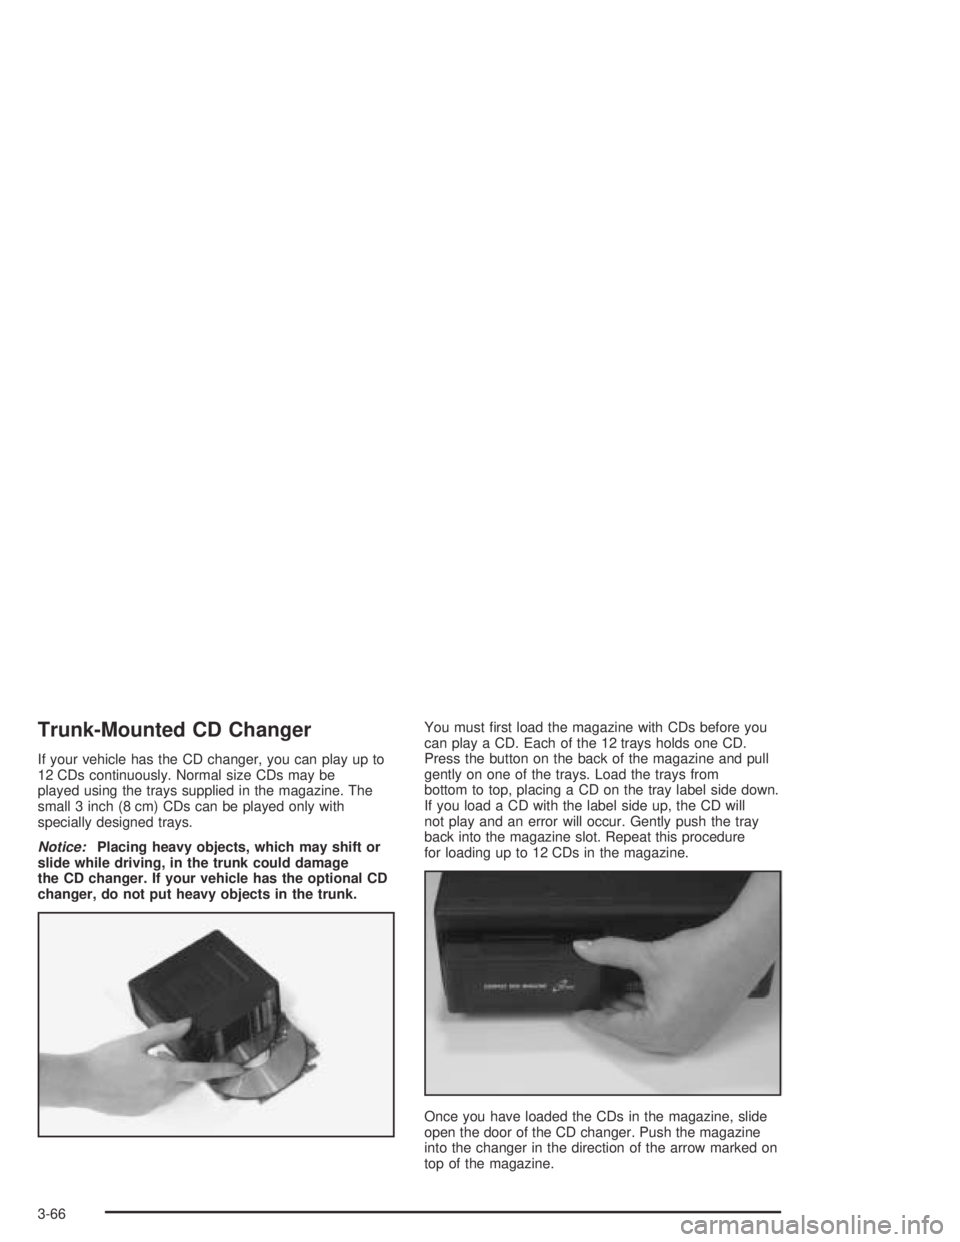
changer, do not put heavy objects in the trunk.You must �rst load the magazine with CDs before you
can play a CD. Each of the 12 trays holds one CD.
Press the button on the back of the magazine and pull
gently on one of the trays. Load the trays from
bottom to top, placing a CD on the tray label side down.
If you load a CD with the label side up, the CD will
not play and an error will occur. Gently push the tray
back into the magazine slot. Repeat this procedure
for loading up to 12 CDs in the magazine.
Once you have loaded the CDs in the magazine, slide
open the door of the CD changer. Push the magazine
into the changer in the direction of the arrow marked on
top of the magazine.
3-66
Page 181 of 388
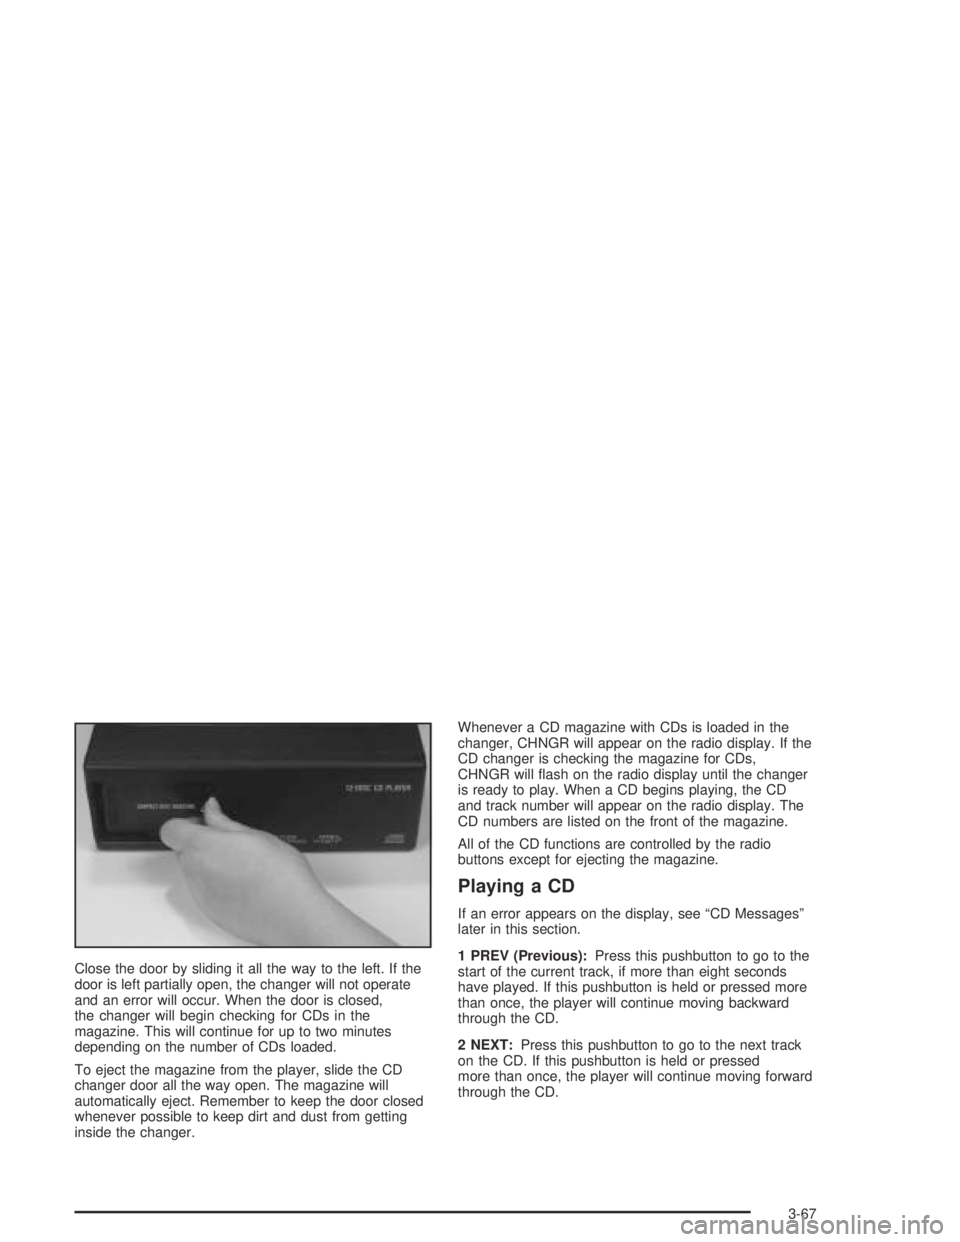
Close the door by sliding it all the way to the left. If the
door is left partially open, the changer will not operate
and an error will occur. When the door is closed,
the changer will begin checking for CDs in the
magazine. This will continue for up to two minutes
depending on the number of CDs loaded.
To eject the magazine from the player, slide the CD
changer door all the way open. The magazine will
automatically eject. Remember to keep the door closed
whenever possible to keep dirt and dust from getting
inside the changer.Whenever a CD magazine with CDs is loaded in the
changer, CHNGR will appear on the radio display. If the
CD changer is checking the magazine for CDs,
CHNGR will �ash on the radio display until the changer
is ready to play. When a CD begins playing, the CD
and track number will appear on the radio display. The
CD numbers are listed on the front of the magazine.
All of the CD functions are controlled by the radio
buttons except for ejecting the magazine.
Playing a CD
If an error appears on the display, see “CD Messages”
later in this section.
1 PREV (Previous):Press this pushbutton to go to the
start of the current track, if more than eight seconds
have played. If this pushbutton is held or pressed more
than once, the player will continue moving backward
through the CD.
2 NEXT:Press this pushbutton to go to the next track
on the CD. If this pushbutton is held or pressed
more than once, the player will continue moving forward
through the CD.
3-67
Page 182 of 388
3r(Reverse):Press and hold this pushbutton
to reverse quickly within a track. You will hear sound
at a reduced level. Release the pushbutton to play
the passage.
4
[(Forward):Press and hold this pushbutton to
advance quickly within a track. You will hear sound
at a reduced level. Release the pushbutton to play
the passage.
5 SIDE:Press this pushbutton to select the next CD in
the magazine. Each time this pushbutton is pressed,
the CD number on the radio display will go to that of the
next available CD. If a CD cannot be played, the
number will be skipped when selecting CDs when this
pushbutton is pressed.
6 RAND (Random):Press this pushbutton to listen to
the tracks in random, rather than sequential, order.
RAND will appear on the display. Press RAND again to
turn off random play.
RECALL:Press this button to see what track is
currently playing. Press it again within �ve seconds to
see how long the track has been playing. EL TM
will appear on the display when in elapsed time mode.
When a new track starts to play, the track number
will appear on the display. Press this button a third time
and the time of day will appear on the display.AM-FM:Press this button to listen to the radio when a
CD is playing. The inactive CD(s) will remain safely
inside the radio for future listening.
SOURCE:Press this button to play a CD when
listening to the radio. You can press this button to switch
between playing a cassette tape, CD, or the CD
changer if all three are loaded.
CD Changer Errors
E (Error):If this message and a number appear on the
display, an error has occurred and the CD cannot play.
E30:CD Loaded Incorrectly. Load the CD in label
side up.
E34:CD Changer Door Open. Completely close the
door to restore normal operation.
E35:CD Changer Cartridge Empty. Try the
magazine again with a CD loaded on one of
the trays.
3-68
Page 183 of 388
If the error occurred while trying to play a CD in the
CD player or changer, it could be for one of the
following reasons:
It is very hot. When the temperature returns to
normal, the CD should play.
You are driving on a very rough road. When the
road becomes smoother, the CD should play.
The CD is dirty, scratched, wet, or upside down.
The air is very humid. If so, wait about an hour and
try again.
There may have been a problem while burning
the CD.
The label may be caught in the CD player.
If any error occurs repeatedly or if an error cannot be
corrected, contact your dealer.
If the radio displays an error message other than the
error codes listed previously, write it down and provide it
to your dealer when reporting the problem.
Personal Choice Radio Controls
If your vehicle has this feature it will enable two drivers
to store and recall personal settings for radio presets,
last tuned station, volume, tone, and audio source
(radio, cassette, or CD).
The memory buttons, 1 and 2, are located on the
driver’s door panel and correspond to the numbers,
1 and 2, found on the back of each remote keyless entry
transmitter.
To recall audio sources, press the unlock button on the
remote keyless entry transmitter and turn the ignition
on. The radio settings will adjust to where they were last
set by the identi�ed driver, 1 or 2.
To program this feature, do the following:
1. Set all radio preferences. For more information see
“Setting Preset Stations” and “Setting the Tone”
listed for the radio.
2. Locate the memory buttons on the driver’s
door panel.
3. Press one of the memory buttons, 1 or 2, until you
hear two beeps. The beeps con�rm that the
selection has been saved and can now be recalled.
Follow these steps each time you want to change the
stored settings.
3-69
Page 329 of 388
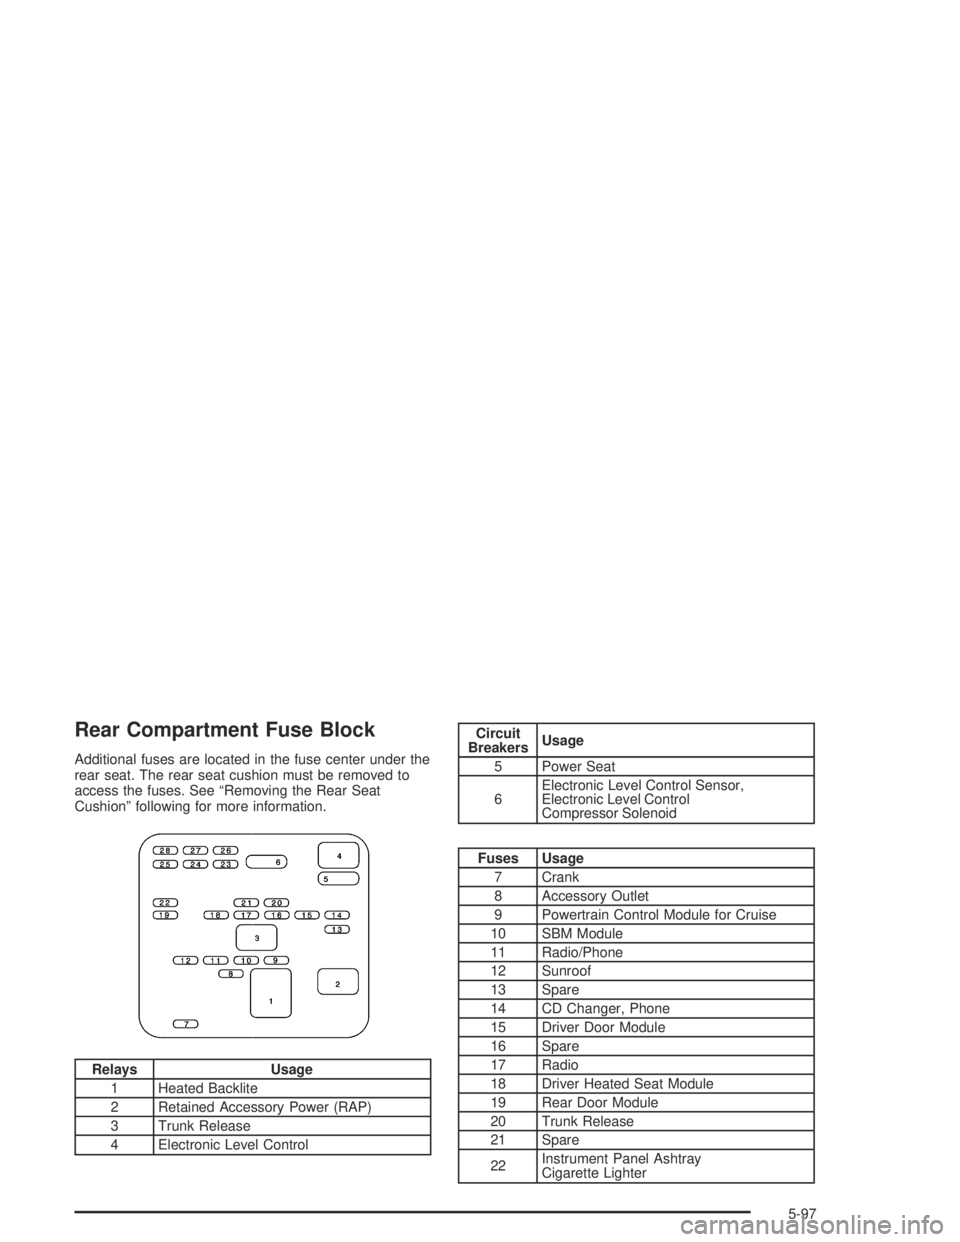
Rear Compartment Fuse Block
Additional fuses are located in the fuse center under the
rear seat. The rear seat cushion must be removed to
access the fuses. See “Removing the Rear Seat
Cushion” following for more information.
Relays Usage
1 Heated Backlite
2 Retained Accessory Power (RAP)
3 Trunk Release
4 Electronic Level Control
Circuit
BreakersUsage
5 Power Seat
6Electronic Level Control Sensor,
Electronic Level Control
Compressor Solenoid
Fuses Usage
7 Crank
8 Accessory Outlet
9 Powertrain Control Module for Cruise
10 SBM Module
11 Radio/Phone
12 Sunroof
13 Spare
14 CD Changer, Phone
15 Driver Door Module
16 Spare
17 Radio
18 Driver Heated Seat Module
19 Rear Door Module
20 Trunk Release
21 Spare
22Instrument Panel Ashtray
Cigarette Lighter
5-97
Page 376 of 388
Audio System(s) (cont.)
Trunk-Mounted CD Changer..........................3-66
Understanding Radio Reception.....................3-72
Automatic Transaxle
Fluid..........................................................5-22
Operation...................................................2-26
B
Battery..........................................................5-40
Run-Down Protection...................................3-19
Battery Warning Light......................................3-37
Before Leaving on a Long Trip.........................4-22
Brake
Anti-Lock Brake System (ABS)........................ 4-7
Emergencies................................................ 4-9
Parking......................................................2-29
System Inspection.......................................6-24
System Warning Light..................................3-38
Brakes..........................................................5-37
Braking........................................................... 4-6
Braking in Emergencies..................................... 4-9
Break-In, New Vehicle.....................................2-22
Bulb Replacement...........................................5-47
Front Turn Signal Lamps..............................5-50
Halogen Bulbs............................................5-47
Headlamp Aiming........................................5-45
Headlamps.................................................5-47Bulb Replacement (cont.)
Rear Quarter Panel Turn Signal and
Stoplamps...............................................5-54
Rear Turn Signal, Stoplamps and
Back-Up Lamps.......................................5-50
Replacement Bulbs......................................5-56
Buying New Tires...........................................5-68C
California Fuel.................................................. 5-5
Canadian Owners................................................ ii
Capacities and Speci�cations..........................5-100
Carbon Monoxide...................2-14, 2-32, 4-25, 4-37
Care of
Safety Belts................................................5-86
Your Cassette Tape Player............................3-73
Your CD Player...........................................3-74
Your CDs ...................................................3-74
CD Changer, Trunk-Mounted............................3-66
Center Console Storage Area...........................2-46
Center Passenger Position, Safety Belts.............1-19
Chains, Tire...................................................5-72
Check
Engine Light...............................................3-40
Tire Pressure System...................................5-65
Checking Things Under the Hood......................5-10
Chemical Paint Spotting...................................5-89
2