buttons BUICK RAINIER 2004 Owner's Manual
[x] Cancel search | Manufacturer: BUICK, Model Year: 2004, Model line: RAINIER, Model: BUICK RAINIER 2004Pages: 452, PDF Size: 4.51 MB
Page 9 of 452
Heated Seats
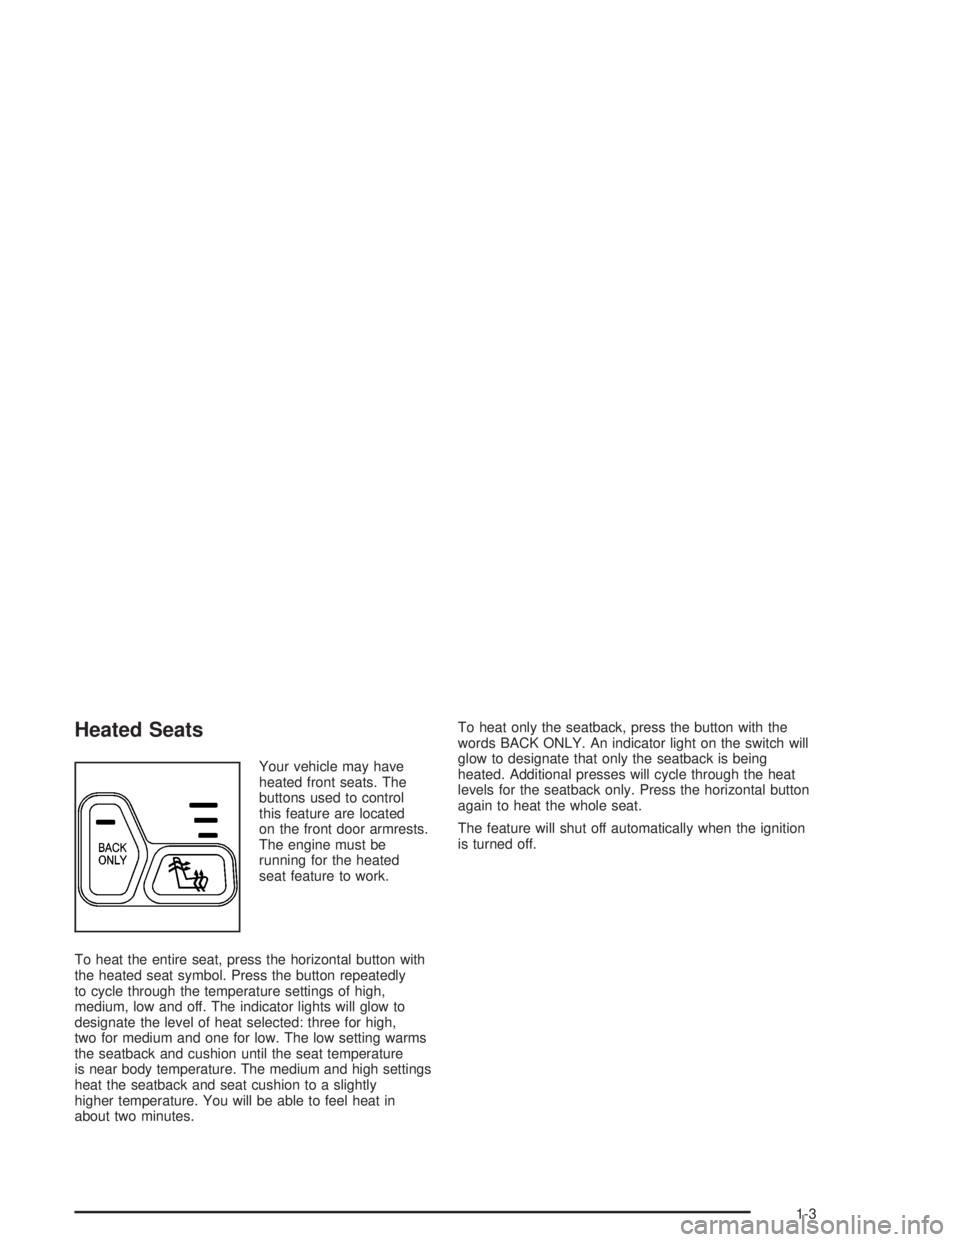
Your vehicle may have
heated front seats. The
buttons used to control
this feature are located
on the front door armrests.
The engine must be
running for the heated
seat feature to work.
To heat the entire seat, press the horizontal button with
the heated seat symbol. Press the button repeatedly
to cycle through the temperature settings of high,
medium, low and off. The indicator lights will glow to
designate the level of heat selected: three for high,
two for medium and one for low. The low setting warms
the seatback and cushion until the seat temperature
is near body temperature. The medium and high settings
heat the seatback and seat cushion to a slightly
higher temperature. You will be able to feel heat in
about two minutes.To heat only the seatback, press the button with the
words BACK ONLY. An indicator light on the switch will
glow to designate that only the seatback is being
heated. Additional presses will cycle through the heat
levels for the seatback only. Press the horizontal button
again to heat the whole seat.
The feature will shut off automatically when the ignition
is turned off.
1-3
Page 93 of 452
Mirrors
Automatic Dimming Rearview Mirror
with OnStar
®and Compass
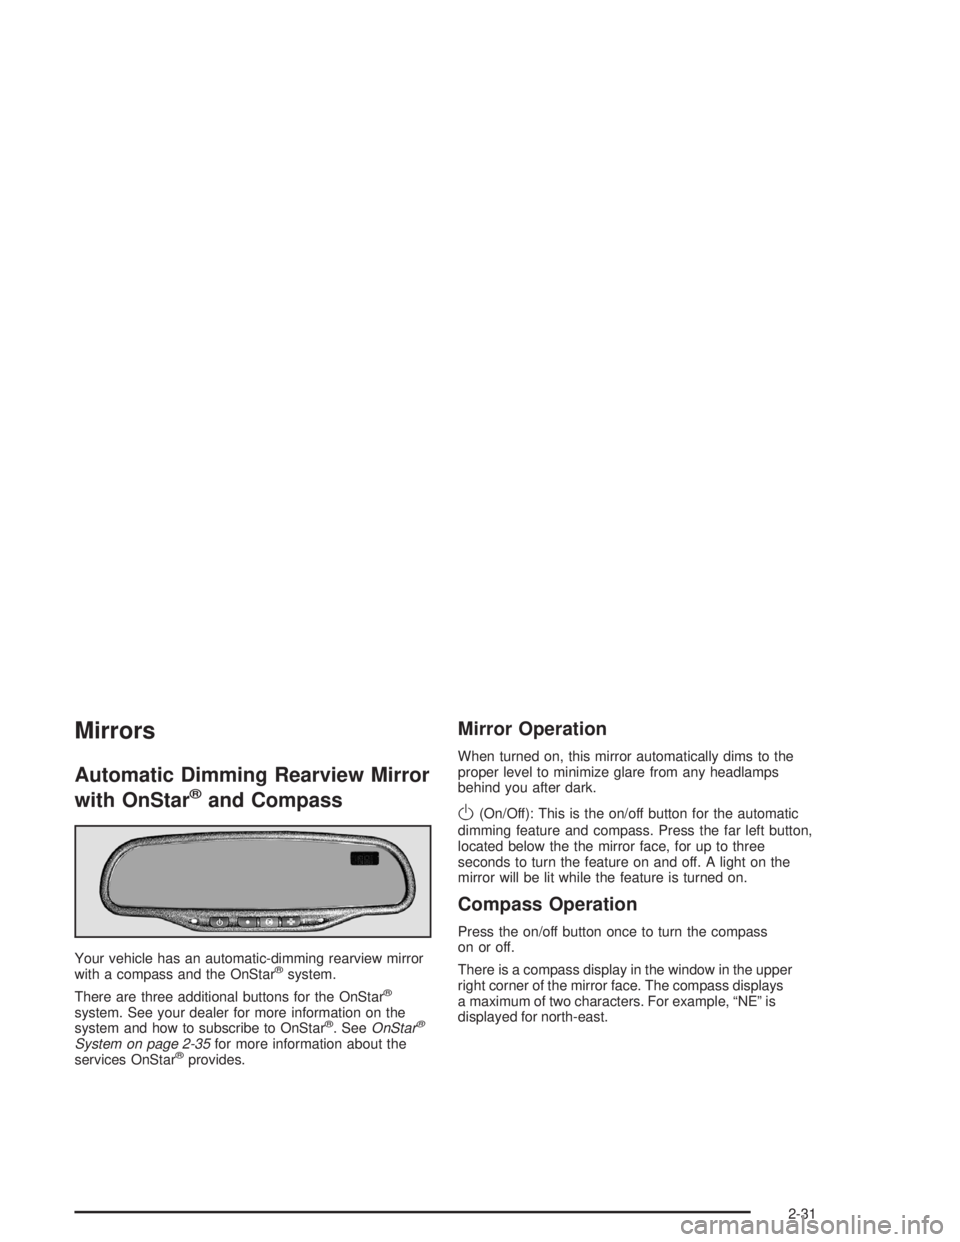
Your vehicle has an automatic-dimming rearview mirror
with a compass and the OnStar®system.
There are three additional buttons for the OnStar
®
system. See your dealer for more information on the
system and how to subscribe to OnStar®. SeeOnStar®
System on page 2-35for more information about the
services OnStar®provides.
Mirror Operation
When turned on, this mirror automatically dims to the
proper level to minimize glare from any headlamps
behind you after dark.
O(On/Off): This is the on/off button for the automatic
dimming feature and compass. Press the far left button,
located below the the mirror face, for up to three
seconds to turn the feature on and off. A light on the
mirror will be lit while the feature is turned on.
Compass Operation
Press the on/off button once to turn the compass
on or off.
There is a compass display in the window in the upper
right corner of the mirror face. The compass displays
a maximum of two characters. For example, “NE” is
displayed for north-east.
2-31
Page 99 of 452
This device complies with RSS- 210 of Industry Canada.
Operation is subject to the following two conditions:
(1) this device may not cause interference, and (2) this
device must accept any interference received, including
interference that may cause undesired operation of
the device.
Changes and modi�cations to this system by other than
an authorized service facility could void authorization
to use this equipment.
Programming the HomeLink®
Transmitter
Do not use the HomeLink®Transmitter with any garage
door opener that does not have the “stop and reverse”
feature. This includes any garage door opener model
manufactured before April 1, 1982. If you have a newer
garage door opener with rolling codes, please be
sure to follow steps 6 through 8 to complete the
programming of your HomeLink
®Transmitter.
Read the instructions completely before attempting to
program the HomeLink
®Transmitter. Because of
the steps involved, it may be helpful to have another
person available to assist you in programming the
transmitter.Keep the original transmitter for use in other vehicles as
well as for future HomeLink
®programming. It is also
recommended that upon the sale of the vehicle, the
programmed HomeLink
®buttons should be erased for
security purposes. Refer to “Erasing HomeLink®Buttons”
or, for assistance, contact HomeLink®on the internet
at: www.homelink.com or by calling 1-800-355-3515.
Be sure that people and objects are clear of the garage
door or gate operator you are programming. When
programming a garage door, it is advised to park outside
of the garage.
It is recommended that a new battery be installed in
your hand-held transmitter for quicker and more
accurate transmission of the radio frequency.
Your vehicle’s engine should be turned off while
programming the transmitter. Follow these steps to
program up to three channels:
1. Press and hold down the two outside buttons,
releasing only when the indicator light begins to
�ash, after 20 seconds. Do not hold down the
buttons for longer than 30 seconds and do not
repeat this step to program a second and/or
third transmitter to the remaining two HomeLink
®
buttons.
2-37
Page 100 of 452

2. Position the end of your hand-held transmitter about
1 to 3 inches (3 to 8 cm) away from the HomeLink®
buttons while keeping the indicator light in view.
3. Simultaneously press and hold both the desired
button on HomeLink
®and the hand-held transmitter
button. Do not release the buttons until Step 4
has been completed.
Some entry gates and garage door openers may
require you to substitute Step 3 with the procedure
noted in “Gate Operator and Canadian
Programming” later in this section.
4. The indicator light will �ash slowly at �rst and then
rapidly after HomeLink
®successfully receives the
frequency signal from the hand-held transmitter.
Release both buttons.
5. Press and hold the newly-trained HomeLink
®button
and observe the indicator light.
If the indicator light stays on constantly,
programming is complete and your device should
activate when the HomeLink
®button is pressed
and released.
To program the remaining two HomeLink
®buttons,
begin with Step 2 under “Programming HomeLink®.”
Do not repeat Step 1 as this will erase all of the
programmed channels.If the indicator light blinks rapidly for two seconds
and then turns to a constant light, continue with
Steps 6 through 8 following to complete the
programming of a rolling-code equipped device
(most commonly, a garage door opener).
6. Locate in the garage, the garage door opener
receiver (motor-head unit). Locate the “Learn”
or “Smart” button. This can usually be found where
the hanging antenna wire is attached to the
motor-head unit.
7. Firmly press and release the “Learn” or “Smart”
button. The name and color of the button may
vary by manufacturer.
You will have 30 seconds to start Step 8.
8. Return to the vehicle. Firmly press and hold the
programmed HomeLink
®button for two seconds,
then release. Repeat the press/hold/release
sequence a second time, and depending on the
brand of the garage door opener (or other rolling
code device), repeat this sequence a third time
to complete the programming.
HomeLink
®should now activate your rolling-code
equipped device.
To program the remaining two HomeLink
®buttons,
begin with Step 2 of “Programming HomeLink®.”
Do not repeat Step 1.
2-38
Page 101 of 452
Gate Operator and Canadian
Programming
Canadian radio-frequency laws require transmitter
signals to “time out” or quit after several seconds of
transmission. This may not be long enough for
HomeLink
®to pick up the signal during programming.
Similarly, some U.S. gate operators are manufactured
to “time out” in the same manner.
If you live in Canada, or you are having difficulty
programming a gate operator by using the “Programming
HomeLink
®” procedures (regardless of where you live),
replace Step 3 under “Programming HomeLink®” with
the following:
Continue to press and hold the HomeLink
®button while
you press and release every two seconds (cycle) your
hand-held transmitter until the frequency signal has been
successfully accepted by HomeLink
®. The indicator light
will �ash slowly at �rst and then rapidly. Proceed with
Step 4 under “Programming HomeLink
®” to complete.
Using HomeLink®
Press and hold the appropriate HomeLink®button for
at least half of a second. The indicator light will come
on while the signal is being transmitted.
Erasing HomeLink®Buttons
To erase programming from the three buttons do the
following:
1. Press and hold down the two outside buttons until
the indicator light begins to �ash, after 20 seconds.
2. Release both buttons. Do not hold for longer than
30 seconds.
HomeLink
®is now in the train (learning) mode and
can be programmed at any time beginning with Step 2
under “Programming HomeLink
®.”
Individual buttons can not be erased, but they can
be reprogrammed. See “Reprogramming a Single
HomeLink
®Button” next.
2-39
Page 102 of 452
Reprogramming a Single HomeLink®
Button
To program a device to HomeLink®using a HomeLink®
button previously trained, follow these steps:
1. Press and hold the desired HomeLink
®button.
Do not release the button.
2. The indicator light will begin to �ash after
20 seconds. While still holding the HomeLink
®
button, proceed with Step 2 under “Programming
HomeLink®.”
Resetting Defaults
To reset HomeLink®to default settings do the following:
1. Hold down the two outside buttons for about
20 seconds until the indicator light begins to �ash.
2. Continue to hold both buttons until the HomeLink
®
indicator light turns off.
3. Release both buttons.
For questions or comments, contact HomeLink
®
at 1-800-355-3515, or on the internet
at www.homelink.com.
Storage Areas
Glove Box
To open your glove box, pull the handle on the front
of the glove box and lower the door.
Overhead Console
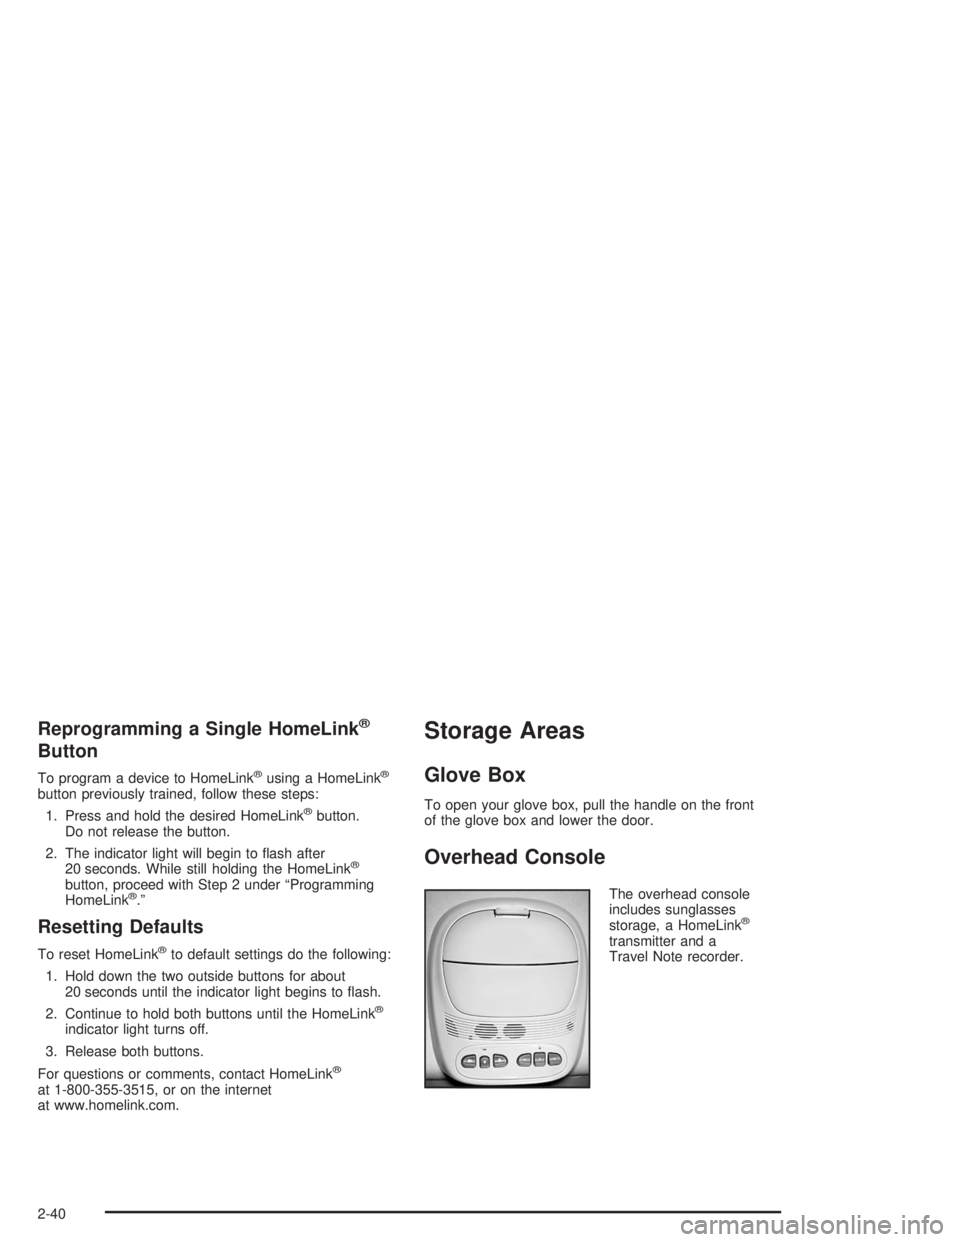
The overhead console
includes sunglasses
storage, a HomeLink
®
transmitter and a
Travel Note recorder.
2-40
Page 103 of 452
Sunglasses Storage Compartment
To open the sunglasses storage compartment in the
overhead console, press the release button. Then pull
the compartment down.
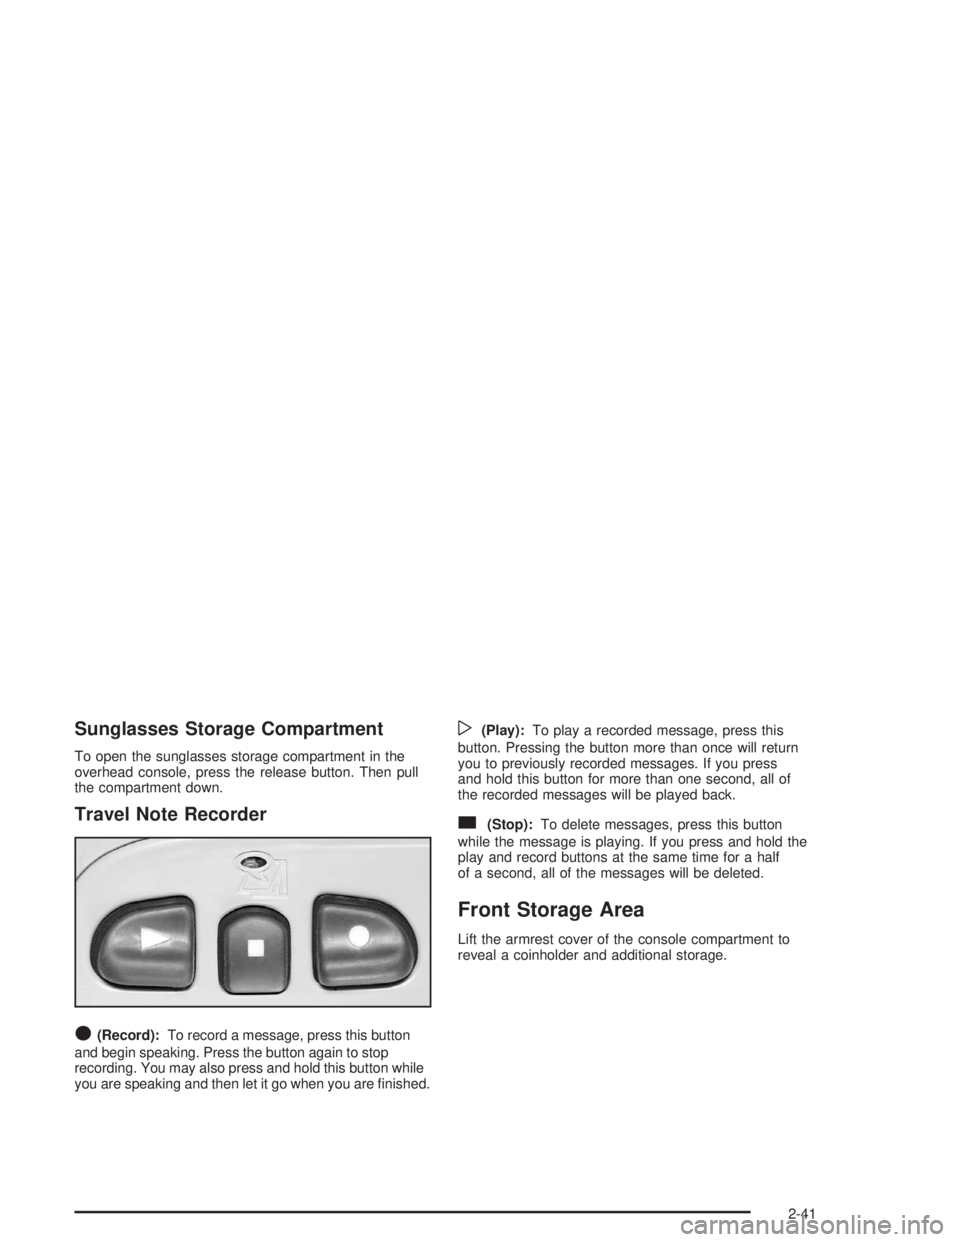
Travel Note Recorder
O
(Record):To record a message, press this button
and begin speaking. Press the button again to stop
recording. You may also press and hold this button while
you are speaking and then let it go when you are �nished.
w(Play):To play a recorded message, press this
button. Pressing the button more than once will return
you to previously recorded messages. If you press
and hold this button for more than one second, all of
the recorded messages will be played back.
c(Stop):To delete messages, press this button
while the message is playing. If you press and hold the
play and record buttons at the same time for a half
of a second, all of the messages will be deleted.
Front Storage Area
Lift the armrest cover of the console compartment to
reveal a coinholder and additional storage.
2-41
Page 108 of 452

A second mirror position, seating position and adjustable
pedal position can be programmed by repeating the
procedure with a second driver and pressing button 2 for
three seconds. Each time button 1 or 2 is pressed and
released while the vehicle is in PARK (P), a single chime
will sound, and the memory position will be recalled.
If you use the unlock button on the remote keyless entry
transmitter to enter your vehicle, the preset driver’s
seat, mirror positions and adjustable pedal position will
be recalled if programmed to do so through the
Driver Information Center (DIC). The numbers on the
back of the transmitters, 1 or 2, correspond to the
numbers on the memory controls.
The seat positions, mirror positions and adjustable
pedal positions can also be recalled by placing the key
in the ignition if programmed to do so through the
Driver Information Center (DIC). SeeDIC Operation
and Displays on page 3-43.
To stop recall movement of the memory feature at
any time, press one of the power seat controls or
memory buttons.Two personalized exit positions can be set by �rst
recalling the driver’s position by pressing 1 or 2, then
positioning the seat in the desired exit position for that
driver. Press and hold the button with the exit symbol for
three seconds. A double chime will sound to let you know
that the position has been stored. With the vehicle in
PARK (P), the exit position for that driver can be recalled
by pressing the exit button. The mirrors, power lumbar,
recline and adjustable pedal positions will not be stored
or recalled for the exit positions. If no exit position is
stored, the default is all the way rearward.
Further programming for automatic seat and mirror
movement can be done through the Driver Information
Center (DIC). You may choose to either select or
not select the following:
Automatic seat, mirror movement and pedal
position when the vehicle is unlocked with the
remote keyless entry
automatic seat, mirror movement and pedal position
when a key is placed in the ignition
automatic seat movement to the exit position when
the vehicle is in PARK (P)
2-46
Page 133 of 452
Operation Tips
Keep the hood and front air inlets free of ice, snow,
or any other obstruction (such as leaves). The
heater and defroster will work far better, reducing
the chance of fogging the inside of your windows.
When you enter a vehicle in cold weather, turn the
fan knob all the way to the right for a few moments
before driving. This helps clear the intake ducts
of snow and moisture, and reduces the chance of
fogging the inside of your window.
Keep the air path under the front seats clear of
objects. This helps air to circulate throughout
your vehicle.
Adding outside equipment to the front of your
vehicle, such as hood-air de�ectors, may affect the
performance of the heating and air conditioning
system. Check with your dealer before adding
equipment to the outside of your vehicle.
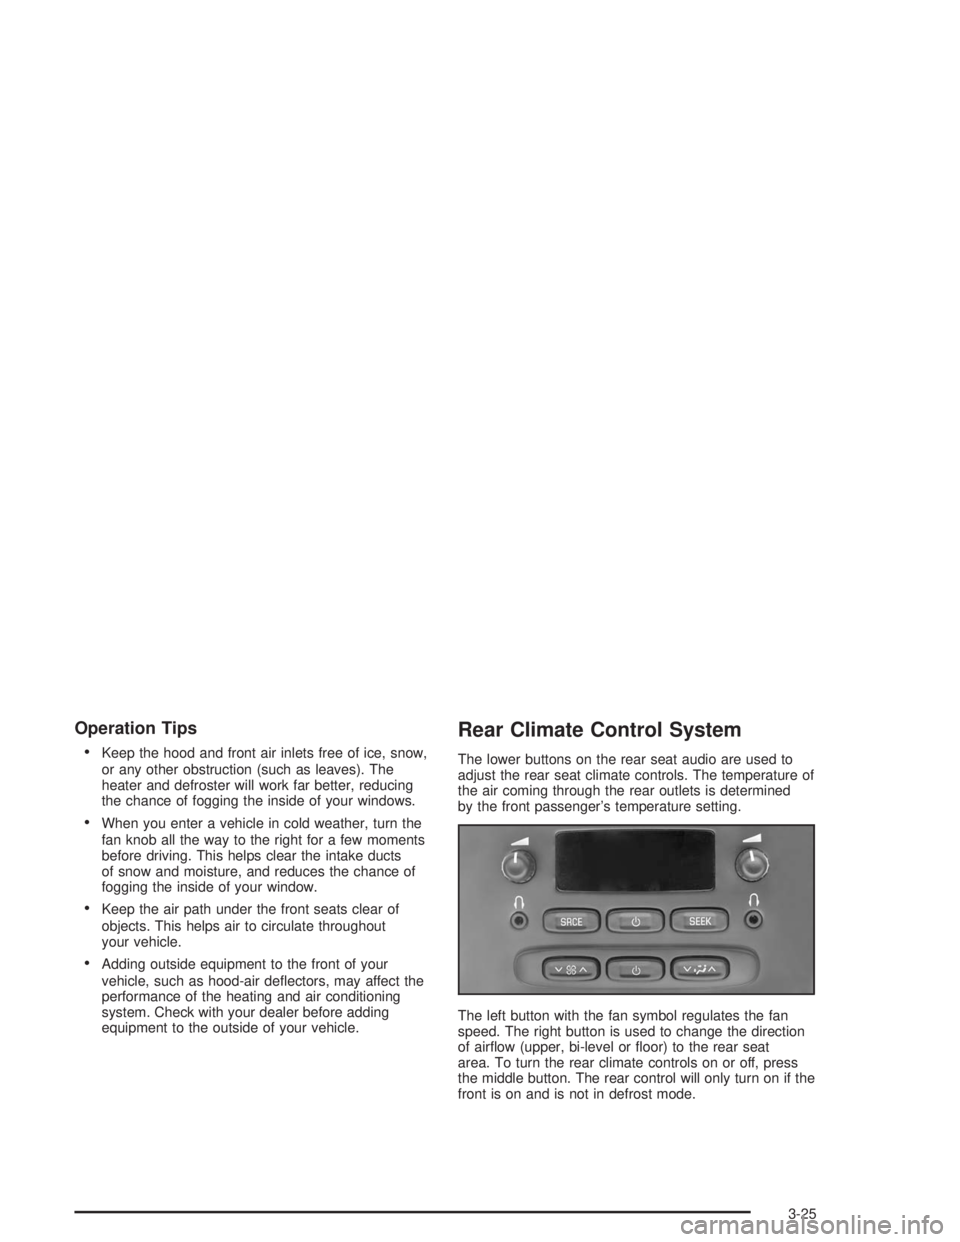
Rear Climate Control System
The lower buttons on the rear seat audio are used to
adjust the rear seat climate controls. The temperature of
the air coming through the rear outlets is determined
by the front passenger’s temperature setting.
The left button with the fan symbol regulates the fan
speed. The right button is used to change the direction
of air�ow (upper, bi-level or �oor) to the rear seat
area. To turn the rear climate controls on or off, press
the middle button. The rear control will only turn on if the
front is on and is not in defrost mode.
3-25
Page 134 of 452

Ventilation System
For mild outside temperatures when little heating or
cooling is needed, use the panel outlet setting to direct
outside air through your vehicle. Air will �ow through
the instrument panel outlets.
Your vehicle’s �ow-through ventilation system supplies
outside air into the vehicle when it’s moving. When
the vehicle is not moving, you can get outside air to �ow
through by selecting any air delivery mode and any
fan speed.Your vehicle has air outlets that allow you to adjust
the direction and amount of air�ow inside the vehicle.
Move the control in the center of each outlet side-to-side
to direct the air from the outlet. Use the thumbwheel
under the outlet to close the louvers. For the most
efficient air�ow and temperature control, keep the
louvers in the fully opened position.
Climate Controls Personalization
If your vehicle is equipped with the Driver Information
Center (DIC), you can store and recall the climate control
settings for temperature, air delivery mode and fan speed
for two different drivers. The personal choice settings
recalled are determined by the transmitter used to enter
the vehicle. After the button with the unlock symbol on a
remote keyless entry transmitter is pressed, the climate
control will adjust to the last settings of the identi�ed
driver. The settings can also be changed by pressing one
of the memory buttons (1 or 2) located on the driver’s
door. When adjustments are made, the new settings are
automatically saved for the driver.
3-26