tow bar BUICK RANDEZVOUS 2002 Owner's Manual
[x] Cancel search | Manufacturer: BUICK, Model Year: 2002, Model line: RANDEZVOUS, Model: BUICK RANDEZVOUS 2002Pages: 455, PDF Size: 2.86 MB
Page 11 of 455

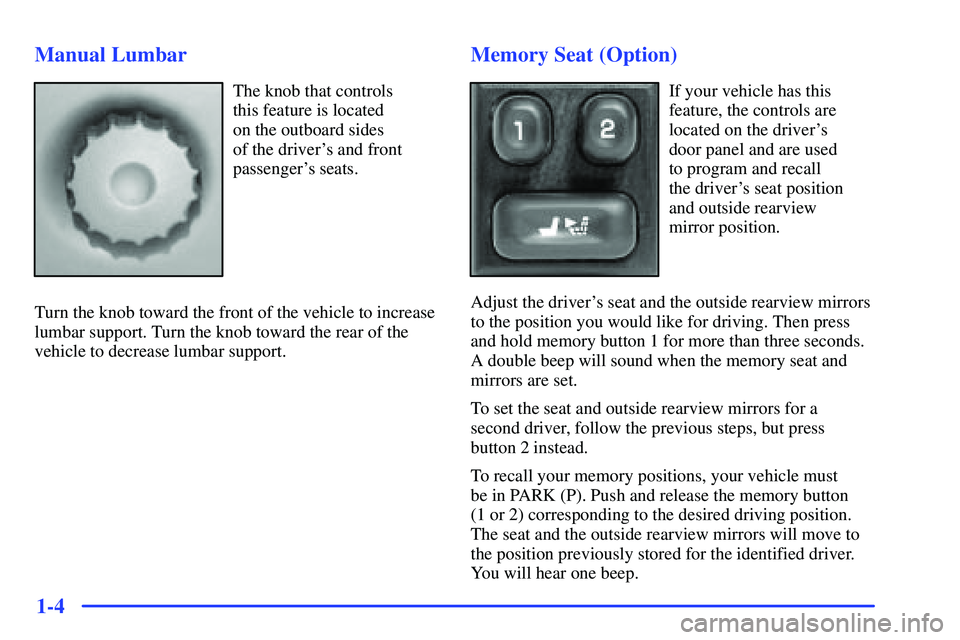
1-4 Manual Lumbar
The knob that controls
this feature is located
on the outboard sides
of the driver's and front
passenger's seats.
Turn the knob toward the front of the vehicle to increase
lumbar support. Turn the knob toward the rear of the
vehicle to decrease lumbar support.
Memory Seat (Option)
If your vehicle has this
feature, the controls are
located on the driver's
door panel and are used
to program and recall
the driver's seat position
and outside rearview
mirror position.
Adjust the driver's seat and the outside rearview mirrors
to the position you would like for driving. Then press
and hold memory button 1 for more than three seconds.
A double beep will sound when the memory seat and
mirrors are set.
To set the seat and outside rearview mirrors for a
second driver, follow the previous steps, but press
button 2 instead.
To recall your memory positions, your vehicle must
be in PARK (P). Push and release the memory button
(1 or 2) corresponding to the desired driving position.
The seat and the outside rearview mirrors will move to
the position previously stored for the identified driver.
You will hear one beep.
Page 18 of 455

1-11
5. To release the front latches, squeeze the angled latch
release bar toward the straight crossbar.
6. Remove the seat by rocking it slightly toward the
rear of the vehicle and then pulling it out.
Repeat these steps for the other section of the split
bench seat.Replacing the Split Bench Sections
CAUTION:
If the seatback isn't locked, it could move forward
in a sudden stop or crash. That could cause injury
to the person sitting there. Always press rearward
on the seatback to be sure it is locked.
CAUTION:
A seat that isn't locked into place properly
can move around in a collision or sudden stop.
People in the vehicle could be injured. Be sure
to lock the seat into place properly when
installing it.
Page 19 of 455

1-12
CAUTION:
A safety belt that is improperly routed, not
properly attached, or twisted won't provide
the protection needed in a crash. The person
wearing the belt could be seriously injured.
After installing the seat, always check to be
sure that the safety belts are properly routed
and attached, and are not twisted.
Make sure that the seatback is in the folded forward
position and that the safety belts are on the correct
section of the seat.
Don't put the sections of the bench seat in so that they
face rearward because they won't latch that way.
The split bench seat sections have seat position labels,
located on the back of each section, showing where
the section must go.
The seat must be placed in the proper location for
the legs to attach correctly.
1. Squeeze the angled latch release bar toward the
straight crossbar while placing the front hooks of
the bench seat onto the front two floor pins.
Page 337 of 455

5-34
Storing the Spare Tire and Tools
1. Lay the compact spare tire on the ground at the
rear of the vehicle. Position the compact spare tire
so that the valve stem is pointed down facing the rear
of the vehicle.
2. Lower the cable to the ground. See ªRemoving
the Spare Tire (Vehicles without the Rear
Convenience/Cargo Tray)º or ªRemoving the Spare
Tire (Vehicles with the Rear Convenience/Cargo
Tray)º in the Index.
3. Tilt the retainer downward and slip it through the
center hole of the spare tire.
Make sure the retainer is fully seated across the
underside of the wheel.
4. Attach the folding wrench to the hoist shaft.5. Turn the folding wrench clockwise to lift the
spare tire.
6. When the tire reaches the stabilizer bar, move the
tire over the bar, then continue to turn the folding
wrench clockwise to lift the spare tire.
7. When the tire is almost in the stored position,
turn the tire so that the valve stem is towards the
rear of the vehicle.
This will help when you check and maintain tire
pressure in the spare.
8. Raise the tire fully against the underside of the
vehicle. Continue turning the folding wrench until
you feel more than two clicks. This indicates that the
compact spare tire is secure and the cable is tight.
The spare tire hoist cannot be overtightened.