maintenance BUICK REGAL 1996 Owners Manual
[x] Cancel search | Manufacturer: BUICK, Model Year: 1996, Model line: REGAL, Model: BUICK REGAL 1996Pages: 356, PDF Size: 17.97 MB
Page 3 of 356
The 1996 Buick Regal Owner’s Manual
7-
Seats and Restraint Systems ............................................................. 1-1
This section tells you how to use your seats and safety belts properly. It also explains “SRS” system.
This section explains how to start and operate your Buick.
This section tells you how to adjust the ventilation and comfort controls and how to operate your
audio system.
Here you’ll find helpful information and tips about the road and how to drive under different conditions.
This section tells you
what to do if you have a problem while driving, such as a flat tire or
overheated engine, etc.
Here the manual tells you how to keep
your Buick running properly and looking good.
This section tells
you when to perform vehicle maintenance and what fluids and lubricants to use.
This section tells you how to contact Buick for assistance and how to get service publications.
It also
gives you information on “Reporting Safety Defects” on page
8-7.
Index ........................................................................\
........ 9-1
Here’s an alphabetical listing of almost every subject in this manual. You can use it to quickly find something
you want to read.
Features and Controls .................................................................. 2-1
Comfort Controls and Audio Systems ..................................................... 3-1
YourDrivingandtheRoad .............................................................. 4-1
ProblemsontheRoad .................................................................. 5-1
Service and Appearance Care. ........................................................... 6-1
Maintenanceschedule .................................................................. 7-1
Customer Assistance Information ........................................................ 8-1
i
ProCarManuals.com
Page 37 of 356
0 Your vehicle is equipped with a crash sensing and
diagnostic module, which records information about
the air bag system. The module records information
about the readiness
of the system, when the sensors are
activated and driver’s safety belt usage at deployment.
Let only qualified technicians work on your air bag
system. Improper service can mean that your air bag
system won’t work properly. See your dealer for service
NOTICE:
If you damage the cover for the driver’s or the
right front passenger’s air bag, they may not
work properly. You may have to replace the air
bag module in the steering wheel
or both the air
bag module and the instrument panel for the
right front passenger’s air bag.
Do not open or
break the air bag covers.
Servicing Your Air Bag-Equipped Buick
Air bags affect how your Buick should be serviced.
There are parts
of the air bag system in several places
around your vehicle.
You don’t want the system to
inflate while someone
is working on your vehicle.
Your Buick dealer and the Regal Service Manual have
information about servicing your vehicle and the air bag
system.
To purchase a service manual, see “Service and
Owner Publications” in the Index.
A CAUTION -
-
For up to 10 seconds after the ignition key is
turned off and the battery is disconnected, an air
bag can still inflate during improper service.
You
can be injured if you are close to an air bag when
it inflates. Avoid wires wrapped with yellow tape
or yellow connectors. They are probably part of
the air bag system. Be sure to follow proper
service procedures, and make sure the person
performing work for you is qualified to do
so.
The air bag system does not need regular maintenance.
1-23
ProCarManuals.com
Page 64 of 356
Safety Belt Extender
If the vehicle’s safety belt will fasten around you, you
should use it.
But if a safety belt isn’t long enough to fasten, your
dealer will order you an extender. It’s free. When you go
in to order it, take the heaviest coat you will wear, so the
extender will be long enough for you. The extender will
be just for you, and just for the seat
in your vehicle that
you choose. Don’t let someone else use
it, and use it
only for the seat it
is made to fit. To wear it. iust attach it
to the regular safety belt.
Checking Your Restraint Systems
Now and then, make sure the safety belt reminder light
and all your belts, buckles, latch plates, retractors and
anchorages are working properly.
Look for any other
loose
or damaged safety belt system parts. If you see
anything that might keep a safety belt system from
doing its job, have it repaired.
Replacing Restraint System Parts
After a Crash
If you’ve had a crash, do you need new belts?
After a very minor collision, nothing
may be h&Wsary.
But if the belts were stretched, as they would be if worn
during a more severe crash, then you need new belts.
If belts are cut or damaged, replace them. Collision
damage also may mean you will need to have safety belt
or seat parts repaired or replaced. New parts and repairs
may be necessary even if the belt wasn’t being used at
the time
of the collision.
If an air bag inflates, you’ll need to replace air bag
system parts. See the part on
the air bag system earlier in
this section.
Torn or frayed safety belts may not protect you
in a
crash. They can rip apart under impact forces.
If a belt is
torn or frayed, get a new one right away.
Also look for any opened or broken air bag covers, and
have them repaired or replaced. (The air bag system
does not need regular maintenance.)
ProCarManuals.com
Page 187 of 356
Parking on Hills
You really should not park your vehicle, with a trailer
attached, on a hill.
If something goes wrong, your rig
could start to move. People can be injured, and both
your vehicle and the trailer can be damaged.
But if you ever have to park your rig
on a hill, here’s
how
to do it:
1. Apply your regular brakes, but don’t shift into
PARK (P)
yet.
2. Have someone place chocks under the trailer wheels.
3. When the wheel chocks are in place, release the
regular brakes until
the chocks absorb the load.
4. Reapply the regular brakes. Then apply your parking
brake, and then shift
to PARK (P).
5. Release the regular brakes.
When You Are Ready to Leave After
Parking on a Hill
1. Apply your regular brakes and hold the pedal down
while you:
Start your engine;
Shift into a gear; and
0 Release the parking brake.
2. Let up on the brake pedal.
3. Drive slowly until the trailer is clear of the chocks.
4. Stop and have someone pick up and store the chocks.
Maintenance When Trailer Towing
Your vehicle will need service more often when you’re
pulling a trailer. See the Maintenance Schedule for more
on this. Things that are especially important in trailer
operation are automatic transaxle
fluid (don’t overfill),
engine oil, belt, cooling system and brake adjustment.
Each of these is covered in this manual, and the Index will
help you find them quickly. If you’re trailering, it’s a good
idea to review these sections before you start your trip.
Check periodically to see that all hitch nuts and bolts
are tight.
4-35
ProCarManuals.com
Page 224 of 356
Doing Your Own Service Work
If you want to do some of your own service work, you’ll
want to get the proper Buick Service Manual. It tells you
much more about how to service your Buick than this
manual can.
To order the proper service manual, see
“Service and Owner Publications” in the Index.
Your vehicle has an air bag system. Before attempting to
do your own service work, see “Servicing Your Air
Bag-Equipped Buick” in the Index.
You should keep a record with all parts receipts and list
the mileage and the date of any service work you
perform. See “Maintenance Record” in the Index.
I
A CAUTION:
You can be injured and your vehicle could be
damaged if you try to do service work on a
vehicle without knowing enough about it.
0 Be sure you have sufficient knowledge,
experience, and the proper replacement
parts and tools before you attempt any
vehicle maintenance task.
0 Be sure to use the proper nuts, bolts and
other fasteners. “English” and “metric”
fasteners can be easily confused.
If you use
the wrong fasteners, parts can later break
or fall off. You could be hurt.
6-2
ProCarManuals.com
Page 238 of 356
1
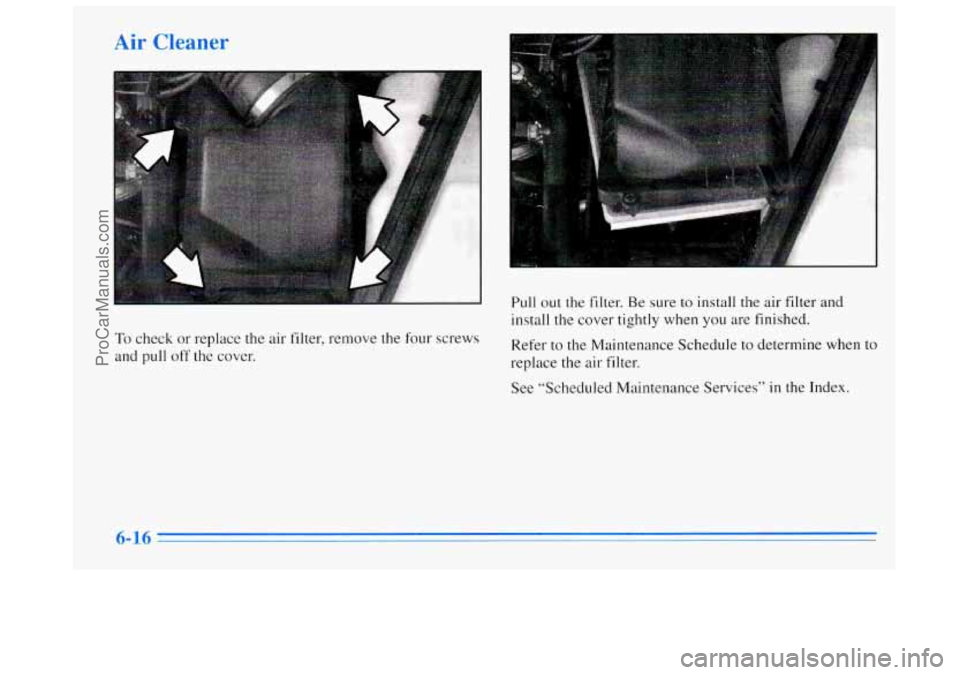
To check or replace the air filter, remove the four screws
and pull off
the cover.
Pull out the filter. Be sure to install the air filter and
install the cover tightly when you are finished.
Refer to the Maintenance Schedule to determine when to
replace the air filter.
See “Scheduled Maintenance Services” in the Index.
ProCarManuals.com
Page 239 of 356
L
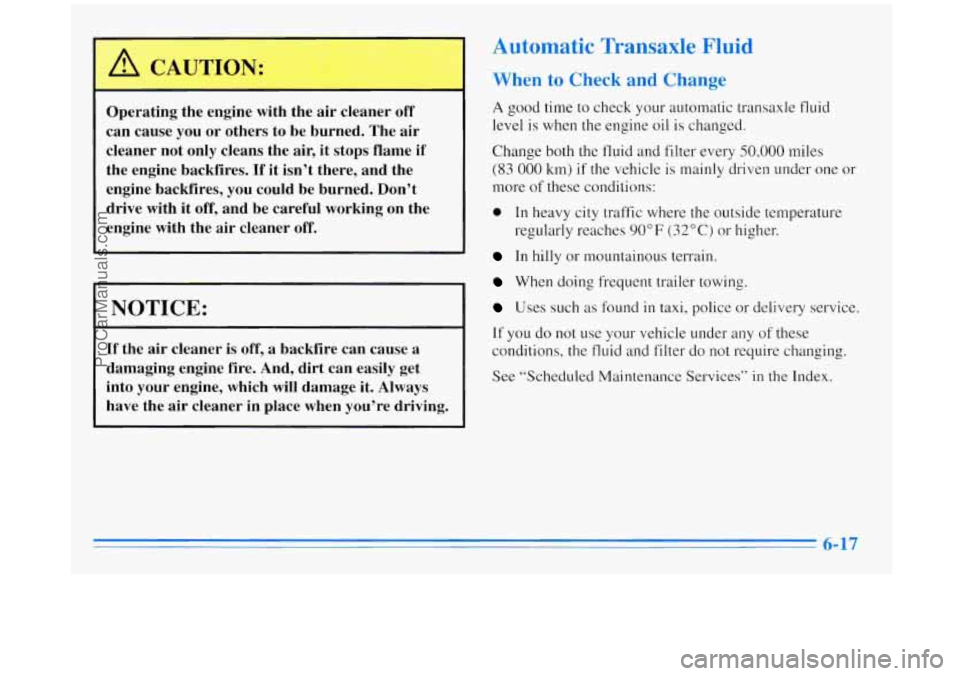
Operating the engine with the air cleaner off
can cause you or others to be burned. The air
cleaner not only cleans the air, it stops flame if
the engine backfires.
If it isn’t there, and the
engine backfires, you could be burned. Don’t
drive with it
off, and be careful working on the
engine with the air cleaner
off.
NOTICE:
If the air cleaner is off, a backfire can cause a
damaging engine fire. And, dirt can easily get into your engine, which will damage it. Always
have the air cleaner in place when you’re driving.
Automatic Transaxle Fluid
When to Check and Change
A good time to check your automatic transaxle fluid
level is when the engine
oil is changed.
Change both the fluid and filter every
50,000 miles
(83 000 km) if the vehicle is mainly driven under one or
more of these conditions:
0 In heavy city traffic where the outside temperature
regularly reaches
90°F (32°C) or higher.
In hilly or mountainous ten-ain.
When doing frequent trailer towing.
Uses such as found in taxi, police or delivery service.
If you do not use your vehicle under any of these
conditions, the fluid and filter do not require changing.
See “Scheduled Maintenance Services”
in the Index.
6-17
ProCarManuals.com
Page 242 of 356
How to Add Fluid
Refer to the Maintenance Schedule to determine what
kind
of transaxle fluid to use. See “Recommended
Fluids and Lubricants’’
in the Index.
If the fluid level is low, add
only enough of the proper
fluid to bring the level into the cross-hatched area on
the dipstick.
1.
2.
0
0
Pull out the dipstick.
Using
a long-neck funnel, add enough fluid at the
dipstick hole to bring
it to the proper level. It doesn’t
take much fluid, generally less than a pint
(0.5 L).
Don t overfill. We recommend you use only fluid
labeled DEXRONO-111, because fluid with that label
is made especially for your automatic transaxle.
Damage caused by fluid other than DEXRON@-I11
is not covered by your new vehicle warranty.
After adding fluid, recheck the fluid level
as
described under “How to Check.”
When
the correct fluid level is obtained, push the
dipstick back in all the way.
Engine Coolant
The cooling system in your vehicle is filled with new
DEX-COOL
TM (orange-colored, silicate-free) engine
coolant. This coolant
is designed to remain in your
vehicle for
5 years or 100,000 miles (166 000 km),
whichever occurs first.
The following explains your cooling system and how to
add coolant when
it is low. If you have a problem with
engine overheating or
if you need to add coolant to your
radiator, see “Engine Overheating” in the Index.
A 50/50 mixture of water and the proper coolant for
your Buick will:
Give freezing protection down to
-34°F (-37°C).
Give boiling protection up
to’ 265 “F ( 129” C).
Protect against rust and corrosion.
Help keep the proper engine temperature.
Let the warning lights and gages work as
they should.
ProCarManuals.com
Page 247 of 356
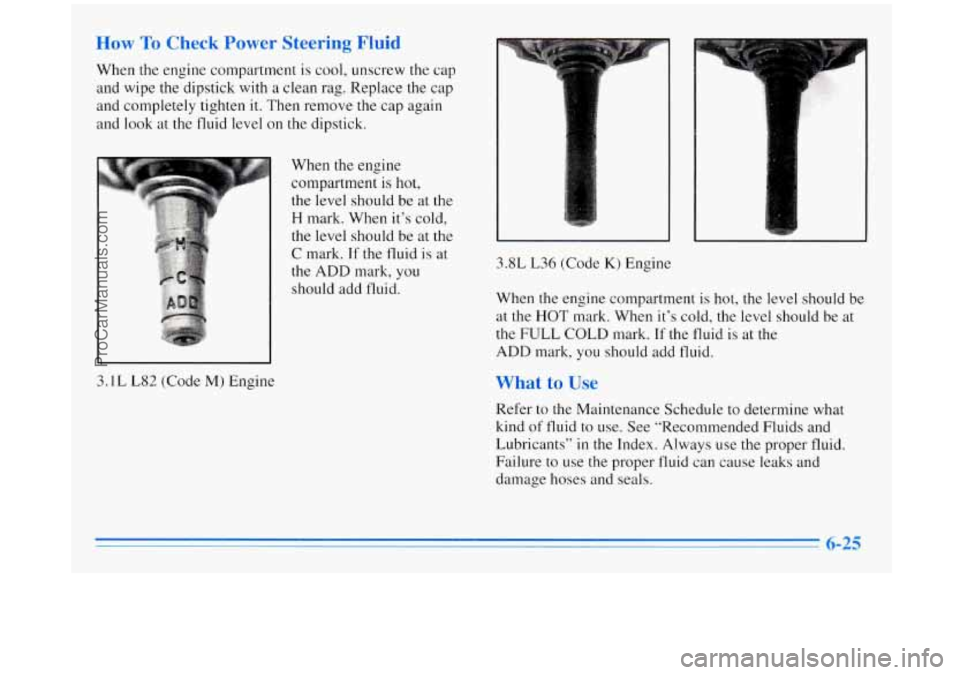
How To Check Power Steering Fluid
When the engine compartment is cool, unscrew the cap
and wipe the dipstick with a clean rag. Replace the cap
and completely tighten it. Then remove the cap again
and
look at the fluid level on the dipstick.
3.1 L L82 (Code M) Engine When
the engine
compartment
is hot,
the level should be at the
H mark. When it’s cold,
the level should be at the
C mark. If the fluid is at
the ADD mark, you
should add fluid. 3.8L L36 (Code K) Engine
When the engine compartment is hot, the level should be
at the
HOT mark. When it’s cold, the level should be at
the FULL COLD mark, If the fluid is at the
ADD mark, you should add fluid.
What to Use
Refer to the Maintenance Schedule to determine what
kind
of fluid to use. See “Recommended Fluids and
Lubricants”
in the Index. Always use the proper fluid.
Failure to use
the proper fluid can cause leaks and
damage hoses and seals.
ProCarManuals.com
Page 258 of 356
NOTICE: (Continued)
If your tires have too much air (overinflation),
you can get the following:
Unusual wear
0 Bad handling
Rough ride
Needless damage from road hazards.
When
to Check
Check your tires once a month or more.
Don’t forget your compact spare tire.
It should be
at
60 psi (420 kPa).
How to Check
Use a good quality pocket-type gage to check tire
pressure. You can’t tell if
your tires are properly inflated
simply by looking at them. Radial tires may look
properly inflated even when they’re underinflated.
Be sure
to put the valve caps back on the valve stems.
They help prevent leaks
by keeping out dirt and moisture.
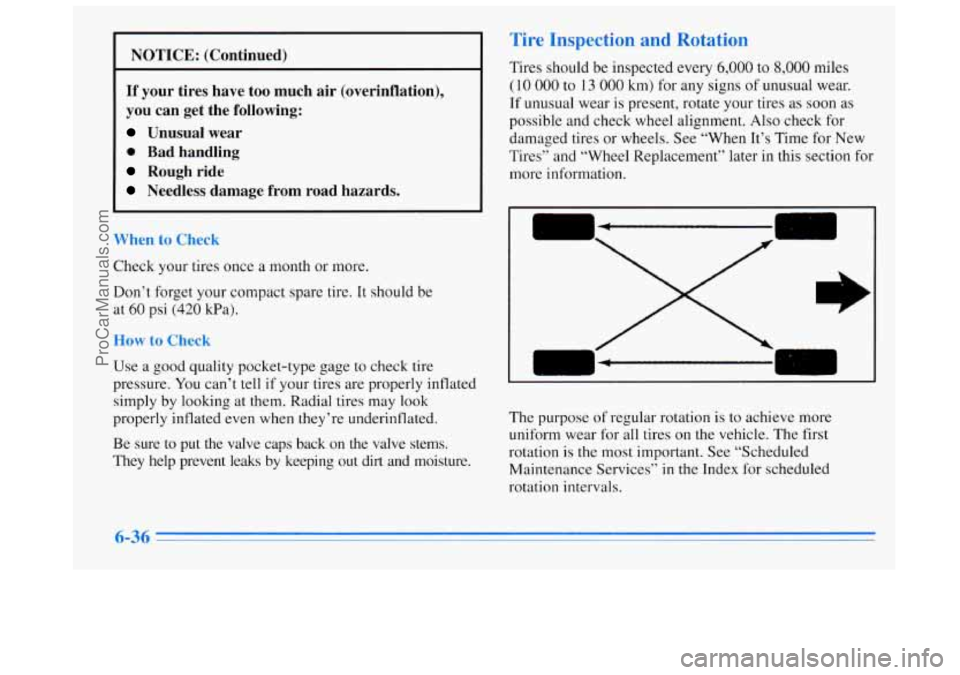
Tire Inspection and Rotation
Tires should be inspected every 6,000 to 8,000 miles
(10
000 to 13 000 km) for any signs of unusual wear.
If unusual wear is present, rotate your tires
as soon as
possible and check wheel alignment. Also check for
damaged tires or wheels. See “When It’s Time for New
Tires” and “Wheel Replacement” later in this section for
more information.
The purpose of regular rotation is to achieve more
uniform wear for all tires on the vehicle.
The first
rotation is the most important. See “Scheduled
Maintenance Services”
in the Index for scheduled
rotation intervals.
6-36
ProCarManuals.com