instrument cluster BUICK REGAL 2011 User Guide
[x] Cancel search | Manufacturer: BUICK, Model Year: 2011, Model line: REGAL, Model: BUICK REGAL 2011Pages: 368, PDF Size: 5.35 MB
Page 146 of 368

Black plate (2,1)Buick Regal Owner Manual - 2011
6-2 Lighting
2(Headlamps):Turns on the
headlamps together with the
following:
.Sidemarker Lamps
.Taillamps
.License Plate Lamps
.Instrument Panel Lights
.Parking Lamps
Exterior Lamps Off
Reminder
A warning chime sounds if the driver
door is opened while the ignition is
off and the exterior lamps are on.
Headlamp High/
Low-Beam Changer
2 3
Headlamp High/Low‐Beam
Changer: Push the turn signal/lane
change lever away from you and
release, to turn the high beams on.
To return to low beams, push the
lever again or pull it toward you and
release.
This indicator light turns on in the
instrument panel cluster when the
high‐beam headlamps are on.
Flash-to-Pass
To flash the high beams, pull the
turn signal/lane change lever toward
you, and release.
Daytime Running
Lamps (DRL)
Daytime Running Lamps (DRL) can
make it easier for others to see the
front of your vehicle during the day.
Fully functional daytime running
lamps are required on all vehicles
first sold in Canada. The DRL system turns on the
low-beam headlamps at a reduced
brightness. For vehicles with High
Intensity Discharge (HID)
headlamps, the dedicated DRL will
come on when all of the following
conditions are met:
.The engine is running.
.The exterior lamp band is
in AUTO.
.The light sensor determines it is
daytime.
When the DRL are on, the
low-beam headlamps will be on.
The taillamps, sidemarker lamps,
instrument panel lights, and other
lamps will not be on.
The DRL turn off when the
headlamps are turned to
Oor the
ignition is off.
Page 147 of 368

Black plate (3,1)Buick Regal Owner Manual - 2011
Lighting 6-3
Automatic Headlamp
System
When the exterior lamp control is
set to AUTO and it is dark enough
outside, the headlamps come on
automatically.
There is a light sensor located on
top of the instrument panel. Do not
cover the sensor. Otherwise the
headlamps will come on when they
are not needed.
The system may also turn on the
headlamps when driving through a
parking garage or tunnel.When it is bright enough outside,
the headlamps will turn off or may
change to daytime running
lamps (DRL).
The automatic headlamp system
turns off when the exterior lamp
control is turned to
Oor the ignition
is off.
Hazard Warning Flashers
|Hazard Warning Flasher:
Press this button located on the
instrument panel above the audio system, to make the front and rear
turn signal lamps flash on and off.
Press again to turn the flashers off.
The hazard warning flashers turn on
automatically if the airbags deploy.
Turn and Lane-Change
Signals
Move the lever all the way up or
down to signal a turn.
An arrow on the instrument panel
cluster flashes in the direction of the
turn or lane change.
Raise or lower the lever until the
arrow starts to flash to signal a lane
change. Hold it there until the lane
change is completed. If the lever is
briefly pressed and released, the
turn signal flashes three times.
Page 148 of 368

Black plate (4,1)Buick Regal Owner Manual - 2011
6-4 Lighting
The turn and lane‐change signal
can be turned off manually by
moving the lever back to its original
position.
If after signaling a turn or lane
change, the arrow flashes rapidly or
does not come on, a signal bulb
might be burned out.
Have the bulbs replaced. If the bulb
is not burned out, check the fuse.
SeeFuses and Circuit Breakers on
page 10‑36.Fog Lamps
To turn on the fog lamps, the ignition
and the headlamps or parking lamps
must be on.
If the fog lamps are turned on while
the exterior lamp switch is in the
AUTO position, the headlamps
come on automatically.
#: Press to turn on or off. An
indicator light on the instrument
panel cluster comes on when the
fog lamps are on.
Some localities have laws that
require the headlamps to be on
along with the fog lamps.
Interior Lighting
Instrument Panel
Illumination Control
The brightness of the instrument
panel lighting and steering wheel
controls can be adjusted.
D: Move and hold the
thumbwheel up or down to brighten
or dim the lights.
Page 215 of 368

Black plate (25,1)Buick Regal Owner Manual - 2011
Driving and Operating 9-25
{WARNING
It can be dangerous to get out
of the vehicle if the automatic
transmission shift lever is not fully
in P (Park) with the parking brake
firmly set. The vehicle can roll.
Do not leave the vehicle when the
engine is running unless you
have to. If you have left the
engine running, the vehicle can
move suddenly. You or others
could be injured. To be sure the
vehicle will not move, even when
it is on fairly level ground, always
set the parking brake and move
the automatic transmission shift
lever to P (Park), or the manual
transmission shift lever to Neutral.
Follow the proper steps to
be sure the vehicle will not move.
If the vehicle has an automatic
transmission, see Shifting Into Park
(Automatic Transmission) on
page 9‑21.
Automatic
Transmission
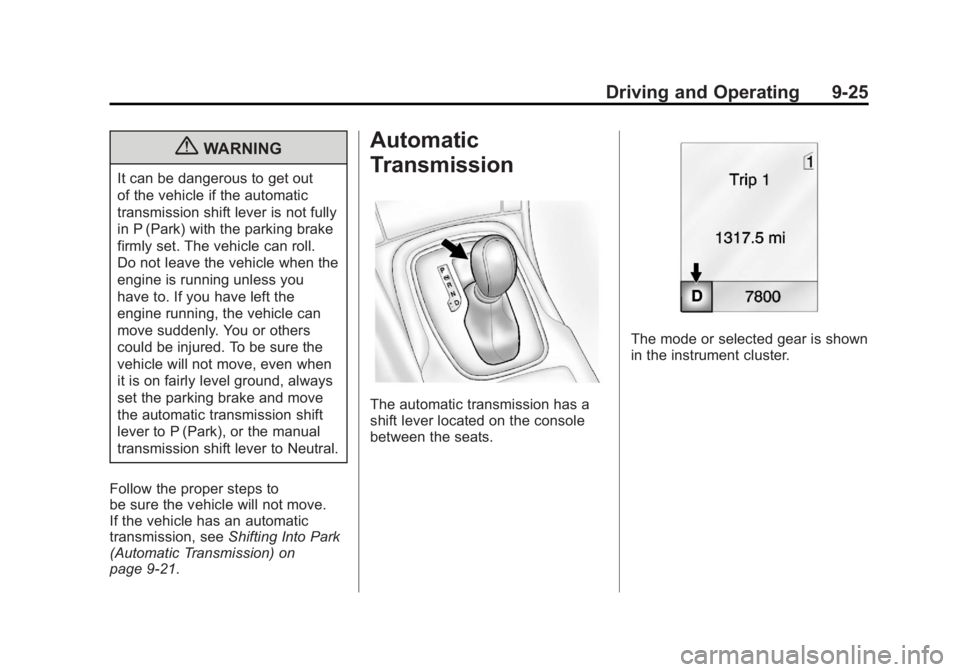
The automatic transmission has a
shift lever located on the console
between the seats.
The mode or selected gear is shown
in the instrument cluster.
Page 230 of 368

Black plate (40,1)Buick Regal Owner Manual - 2011
9-40 Driving and Operating
1(On/Off):Press to turn the
cruise control system on and off.
An indicator light will turn on or off in
the instrument panel cluster.
*(Cancel): Press to disengage
cruise control without erasing the
set speed from memory.
RES/+ (Resume/Accelerate):
Move the thumbwheel up to make
the vehicle resume to a previously
set speed or to accelerate.
SET/− (Set/Coast): Move the
thumbwheel down to set a speed or
to make the vehicle decelerate.
Setting Cruise Control
If the cruise button is on when not in
use, it could get bumped and go into
cruise when not desired. Keep the
cruise control switch off when cruise
is not being used.
1. Press
1to turn cruise
control on.
2. Get to the speed desired. 3. Move the thumbwheel down
toward SET/− and release it.
The desired set speed briefly
appears in the instrument panel
cluster.
4. Take your foot off the accelerator pedal.
Resuming a Set Speed
If the cruise control is set at a
desired speed and then the brakes
are applied, the cruise control is
disengaged without erasing the set
speed from memory.
Once the vehicle speed reaches
about 40 km/h (25 mph) or more,
move the thumbwheel up toward
RES/+ briefly. The vehicle returns to
the previous set speed and stays
there. Increasing Speed While Using
Cruise Control
If the cruise control system is
already activated:
.Move the thumbwheel up toward
RES/+ and hold it until the
desired speed is reached, then
release it.
.To increase vehicle speed in
small amounts, move the
thumbwheel up toward RES/+
briefly and then release it. Each
time this is done, the vehicle
goes about 1.6 km/h (1 mph)
faster.
Page 261 of 368

Black plate (21,1)Buick Regal Owner Manual - 2011
Vehicle Care 10-21
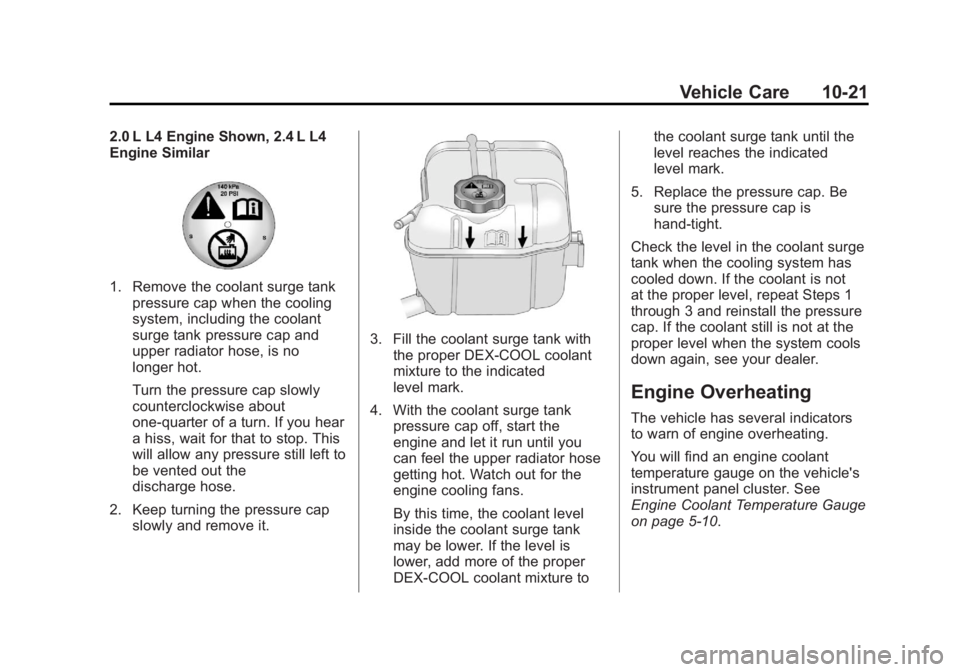
2.0 L L4 Engine Shown, 2.4 L L4
Engine Similar
1. Remove the coolant surge tankpressure cap when the cooling
system, including the coolant
surge tank pressure cap and
upper radiator hose, is no
longer hot.
Turn the pressure cap slowly
counterclockwise about
one-quarter of a turn. If you hear
a hiss, wait for that to stop. This
will allow any pressure still left to
be vented out the
discharge hose.
2. Keep turning the pressure cap slowly and remove it.
3. Fill the coolant surge tank withthe proper DEX-COOL coolant
mixture to the indicated
level mark.
4. With the coolant surge tank pressure cap off, start the
engine and let it run until you
can feel the upper radiator hose
getting hot. Watch out for the
engine cooling fans.
By this time, the coolant level
inside the coolant surge tank
may be lower. If the level is
lower, add more of the proper
DEX-COOL coolant mixture to the coolant surge tank until the
level reaches the indicated
level mark.
5. Replace the pressure cap. Be sure the pressure cap is
hand-tight.
Check the level in the coolant surge
tank when the cooling system has
cooled down. If the coolant is not
at the proper level, repeat Steps 1
through 3 and reinstall the pressure
cap. If the coolant still is not at the
proper level when the system cools
down again, see your dealer.
Engine Overheating
The vehicle has several indicators
to warn of engine overheating.
You will find an engine coolant
temperature gauge on the vehicle's
instrument panel cluster. See
Engine Coolant Temperature Gauge
on page 5‑10.
Page 281 of 368

Black plate (41,1)Buick Regal Owner Manual - 2011
Vehicle Care 10-41
Number Usage9 Body Control
Module 4
10 Body Control
Module 8
11 Front Heater
Ventilation Air
Conditioning/Blower
12 Right Hand Power
Front Seat
13 Left Hand Power
Front Seat
14 Diagnostic Link
Connector
15 Airbag Number Usage
16 Trunk Release
17 Heater Ventilation
Air Conditioning
Controller
18 Service Fuse,
Logistic Relay
19 Not Used
20 Automatic Occupant
Sensing
21 Instrument Panel
Cluster
22 Discrete Logic
Ignition Switch Number Usage
23 Body Control
Module 1
24 Body Control
Module 2
25 OnStar
®
26 Power Outlet, Trunk
Page 292 of 368

Black plate (52,1)Buick Regal Owner Manual - 2011
10-52 Vehicle Care
Federal Communications
Commission (FCC) and
Industry Canada
SeeRadio Frequency Statement on
page 13‑15 for information
regarding Part 15 of the Federal
Communications Commission (FCC)
rules and Industry Canada
Standards RSS-210/220/310.
Tire Pressure Monitor
Operation
This vehicle may have a Tire
Pressure Monitor System (TPMS).
The TPMS is designed to warn the
driver when a low tire pressure
condition exists. TPMS sensors are
mounted onto each tire and wheel
assembly, excluding the spare tire
and wheel assembly. The TPMS
sensors monitor the air pressure in
the tires and transmit the tire
pressure readings to a receiver
located in the vehicle.
When a low tire pressure condition
is detected, the TPMS illuminates
the low tire pressure warning light
located on the instrument cluster.
If the warning light comes on, stop
as soon as possible and inflate the
tires to the recommended pressure
shown on the Tire and Loading
Information label. See Vehicle Load
Limits on page 9‑12.
A message to check the pressure in
a specific tire displays in the Driver
Information Center (DIC). The low
tire pressure warning light and the
DIC warning message come on at
each ignition cycle until the tires are
inflated to the correct inflation
pressure. Using the DIC, tire
pressure levels can be viewed. For
additional information and details about the DIC operation and
displays, see
Driver Information
Center (DIC) on page 5‑22.
The low tire pressure warning light
may come on in cool weather when
the vehicle is first started, and then
turn off as the vehicle is driven. This
could be an early indicator that the
air pressure is getting low and
needs to be inflated to the proper
pressure.
A Tire and Loading Information label
shows the size of the original
equipment tires and the correct
inflation pressure for the tires when
they are cold. See Vehicle Load
Limits on page 9‑12, for an example
of the Tire and Loading Information
label and its location. Also see Tire
Pressure on page 10‑49.
The TPMS can warn about a
low tire pressure condition, but
it does not replace normal tire
maintenance. See Tire Inspection
on page 10‑55, Tire Rotation on
page 10‑55, and Tires on
page 10‑42.
Page 358 of 368

Black plate (2,1)Buick Regal Owner Manual - 2011
i-2 INDEX
Brakes . . . . . . . . . . . . . . . . . . . . . . . . 10-25Antilock . . . . . . . . . . . . . . . . . . . . . . . 9-30
Assist . . . . . . . . . . . . . . . . . . . . . . . . . 9-33
Fluid . . . . . . . . . . . . . . . . . . . . . . . . 10-26
Parking . . . . . . . . . . . . . . . . . . . . . . . 9-31
System Messages . . . . . . . . . . . . 5-26
Braking . . . . . . . . . . . . . . . . . . . . . . . . . 9-3
Break-In, New Vehicle . . . . . . . . . 9-16
Bulb Replacement . . . . . . . . . . . . 10-34
Fog Lamps . . . . . . . . . . . . . 10-32, 6-4
Halogen Bulbs . . . . . . . . . . . . . . 10-31
Headlamp Aiming . . . . . . . . . . . 10-30
Headlamps . . . . . . . . . . . . . . . . . 10-31
Headlamps, Front TurnSignal, and Parking
Lamps . . . . . . . . . . . . . . . . . . . . 10-31
License Plate Lamps . . . . . . . 10-34
Taillamps, Turn Signal, Stoplamps, and
Back-up Lamps . . . . . . . . . . . 10-33
Buying New Tires . . . . . . . . . . . . . 10-57C
Calibration . . . . . . . . . . . . . . . . . . . . . . 5-4
California
Fuel Requirements . . . . . . . . . . . 9-45
Perchlorate MaterialsRequirements . . . . . . . . . . . . . . . 10-3
Warning . . . . . . . . . . . . . . . . . . . . . . 10-3
Canadian Vehicle Owners . . . . . . . . iii
Capacities and Specifications . . . . . . . . . . . . . . . . 12-2
Carbon Monoxide
Engine Exhaust . . . . . . . . . . . . . . . 9-24
Trunk . . . . . . . . . . . . . . . . . . . . . . . . . . 2-7
Winter Driving . . . . . . . . . . . . . . . . . 9-9
Cargo Net . . . . . . . . . . . . . . . . . . . . . . 4-3
Cautions, Danger, and Warnings . . . . . . . . . . . . . . . . . . . . . . . . iii
CD Player . . . . . . . . . . . . . . . . . . . . . 7-14
Center Console Storage . . . . . . . . 4-2
Chains, Tire . . . . . . . . . . . . . . . . . . 10-62
Charging System Light . . . . . . . . 5-13
Check Engine Light . . . . . . . . . . . . . . . . . . 5-13
IgnitionTransmission Lock . . . . . . . . 10-29 Child Restraints
Infants and Young
Children . . . . . . . . . . . . . . . . . . . . . 3-43
Lower Anchors and Tethers for Children . . . . . . . . . 3-49
Older Children . . . . . . . . . . . . . . . . 3-40
Securing . . . . . . . . . . . . . . . . 3-57, 3-59
Systems . . . . . . . . . . . . . . . . . . . . . . 3-45
Circuit Breakers . . . . . . . . . . . . . . 10-36
Cleaning Exterior Care . . . . . . . . . . . . . . . 10-77
Interior Care . . . . . . . . . . . . . . . . 10-80
Climate Control Systems Dual Automatic . . . . . . . . . . . . . . . . 8-1
Clock . . . . . . . . . . . . . . . . . . . . . . . . . . . 5-5
Cluster, Instrument . . . . . . . . . . . . . 5-8
Clutch, Hydraulic . . . . . . . . . . . . . 10-14
Collision Damage Repair . . . . . . 13-9
Compact Spare Tire . . . . . . . . . . 10-69
Compass . . . . . . . . . . . . . . . . . . . . . . . 5-4 Messages . . . . . . . . . . . . . . . . . . . . 5-26
Control of a Vehicle . . . . . . . . . . . . . 9-3
Convenience Net . . . . . . . . . . . . . . . 4-3
Convex Mirrors . . . . . . . . . . . . . . . . 2-10
Page 361 of 368

Black plate (5,1)Buick Regal Owner Manual - 2011
INDEX i-5
G
GasolineSpecifications . . . . . . . . . . . . . . . . . 9-45
Gauges Engine CoolantTemperature . . . . . . . . . . . . . . . . 5-10
Fuel . . . . . . . . . . . . . . . . . . . . . . . . . . . 5-9
Odometer . . . . . . . . . . . . . . . . . . . . . . 5-9
Speedometer . . . . . . . . . . . . . . . . . . 5-9
Tachometer . . . . . . . . . . . . . . . . . . . . 5-9
Trip Odometer . . . . . . . . . . . . . . . . . 5-9
Warning Lights and
Indicators . . . . . . . . . . . . . . . . . . . . 5-7
General Information Service and Maintenance . . . . . 11-1
Towing . . . . . . . . . . . . . . . . . . . . . . . . 9-50
Vehicle Care . . . . . . . . . . . . . . . . . . 10-2
Glove Box . . . . . . . . . . . . . . . . . . . . . . 4-1
GM Mobility Reimbursement Program . . . . . . . . . . . . . . . . . . . . . . 13-5
H
Halogen Bulbs . . . . . . . . . . . . . . . . 10-31
Hazard Warning Flashers . . . . . . . 6-3
Head Restraints . . . . . . . . . . . . . . . . 3-2
Headlamps
Aiming . . . . . . . . . . . . . . . . . . . . . . 10-30
Automatic . . . . . . . . . . . . . . . . . . . . . . 6-3
Bulb Replacement . . . . . . . . . . 10-31
Daytime RunningLamps (DRL) . . . . . . . . . . . . . . . . . 6-2
Flash-to-Pass . . . . . . . . . . . . . . . . . . 6-2
High-Beam On Light . . . . . . . . . . 5-21
High/Low Beam Changer . . . . . . 6-2
Lamps On Reminder . . . . . . . . . 5-21
Heated Front Seats . . . . . . . . . . . . . 3-8
Heated Mirrors . . . . . . . . . . . . . . . . . 2-11
Heater Engine . . . . . . . . . . . . . . . . . . . . . . . . 9-20
High-Beam On Light . . . . . . . . . . . 5-21
High-Speed Operation . . . . . . . . 10-50
Highway Hypnosis . . . . . . . . . . . . . . 9-8
Hill and Mountain Roads . . . . . . . . 9-8
Hill Start Assist (HSA) . . . . . . . . . 9-34 Hood . . . . . . . . . . . . . . . . . . . . . . . . . . 10-5
Horn . . . . . . . . . . . . . . . . . . . . . . . . . . . . 5-2
How to Wear Safety Belts
Properly . . . . . . . . . . . . . . . . . . . . . . 3-14
Hydraulic Clutch . . . . . . . . . . . . . . 10-14
I
Ignition Positions . . . . . . . . . . . . . . 9-17
Ignition Transmission Lock Check . . . . . . . . . . . . . . . . . . . . . . . 10-29
Immobilizer . . . . . . . . . . . . . . . . . . . . . 2-9
Infants and Young Children, Restraints . . . . . . . . . . . . . . . . . . . . 3-43
Infotainment . . . . . . . . . . . . . . . . . . . . 7-1
Instrument Cluster . . . . . . . . . . . . . . 5-8
Instrument Panel Storage Area . . . . . . . . . . . . . . . . . . 4-1
Interactive
Drive Control System . . . . . . . . . 9-38
Interactive Drive Control System . . . . . . . . . . . . . . . . . . . . . . . 9-38
Introduction . . . . . . . . . . . . . . . . . . . . . . . iii