center console BUICK REGAL 2011 Owner's Manual
[x] Cancel search | Manufacturer: BUICK, Model Year: 2011, Model line: REGAL, Model: BUICK REGAL 2011Pages: 368, PDF Size: 5.35 MB
Page 17 of 368
Black plate (13,1)Buick Regal Owner Manual - 2011
In Brief 1-13
Storing a Favorite Station
Stations from all bands can be
stored in the favorite lists in any
order. Up to six stations can be
stored in each favorite page and the
number of available favorite pages
can be set.
To store the station to a position in
the list, press the corresponding
numeric button 1 to 6 until a beep is
heard. The stored station will begin
playback.
For more information, see“Storing a
Station as a Favorite” inAM-FM
Radio on page 7‑7.
Setting the Clock
Adjusting the Time
1. Press the CONFIG button and
select Time and Date Settings.
2. Select Set Time.
3. Turn the
Zknob to adjust
the highlighted number.
4. Press the
Zknob to select
the next number. 5. To save the time and return to
the Time Settings menu, press
the BACK button at any time or
press the
Zbutton after
adjusting the minutes.
Setting the 12/24 Hour Format
1. Press the CONFIG button and select Time and Date Settings.
2. Highlight 12/24 Hour Format.
3. Press the
Zbutton to select
the 12 hour or 24 hour display
format.
For detailed instructions on setting
the clock, see Clock on page 5‑5.
Satellite Radio
Vehicles with an XM™ Satellite
Radio tuner and a valid XM Satellite
Radio subscription can receive XM
programming.
XM Satellite Radio Service
XM is a satellite radio service based
in the 48 contiguous United States
and 10 Canadian provinces. XM Satellite Radio has a wide variety of
programming and commercial-free
music, coast to coast, and in
digital-quality sound. A fee is
required to receive the XM service.
For more information refer to:
.www.xmradio.com or call
1-800-929-2100 (U.S.).
.www.xmradio.ca or call
1-877-438-9677 (Canada).
For more information, see Satellite
Radio on page 7‑10.
Portable Audio Devices
Some vehicles have a 3.5 mm
(1/8 in) auxiliary input and a USB
port located in the center console.
External devices such as iPods
®,
laptop computers, MP3 players, CD
changers, and USB storage devices
may be connected, depending on
the audio system.
For more information, see Auxiliary
Devices on page 7‑17.
Page 20 of 368
Black plate (16,1)Buick Regal Owner Manual - 2011
1-16 In Brief
MENU:Press to get to the Trip/
Fuel Menu and the Vehicle
Information Menu.
For more information, see Driver
Information Center (DIC) on
page 5‑22.
Vehicle Personalization
Some vehicle features can be
programmed by using the audio
system controls. These features
include:
.Climate and Air Quality
.Comfort and Convenience
.Collision/Detection Systems
.Language
.Lighting
.Power Door Locks
.Remote Lock/Unlock
See Vehicle Personalization on
page 5‑31.
Ultrasonic Parking Assist
Ultrasonic Rear Parking Assist
(URPA) uses sensors on the rear
bumper to detect objects while
parking the vehicle. It operates at
speeds less than 8 km/h (5 mph).
URPA uses audio beeps to provide
distance and system information.
Keep the sensors on the vehicle's
rear bumper clean to ensure proper
operation.
The system can be disabled by
pressing the park assist button
located next to the radio.
See Ultrasonic Parking Assist on
page 9‑42 for more information.
Power Outlets
The accessory power outlet can be
used to plug in electrical equipment,
such as a cell phone, an MP3
player, etc.
This outlet is located under the
armrest inside the center console
storage. The vehicle may have a 110v power
outlet located on the rear of the
center floor console.
Open the protective cover to use the
outlets.
See
Power Outlets on page 5‑5.
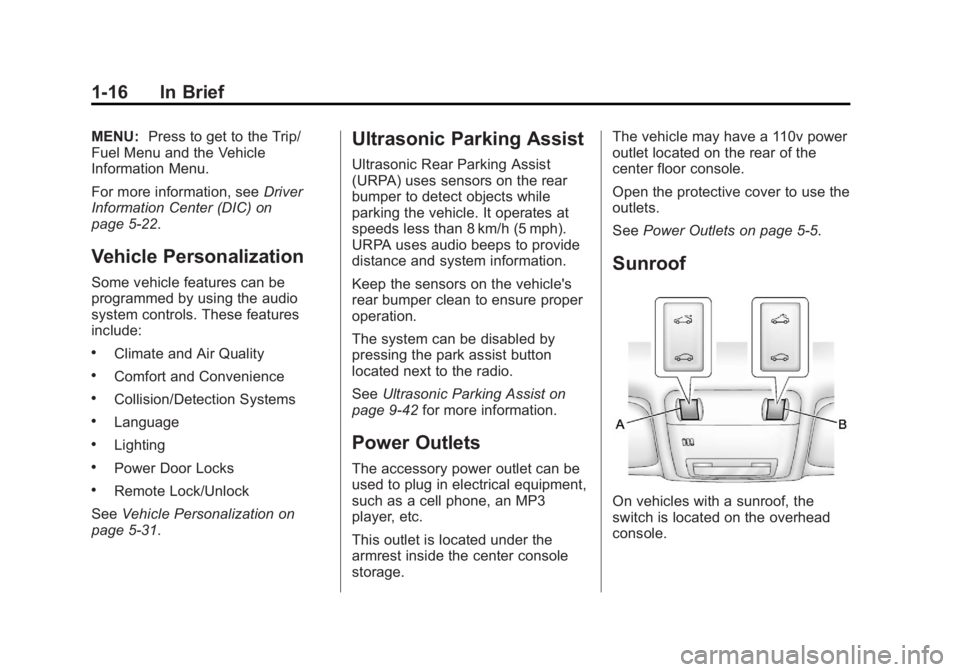
Sunroof
On vehicles with a sunroof, the
switch is located on the overhead
console.
Page 105 of 368
Black plate (1,1)Buick Regal Owner Manual - 2011
Storage 4-1
Storage
Storage Compartments
Instrument Panel Storage . . . . . 4-1
Glove Box . . . . . . . . . . . . . . . . . . . . 4-1
Cupholders . . . . . . . . . . . . . . . . . . . 4-2
Rear Storage . . . . . . . . . . . . . . . . . 4-2
Center Console Storage . . . . . . 4-2
Additional Storage Features
Cargo Net . . . . . . . . . . . . . . . . . . . . . 4-3
Convenience Net . . . . . . . . . . . . . 4-3
Storage
Compartments
Instrument Panel Storage
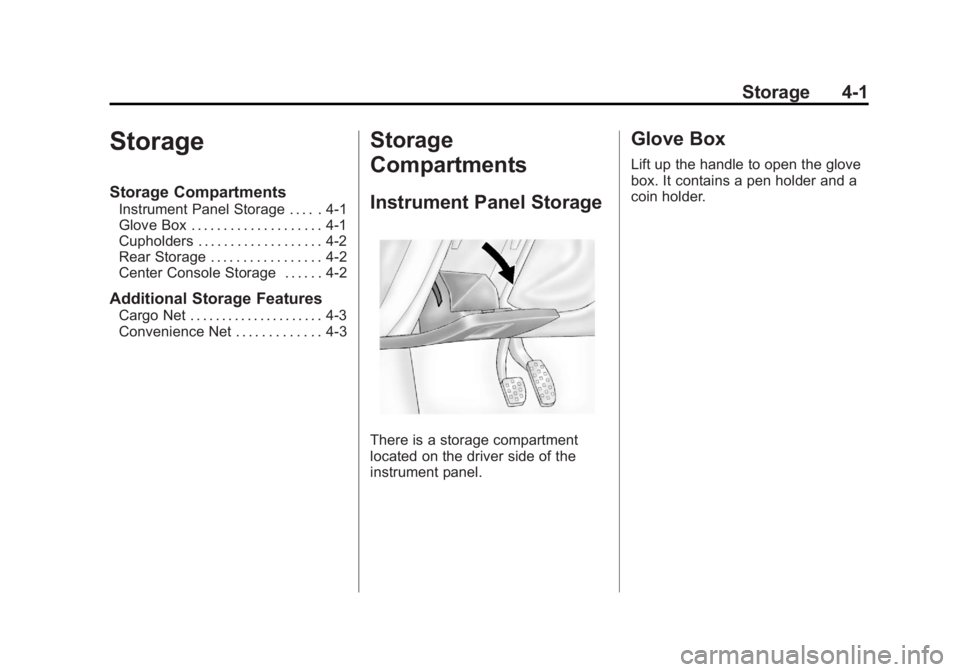
There is a storage compartment
located on the driver side of the
instrument panel.
Glove Box
Lift up the handle to open the glove
box. It contains a pen holder and a
coin holder.
Page 106 of 368
Black plate (2,1)Buick Regal Owner Manual - 2011
4-2 Storage
Cupholders
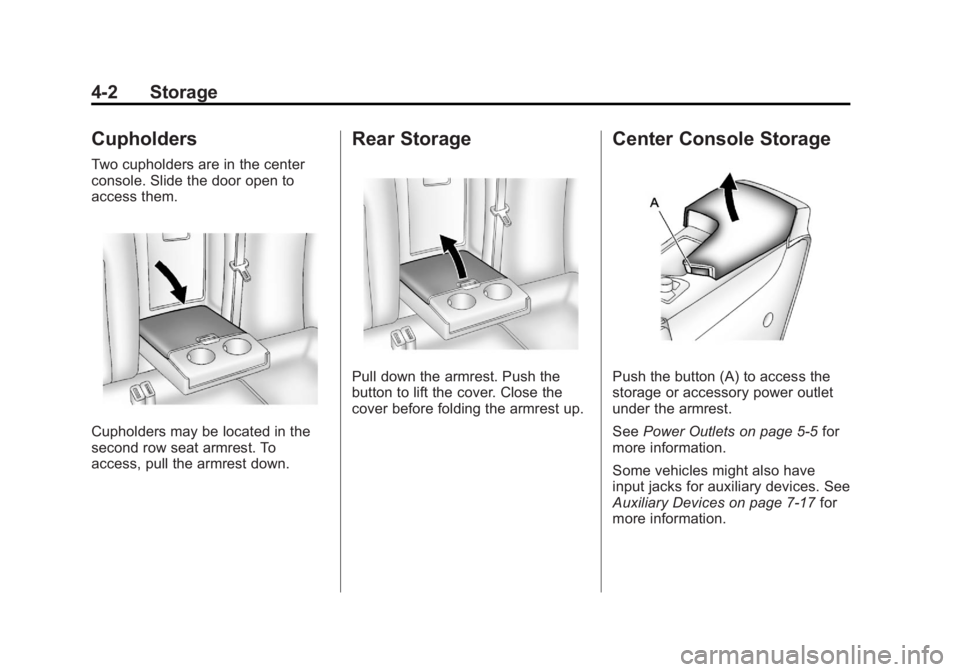
Two cupholders are in the center
console. Slide the door open to
access them.
Cupholders may be located in the
second row seat armrest. To
access, pull the armrest down.
Rear Storage
Pull down the armrest. Push the
button to lift the cover. Close the
cover before folding the armrest up.
Center Console Storage
Push the button (A) to access the
storage or accessory power outlet
under the armrest.
SeePower Outlets on page 5‑5 for
more information.
Some vehicles might also have
input jacks for auxiliary devices. See
Auxiliary Devices on page 7‑17 for
more information.
Page 113 of 368

Black plate (5,1)Buick Regal Owner Manual - 2011
Instruments and Controls 5-5
Clock
The infotainment system controls
are used to access the time and
date settings through the menu
system. SeeOperation on page 7‑4
for information about how to use the
menu system.
Setting the Time and Date
1. Press the CONFIG button and select Time and Date Settings.
2. Select Set Time or Set Date.
3. Turn the
Zknob to adjust
the highlighted value.
4. Press the
Zknob to select
the next value.
5. To save the time and return to the Time Settings menu, press
the BACK button at any time or
press the
Zknob after
adjusting the minutes.
Setting the 12/24 Hour Format
1. Press the CONFIG button and select Time and Date Settings.
2. Highlight 12/24 HR Format.
3. Press the
Zknob to select
the 12 hour or 24 hour display
format.
Setting the Month and Day
Format
1. Press the CONFIG button and select Time and Date Settings.
2. Highlight Month & Day format.
3. Press the
Zknob to select
DD/MM/YYYY (day/month/year),
MM/DD/YYYY (month/day/year),
or YYYY/MM/DD (year/month/
day) display format.
Power Outlets
The accessory power outlet can be
used to plug in electrical equipment,
such as a cell phone or MP3 player.
This outlet is located under the
armrest inside the center console
storage.
The outlet is powered when the
ignition is in ON/RUN or ACC/
ACCESSORY, or until the driver
door is opened within 10 minutes of
turning off the vehicle. See Retained
Accessory Power (RAP) on
page 9‑21.
Open the protective cover to use the
accessory power outlet.
Page 114 of 368
Black plate (6,1)Buick Regal Owner Manual - 2011
5-6 Instruments and Controls
Certain electrical accessories
may not be compatible with the
accessory power outlets and could
overload vehicle or adapter fuses.
If there is a problem, see your
dealer.
When adding electrical equipment,
be sure to follow the installation
instructions included with the
equipment. SeeAdd-On Electrical
Equipment on page 9‑50.
Notice: Hanging heavy
equipment from the power
outlet can cause damage not
covered by the vehicle warranty.
The power outlets are designed
for accessory power plugs only,
such as cell phone charge cords. Power Outlet 110 Volt Alternating
Current
The vehicle may have a power
outlet that can be used to plug
in electrical equipment with a
maximum limit of 150 watts.
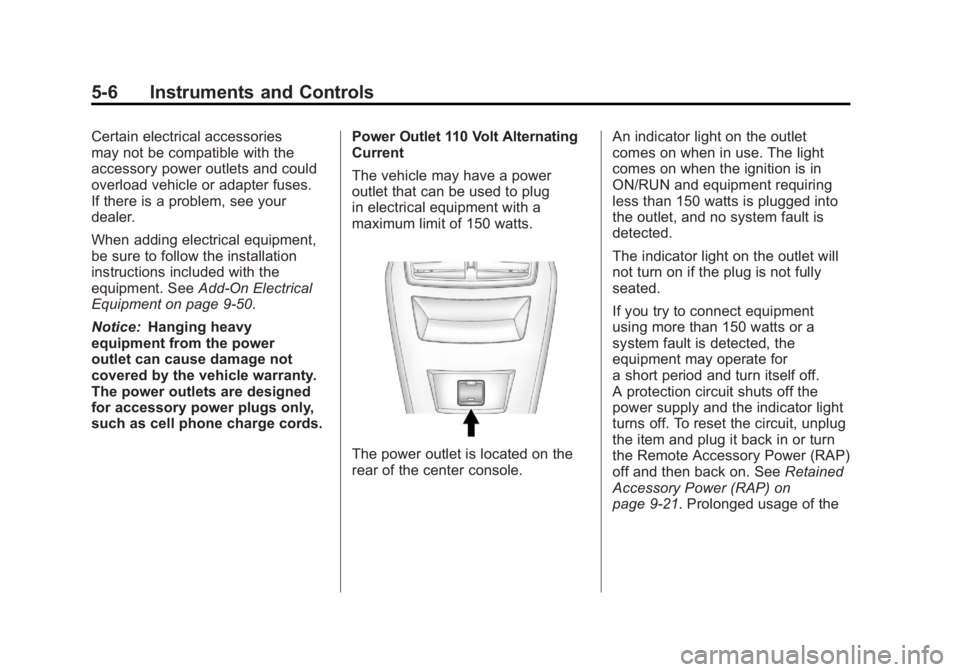
The power outlet is located on the
rear of the center console.An indicator light on the outlet
comes on when in use. The light
comes on when the ignition is in
ON/RUN and equipment requiring
less than 150 watts is plugged into
the outlet, and no system fault is
detected.
The indicator light on the outlet will
not turn on if the plug is not fully
seated.
If you try to connect equipment
using more than 150 watts or a
system fault is detected, the
equipment may operate for
a short period and turn itself off.
A protection circuit shuts off the
power supply and the indicator light
turns off. To reset the circuit, unplug
the item and plug it back in or turn
the Remote Accessory Power (RAP)
off and then back on. See
Retained
Accessory Power (RAP) on
page 9‑21. Prolonged usage of the
Page 119 of 368

Black plate (11,1)Buick Regal Owner Manual - 2011
Instruments and Controls 5-11
Safety Belt Reminders
Driver Safety Belt Reminder
Light
There is a driver safety belt
reminder light on the instrument
panel cluster.
When the engine is started this light
begins to flash and a chime comes
on for several seconds to remind
the driver to fasten their safety belt.
The light also stays on if the driver
remains unbuckled.
This cycle repeats if the driver is
unbuckled while the vehicle is
moving.
If the driver safety belt is already
buckled, neither the light nor the
chime comes on.
Passenger Safety Belt
Reminder Light
There is a passenger safety belt
reminder light located on the center
console.
When the engine is started this light
begins to flash and a chime comes
on for several seconds to remind
the passenger to fasten their safety
belt. The light also stays on if the
passenger remains unbuckled.
This cycle repeats if the passenger
is unbuckled while the vehicle is
moving.
If the passenger safety belt is
buckled, neither the chime nor the
light comes on.The front passenger safety belt
warning light and chime may turn on
if an object is put on the seat such
as a briefcase, handbag, grocery
bag, laptop, or other electronic
device. To turn off the warning light
and/or chime, remove the object
from the seat or buckle the
safety belt.
Airbag Readiness Light
This light shows if there is an
electrical problem. The system
check includes the airbag sensor,
the pretensioners, the airbag
modules, the wiring, and the crash
sensing and diagnostic module.
For more information on the airbag
system, see
Airbag System on
page 3‑27.
Page 167 of 368
Black plate (17,1)Buick Regal Owner Manual - 2011
Infotainment System 7-17
Auxiliary Devices
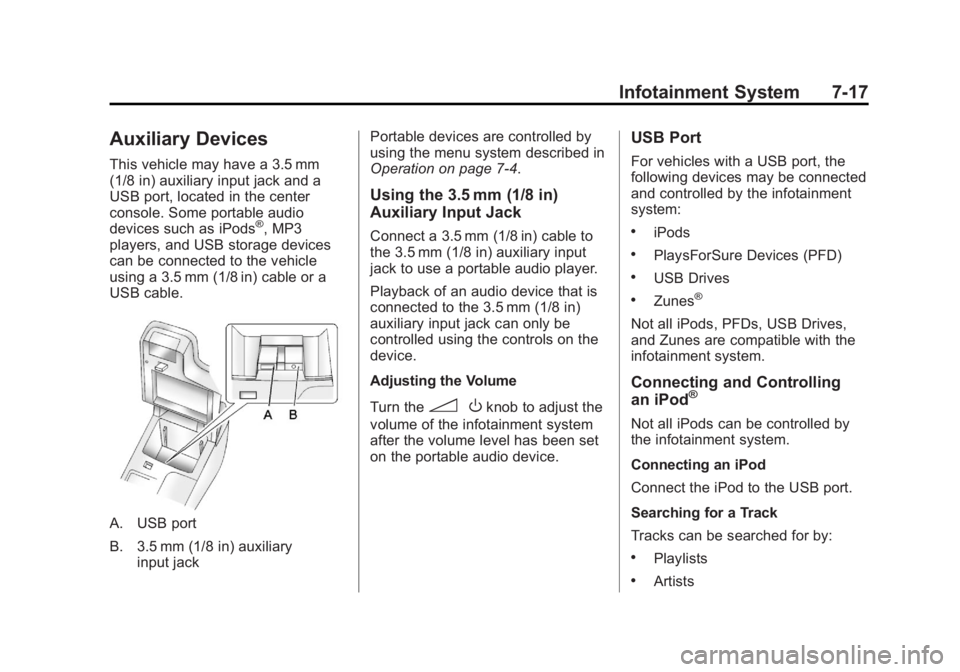
This vehicle may have a 3.5 mm
(1/8 in) auxiliary input jack and a
USB port, located in the center
console. Some portable audio
devices such as iPods
®, MP3
players, and USB storage devices
can be connected to the vehicle
using a 3.5 mm (1/8 in) cable or a
USB cable.
A. USB port
B. 3.5 mm (1/8 in) auxiliary input jack Portable devices are controlled by
using the menu system described in
Operation on page 7‑4.
Using the 3.5 mm (1/8 in)
Auxiliary Input Jack
Connect a 3.5 mm (1/8 in) cable to
the 3.5 mm (1/8 in) auxiliary input
jack to use a portable audio player.
Playback of an audio device that is
connected to the 3.5 mm (1/8 in)
auxiliary input jack can only be
controlled using the controls on the
device.
Adjusting the Volume
Turn the
3
Oknob to adjust the
volume of the infotainment system
after the volume level has been set
on the portable audio device.
USB Port
For vehicles with a USB port, the
following devices may be connected
and controlled by the infotainment
system:
.iPods
.PlaysForSure Devices (PFD)
.USB Drives
.Zunes®
Not all iPods, PFDs, USB Drives,
and Zunes are compatible with the
infotainment system.
Connecting and Controlling
an iPod®
Not all iPods can be controlled by
the infotainment system.
Connecting an iPod
Connect the iPod to the USB port.
Searching for a Track
Tracks can be searched for by:
.Playlists
.Artists
Page 221 of 368
Black plate (31,1)Buick Regal Owner Manual - 2011
Driving and Operating 9-31
If driving safely on a wet road and it
becomes necessary to slam on the
brakes and continue braking to
avoid a sudden obstacle, a
computer senses that the wheels
are slowing down. If one of the
wheels is about to stop rolling, the
computer will separately work the
brakes at each wheel.
ABS can change the brake pressure
to each wheel, as required, faster
than any driver could. This can help
the driver steer around the obstacle
while braking hard.
As the brakes are applied, the
computer keeps receiving updates
on wheel speed and controls
braking pressure accordingly.
Remember: ABS does not change
the time needed to get a foot up to
the brake pedal or always decrease
stopping distance. If you get tooclose to the vehicle in front of you,
there will not be enough time to
apply the brakes if that vehicle
suddenly slows or stops. Always
leave enough room up ahead to
stop, even with ABS.
Using ABS
Do not pump the brakes. Just hold
the brake pedal down firmly and let
ABS work. You might hear the ABS
pump or motor operating and feel
the brake pedal pulsate, but this is
normal.
Braking in Emergencies
ABS allows the driver to steer and
brake at the same time. In many
emergencies, steering can help
more than even the very best
braking.
Parking Brake
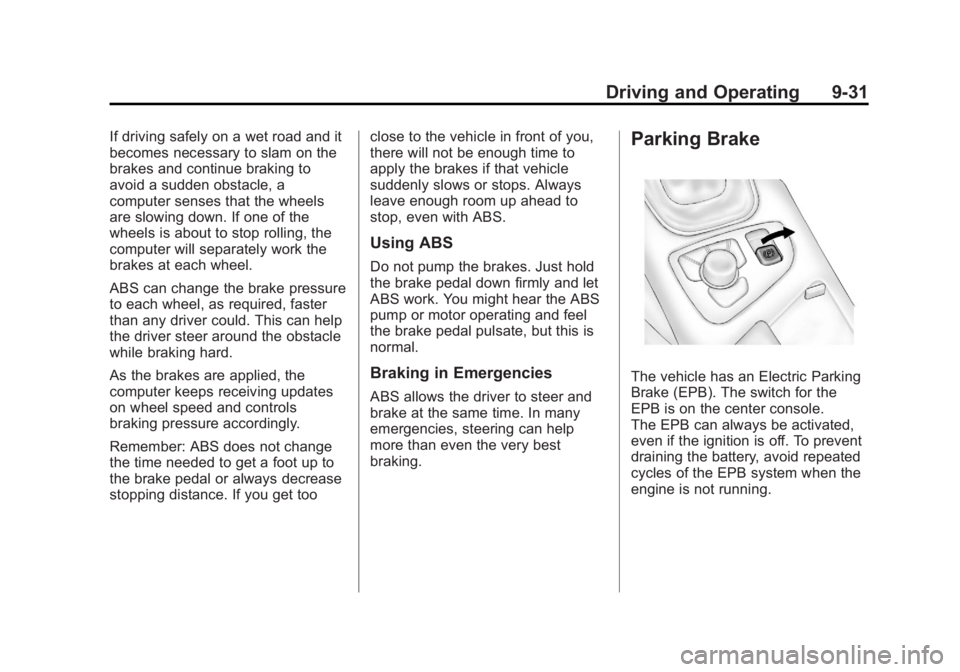
The vehicle has an Electric Parking
Brake (EPB). The switch for the
EPB is on the center console.
The EPB can always be activated,
even if the ignition is off. To prevent
draining the battery, avoid repeated
cycles of the EPB system when the
engine is not running.
Page 358 of 368

Black plate (2,1)Buick Regal Owner Manual - 2011
i-2 INDEX
Brakes . . . . . . . . . . . . . . . . . . . . . . . . 10-25Antilock . . . . . . . . . . . . . . . . . . . . . . . 9-30
Assist . . . . . . . . . . . . . . . . . . . . . . . . . 9-33
Fluid . . . . . . . . . . . . . . . . . . . . . . . . 10-26
Parking . . . . . . . . . . . . . . . . . . . . . . . 9-31
System Messages . . . . . . . . . . . . 5-26
Braking . . . . . . . . . . . . . . . . . . . . . . . . . 9-3
Break-In, New Vehicle . . . . . . . . . 9-16
Bulb Replacement . . . . . . . . . . . . 10-34
Fog Lamps . . . . . . . . . . . . . 10-32, 6-4
Halogen Bulbs . . . . . . . . . . . . . . 10-31
Headlamp Aiming . . . . . . . . . . . 10-30
Headlamps . . . . . . . . . . . . . . . . . 10-31
Headlamps, Front TurnSignal, and Parking
Lamps . . . . . . . . . . . . . . . . . . . . 10-31
License Plate Lamps . . . . . . . 10-34
Taillamps, Turn Signal, Stoplamps, and
Back-up Lamps . . . . . . . . . . . 10-33
Buying New Tires . . . . . . . . . . . . . 10-57C
Calibration . . . . . . . . . . . . . . . . . . . . . . 5-4
California
Fuel Requirements . . . . . . . . . . . 9-45
Perchlorate MaterialsRequirements . . . . . . . . . . . . . . . 10-3
Warning . . . . . . . . . . . . . . . . . . . . . . 10-3
Canadian Vehicle Owners . . . . . . . . iii
Capacities and Specifications . . . . . . . . . . . . . . . . 12-2
Carbon Monoxide
Engine Exhaust . . . . . . . . . . . . . . . 9-24
Trunk . . . . . . . . . . . . . . . . . . . . . . . . . . 2-7
Winter Driving . . . . . . . . . . . . . . . . . 9-9
Cargo Net . . . . . . . . . . . . . . . . . . . . . . 4-3
Cautions, Danger, and Warnings . . . . . . . . . . . . . . . . . . . . . . . . iii
CD Player . . . . . . . . . . . . . . . . . . . . . 7-14
Center Console Storage . . . . . . . . 4-2
Chains, Tire . . . . . . . . . . . . . . . . . . 10-62
Charging System Light . . . . . . . . 5-13
Check Engine Light . . . . . . . . . . . . . . . . . . 5-13
IgnitionTransmission Lock . . . . . . . . 10-29 Child Restraints
Infants and Young
Children . . . . . . . . . . . . . . . . . . . . . 3-43
Lower Anchors and Tethers for Children . . . . . . . . . 3-49
Older Children . . . . . . . . . . . . . . . . 3-40
Securing . . . . . . . . . . . . . . . . 3-57, 3-59
Systems . . . . . . . . . . . . . . . . . . . . . . 3-45
Circuit Breakers . . . . . . . . . . . . . . 10-36
Cleaning Exterior Care . . . . . . . . . . . . . . . 10-77
Interior Care . . . . . . . . . . . . . . . . 10-80
Climate Control Systems Dual Automatic . . . . . . . . . . . . . . . . 8-1
Clock . . . . . . . . . . . . . . . . . . . . . . . . . . . 5-5
Cluster, Instrument . . . . . . . . . . . . . 5-8
Clutch, Hydraulic . . . . . . . . . . . . . 10-14
Collision Damage Repair . . . . . . 13-9
Compact Spare Tire . . . . . . . . . . 10-69
Compass . . . . . . . . . . . . . . . . . . . . . . . 5-4 Messages . . . . . . . . . . . . . . . . . . . . 5-26
Control of a Vehicle . . . . . . . . . . . . . 9-3
Convenience Net . . . . . . . . . . . . . . . 4-3
Convex Mirrors . . . . . . . . . . . . . . . . 2-10