check oil BUICK REGAL 2011 Owner's Manual
[x] Cancel search | Manufacturer: BUICK, Model Year: 2011, Model line: REGAL, Model: BUICK REGAL 2011Pages: 368, PDF Size: 5.35 MB
Page 128 of 368

Black plate (20,1)Buick Regal Owner Manual - 2011
5-20 Instruments and Controls
Engine Oil Pressure Light
{WARNING
Do not keep driving if the oil
pressure is low. The engine can
become so hot that it catches fire.
Someone could be burned. Check
the oil as soon as possible and
have the vehicle serviced.
Notice: Lack of proper engine oil
maintenance can damage the
engine. The repairs would not be
covered by the vehicle warranty.
Always follow the maintenance
schedule for changing engine oil.
The oil pressure light should come
on briefly as the engine is started.
If it does not come on have the
vehicle serviced by your dealer.
If the light comes on and stays on, it
means that oil is not flowing through
the engine properly. The vehicle
could be low on oil and might have
some other system problem. See
your dealer.
Low Fuel Warning Light
This light comes on for a
few seconds when the ignition is
turned on as a check to indicate
it is working. If it does not come on,
have it fixed.
The low fuel warning light (A) comes
on and a chime sounds periodically
when the vehicle is low on fuel. The
light turns off when fuel is added to
the fuel tank.
See Driver Information Center (DIC)
on page 5‑22 for more information.
Page 136 of 368

Black plate (28,1)Buick Regal Owner Manual - 2011
5-28 Instruments and Controls
HIGH COOLANT
TEMPERATURE
This message displays if the coolant
temperature is hot. SeeEngine
Overheating on page 10‑21.
Engine Oil Messages
CHANGE ENGINE OIL SOON
This message displays when the
engine oil needs to be changed.
When you change the engine oil, be
sure to reset the Oil Life System.
See Engine Oil Life System on
page 10‑13 andDriver Information
Center (DIC) on page 5‑22 for
information on how to reset the
system. See Engine Oil on
page 10‑9 andScheduled
Maintenance on page 11‑2
for more information.
ENGINE OIL HOT, IDLE
ENGINE
This message displays when the
engine oil temperature is too hot.
Stop and allow the vehicle to idle
until it cools down.
ENGINE OIL LOW —ADD OIL
This message displays when the
engine oil level is too low. Check
the oil level. See Engine Oil on
page 10‑9.
OIL PRESSURE LOW —STOP
ENGINE
This message displays if low oil
pressure levels occur. Stop the
vehicle as soon as safely possible
and do not operate it until the cause
of the low oil pressure has been
corrected. Check the oil as soon
as possible and have the vehicle
serviced by your dealer.
Engine Power Messages
ENGINE POWER IS REDUCED
This message displays when the
vehicle's engine power is reduced.
Reduced engine power can affect
the vehicle's ability to accelerate.
If this message is on, but there
is no reduction in performance,
proceed to your destination.
The performance may be reduced
the next time the vehicle is driven.
The vehicle may be driven at a
reduced speed while this message
is on, but maximum acceleration
and speed may be reduced.
Anytime this message stays on, the
vehicle should be taken to your
dealer for service as soon as
possible.
Fuel System Messages
FUEL LEVEL LOW
This message displays when the
vehicle is low on fuel. Refuel as
soon as possible.
Page 209 of 368
Black plate (19,1)Buick Regal Owner Manual - 2011
Driving and Operating 9-19
Starting Procedure
1. With your foot off the acceleratorpedal, turn the ignition key to
START. When the engine starts,
let go of the key. The idle speed
will go down as the engine
warms. Do not race the engine
immediately after starting it.
Allow the oil to warm up and
lubricate all moving parts.
The vehicle has a
Computer-Controlled Cranking
System. This feature assists in
starting the engine and protects
components. If the ignition key is
turned to the START position,
and then released when the
engine begins cranking, the
engine will continue cranking
for a few seconds or until the
vehicle starts. If the engine does
not start and the key is held in
START for many seconds,
cranking stops after 15 seconds
to prevent cranking motor
damage. To prevent gear
damage, this system also
prevents cranking if the engine is already running. Engine
cranking can be stopped by
turning the ignition switch to
ACC/ACCESSORY or
LOCK/OFF.
Notice: Cranking the engine for
long periods of time, by returning
the key to the START position
immediately after cranking has
ended, can overheat and damage
the cranking motor, and drain the
battery. Wait at least 15 seconds
between each try, to let the
cranking motor cool down.
2. If the engine does not start after 5 to 10 seconds, especially in
very cold weather (below −18°C
or 0°F), it could be flooded with
too much gasoline. Push the
accelerator pedal all the way to
the floor and hold it there as you
hold the key in START for a
maximum of 15 seconds. Wait at
least 15 seconds between each
try, to allow the cranking motor
to cool. When the engine starts,
let go of the key and accelerator. If the vehicle starts briefly but
then stops again, repeat the
procedure. This clears the extra
gasoline from the engine. Do not
race the engine immediately
after starting it. Operate the
engine and transmission gently
until the oil warms up and
lubricates all moving parts.
Notice: The engine is designed to
work with the electronics in the
vehicle. If you add electrical parts
or accessories, you could change
the way the engine operates.
Before adding electrical
equipment, check with your
dealer. If you do not, the engine
might not perform properly. Any
resulting damage would not be
covered by the vehicle warranty.
Overrun Cut‐Off
When the vehicle is driven with a
gear engaged but the accelerator
released, the fuel supply is
automatically cut off to improve
fuel economy.
Page 235 of 368
Black plate (45,1)Buick Regal Owner Manual - 2011
Driving and Operating 9-45
If the vehicle has the 2.0L L4 engine
(VIN Code V), use premium
unleaded gasoline with a posted
octane rating of 91 or higher.
You can also use regular unleaded
gasoline rated at 87 octane or
higher, but the vehicle's acceleration
could be slightly reduced, and a
slight audible knocking noise,
commonly referred to as spark
knock, might be heard. If the octane
is less than 87, a heavy knocking
noise might be heard when driving.
If this occurs, use a gasoline rated
at 87 octane or higher as soon as
possible. Otherwise, you could
damage the engine. If heavy
knocking is heard when using
gasoline rated at 87 octane or
higher, the engine needs service.Gasoline Specifications
(U.S. and Canada Only)
At a minimum, gasoline
should meet ASTM specification
D 4814 in the United States or
CAN/CGSB‐3.5 or 3.511 in Canada.
Some gasolines contain an
octane-enhancing additive called
methylcyclopentadienyl manganese
tricarbonyl (MMT). We recommend
against the use of gasolines
containing MMT. SeeFuel Additives
on page 9‑46 for additional
information.
California Fuel
Requirements
If the vehicle is certified to meet
California Emissions Standards, it is
designed to operate on fuels that
meet California specifications.
See the underhood emission control
label. If this fuel is not available in
states adopting California Emissions
Standards, the vehicle will operate satisfactorily on fuels meeting
federal specifications, but emission
control system performance might
be affected. The malfunction
indicator lamp could turn on and the
vehicle might fail a smog‐check test.
See
Malfunction Indicator Lamp on
page 5‑13. If this occurs, return to
your authorized dealer for diagnosis.
If it is determined that the condition
is caused by the type of fuel used,
repairs might not be covered by the
vehicle warranty.
Fuels in Foreign
Countries
Never use leaded gasoline or any
other fuel not recommended in the
previous text on fuel. Costly repairs
caused by use of improper fuel
would not be covered by the vehicle
warranty.
To check the fuel availability, ask an
auto club, or contact a major oil
company that does business in the
country where you will be driving.
Page 241 of 368
Black plate (1,1)Buick Regal Owner Manual - 2011
Vehicle Care 10-1
Vehicle Care
General Information
General Information . . . . . . . . . . 10-2
California Proposition 65Warning . . . . . . . . . . . . . . . . . . . . 10-3
California Perchlorate Materials Requirements . . . . 10-3
Accessories and Modifications . . . . . . . . . . . . . . . 10-3
Vehicle Checks
Doing Your OwnService Work . . . . . . . . . . . . . . . 10-4
Hood . . . . . . . . . . . . . . . . . . . . . . . . 10-5
Engine Compartment Overview . . . . . . . . . . . . . . . . . . . 10-6
Engine Oil . . . . . . . . . . . . . . . . . . . 10-9
Engine Oil Life System . . . . . 10-13
Automatic Transmission Fluid . . . . . . . . . . . . . . . . . . . . . . 10-14
Manual Transmission Fluid . . . . . . . . . . . . . . . . . . . . . . 10-14 Hydraulic Clutch . . . . . . . . . . . . 10-14
Engine Air Cleaner/Filter . . . . 10-15
Cooling System . . . . . . . . . . . . 10-17
Engine Coolant . . . . . . . . . . . . . 10-18
Engine Overheating . . . . . . . . 10-21
Power Steering Fluid . . . . . . . 10-23
Washer Fluid . . . . . . . . . . . . . . . 10-24
Brakes . . . . . . . . . . . . . . . . . . . . . 10-25
Brake Fluid . . . . . . . . . . . . . . . . . 10-26
Battery . . . . . . . . . . . . . . . . . . . . . 10-27
Starter Switch Check . . . . . . . 10-28
Automatic Transmission Shift
Lock Control Function
Check . . . . . . . . . . . . . . . . . . . . . 10-28
Ignition Transmission Lock Check . . . . . . . . . . . . . . . . . . . . . 10-29
Park Brake and P (Park) Mechanism Check . . . . . . . . 10-29
Wiper Blade Replacement . . . . . . . . . . . . . . 10-30
Headlamp Aiming
Headlamp Aiming . . . . . . . . . . 10-30
Bulb Replacement
Bulb Replacement . . . . . . . . . . 10-31
Halogen Bulbs . . . . . . . . . . . . . . 10-31
Headlamps, Front TurnSignal and Parking
Lamps . . . . . . . . . . . . . . . . . . . . 10-31
Fog Lamps . . . . . . . . . . . . . . . . . 10-32
Taillamps, Turn Signal, Stoplamps, and Back-Up
Lamps . . . . . . . . . . . . . . . . . . . . 10-33
License Plate Lamp . . . . . . . . 10-34
Replacement Bulbs . . . . . . . . . 10-34
Electrical System
Electrical System Overload . . . . . . . . . . . . . . . . . . 10-35
Fuses and Circuit Breakers . . . . . . . . . . . . . . . . . . 10-36
Engine Compartment Fuse Block . . . . . . . . . . . . . . . . . . . . . 10-36
Instrument Panel Fuse Block . . . . . . . . . . . . . . . . . . . . . 10-40
Page 249 of 368
Black plate (9,1)Buick Regal Owner Manual - 2011
Vehicle Care 10-9
A.Engine Air Cleaner/Filter on
page 10‑15.
B. Engine Cover.
C. Engine Oil Fill Cap. See Engine
Oil on page 10‑9.
D. Engine Oil Dipstick. See Engine
Oil on page 10‑9.
E. Transmission Fluid Cap and Dipstick. See Automatic
Transmission Fluid on
page 10‑14.
F. Brake Master Cylinder Reservoir. See Brakes on
page 10‑25.
G. Power Steering Fluid Reservoir and Cap. See Power Steering
Fluid on page 10‑23.
H. Engine Coolant Reservoir and Pressure Cap. See Engine
Coolant on page 10‑18.
I. Battery Cover. See Battery on
page 10‑27.
J. Engine Compartment Fuse
Block on page 10‑36. K. Windshield Washer Fluid
Reservoir. See Washer Fluid on
page 10‑24.
Engine Oil
To ensure proper engine
performance and long life, careful
attention must be paid to engine oil.
Following these simple, but
important steps will help protect
your investment:
.Always use engine oil approved
to the proper specification and of
the proper viscosity grade. See
“Selecting the Right Engine Oil”
in this section.
.Check the engine oil level
regularly and maintain the
proper oil level. See “Checking
Engine Oil” and“When to Add
Engine Oil” in this section.
.Change the engine oil at the
appropriate time. See Engine Oil
Life System on page 10‑13.
.Always dispose of engine oil
properly. See “What to Do with
Used Oil” in this section.
Checking Engine Oil
It is a good idea to check the engine
oil level at each fuel fill. In order to
get an accurate reading, the oil
must be warm and the vehicle must
be on level ground. The engine oil
dipstick handle is a yellow loop. See
Engine Compartment Overview on
page 10‑6 for the location of the
engine oil dipstick.
Obtaining an accurate oil level
reading is essential:
1. If the engine has been running recently, turn off the engine and
allow several minutes for the oil
to drain back into the oil pan.
Checking the oil level too soon
after engine shutoff will not
provide an accurate oil level
reading.
Page 250 of 368
Black plate (10,1)Buick Regal Owner Manual - 2011
10-10 Vehicle Care
2. Pull out the dipstick and clean itwith a paper towel or cloth, then
push it back in all the way.
Remove it again, keeping the tip
down, and check the level.
When to Add Engine Oil
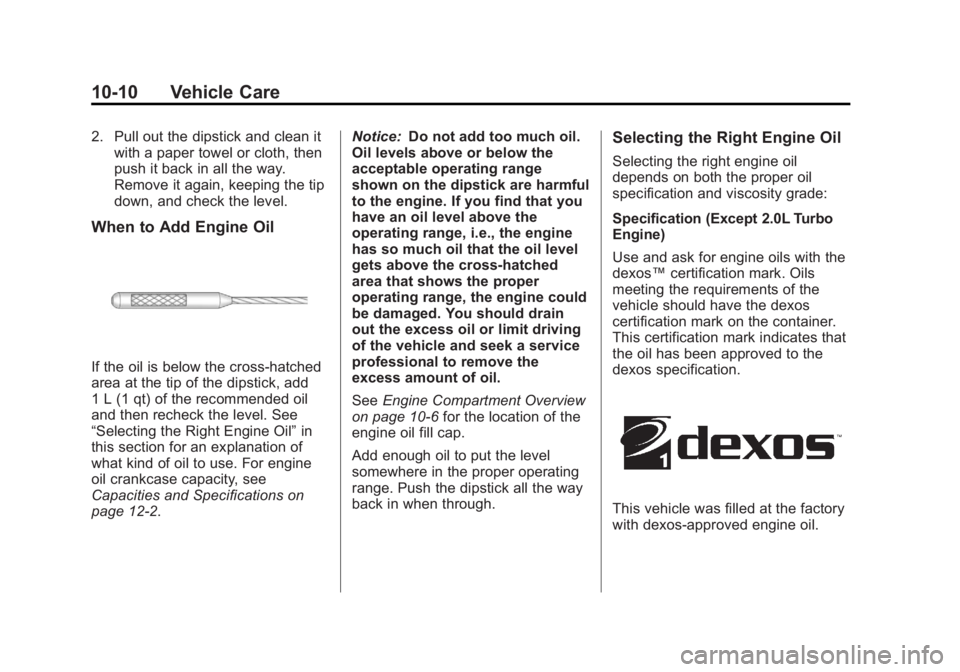
If the oil is below the cross-hatched
area at the tip of the dipstick, add
1 L (1 qt) of the recommended oil
and then recheck the level. See
“Selecting the Right Engine Oil” in
this section for an explanation of
what kind of oil to use. For engine
oil crankcase capacity, see
Capacities and Specifications on
page 12‑2. Notice:
Do not add too much oil.
Oil levels above or below the
acceptable operating range
shown on the dipstick are harmful
to the engine. If you find that you
have an oil level above the
operating range, i.e., the engine
has so much oil that the oil level
gets above the cross-hatched
area that shows the proper
operating range, the engine could
be damaged. You should drain
out the excess oil or limit driving
of the vehicle and seek a service
professional to remove the
excess amount of oil.
See Engine Compartment Overview
on page 10‑6 for the location of the
engine oil fill cap.
Add enough oil to put the level
somewhere in the proper operating
range. Push the dipstick all the way
back in when through.
Selecting the Right Engine Oil
Selecting the right engine oil
depends on both the proper oil
specification and viscosity grade:
Specification (Except 2.0L Turbo
Engine)
Use and ask for engine oils with the
dexos™ certification mark. Oils
meeting the requirements of the
vehicle should have the dexos
certification mark on the container.
This certification mark indicates that
the oil has been approved to the
dexos specification.
This vehicle was filled at the factory
with dexos‐approved engine oil.
Page 253 of 368
Black plate (13,1)Buick Regal Owner Manual - 2011
Vehicle Care 10-13
What to Do with Used Oil
Used engine oil contains certain
elements that can be unhealthy for
your skin and could even cause
cancer. Do not let used oil stay on
your skin for very long. Clean your
skin and nails with soap and water,
or a good hand cleaner. Wash or
properly dispose of clothing or rags
containing used engine oil. See the
manufacturer's warnings about the
use and disposal of oil products.
Used oil can be a threat to the
environment. If you change your
own oil, be sure to drain all the oil
from the filter before disposal. Never
dispose of oil by putting it in the
trash or pouring it on the ground,
into sewers, or into streams or
bodies of water. Recycle it by taking
it to a place that collects used oil.
Engine Oil Life System
When to Change Engine Oil
This vehicle has a computer system
that indicates when to change the
engine oil and filter. This is based
on a combination of factors which
include engine revolutions, engine
temperature, and miles driven.
Based on driving conditions, the
mileage at which an oil change is
indicated can vary considerably. For
the oil life system to work properly,
the system must be reset every time
the oil is changed.
When the system has calculated
that oil life has been diminished, it
indicates that an oil change is
necessary. A CHANGE ENGINE
OIL SOON message comes on. See
Engine Oil Messages on page 5‑28.
Change the oil as soon as possible
within the next 1 000 km (600 mi).
It is possible that, if driving under
the best conditions, the oil life
system might indicate that an oil
change is not necessary for up to a
year. The engine oil and filter mustbe changed at least once a year
and, at this time, the system must
be reset. Your dealer has trained
service people who will perform this
work and reset the system. It is also
important to check the oil regularly
over the course of an oil drain
interval and keep it at the proper
level.
If the system is ever reset
accidentally, the oil must be
changed at 5 000 km (3,000 mi)
since the last oil change.
Remember to reset the oil life
system whenever the oil is changed.
How to Reset the Engine Oil
Life System
Reset the system whenever the
engine oil is changed so that the
system can calculate the next
engine oil change. To reset the
system:
1. Turn the ignition to ON/RUN with
the engine off.
Page 254 of 368
Black plate (14,1)Buick Regal Owner Manual - 2011
10-14 Vehicle Care
2. Press the DIC menu button onthe turn signal lever to enter the
Vehicle Information Menu. Use
the thumbwheel to scroll through
the menu items until you reach
REMAINING OIL LIFE.
3. Press the SET/CLR button to reset the oil life at 100%.
4. Turn the ignition to LOCK/OFF.
The system is reset when the
CHANGE ENGINE OIL SOON
message is off and the REMAINING
OIL LIFE 100% message is
displayed.
If the CHANGE ENGINE OIL
message comes back on when the
vehicle is started, the engine oil life
system has not been reset. Repeat
the procedure.Automatic Transmission
Fluid
How to Check Automatic
Transmission Fluid
It is not necessary to check the
transmission fluid level.
A transmission fluid leak is the only
reason for fluid loss. If a leak
occurs, take the vehicle to your
dealer service department and have
it repaired as soon as possible.
There is a special procedure for
checking and changing the
transmission fluid. Because this
procedure is difficult, you should
have this done at your dealer
service department. Contact your
dealer for additional information.
The procedure can be found in the
service manual. To purchase a
service manual, see Service
Publications Ordering Information
on page 13‑11.
Change the fluid and filter at the
intervals listed in Scheduled
Maintenance on page 11‑2, and be sure to use the fluid listed in
Recommended Fluids and
Lubricants on page 11‑6.
Manual Transmission
Fluid
It is not necessary to check the
manual transmission fluid level.
A transmission fluid leak is the only
reason for fluid loss. If a leak
occurs, take the vehicle to your
dealer service department and
have it repaired as soon as
possible. See
Recommended Fluids
and Lubricants on page 11‑6 for the
proper fluid to use.
Hydraulic Clutch
For vehicles with a manual
transmission, it is not necessary to
regularly check brake/clutch fluid
unless there is a leak suspected.
Adding fluid will not correct a leak.
A fluid loss in this system could
indicate a problem. Have the
system inspected and repaired.
Page 255 of 368
Black plate (15,1)Buick Regal Owner Manual - 2011
Vehicle Care 10-15
When to Check and What
to Use
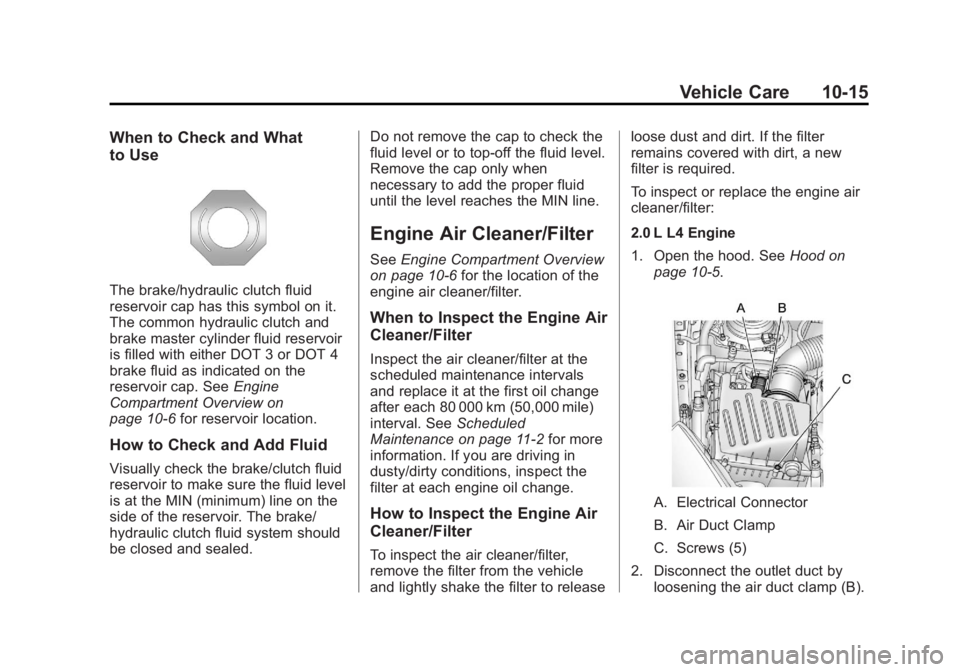
The brake/hydraulic clutch fluid
reservoir cap has this symbol on it.
The common hydraulic clutch and
brake master cylinder fluid reservoir
is filled with either DOT 3 or DOT 4
brake fluid as indicated on the
reservoir cap. SeeEngine
Compartment Overview on
page 10‑6 for reservoir location.
How to Check and Add Fluid
Visually check the brake/clutch fluid
reservoir to make sure the fluid level
is at the MIN (minimum) line on the
side of the reservoir. The brake/
hydraulic clutch fluid system should
be closed and sealed. Do not remove the cap to check the
fluid level or to top‐off the fluid level.
Remove the cap only when
necessary to add the proper fluid
until the level reaches the MIN line.
Engine Air Cleaner/Filter
See
Engine Compartment Overview
on page 10‑6 for the location of the
engine air cleaner/filter.
When to Inspect the Engine Air
Cleaner/Filter
Inspect the air cleaner/filter at the
scheduled maintenance intervals
and replace it at the first oil change
after each 80 000 km (50,000 mile)
interval. See Scheduled
Maintenance on page 11‑2 for more
information. If you are driving in
dusty/dirty conditions, inspect the
filter at each engine oil change.
How to Inspect the Engine Air
Cleaner/Filter
To inspect the air cleaner/filter,
remove the filter from the vehicle
and lightly shake the filter to release loose dust and dirt. If the filter
remains covered with dirt, a new
filter is required.
To inspect or replace the engine air
cleaner/filter:
2.0 L L4 Engine
1. Open the hood. See
Hood on
page 10‑5.
A. Electrical Connector
B. Air Duct Clamp
C. Screws (5)
2. Disconnect the outlet duct by loosening the air duct clamp (B).