ECO mode BUICK REGAL 2015 Owner's Manual
[x] Cancel search | Manufacturer: BUICK, Model Year: 2015, Model line: REGAL, Model: BUICK REGAL 2015Pages: 399, PDF Size: 4.96 MB
Page 4 of 399
Black plate (3,1)Buick Regal Owner Manual (GMNA-Localizing-U.S./Canada/Mexico-
7576024) - 2015 - CRC - 9/15/14
Introduction iii
The names, logos, emblems,
slogans, vehicle model names, and
vehicle body designs appearing in
this manual including, but not limited
to, GM, the GM logo, BUICK, the
BUICK Emblem, and REGAL are
trademarks and/or service marks of
General Motors LLC, its
subsidiaries, affiliates, or licensors.
For vehicles first sold in Canada,
substitute the name“General
Motors of Canada Limited” for Buick
Motor Division wherever it appears
in this manual. This manual describes features that
may or may not be on the vehicle
because of optional equipment that
was not purchased on the vehicle,
model variants, country
specifications, features/applications
that may not be available in your
region, or changes subsequent to
the printing of this owner manual.
Refer to the purchase
documentation relating to your
specific vehicle to confirm the
features.
Keep this manual in the vehicle for
quick reference.
Canadian Vehicle Owners
Propriétaires Canadiens
A French language manual can be
obtained from your dealer, at
www.helminc.com, or from:
On peut obtenir un exemplaire de
ce guide en français auprès du
concessionnaire ou à l'adresse
savant:
Helm, Incorporated
Attention: Customer Service
47911 Halyard Drive
Plymouth, MI 48170
Using this Manual
To quickly locate information about
the vehicle, use the Index in the
back of the manual. It is an
alphabetical list of what is in the
manual and the page number where
it can be found.
Litho in U.S.A.
Part No. 22941512 B Second Printing©2014 General Motors LLC. All Rights Reserved.
Page 21 of 399
Black plate (14,1)Buick Regal Owner Manual (GMNA-Localizing-U.S./Canada/Mexico-
7576024) - 2015 - CRC - 9/15/14
1-14 In Brief
8. A/C (Air Conditioning)
9. Recirculation
10. AUTO (Automatic Operation)
11. SYNC (SynchronizedTemperature)
See Dual Automatic Climate Control
System on page 8-1.
Transmission
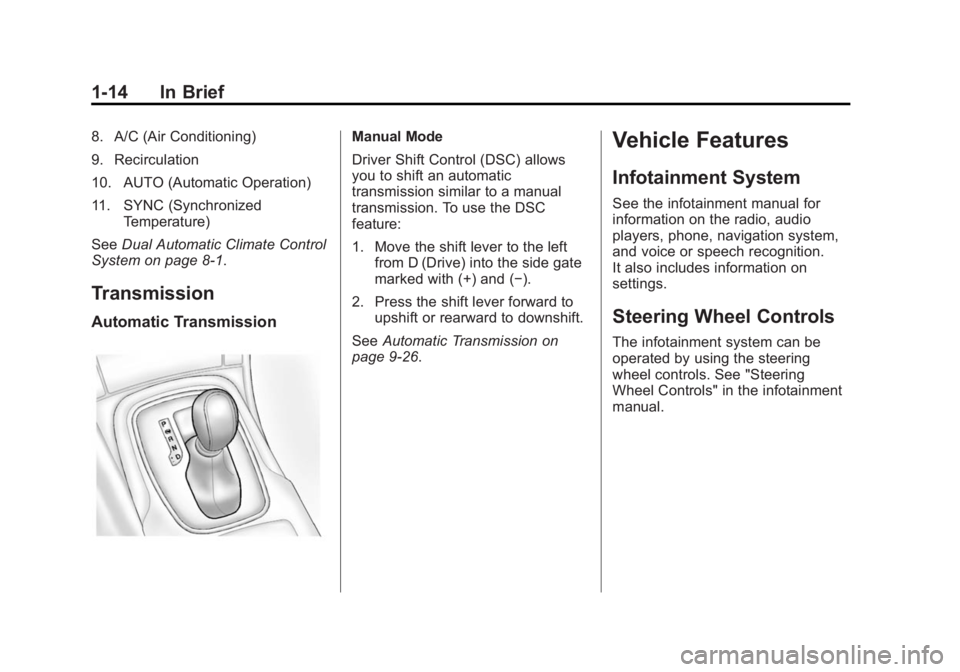
Automatic Transmission
Manual Mode
Driver Shift Control (DSC) allows
you to shift an automatic
transmission similar to a manual
transmission. To use the DSC
feature:
1. Move the shift lever to the left from D (Drive) into the side gate
marked with (+) and (−).
2. Press the shift lever forward to upshift or rearward to downshift.
See Automatic Transmission on
page 9-26.Vehicle Features
Infotainment System
See the infotainment manual for
information on the radio, audio
players, phone, navigation system,
and voice or speech recognition.
It also includes information on
settings.
Steering Wheel Controls
The infotainment system can be
operated by using the steering
wheel controls. See "Steering
Wheel Controls" in the infotainment
manual.
Page 38 of 399
Black plate (7,1)Buick Regal Owner Manual (GMNA-Localizing-U.S./Canada/Mexico-
7576024) - 2015 - CRC - 9/15/14
Keys, Doors, and Windows 2-7
2. Insert the vehicle key of the newtransmitter into the key lock
cylinder located on the outside
of the driver door and turn the
key counterclockwise to the
unlock position five times within
10 seconds.
The Driver Information Center
(DIC) displays READY FOR
REMOTE #2, 3, 4 or 5.
3. Place the new transmitter into the transmitter pocket with the
buttons facing up. The
transmitter pocket is located
inside the center console
cupholder.
4. Press the ENGINE START/ STOP button. When the
transmitter is learned, the DIC
will show that it is ready to
program the next transmitter.
5. Remove the transmitter from the transmitter pocket and press
K.
To program additional
transmitters, repeat Steps 3–5. When all additional transmitters
are programmed, press and hold
the ignition for 12 seconds to
exit programming mode.
Reinstall the rubber cupliner.
Programming without a
Recognized Transmitter (Keyless
Access Vehicles Only)
If there are no currently recognized
transmitters available, follow this
procedure to program up to eight
transmitters. This feature is not
available in Canada. This procedure
will take approximately 30 minutes
to complete. The vehicle must be off
and all of the transmitters you wish
to program must be with you.
1. Insert the vehicle key of the transmitter into the key lock
cylinder located on the outside
of the driver door and turn the
key to the unlock position,
counterclockwise, five times
within 10 seconds. The Driver Information Center
(DIC) displays REMOTE LEARN
PENDING, PLEASE WAIT.
2. Wait for 10 minutes until the DIC displays PRESS ENGINE
START BUTTON TO LEARN
and then press the ENGINE
START/STOP button.
The DIC display will again show
REMOTE LEARN PENDING,
PLEASE WAIT.
3. Repeat Step 2 two additional times. After the third time all
previously known transmitters
will no longer work with the
vehicle. Remaining transmitters
can be relearned during the next
steps.
The DIC display should now
show READY FOR REMOTE
# 1.
Page 39 of 399
Black plate (8,1)Buick Regal Owner Manual (GMNA-Localizing-U.S./Canada/Mexico-
7576024) - 2015 - CRC - 9/15/14
2-8 Keys, Doors, and Windows
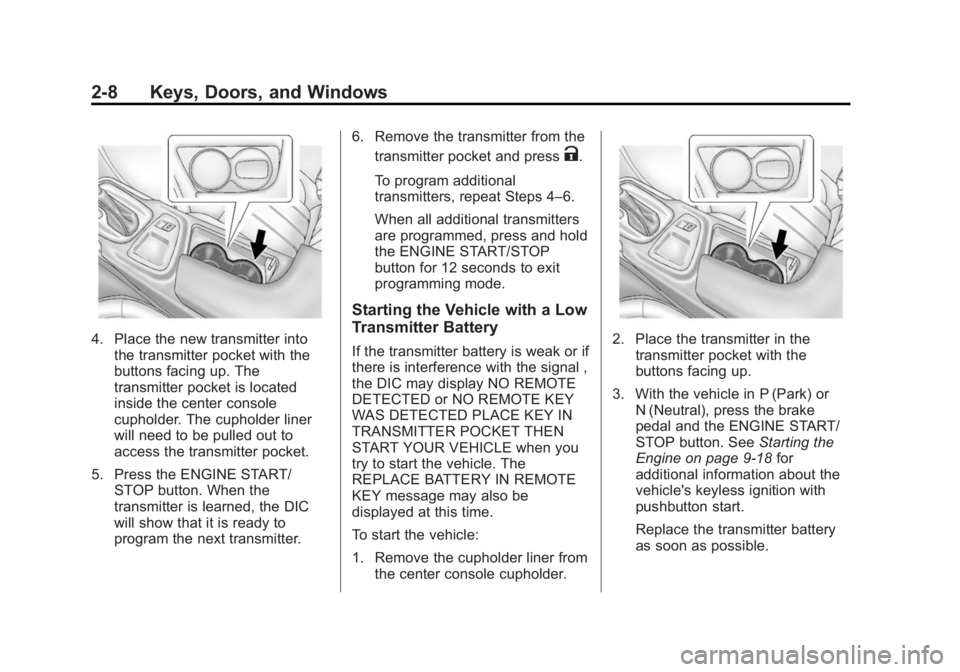
4. Place the new transmitter intothe transmitter pocket with the
buttons facing up. The
transmitter pocket is located
inside the center console
cupholder. The cupholder liner
will need to be pulled out to
access the transmitter pocket.
5. Press the ENGINE START/ STOP button. When the
transmitter is learned, the DIC
will show that it is ready to
program the next transmitter. 6. Remove the transmitter from the
transmitter pocket and press
K.
To program additional
transmitters, repeat Steps 4–6.
When all additional transmitters
are programmed, press and hold
the ENGINE START/STOP
button for 12 seconds to exit
programming mode.
Starting the Vehicle with a Low
Transmitter Battery
If the transmitter battery is weak or if
there is interference with the signal ,
the DIC may display NO REMOTE
DETECTED or NO REMOTE KEY
WAS DETECTED PLACE KEY IN
TRANSMITTER POCKET THEN
START YOUR VEHICLE when you
try to start the vehicle. The
REPLACE BATTERY IN REMOTE
KEY message may also be
displayed at this time.
To start the vehicle:
1. Remove the cupholder liner from the center console cupholder.2. Place the transmitter in thetransmitter pocket with the
buttons facing up.
3. With the vehicle in P (Park) or N (Neutral), press the brake
pedal and the ENGINE START/
STOP button. See Starting the
Engine on page 9-18 for
additional information about the
vehicle's keyless ignition with
pushbutton start.
Replace the transmitter battery
as soon as possible.
Page 76 of 399
Black plate (21,1)Buick Regal Owner Manual (GMNA-Localizing-U.S./Canada/Mexico-
7576024) - 2015 - CRC - 9/15/14
Seats and Restraints 3-21
A seat-mounted side impact airbag
is designed to inflate on the side of
the vehicle that is struck.
Roof-rail airbags are designed to
inflate in moderate to severe side
crashes depending on the location
of the impact. In addition, these
roof-rail airbags are designed to
inflate during a rollover or in a
severe frontal impact. Roof-rail
airbags are not designed to inflate in
rear impacts. Both roof-rail airbags
will inflate when either side of the
vehicle is struck, if the sensing
system predicts that the vehicle is
about to roll over on its side, or in a
severe frontal impact.
In any particular crash, no one can
say whether an airbag should have
inflated simply because of the
vehicle damage or repair costs.
What Makes an Airbag
Inflate?
In a deployment event, the sensing
system sends an electrical signal
triggering a release of gas from theinflator. Gas from the inflator fills the
airbag causing the bag to break out
of the cover. The inflator, the airbag,
and related hardware are all part of
the airbag module.
For airbag locations, see
Where Are
the Airbags? on page 3-19.
How Does an Airbag
Restrain?
In moderate to severe frontal or
near frontal collisions, even belted
occupants can contact the steering
wheel or the instrument panel. In
moderate to severe side collisions,
even belted occupants can contact
the inside of the vehicle.
Airbags supplement the protection
provided by safety belts by
distributing the force of the impact
more evenly over the
occupant's body.
Rollover capable roof-rail airbags
are designed to help contain the
head and chest of occupants in the
outboard seating positions in the first and second rows. The rollover
capable roof-rail airbags are
designed to help reduce the risk of
full or partial ejection in rollover
events, although no system can
prevent all such ejections.
But airbags would not help in many
types of collisions, primarily
because the occupant's motion is
not toward those airbags. See
When
Should an Airbag Inflate? on
page 3-20.
Airbags should never be regarded
as anything more than a supplement
to safety belts.
What Will You See after
an Airbag Inflates?
After the frontal airbags and
seat-mounted side impact airbags
inflate, they quickly deflate, so
quickly that some people may not
even realize an airbag inflated.
Roof-rail airbags may still be at least
partially inflated for some time after
they inflate. Some components of
the airbag module may be hot for
Page 129 of 399
Black plate (20,1)Buick Regal Owner Manual (GMNA-Localizing-U.S./Canada/Mexico-
7576024) - 2015 - CRC - 9/15/14
5-20 Instruments and Controls
{Warning
If the airbag readiness light ever
comes on and stays on, it means
that something may be wrong
with the airbag system. To help
avoid injury to yourself or others,
have the vehicle serviced right
away. SeeAirbag Readiness
Light on page 5-18 for more
information, including important
safety information.
Charging System Light
The charging system light comes on
briefly when the ignition is turned
on, but the engine is not running, as
a check to show the light is working.
The light turns off when the engine
is started. If it does not, have the
vehicle serviced by your dealer.
If the light stays on, or comes on
while driving, there could be a
problem with the electrical charging
system. Have it checked by your
dealer. Driving while this light is on
could drain the battery.
If a short distance must be driven
with the light on, be sure to turn off
all accessories, such as the radio
and air conditioner.
Malfunction
Indicator Lamp
A computer system called OBD II
(On-Board Diagnostics-Second
Generation) monitors the operation
of the vehicle to ensure emissions
are at acceptable levels, helping to
maintain a clean environment. The
malfunction indicator lamp comes
on when the vehicle is placed in
ON/RUN for Key Access or Service
Only Mode for Keyless Access, as a
check to show it is working. If it
does not, have the vehicle serviced
by your dealer. See Ignition
Positions (Key Access) on
page 9-15 orIgnition Positions
(Keyless Access) on page 9-16 for
more information.
Page 154 of 399
Black plate (45,1)Buick Regal Owner Manual (GMNA-Localizing-U.S./Canada/Mexico-
7576024) - 2015 - CRC - 9/15/14
Instruments and Controls 5-45
Ride Control System
Messages
SERVICE ALL WHEEL DRIVE
SYSTEM
This message displays when there
is a problem with the AWD system.
This message could be set by a
number of issues. Some may
require service of the All Wheel
Drive system; some will not. The
vehicle will run in normal
two-wheel-drive mode when this
message has been set. This could
be caused by:
.A vehicle or an AWD system
electronics problem.
.Various vehicle electrical issues.
.Worn out or overheated clutch
plates.
.Loss of fluids.
If this message appears, stop when
it is safe to do so and turn off the
ignition for 30 seconds. Restart the
vehicle and check for the message
on the DIC display. If the message does not appear it is not necessary
to take your vehicle to the dealer.
If the message still displays or
appears again when you begin
driving, the system needs service.
See your dealer.
SERVICE TRACTION
CONTROL
This message displays when there
is a problem with the Traction
Control System (TCS). When this
message is displayed, the system
will not limit wheel spin. Adjust your
driving accordingly. See your dealer
for service.
SERVICE STABILITRAK
This message displays if there is a
problem with the StabiliTrak system.
If this message appears, try to reset
the system. Stop; turn off the engine
for at least 15 seconds; then start
the engine again. If this message
still comes on, it means there is a
problem. See your dealer for
service. The vehicle is safe to drive;
however, you do not have the
benefit of StabiliTrak, so reduce
your speed and drive accordingly.
SPORT MODE ON
This message displays when using
the interactive drive control. See
Selective Ride Control on
page 9-37.
TRACTION CONTROL OFF
This message displays when the
Traction Control System (TCS) is
turned off. Adjust your driving
accordingly.
TRACTION CONTROL ON
This message displays when the
Traction Control System (TCS) is
turned on.
Security Messages
THEFT ATTEMPTED
This message displays if the vehicle
detects a tamper condition.
Page 161 of 399
Black plate (52,1)Buick Regal Owner Manual (GMNA-Localizing-U.S./Canada/Mexico-
7576024) - 2015 - CRC - 9/15/14
5-52 Instruments and Controls
Device Management
Select to connect to a different
phone source, disconnect a phone,
or delete a phone.
Ringtones
Press to change the ring tone for
the specific phone. The phone does
not need to be connected to change
the ring.
Voice Mail Numbers
This feature displays the voice mail
number for all connected phones.
To change the voice mail number,
select EDIT or press the EDIT
button. Type a new number, then
select SAVE or press the SAVE
button.
Voice
Select and the following may
display:
.Confidence Threshold
.Prompt Length
.Audio Feedback SpeedConfidence Threshold
This feature adjusts the sensitivity of
the speech recognition system.
Select Confirm More or
Confirm Less.
Prompt Length
This feature adjusts the voice
prompt length.
Select Short or Long.
Audio Feedback Speed
This feature adjusts the audio
feedback speed.
Select Slow, Medium, or Fast.
Display
Select and the following may
display:
.Mode
.Calibrate Touchscreen
.Turn Display Off
Mode
Select to change the display screen
for day or night driving.
Select Auto, Day, or Night.
Calibrate Touchscreen
Select to calibrate the touchscreen,
then follow the prompts.
Turn Display Off
Select to turn the display off. Press
anywhere on the display area or any
faceplate button to turn the
display on.
Rear Camera
Select and the following may
display:
.Guidance Lines
.Rear Cross Traffic Alert
.Rear Park Assist Symbols
Guidance Lines
Select to turn Off or On. See
Assistance Systems for Parking or
Backing on page 9-49.
Page 163 of 399
Black plate (54,1)Buick Regal Owner Manual (GMNA-Localizing-U.S./Canada/Mexico-
7576024) - 2015 - CRC - 9/15/14
5-54 Instruments and Controls
Do not use the Universal Remote
system with any garage door opener
that does not have the stop and
reverse feature. This includes any
garage door opener model
manufactured before April 1, 1982.
Read these instructions completely
before programming the Universal
Remote system. It may help to have
another person assist with the
programming process.
Keep the original hand-held
transmitter for use in other vehicles
as well as for future programming.
Erase the programming when
vehicle ownership is terminated.
See“Erasing Universal Remote
System Buttons” later in this
section.
To program a garage door opener,
park outside directly in line with and
facing the garage door opener
receiver. Clear all people and
objects near the garage door. Make sure the hand-held transmitter
has a new battery for quick and
accurate transmission of the
radio-frequency signal.
Programming the Universal
Remote System
For questions or help programming
the Universal Remote system, call
1-800-355-3515 or see
www.homelink.com.
Programming involves
time-sensitive actions, and may time
out causing the procedure to be
repeated.
To program up to three devices:
1. Hold the end of the hand-held
transmitter about 3 to 8 cm (1 to
3 in) away from the Universal
Remote system buttons with the
indicator light in view. The
hand-held transmitter was
supplied by the manufacturer of
the garage door opener receiver. 2. At the same time, press and
hold both the hand-held
transmitter button and one of the
three Universal Remote system
buttons to be used to operate
the garage door. Do not release
either button until the indicator
light changes from a slow to a
rapid flash. Then release both
buttons.
Some garage door openers may
require substitution of Step 2
with the procedure under “Radio
Signals for Canada and Some
Gate Operators” later in this
section.
3. Press and hold the newly programmed Universal Remote
system button for five seconds
while watching the indicator light
and garage door activation.
.If the indicator light stays on
continuously or the garage
door moves when the
button is pressed, then
Page 177 of 399
Black plate (2,1)Buick Regal Owner Manual (GMNA-Localizing-U.S./Canada/Mexico-
7576024) - 2015 - CRC - 9/15/14
8-2 Climate Controls
1. Driver and PassengerTemperature Controls
2. Heated Front Seats (If Equipped)
3. Defrost
4. Air Delivery Mode Controls
5. Fan Control
6. Power
7. Rear Window Defogger
8. A/C (Air Conditioning)
9. Recirculation
10. AUTO (Automatic Operation)
11. SYNC (Synchronized Temperature)
Climate Control Influence on
eAssist Operation and Fuel
Economy (If Equipped)
The climate control system depends
on other vehicle systems for heat
and power input. Certain climate
control settings can lead to higher
fuel usage and/or fewer auto stops. The following climate control
settings use more fuel:
.Comfort air conditioning mode.
.The defrost mode.
.Extreme temperature settings,
such as 15°C (60°F) or 32°C
(90°F).
.High fan speed settings.
To help reduce fuel usage:
.Use the full automatic control as
described under “Automatic
Operation.”
.Use eco air conditioning, instead
of the comfort air conditioning.
.Select a temperature setting that
is higher in hot weather and
lower in cold weather.
.Turn off the air conditioning
when it is not needed.
.Only use defrost to clear the
windows. Automatic Operation
The system automatically controls
the fan speed, air delivery, air
conditioning, and recirculation in
order to heat or cool the vehicle to
the desired temperature.
When the AUTO indicator light is
on, the system is in full automatic
operation. If the air delivery mode,
fan speed, recirculation, or air
conditioning setting is adjusted, the
AUTO indicator turns off and the
selected settings will appear on the
display.
To place the system in
automatic mode:
1. Press AUTO.
2. Set the temperature. Allow the
system time to stabilize. Adjust
the temperature as needed for
best comfort.
To improve fuel efficiency and to
cool the vehicle faster, recirculation
may be automatically selected in
warm weather. The recirculation