inflation pressure BUICK REGAL 2016 User Guide
[x] Cancel search | Manufacturer: BUICK, Model Year: 2016, Model line: REGAL, Model: BUICK REGAL 2016Pages: 357, PDF Size: 5.37 MB
Page 268 of 357
Buick Regal Owner Manual (GMNA-Localizing-U.S./Canada/Mexico-
9159380) - 2016 - CRC - 2/23/16
Vehicle Care 267
Tire Inspection
We recommend that the tires,
including the spare tire, if the
vehicle has one, be inspected
for signs of wear or damage at
least once a month.
Replace the tire if:
.The indicators at three or
more places around the tire
can be seen.
.There is cord or fabric
showing through the tire's
rubber.
.The tread or sidewall is
cracked, cut, or snagged
deep enough to show cord or
fabric.
.The tire has a bump, bulge,
or split.
.The tire has a puncture, cut,
or other damage that cannot
be repaired well because of
the size or location of the
damage.
Tire Rotation
Tires should be rotated every
12 000 km (7,500 mi). See
Maintenance Schedule0305.
Tires are rotated to achieve a
more uniform wear for all tires.
The first rotation is the most
important.
Anytime unusual wear is
noticed, rotate the tires as soon
as possible, check for proper tire
inflation pressure, and check for
damaged tires or wheels. If the
unusual wear continues after the
rotation, check the wheel
alignment. See When It Is Time
for New Tires 0268 andWheel
Replacement 0272.
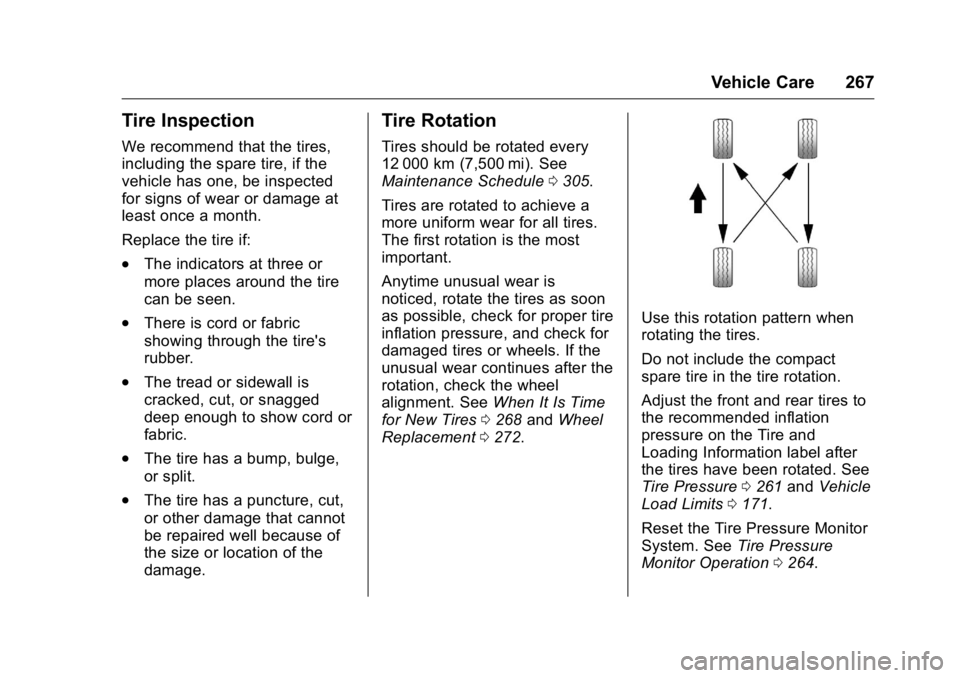
Use this rotation pattern when
rotating the tires.
Do not include the compact
spare tire in the tire rotation.
Adjust the front and rear tires to
the recommended inflation
pressure on the Tire and
Loading Information label after
the tires have been rotated. See
Tire Pressure 0261 and Vehicle
Load Limits 0171.
Reset the Tire Pressure Monitor
System. See Tire Pressure
Monitor Operation 0264.
Page 269 of 357
Buick Regal Owner Manual (GMNA-Localizing-U.S./Canada/Mexico-
9159380) - 2016 - CRC - 2/23/16
268 Vehicle Care
Check that all wheel nuts are
properly tightened. See“Wheel
Nut Torque” underCapacities
and Specifications 0319.
{Warning
Rust or dirt on a wheel, or on the
parts to which it is fastened, can
make wheel nuts become loose
after time. The wheel could come
off and cause an accident. When
changing a wheel, remove any
rust or dirt from places where the
wheel attaches to the vehicle. In
an emergency, a cloth or a paper
towel can be used; however, use
a scraper or wire brush later to
remove all rust or dirt.
Lightly coat the center of the
wheel hub with wheel bearing
grease after a wheel change or
tire rotation to prevent corrosion
or rust build-up. Do not get
grease on the flat wheel
mounting surface or on the
wheel nuts or bolts.
When It Is Time for New
Tires
Factors such as maintenance,
temperatures, driving speeds,
vehicle loading, and road conditions
affect the wear rate of the tires.
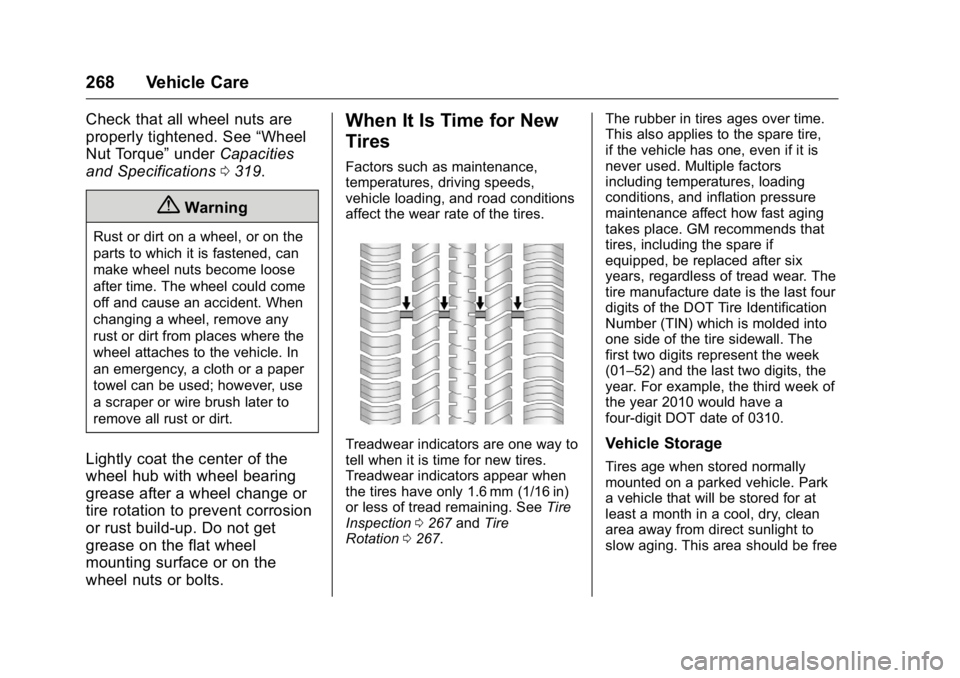
Treadwear indicators are one way to
tell when it is time for new tires.
Treadwear indicators appear when
the tires have only 1.6 mm (1/16 in)
or less of tread remaining. See Tire
Inspection 0267 andTire
Rotation 0267. The rubber in tires ages over time.
This also applies to the spare tire,
if the vehicle has one, even if it is
never used. Multiple factors
including temperatures, loading
conditions, and inflation pressure
maintenance affect how fast aging
takes place. GM recommends that
tires, including the spare if
equipped, be replaced after six
years, regardless of tread wear. The
tire manufacture date is the last four
digits of the DOT Tire Identification
Number (TIN) which is molded into
one side of the tire sidewall. The
first two digits represent the week
(01–52) and the last two digits, the
year. For example, the third week of
the year 2010 would have a
four-digit DOT date of 0310.Vehicle Storage
Tires age when stored normally
mounted on a parked vehicle. Park
a vehicle that will be stored for at
least a month in a cool, dry, clean
area away from direct sunlight to
slow aging. This area should be free
Page 273 of 357
Buick Regal Owner Manual (GMNA-Localizing-U.S./Canada/Mexico-
9159380) - 2016 - CRC - 2/23/16
272 Vehicle Care
to the generation of heat and its
ability to dissipate heat when
tested under controlled
conditions on a specified indoor
laboratory test wheel. Sustained
high temperature can cause the
material of the tire to degenerate
and reduce tire life, and
excessive temperature can lead
to sudden tire failure. The grade
C corresponds to a level of
performance which all
passenger car tires must meet
under the Federal Motor Safety
Standard No. 109. Grades B and
A represent higher levels of
performance on the laboratory
test wheel than the minimum
required by law. Warning: The
temperature grade for this tire is
established for a tire that is
properly inflated and not
overloaded. Excessive speed,
underinflation, or excessive
loading, either separately or in
combination, can cause heat
buildup and possible tire failure.Wheel Alignment and Tire
Balance
The tires and wheels were aligned
and balanced at the factory to
provide the longest tire life and best
overall performance. Adjustments to
wheel alignment and tire balancing
are not necessary on a regular
basis. Consider an alignment check
if there is unusual tire wear or the
vehicle is significantly pulling to one
side or the other. Some slight pull to
the left or right, depending on the
crown of the road and/or other road
surface variations such as troughs
or ruts, is normal. If the vehicle is
vibrating when driving on a smooth
road, the tires and wheels may need
to be rebalanced. See your dealer
for proper diagnosis.
Wheel Replacement
Replace any wheel that is bent,
cracked, or badly rusted or
corroded. If wheel nuts keep coming
loose, the wheel, wheel bolts, and
wheel nuts should be replaced.
If the wheel leaks air, replace it.Some aluminum wheels can be
repaired. See your dealer if any of
these conditions exist.
Your dealer will know the kind of
wheel that is needed.
Each new wheel should have the
same load-carrying capacity,
diameter, width, offset, and be
mounted the same way as the one it
replaces.
Replace wheels, wheel bolts, wheel
nuts, or Tire Pressure Monitor
System (TPMS) sensors with new
GM original equipment parts.
{Warning
Using the wrong replacement
wheels, wheel bolts, or wheel
nuts can be dangerous. It could
affect the braking and handling of
the vehicle. Tires can lose air,
and cause loss of control, causing
a crash. Always use the correct
wheel, wheel bolts, and wheel
nuts for replacement.
Page 279 of 357

Buick Regal Owner Manual (GMNA-Localizing-U.S./Canada/Mexico-
9159380) - 2016 - CRC - 2/23/16
278 Vehicle Care
5. Attach the sealant/air hose (6)onto the tire valve stem. Turn it
clockwise until it is tight.
6. Plug the power plug (8) into the accessory power outlet in the
vehicle. Unplug all items from
other accessory power outlets.
See Power Outlets 0101.
If the vehicle has an accessory
power outlet, do not use the
cigarette lighter.
If the vehicle only has a
cigarette lighter, use the
cigarette lighter.
Do not pinch the power plug
cord in the door or window.
7. Start the vehicle. The vehicle must be running while using
the air compressor.
8. Press and turn the selector switch (1) counterclockwise to
the Sealant + Air position.
9. Press the on/off button (2) to turn the tire sealant and
compressor kit on.
The compressor will inject
sealant and air into the tire. The pressure gauge (3) will
initially show a high pressure
while the compressor pushes
the sealant into the tire. Once
the sealant is completely
dispersed into the tire, the
pressure will quickly drop and
start to rise again as the tire
inflates with air only.
10. Inflate the tire to the recommended inflation
pressure using the pressure
gauge (3). The recommended
inflation pressure can be found
on the Tire and Loading
Information label. See Tire
Pressure 0261.
The pressure gauge (3) may
read higher than the actual tire
pressure while the compressor
is on. Turn the compressor off
to get an accurate pressure
reading. The compressor may
be turned on/off until the
correct pressure is reached.Caution
If the recommended pressure
cannot be reached after
approximately 25 minutes, the
vehicle should not be driven
farther. The tire is too severely
damaged and the tire sealant and
compressor kit cannot inflate the
tire. Remove the power plug from
the accessory power outlet and
unscrew the inflating hose from
the tire valve. See Roadside
Assistance Program 0326.
11. Press the on/off button (2) to turn the tire sealant and
compressor kit off.
The tire is not sealed and will
continue to leak air until the
vehicle is driven and the
sealant is distributed in the tire;
therefore, Steps 12–18 must be
done immediately after
Step 11.
Page 280 of 357
Buick Regal Owner Manual (GMNA-Localizing-U.S./Canada/Mexico-
9159380) - 2016 - CRC - 2/23/16
Vehicle Care 279
Be careful while handling the
tire sealant and compressor kit
as it could be warm after
usage.
12. Unplug the power plug (8) from the accessory power outlet in
the vehicle.
13. Turn the sealant/air hose (6) counterclockwise to remove it
from the tire valve stem.
14. Replace the tire valve stem cap.
15. Replace the sealant/air hose (6) and the power plug (8) back
in their original location.
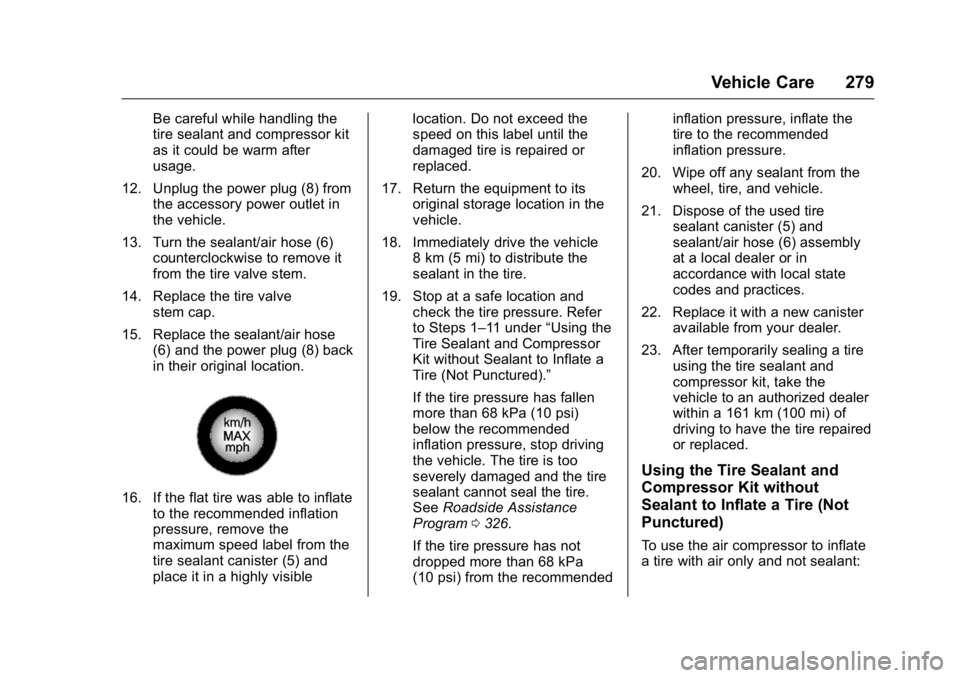
16. If the flat tire was able to inflateto the recommended inflation
pressure, remove the
maximum speed label from the
tire sealant canister (5) and
place it in a highly visible location. Do not exceed the
speed on this label until the
damaged tire is repaired or
replaced.
17. Return the equipment to its original storage location in the
vehicle.
18. Immediately drive the vehicle 8 km (5 mi) to distribute the
sealant in the tire.
19. Stop at a safe location and check the tire pressure. Refer
to Steps 1–11 under “Using the
Tire Sealant and Compressor
Kit without Sealant to Inflate a
Tire (Not Punctured).”
If the tire pressure has fallen
more than 68 kPa (10 psi)
below the recommended
inflation pressure, stop driving
the vehicle. The tire is too
severely damaged and the tire
sealant cannot seal the tire.
See Roadside Assistance
Program 0326.
If the tire pressure has not
dropped more than 68 kPa
(10 psi) from the recommended inflation pressure, inflate the
tire to the recommended
inflation pressure.
20. Wipe off any sealant from the wheel, tire, and vehicle.
21. Dispose of the used tire sealant canister (5) and
sealant/air hose (6) assembly
at a local dealer or in
accordance with local state
codes and practices.
22. Replace it with a new canister available from your dealer.
23. After temporarily sealing a tire using the tire sealant and
compressor kit, take the
vehicle to an authorized dealer
within a 161 km (100 mi) of
driving to have the tire repaired
or replaced.
Using the Tire Sealant and
Compressor Kit without
Sealant to Inflate a Tire (Not
Punctured)
To use the air compressor to inflate
a tire with air only and not sealant:
Page 281 of 357
Buick Regal Owner Manual (GMNA-Localizing-U.S./Canada/Mexico-
9159380) - 2016 - CRC - 2/23/16
280 Vehicle Care
If a tire goes flat, avoid further tire
and wheel damage by driving slowly
to a level place. Turn on the hazard
warning flashers. SeeHazard
Warning Flashers 0152. See
If a Tire Goes Flat 0273 for
other important safety warnings.
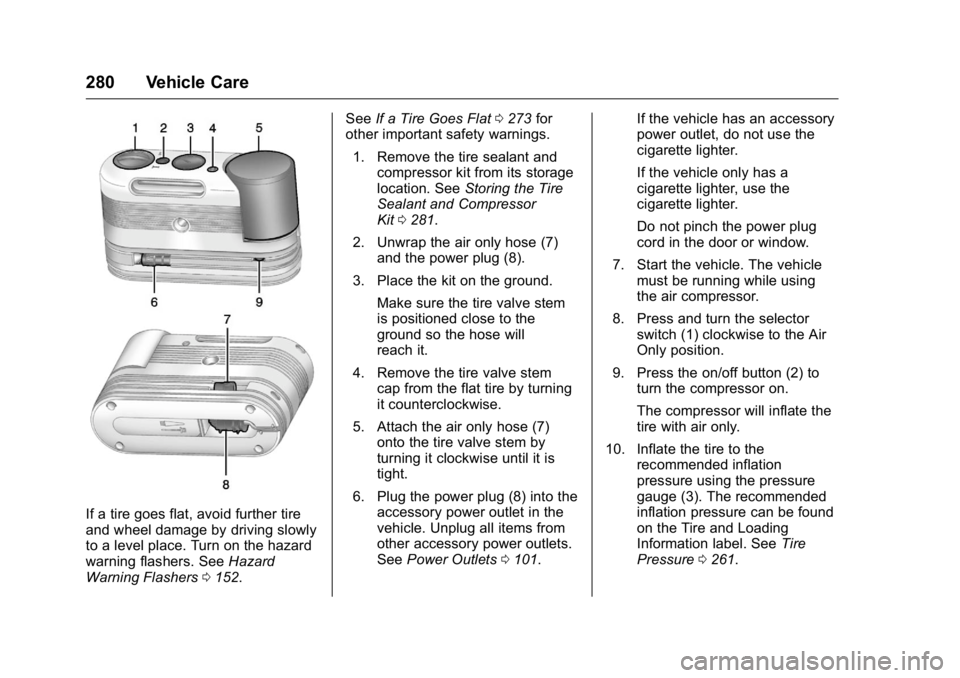
1. Remove the tire sealant and compressor kit from its storage
location. See Storing the Tire
Sealant and Compressor
Kit 0281.
2. Unwrap the air only hose (7) and the power plug (8).
3. Place the kit on the ground. Make sure the tire valve stem
is positioned close to the
ground so the hose will
reach it.
4. Remove the tire valve stem cap from the flat tire by turning
it counterclockwise.
5. Attach the air only hose (7) onto the tire valve stem by
turning it clockwise until it is
tight.
6. Plug the power plug (8) into the accessory power outlet in the
vehicle. Unplug all items from
other accessory power outlets.
See Power Outlets 0101. If the vehicle has an accessory
power outlet, do not use the
cigarette lighter.
If the vehicle only has a
cigarette lighter, use the
cigarette lighter.
Do not pinch the power plug
cord in the door or window.
7. Start the vehicle. The vehicle must be running while using
the air compressor.
8. Press and turn the selector switch (1) clockwise to the Air
Only position.
9. Press the on/off button (2) to turn the compressor on.
The compressor will inflate the
tire with air only.
10. Inflate the tire to the recommended inflation
pressure using the pressure
gauge (3). The recommended
inflation pressure can be found
on the Tire and Loading
Information label. See Tire
Pressure 0261.
Page 288 of 357
Buick Regal Owner Manual (GMNA-Localizing-U.S./Canada/Mexico-
9159380) - 2016 - CRC - 2/23/16
Vehicle Care 287
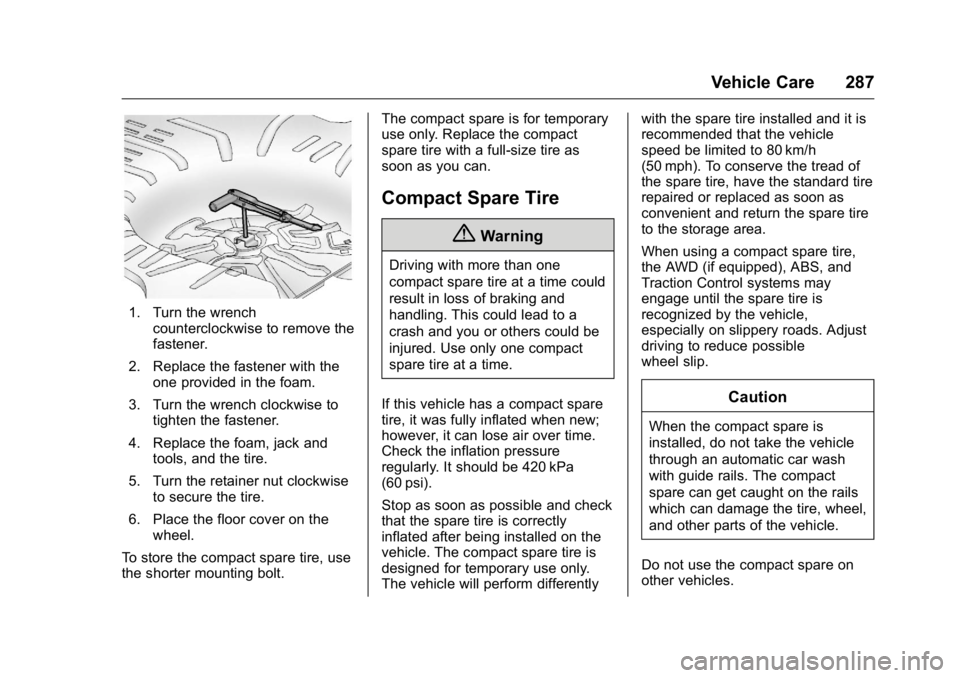
1. Turn the wrenchcounterclockwise to remove the
fastener.
2. Replace the fastener with the one provided in the foam.
3. Turn the wrench clockwise to tighten the fastener.
4. Replace the foam, jack and tools, and the tire.
5. Turn the retainer nut clockwise to secure the tire.
6. Place the floor cover on the wheel.
To store the compact spare tire, use
the shorter mounting bolt. The compact spare is for temporary
use only. Replace the compact
spare tire with a full-size tire as
soon as you can.
Compact Spare Tire
{Warning
Driving with more than one
compact spare tire at a time could
result in loss of braking and
handling. This could lead to a
crash and you or others could be
injured. Use only one compact
spare tire at a time.
If this vehicle has a compact spare
tire, it was fully inflated when new;
however, it can lose air over time.
Check the inflation pressure
regularly. It should be 420 kPa
(60 psi).
Stop as soon as possible and check
that the spare tire is correctly
inflated after being installed on the
vehicle. The compact spare tire is
designed for temporary use only.
The vehicle will perform differently with the spare tire installed and it is
recommended that the vehicle
speed be limited to 80 km/h
(50 mph). To conserve the tread of
the spare tire, have the standard tire
repaired or replaced as soon as
convenient and return the spare tire
to the storage area.
When using a compact spare tire,
the AWD (if equipped), ABS, and
Traction Control systems may
engage until the spare tire is
recognized by the vehicle,
especially on slippery roads. Adjust
driving to reduce possible
wheel slip.
Caution
When the compact spare is
installed, do not take the vehicle
through an automatic car wash
with guide rails. The compact
spare can get caught on the rails
which can damage the tire, wheel,
and other parts of the vehicle.
Do not use the compact spare on
other vehicles.
Page 306 of 357
Buick Regal Owner Manual (GMNA-Localizing-U.S./Canada/Mexico-
9159380) - 2016 - CRC - 2/23/16
Service and Maintenance 305
Because of the way people use
vehicles, maintenance needs vary.
There may need to be more
frequent checks and services. The
Additional Required Services -
Normal are for vehicles that:
.Carry passengers and cargo
within recommended limits on
the Tire and Loading Information
label. See Vehicle Load
Limits 0171.
. Are driven on reasonable road
surfaces within legal driving
limits.
. Use the recommended fuel. See
Fuel 0214.
Refer to the information in the
Maintenance Schedule Additional
Required Services - Normal chart.
The Additional Required Services -
Severe are for vehicles that are:
. Mainly driven in heavy city traffic
in hot weather.
. Mainly driven in hilly or
mountainous terrain. .
Frequently towing a trailer.
. Used for high speed or
competitive driving.
. Used for taxi, police, or delivery
service.
Refer to the information in the
Maintenance Schedule Additional
Required Services - Severe chart.
{Warning
Performing maintenance work can
be dangerous and can cause
serious injury. Perform
maintenance work only if the
required information, proper tools,
and equipment are available.
If they are not, see your dealer to
have a trained technician do the
work. See Doing Your Own
Service Work 0221.
Maintenance
Schedule
Owner Checks and Services
At Each Fuel Stop
.
Check the engine oil level. See
Engine Oil 0228.
Once a Month
. Check the tire inflation
pressures. See Tire
Pressure 0261.
. Inspect the tires for wear. See
Tire Inspection 0267.
. Check the windshield washer
fluid level. See Washer
Fluid 0239.
Page 307 of 357
Buick Regal Owner Manual (GMNA-Localizing-U.S./Canada/Mexico-
9159380) - 2016 - CRC - 2/23/16
306 Service and Maintenance
Engine Oil Change
When the CHANGE ENGINE OIL
SOON message displays, have the
engine oil and filter changed within
the next 1 000 km/600 mi. If driven
under the best conditions, the
engine oil life system may not
indicate the need for vehicle service
for up to a year. The engine oil and
filter must be changed at least once
a year and the oil life system must
be reset. Your trained dealer
technician can perform this work.
If the engine oil life system is reset
accidentally, service the vehicle
within 5 000 km/3,000 mi since the
last service. Reset the oil life
system when the oil is changed.
SeeEngine Oil Life System 0230.
Tire Rotation and Required
Services Every 12 000 km/
7,500 mi
Rotate the tires, if recommended for
the vehicle, and perform the
following services. See Tire
Rotation 0267.
. Check engine oil level and oil
life percentage. If needed,
change engine oil and filter, and
reset oil life system. See Engine
Oil 0228 andEngine Oil Life
System 0230.
. Check engine coolant level. See
Engine Coolant 0235.
. Check windshield washer fluid
level. See Washer Fluid 0239. .
Visually inspect windshield wiper
blades for wear, cracking,
or contamination. See Exterior
Care 0295. Replace worn or
damaged wiper blades. See
Wiper Blade
Replacement 0244.
. Check tire inflation pressures.
See Tire Pressure 0261.
. Inspect tire wear. See Tire
Inspection 0267.
. Visually check for fluid leaks.
. Inspect engine air cleaner filter.
See Engine Air Cleaner/
Filter 0231.
. Inspect brake system. See
Exterior Care 0295.