buttons BUICK REGAL 2018 Owner's Manual
[x] Cancel search | Manufacturer: BUICK, Model Year: 2018, Model line: REGAL, Model: BUICK REGAL 2018Pages: 384, PDF Size: 5.67 MB
Page 15 of 384
Buick Regal Owner Manual (GMNA-Localizing-2nd Timed Print-U.S./Canada-
11486030) - 2018 - crc - 3/23/18
14 In Brief
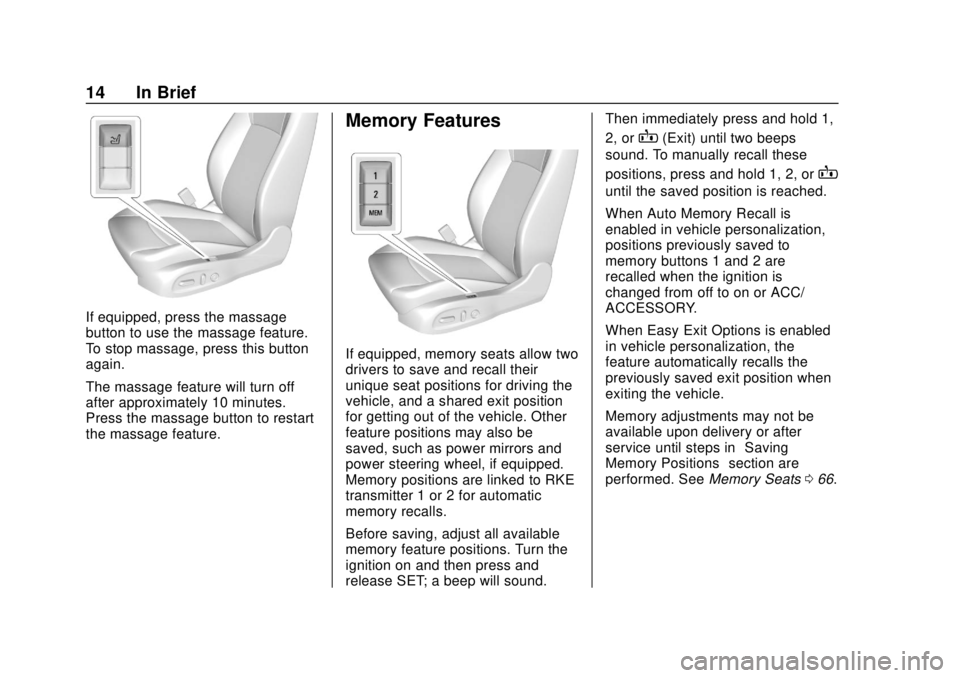
If equipped, press the massage
button to use the massage feature.
To stop massage, press this button
again.
The massage feature will turn off
after approximately 10 minutes.
Press the massage button to restart
the massage feature.
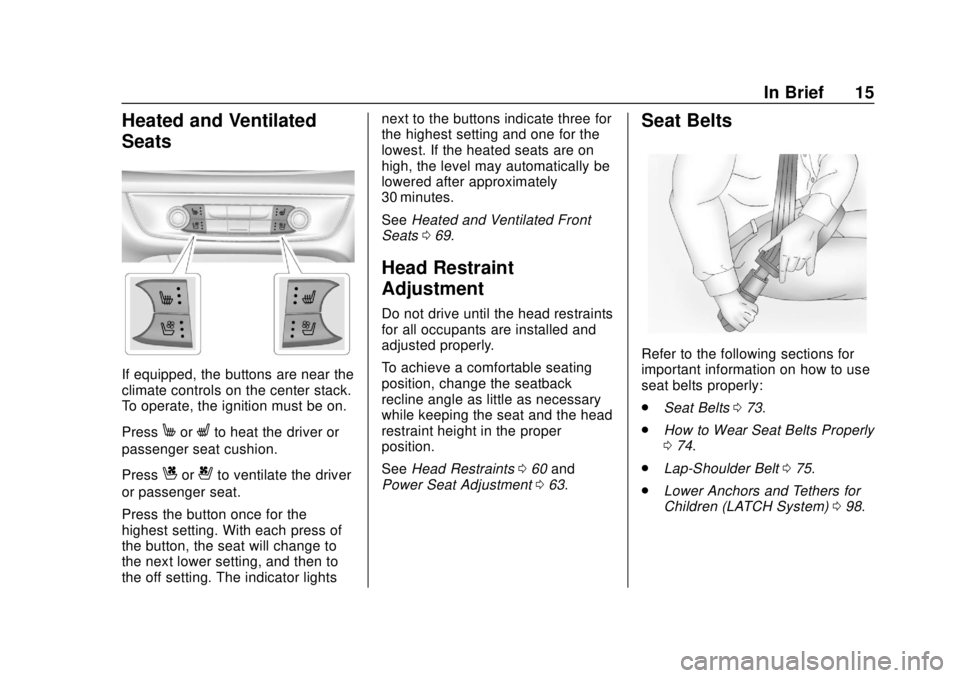
Memory Features
If equipped, memory seats allow two
drivers to save and recall their
unique seat positions for driving the
vehicle, and a shared exit position
for getting out of the vehicle. Other
feature positions may also be
saved, such as power mirrors and
power steering wheel, if equipped.
Memory positions are linked to RKE
transmitter 1 or 2 for automatic
memory recalls.
Before saving, adjust all available
memory feature positions. Turn the
ignition on and then press and
release SET; a beep will sound.Then immediately press and hold 1,
2, or
B(Exit) until two beeps
sound. To manually recall these
positions, press and hold 1, 2, or
B
until the saved position is reached.
When Auto Memory Recall is
enabled in vehicle personalization,
positions previously saved to
memory buttons 1 and 2 are
recalled when the ignition is
changed from off to on or ACC/
ACCESSORY.
When Easy Exit Options is enabled
in vehicle personalization, the
feature automatically recalls the
previously saved exit position when
exiting the vehicle.
Memory adjustments may not be
available upon delivery or after
service until steps in “Saving
Memory Positions” section are
performed. See Memory Seats066.
Page 16 of 384
Buick Regal Owner Manual (GMNA-Localizing-2nd Timed Print-U.S./Canada-
11486030) - 2018 - crc - 3/23/18
In Brief 15
Heated and Ventilated
Seats
If equipped, the buttons are near the
climate controls on the center stack.
To operate, the ignition must be on.
Press
MorLto heat the driver or
passenger seat cushion.
Press
Cor{to ventilate the driver
or passenger seat.
Press the button once for the
highest setting. With each press of
the button, the seat will change to
the next lower setting, and then to
the off setting. The indicator lights next to the buttons indicate three for
the highest setting and one for the
lowest. If the heated seats are on
high, the level may automatically be
lowered after approximately
30 minutes.
See
Heated and Ventilated Front
Seats 069.
Head Restraint
Adjustment
Do not drive until the head restraints
for all occupants are installed and
adjusted properly.
To achieve a comfortable seating
position, change the seatback
recline angle as little as necessary
while keeping the seat and the head
restraint height in the proper
position.
See Head Restraints 060 and
Power Seat Adjustment 063.
Seat Belts
Refer to the following sections for
important information on how to use
seat belts properly:
.
Seat Belts 073.
. How to Wear Seat Belts Properly
074.
. Lap-Shoulder Belt 075.
. Lower Anchors and Tethers for
Children (LATCH System) 098.
Page 18 of 384
Buick Regal Owner Manual (GMNA-Localizing-2nd Timed Print-U.S./Canada-
11486030) - 2018 - crc - 3/23/18
In Brief 17
Folding Mirrors
The outside mirrors can be folded
inward to prevent damage when
going through an automatic car
wash. Push the mirror outward to
return it to the original position.
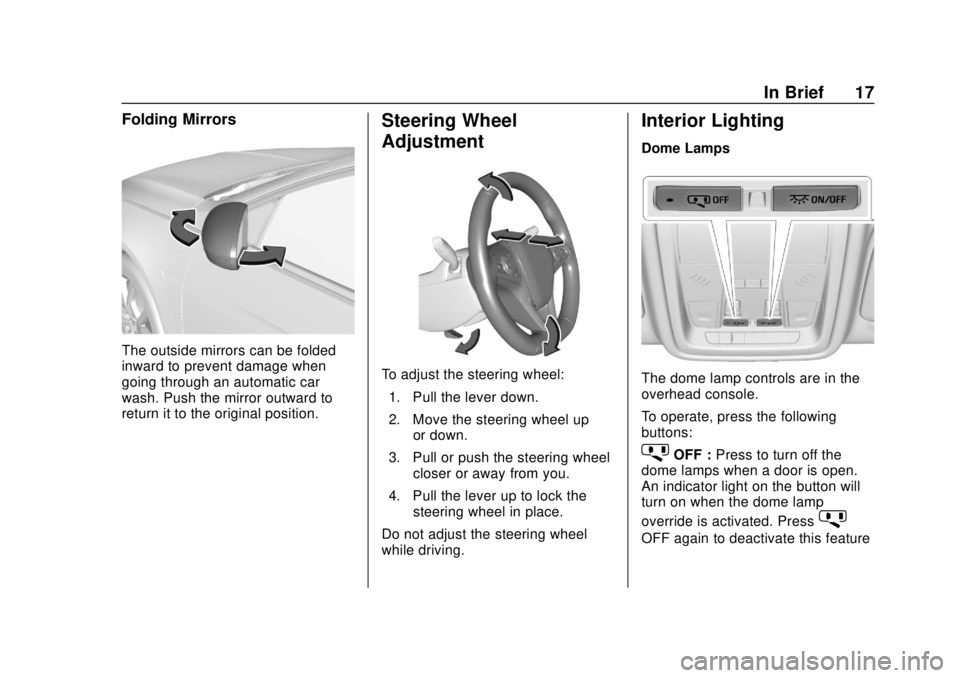
Steering Wheel
Adjustment
To adjust the steering wheel:1. Pull the lever down.
2. Move the steering wheel up or down.
3. Pull or push the steering wheel closer or away from you.
4. Pull the lever up to lock the steering wheel in place.
Do not adjust the steering wheel
while driving.
Interior Lighting
Dome Lamps
The dome lamp controls are in the
overhead console.
To operate, press the following
buttons:
jOFF : Press to turn off the
dome lamps when a door is open.
An indicator light on the button will
turn on when the dome lamp
override is activated. Press
j
OFF again to deactivate this feature
Page 21 of 384
Buick Regal Owner Manual (GMNA-Localizing-2nd Timed Print-U.S./Canada-
11486030) - 2018 - crc - 3/23/18
20 In Brief
Climate Controls
Dual Automatic Climate Control System
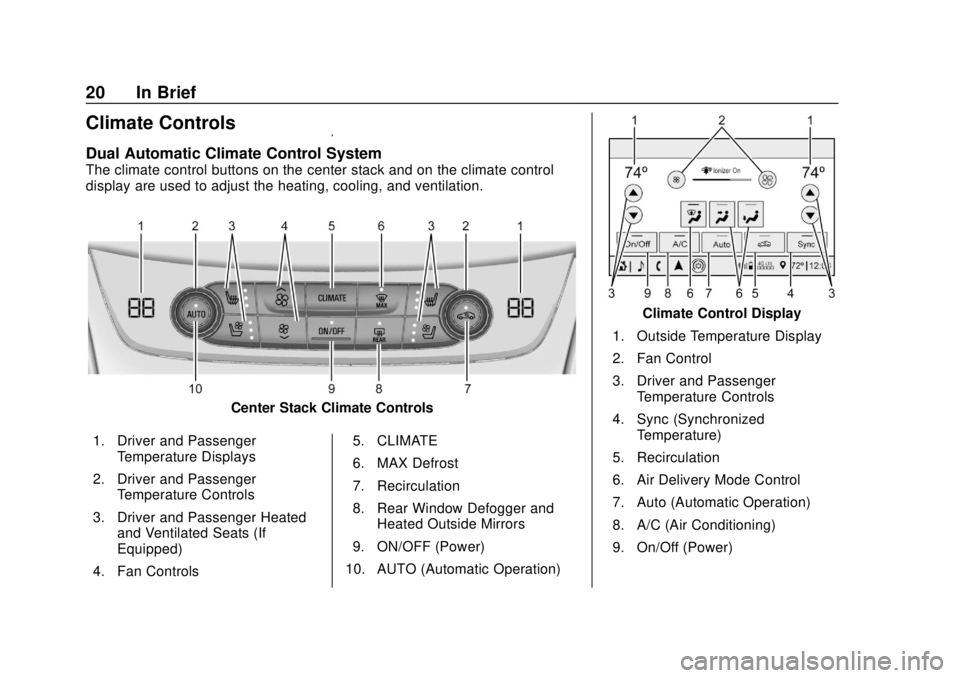
The climate control buttons on the center stack and on the climate control
display are used to adjust the heating, cooling, and ventilation.
Center Stack Climate Controls
1. Driver and Passenger Temperature Displays
2. Driver and Passenger Temperature Controls
3. Driver and Passenger Heated and Ventilated Seats (If
Equipped)
4. Fan Controls 5. CLIMATE
6. MAX Defrost
7. Recirculation
8. Rear Window Defogger and
Heated Outside Mirrors
9. ON/OFF (Power)
10. AUTO (Automatic Operation)
Climate Control Display
1. Outside Temperature Display
2. Fan Control
3. Driver and Passenger Temperature Controls
4. Sync (Synchronized Temperature)
5. Recirculation
6. Air Delivery Mode Control
7. Auto (Automatic Operation)
8. A/C (Air Conditioning)
9. On/Off (Power)
Page 33 of 384
Buick Regal Owner Manual (GMNA-Localizing-2nd Timed Print-U.S./Canada-
11486030) - 2018 - crc - 3/23/18
32 Keys, Doors, and Windows
/:If equipped, press and releaseQand then immediately press and
hold
/for at least four seconds to
start the engine from outside the
vehicle using the RKE transmitter.
See Remote Vehicle Start 036.
b:If equipped, press twice to
open the liftgate.
Keyless Access Operation
The Keyless Access system allows
you to lock and unlock the doors
and access the liftgate without
removing the RKE transmitter from
your pocket, purse, briefcase, etc.
The RKE transmitter should be
within 1 m (3 ft) of the liftgate or door
being opened. There are buttons on
the outside door handles.
Keyless Access can be
programmed to unlock all doors on
the first lock/unlock press from the
driver door. See Vehicle
Personalization 0150.
If equipped with memory seats, RKE
transmitters 1 and 2 are linked to
seating positions of memory 1 or 2.
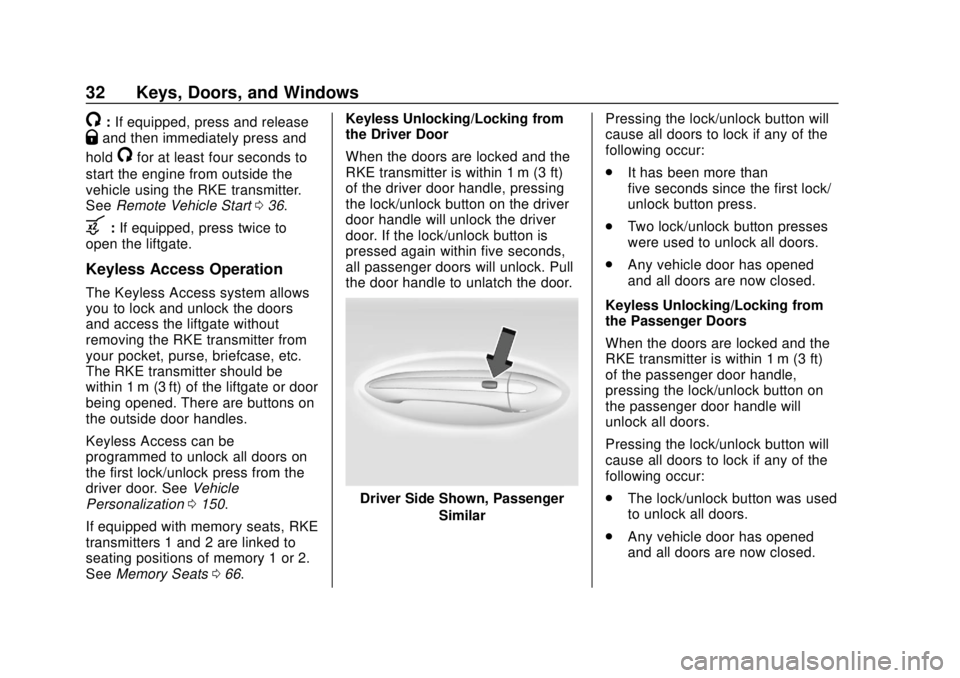
See Memory Seats 066. Keyless Unlocking/Locking from
the Driver Door
When the doors are locked and the
RKE transmitter is within 1 m (3 ft)
of the driver door handle, pressing
the lock/unlock button on the driver
door handle will unlock the driver
door. If the lock/unlock button is
pressed again within five seconds,
all passenger doors will unlock. Pull
the door handle to unlatch the door.
Driver Side Shown, Passenger
Similar Pressing the lock/unlock button will
cause all doors to lock if any of the
following occur:
.
It has been more than
five seconds since the first lock/
unlock button press.
. Two lock/unlock button presses
were used to unlock all doors.
. Any vehicle door has opened
and all doors are now closed.
Keyless Unlocking/Locking from
the Passenger Doors
When the doors are locked and the
RKE transmitter is within 1 m (3 ft)
of the passenger door handle,
pressing the lock/unlock button on
the passenger door handle will
unlock all doors.
Pressing the lock/unlock button will
cause all doors to lock if any of the
following occur:
. The lock/unlock button was used
to unlock all doors.
. Any vehicle door has opened
and all doors are now closed.
Page 35 of 384
Buick Regal Owner Manual (GMNA-Localizing-2nd Timed Print-U.S./Canada-
11486030) - 2018 - crc - 3/23/18
34 Keys, Doors, and Windows
replacement can be purchased and
programmed through your dealer.
The vehicle can be reprogrammed
so that lost or stolen RKE
transmitters no longer work. Any
remaining RKE transmitters will
need to be reprogrammed. Each
vehicle can have up to eight
transmitters matched to it.
Programming with Recognized
Transmitters
A new RKE transmitter can be
programmed to the vehicle when
there are two recognized RKE
transmitters. To program, the vehicle
must be off and all of the RKE
transmitters, both currently
recognized and new, must be
with you.
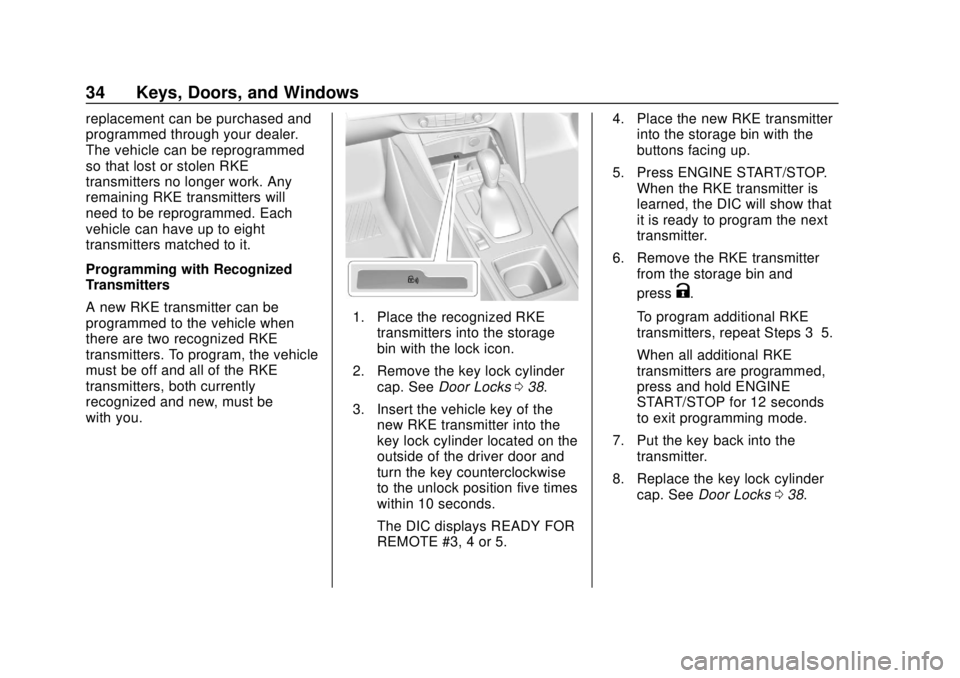
1. Place the recognized RKEtransmitters into the storage
bin with the lock icon.
2. Remove the key lock cylinder cap. See Door Locks 038.
3. Insert the vehicle key of the new RKE transmitter into the
key lock cylinder located on the
outside of the driver door and
turn the key counterclockwise
to the unlock position five times
within 10 seconds.
The DIC displays READY FOR
REMOTE #3, 4 or 5. 4. Place the new RKE transmitter
into the storage bin with the
buttons facing up.
5. Press ENGINE START/STOP. When the RKE transmitter is
learned, the DIC will show that
it is ready to program the next
transmitter.
6. Remove the RKE transmitter from the storage bin and
press
K.
To program additional RKE
transmitters, repeat Steps 3–5.
When all additional RKE
transmitters are programmed,
press and hold ENGINE
START/STOP for 12 seconds
to exit programming mode.
7. Put the key back into the transmitter.
8. Replace the key lock cylinder cap. See Door Locks 038.
Page 36 of 384
Buick Regal Owner Manual (GMNA-Localizing-2nd Timed Print-U.S./Canada-
11486030) - 2018 - crc - 3/23/18
Keys, Doors, and Windows 35
Programming without a
Recognized Transmitter
If there are no currently recognized
RKE transmitters available, follow
this procedure to program up to
eight RKE transmitters. This
procedure will take approximately
30 minutes to complete. The vehicle
must be off and all of the RKE
transmitters you wish to program
must be with you.1. Remove the key lock cylinder cap. See Door Locks 038.
2. Insert the vehicle key of the RKE transmitter into the key
lock cylinder located on the
outside of the driver door and
turn the key to the unlock
position, counterclockwise, five
times within 10 seconds.
The DIC displays REMOTE
LEARN PENDING,
PLEASE WAIT.
3. Wait for 10 minutes until the DIC displays PRESS ENGINE
START BUTTON TO LEARN
and then press ENGINE
START/STOP. The DIC will again display
REMOTE LEARN PENDING,
PLEASE WAIT.
4. Repeat Step 2 two additional times. After the third time all
previously known RKE
transmitters will no longer work
with the vehicle. Remaining
RKE transmitters can be
relearned during the next
steps.
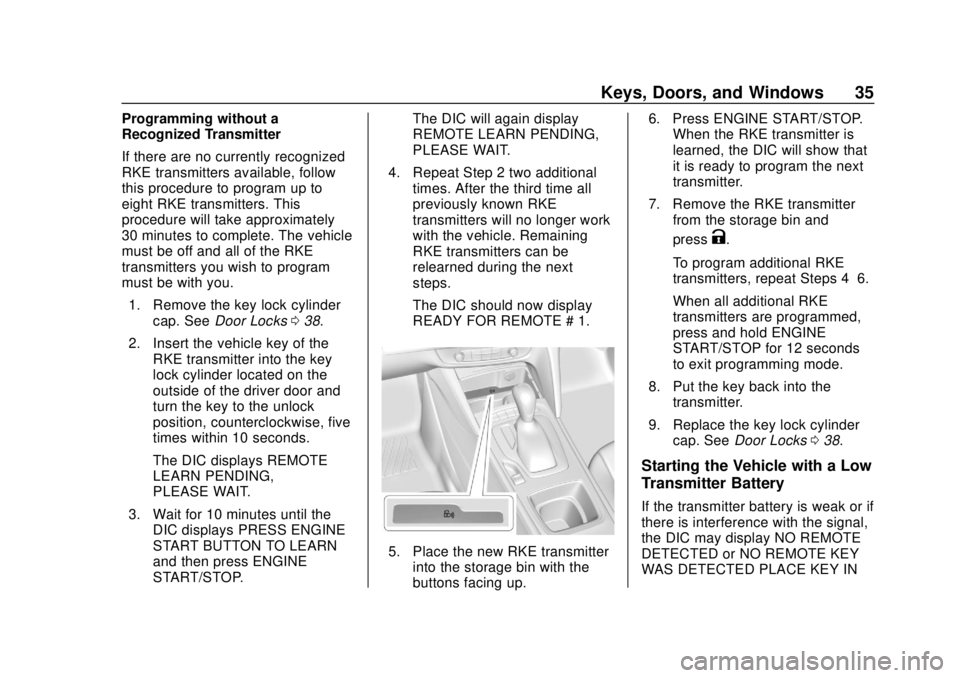
The DIC should now display
READY FOR REMOTE # 1.
5. Place the new RKE transmitterinto the storage bin with the
buttons facing up. 6. Press ENGINE START/STOP.
When the RKE transmitter is
learned, the DIC will show that
it is ready to program the next
transmitter.
7. Remove the RKE transmitter from the storage bin and
press
K.
To program additional RKE
transmitters, repeat Steps 4–6.
When all additional RKE
transmitters are programmed,
press and hold ENGINE
START/STOP for 12 seconds
to exit programming mode.
8. Put the key back into the transmitter.
9. Replace the key lock cylinder cap. See Door Locks 038.
Starting the Vehicle with a Low
Transmitter Battery
If the transmitter battery is weak or if
there is interference with the signal,
the DIC may display NO REMOTE
DETECTED or NO REMOTE KEY
WAS DETECTED PLACE KEY IN
Page 37 of 384
Buick Regal Owner Manual (GMNA-Localizing-2nd Timed Print-U.S./Canada-
11486030) - 2018 - crc - 3/23/18
36 Keys, Doors, and Windows
TRANSMITTER POCKET THEN
START YOUR VEHICLE when you
try to start the vehicle. The DIC may
also display REPLACE BATTERY
IN REMOTE KEY.
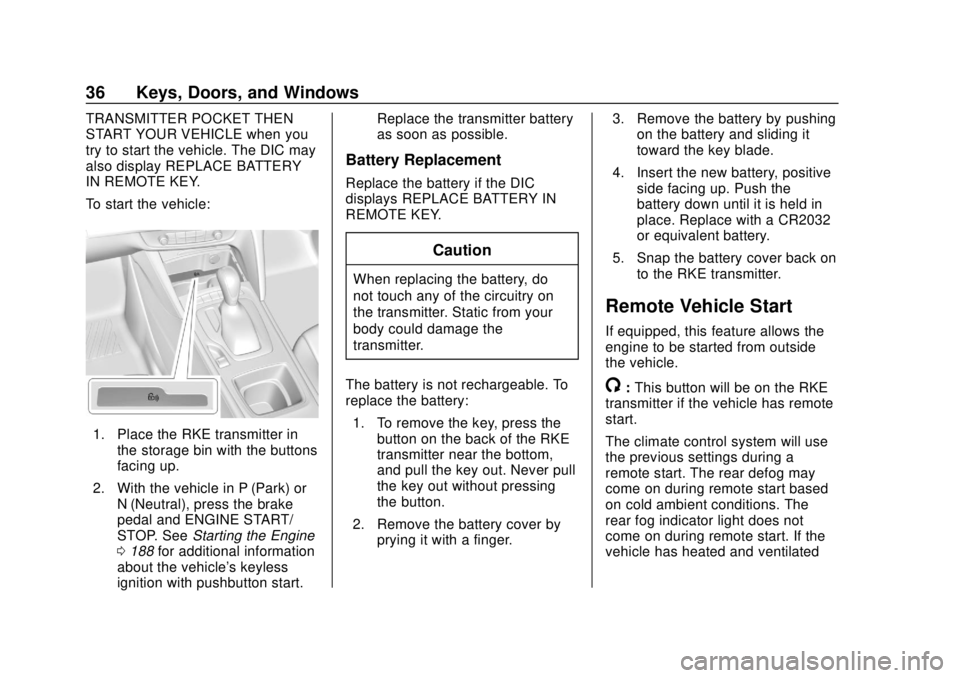
To start the vehicle:
1. Place the RKE transmitter inthe storage bin with the buttons
facing up.
2. With the vehicle in P (Park) or N (Neutral), press the brake
pedal and ENGINE START/
STOP. See Starting the Engine
0 188 for additional information
about the vehicle's keyless
ignition with pushbutton start. Replace the transmitter battery
as soon as possible.
Battery Replacement
Replace the battery if the DIC
displays REPLACE BATTERY IN
REMOTE KEY.
Caution
When replacing the battery, do
not touch any of the circuitry on
the transmitter. Static from your
body could damage the
transmitter.
The battery is not rechargeable. To
replace the battery: 1. To remove the key, press the button on the back of the RKE
transmitter near the bottom,
and pull the key out. Never pull
the key out without pressing
the button.
2. Remove the battery cover by prying it with a finger. 3. Remove the battery by pushing
on the battery and sliding it
toward the key blade.
4. Insert the new battery, positive side facing up. Push the
battery down until it is held in
place. Replace with a CR2032
or equivalent battery.
5. Snap the battery cover back on to the RKE transmitter.
Remote Vehicle Start
If equipped, this feature allows the
engine to be started from outside
the vehicle.
/:This button will be on the RKE
transmitter if the vehicle has remote
start.
The climate control system will use
the previous settings during a
remote start. The rear defog may
come on during remote start based
on cold ambient conditions. The
rear fog indicator light does not
come on during remote start. If the
vehicle has heated and ventilated
Page 55 of 384
Buick Regal Owner Manual (GMNA-Localizing-2nd Timed Print-U.S./Canada-
11486030) - 2018 - crc - 3/23/18
54 Keys, Doors, and Windows
See“Rear Window Defogger” under
Dual Automatic Climate Control
System 0168.
Reverse Tilt Mirrors
If equipped with memory seats, the
passenger and/or driver mirror tilts
to a preselected position when the
vehicle is in R (Reverse). This
allows the curb to be seen when
parallel parking. The mirror(s) return
to the original position when:
.
The vehicle is shifted out of
R (Reverse), or remains in
R (Reverse) for about
30 seconds.
. The ignition is turned off.
. The vehicle is driven in
R (Reverse) above a set speed.
Turn this feature on or off through
vehicle personalization. See Vehicle
Personalization 0150.
Interior Mirrors
Interior Rearview Mirrors
Adjust the rearview mirror for a clear
view of the area behind your
vehicle.
If equipped with OnStar, the vehicle
may have three control buttons at
the bottom of the mirror. See OnStar
Overview 0360.
Do not spray glass cleaner directly
on the mirror. Use a soft towel
dampened with water.
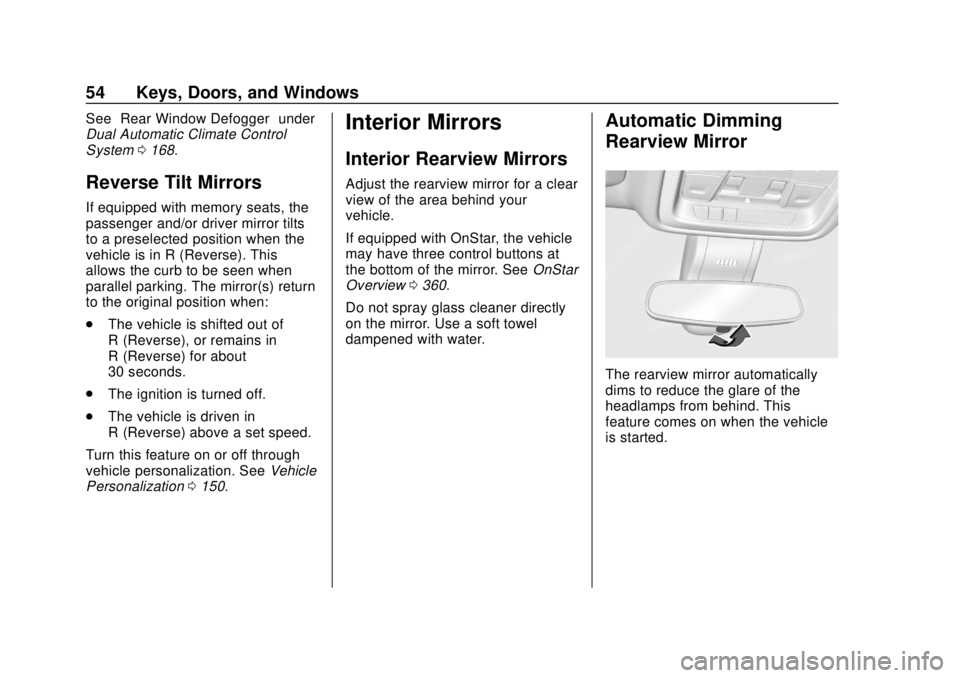
Automatic Dimming
Rearview Mirror
The rearview mirror automatically
dims to reduce the glare of the
headlamps from behind. This
feature comes on when the vehicle
is started.
Page 62 of 384
Buick Regal Owner Manual (GMNA-Localizing-2nd Timed Print-U.S./Canada-
11486030) - 2018 - crc - 3/23/18
Seats and Restraints 61
Rear Seats
Second Row Seats
The vehicle’s rear seat has
adjustable head restraints in the
outboard seating positions.
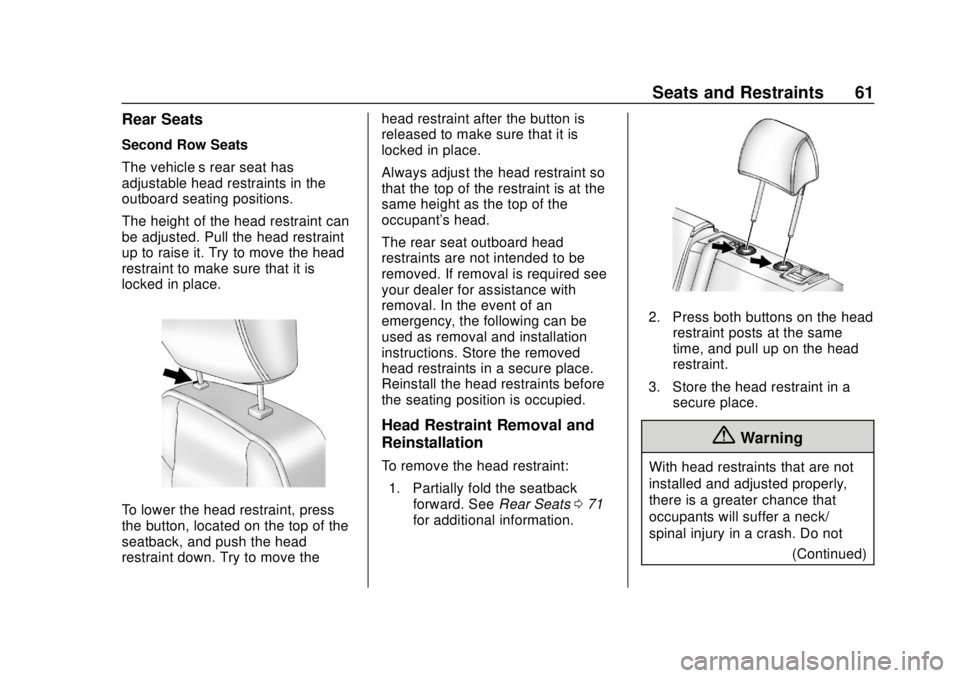
The height of the head restraint can
be adjusted. Pull the head restraint
up to raise it. Try to move the head
restraint to make sure that it is
locked in place.
To lower the head restraint, press
the button, located on the top of the
seatback, and push the head
restraint down. Try to move thehead restraint after the button is
released to make sure that it is
locked in place.
Always adjust the head restraint so
that the top of the restraint is at the
same height as the top of the
occupant's head.
The rear seat outboard head
restraints are not intended to be
removed. If removal is required see
your dealer for assistance with
removal. In the event of an
emergency, the following can be
used as removal and installation
instructions. Store the removed
head restraints in a secure place.
Reinstall the head restraints before
the seating position is occupied.
Head Restraint Removal and
Reinstallation
To remove the head restraint:
1. Partially fold the seatback forward. See Rear Seats071
for additional information.
2. Press both buttons on the head restraint posts at the same
time, and pull up on the head
restraint.
3. Store the head restraint in a secure place.
{Warning
With head restraints that are not
installed and adjusted properly,
there is a greater chance that
occupants will suffer a neck/
spinal injury in a crash. Do not
(Continued)