engine BUICK REGAL 2020 User Guide
[x] Cancel search | Manufacturer: BUICK, Model Year: 2020, Model line: REGAL, Model: BUICK REGAL 2020Pages: 378, PDF Size: 6.91 MB
Page 31 of 378
Buick Regal Owner Manual (GMNA-Localizing-U.S./Canada-13557849) -
2020 - CRC - 6/25/19
30 Keys, Doors, and Windows
the lights will flash to indicate
pre-alarm. If the vehicle is not
started, or the door is not unlocked
by pressing
Kon the RKE
transmitter during the 10-second
pre-alarm, the alarm will be
activated.
If a door, the hood, or the liftgate is
opened without first disarming the
system, the turn signals will flash
and the horn will sound for about
30 seconds. The alarm system will
then re-arm to monitor for the next
unauthorized event.
Disarming the Alarm System
Do one of the following to disarm
the alarm system or turn off the
alarm if it has been activated:
. Press
Kon the RKE transmitter.
. Unlock the vehicle using the
Keyless Access system.
. Start the vehicle.
To avoid setting off the alarm by
accident: .
Lock the vehicle after all
occupants have left the vehicle
and all doors are closed.
. Always unlock a door with the
RKE transmitter or use the
Keyless Access system.
Unlocking the driver door with the
key will not disarm the system or
turn off the alarm.
How to Detect a Tamper
Condition
IfKis pressed on the RKE
transmitter and the horn chirps three
times, an alarm occurred previously
while the alarm system was armed.
If the alarm has been activated, a
message will appear on the DIC.
Immobilizer
See Radio Frequency Statement
0 350.
Immobilizer Operation
This vehicle has a passive
theft-deterrent system. The system does not have to be
manually armed or disarmed.
The vehicle is automatically
immobilized when the transmitter
leaves the vehicle.
The immobilization system is
disarmed when ENGINE START/
STOP is pressed and a valid
transmitter is in the vehicle.
The security light in the instrument
cluster comes on when there is a
problem with arming or disarming
the theft-deterrent system.
The system has one or more
transmitters matched to an
immobilizer control unit in the
vehicle. Only a correctly matched
transmitter will start the vehicle.
If the transmitter is damaged, the
vehicle may not start.
Page 35 of 378
Buick Regal Owner Manual (GMNA-Localizing-U.S./Canada-13557849) -
2020 - CRC - 6/25/19
34 Keys, Doors, and Windows
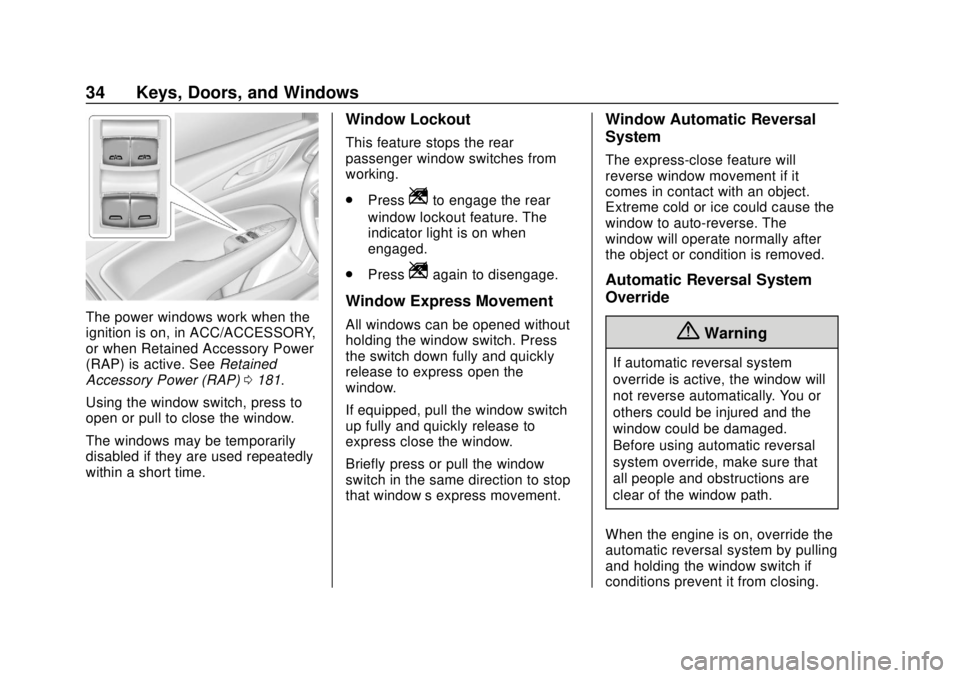
The power windows work when the
ignition is on, in ACC/ACCESSORY,
or when Retained Accessory Power
(RAP) is active. SeeRetained
Accessory Power (RAP) 0181.
Using the window switch, press to
open or pull to close the window.
The windows may be temporarily
disabled if they are used repeatedly
within a short time.
Window Lockout
This feature stops the rear
passenger window switches from
working.
. Press
Zto engage the rear
window lockout feature. The
indicator light is on when
engaged.
. Press
Zagain to disengage.
Window Express Movement
All windows can be opened without
holding the window switch. Press
the switch down fully and quickly
release to express open the
window.
If equipped, pull the window switch
up fully and quickly release to
express close the window.
Briefly press or pull the window
switch in the same direction to stop
that window’s express movement.
Window Automatic Reversal
System
The express-close feature will
reverse window movement if it
comes in contact with an object.
Extreme cold or ice could cause the
window to auto-reverse. The
window will operate normally after
the object or condition is removed.
Automatic Reversal System
Override
{Warning
If automatic reversal system
override is active, the window will
not reverse automatically. You or
others could be injured and the
window could be damaged.
Before using automatic reversal
system override, make sure that
all people and obstructions are
clear of the window path.
When the engine is on, override the
automatic reversal system by pulling
and holding the window switch if
conditions prevent it from closing.
Page 49 of 378
Buick Regal Owner Manual (GMNA-Localizing-U.S./Canada-13557849) -
2020 - CRC - 6/25/19
48 Seats and Restraints
.Power mirror, with the driver or
passenger side mirror selected
. Power steering wheel,
if equipped
Obstructions
If something has blocked the driver
seat and/or power steering wheel
while recalling a memory position,
the recall may stop. Remove the
obstruction and try the recall again.
If the memory position still does not
recall, see your dealer.
Heated and Ventilated
Front Seats
{Warning
If temperature change or pain to
the skin cannot be felt, the seat
heater may cause burns. To
reduce the risk of burns, use care
when using the seat heater,
especially for long periods of
time. Do not place anything on
the seat that insulates against (Continued)
Warning (Continued)
heat, such as a blanket, cushion,
cover, or similar item. This may
cause the seat heater to
overheat. An overheated seat
heater may cause a burn or may
damage the seat.
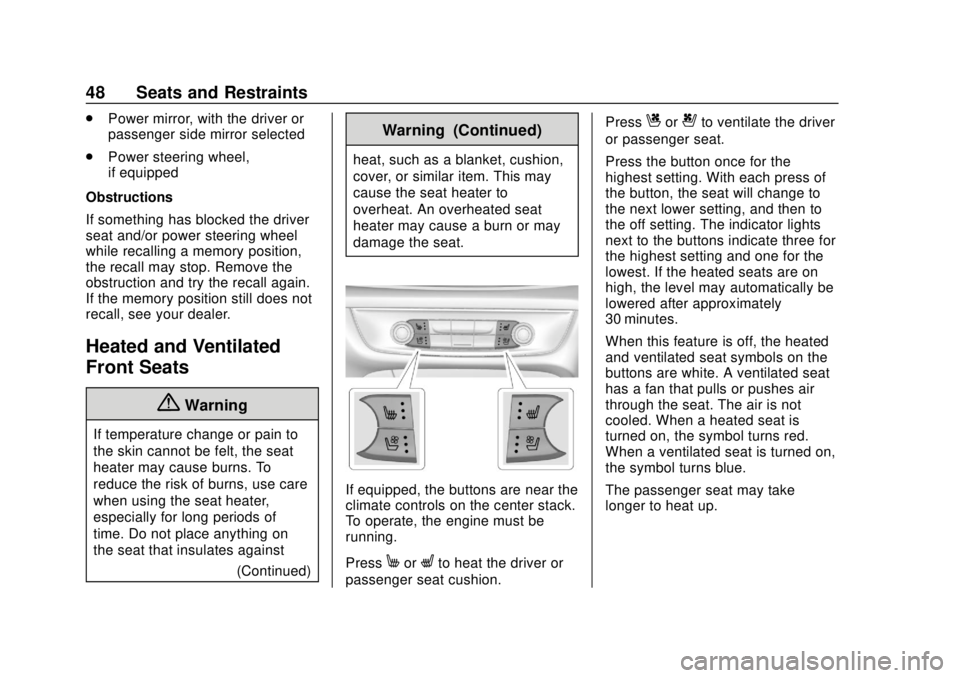
If equipped, the buttons are near the
climate controls on the center stack.
To operate, the engine must be
running.
Press
MorLto heat the driver or
passenger seat cushion. Press
Cor{to ventilate the driver
or passenger seat.
Press the button once for the
highest setting. With each press of
the button, the seat will change to
the next lower setting, and then to
the off setting. The indicator lights
next to the buttons indicate three for
the highest setting and one for the
lowest. If the heated seats are on
high, the level may automatically be
lowered after approximately
30 minutes.
When this feature is off, the heated
and ventilated seat symbols on the
buttons are white. A ventilated seat
has a fan that pulls or pushes air
through the seat. The air is not
cooled. When a heated seat is
turned on, the symbol turns red.
When a ventilated seat is turned on,
the symbol turns blue.
The passenger seat may take
longer to heat up.
Page 50 of 378
Buick Regal Owner Manual (GMNA-Localizing-U.S./Canada-13557849) -
2020 - CRC - 6/25/19
Seats and Restraints 49
Auto Heated and Ventilated Seats
If the vehicle is equipped with auto
heated or ventilated seats, and the
engine is running, this feature will
automatically activate the heated or
ventilated seats at the level required
by the vehicle's interior temperature.
The active high, medium, low, or off
heated or ventilated seat level will
be indicated by the manual heated
and ventilated seat buttons on the
center stack. Use the manual
heated and ventilated seat buttons
on the center stack to turn auto
heated or ventilated seats off. If the
passenger seat is unoccupied, the
auto heated or ventilated seats
feature will not activate that seat.
The auto heated and ventilated
seats feature can be programmed to
always be enabled when the vehicle
is on.
SeeVehicle Personalization 0138. Remote Start Heated and
Ventilated Seats
If equipped, the heated seats will
turn on automatically during a
remote start if it is cold outside and
the ventilated seats will turn on
automatically if it is hot outside. The
heated and ventilated seat
indicators may not come on during
this operation.
The heated and ventilated seats
may cancel when the vehicle is
started. These features can be
manually selected after the ignition
is turned on.
The temperature performance of an
unoccupied seat may be reduced.
This is normal.
The heated or ventilated seats will
not turn on during a remote start
unless they are enabled in the
vehicle personalization menu. See
Remote Vehicle Start
015 and
Vehicle Personalization 0138.Massage
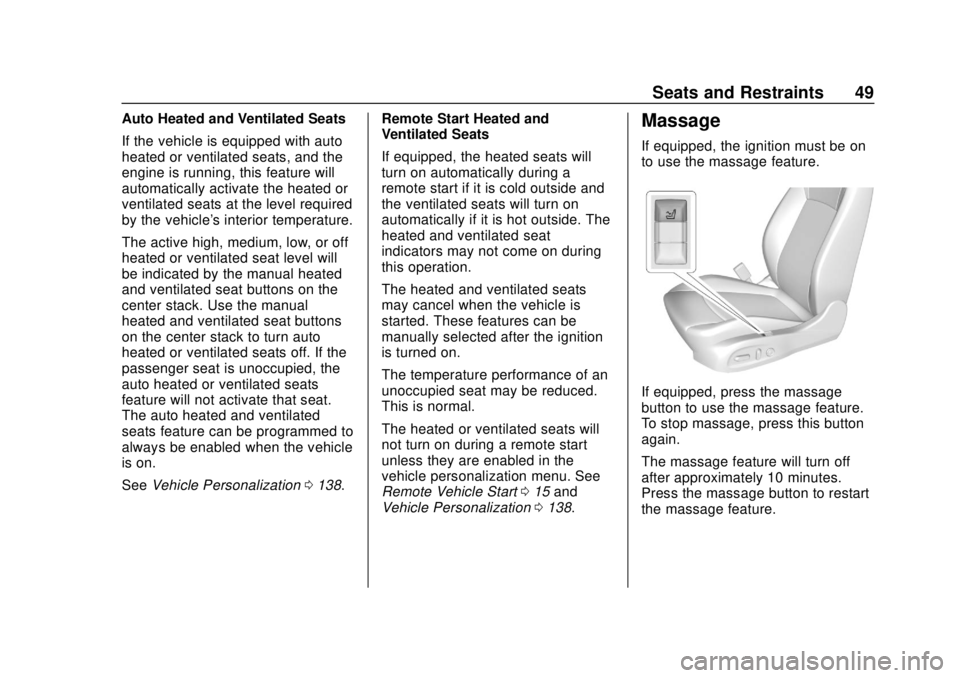
If equipped, the ignition must be on
to use the massage feature.
If equipped, press the massage
button to use the massage feature.
To stop massage, press this button
again.
The massage feature will turn off
after approximately 10 minutes.
Press the massage button to restart
the massage feature.
Page 66 of 378

Buick Regal Owner Manual (GMNA-Localizing-U.S./Canada-13557849) -
2020 - CRC - 6/25/19
Seats and Restraints 65
The vehicle has a feature that may
automatically unlock the doors, turn
on the interior lamps and hazard
warning flashers, and shut off the
fuel system after the airbags inflate.
The feature may also activate,
without airbag inflation, after an
event that exceeds a predetermined
threshold. After turning the ignition
off and then on again, the fuel
system will return to normal
operation; the doors can be locked,
the interior lamps can be turned off,
and the hazard warning flashers can
be turned off using the controls for
those features. If any of these
systems are damaged in the crash
they may not operate as normal.
{Warning
A crash severe enough to inflate
the airbags may have also
damaged important functions in
the vehicle, such as the fuel
system, brake and steering
systems, etc. Even if the vehicle
appears to be drivable after a(Continued)
Warning (Continued)
moderate crash, there may be
concealed damage that could
make it difficult to safely operate
the vehicle.
Use caution if you should attempt
to restart the engine after a crash
has occurred.
In many crashes severe enough to
inflate the airbag, windshields are
broken by vehicle deformation.
Additional windshield breakage may
also occur from the front outboard
passenger airbag.
. Airbags are designed to inflate
only once. After an airbag
inflates, you will need some new
parts for the airbag system.
If you do not get them, the
airbag system will not be there
to help protect you in another
crash. A new system will include
airbag modules and possibly
other parts. The service manual
for the vehicle covers the need
to replace other parts. .
The vehicle has a crash sensing
and diagnostic module which
records information after a
crash. See Vehicle Data
Recording and Privacy 0352
and
Event Data Recorders 0352.
. Let only qualified technicians
work on the airbag systems.
Improper service can mean that
an airbag system will not work
properly. See your dealer for
service.
Passenger Sensing
System
The vehicle has a passenger
sensing system for the front
outboard passenger position. The
passenger airbag status indicator
will light on the overhead console
when the vehicle is started.
Page 91 of 378
Buick Regal Owner Manual (GMNA-Localizing-U.S./Canada-13557849) -
2020 - CRC - 6/25/19
90 Seats and Restraints
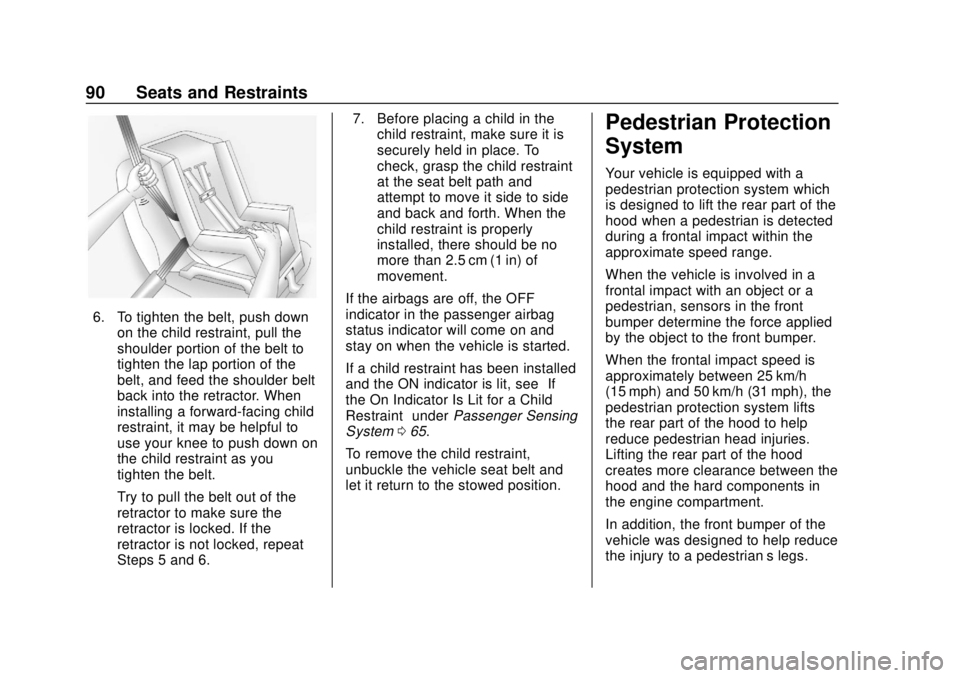
6. To tighten the belt, push downon the child restraint, pull the
shoulder portion of the belt to
tighten the lap portion of the
belt, and feed the shoulder belt
back into the retractor. When
installing a forward-facing child
restraint, it may be helpful to
use your knee to push down on
the child restraint as you
tighten the belt.
Try to pull the belt out of the
retractor to make sure the
retractor is locked. If the
retractor is not locked, repeat
Steps 5 and 6. 7. Before placing a child in the
child restraint, make sure it is
securely held in place. To
check, grasp the child restraint
at the seat belt path and
attempt to move it side to side
and back and forth. When the
child restraint is properly
installed, there should be no
more than 2.5 cm (1 in) of
movement.
If the airbags are off, the OFF
indicator in the passenger airbag
status indicator will come on and
stay on when the vehicle is started.
If a child restraint has been installed
and the ON indicator is lit, see “If
the On Indicator Is Lit for a Child
Restraint” underPassenger Sensing
System 065.
To remove the child restraint,
unbuckle the vehicle seat belt and
let it return to the stowed position.
Pedestrian Protection
System
Your vehicle is equipped with a
pedestrian protection system which
is designed to lift the rear part of the
hood when a pedestrian is detected
during a frontal impact within the
approximate speed range.
When the vehicle is involved in a
frontal impact with an object or a
pedestrian, sensors in the front
bumper determine the force applied
by the object to the front bumper.
When the frontal impact speed is
approximately between 25 km/h
(15 mph) and 50 km/h (31 mph), the
pedestrian protection system lifts
the rear part of the hood to help
reduce pedestrian head injuries.
Lifting the rear part of the hood
creates more clearance between the
hood and the hard components in
the engine compartment.
In addition, the front bumper of the
vehicle was designed to help reduce
the injury to a pedestrian’s legs.
Page 93 of 378
Buick Regal Owner Manual (GMNA-Localizing-U.S./Canada-13557849) -
2020 - CRC - 6/25/19
92 Seats and Restraints
Temporary Hood Repair
If the rear of the hood is raised, the
hood may be repositioned
temporarily if a towing service is not
available.
{Warning
Before beginning the procedure,
read all the instructions. Failure to
read and follow the instructions
could injure you or others, and
damage the vehicle.
{Warning
After the hood has lifted, the hood
hinge and latch area may be hot.
Do not touch the pedestrian
protection system components.
Allow the engine to cool before
attempting any repair.
{Warning
You or others could be injured
when the hood is lowered or
latched.
Be sure to keep fingers and other
body parts away from the edge of
the hood and fenders.
1. Place both hands on top of the right corner of the hood near
the windshield and push the
hood down quickly.
If the hood does not latch, push
down again with slightly more
force until the hood is latched
securely.
2. Repeat the previous step to latch the left side of the hood.
3. Pull up on the rear corners of the hood to make sure the
hood is latched securely and
will not lift.
{Warning
Do not drive the vehicle if the
hood is not securely latched at
both rear corners and the front
latch.
Operating your vehicle without the
hood securely latched can lead to
a collision resulting in damage to
your vehicle, damage to other
property, personal injury, or even
death.
4. Drive directly to a dealer for service. If you cannot go in for
service immediately, have the
vehicle towed.
Some noise will occur when
the vehicle is driven while the
hood is temporarily
repositioned.
Page 100 of 378
Buick Regal Owner Manual (GMNA-Localizing-U.S./Canada-13557849) -
2020 - CRC - 6/25/19
Instruments and Controls 99
Instruments and
Controls
Controls
Steering Wheel Adjustment . . . 100
Steering Wheel Controls . . . . . . 100
Heated Steering Wheel . . . . . . . 100
Horn . . . . . . . . . . . . . . . . . . . . . . . . . . 100
Windshield Wiper/Washer . . . . 100
Rear Window Wiper/Washer . . . . . . . . . . . . . . . . . . . . . 102
Compass . . . . . . . . . . . . . . . . . . . . . 102
Clock . . . . . . . . . . . . . . . . . . . . . . . . . 102
Power Outlets . . . . . . . . . . . . . . . . 103
Wireless Charging . . . . . . . . . . . . 103
Warning Lights, Gauges, and
Indicators
Warning Lights, Gauges, and Indicators . . . . . . . . . . . . . . . . . . . 106
Instrument Cluster . . . . . . . . . . . . 107
Speedometer . . . . . . . . . . . . . . . . . 113
Odometer . . . . . . . . . . . . . . . . . . . . . 113
Tachometer . . . . . . . . . . . . . . . . . . . 113
Fuel Gauge . . . . . . . . . . . . . . . . . . . 113
Engine Oil Temperature Gauge
(Uplevel) . . . . . . . . . . . . . . . . . . . . 115 Engine Coolant Temperature
Gauge . . . . . . . . . . . . . . . . . . . . . . 115
Voltmeter Gauge (Uplevel) . . . . 116
Seat Belt Reminders . . . . . . . . . . 117
Airbag Readiness Light . . . . . . . 118
Passenger Airbag Status Indicator . . . . . . . . . . . . . . . . . . . . . 118
Charging System Light . . . . . . . 119
Malfunction Indicator Lamp (Check Engine Light) . . . . . . . . 119
Brake System Warning Light . . . . . . . . . . . . . . . . . . . . . . . . 121
Electric Parking Brake Light . . . . . . . . . . . . . . . . . . . . . . . . 122
Service Electric Parking Brake Light . . . . . . . . . . . . . . . . . . . . . . . . 122
Antilock Brake System (ABS) Warning Light . . . . . . . . . . . . . . . 122
Lane Keep Assist (LKA) Light . . . . . . . . . . . . . . . . . . . . . . . . 123
Vehicle Ahead Indicator . . . . . . 123
Pedestrian Ahead Indicator . . . 124
Traction Off Light . . . . . . . . . . . . . 124
StabiliTrak OFF Light . . . . . . . . . 124
Traction Control System (TCS)/ StabiliTrak Light . . . . . . . . . . . . . 125
Engine Coolant Temperature Warning Light (Uplevel) . . . . . 125
Tire Pressure Light . . . . . . . . . . . 125
Engine Oil Pressure Light . . . . 126 Low Fuel Warning Light . . . . . . 126
Security Light . . . . . . . . . . . . . . . . . 127
High-Beam On Light . . . . . . . . . . 127
Adaptive Forward Lighting
(AFL) Light . . . . . . . . . . . . . . . . . . 127
Front Fog Lamp Light . . . . . . . . . 127
Lamps On Reminder . . . . . . . . . 128
Cruise Control Light . . . . . . . . . . 128
Door Ajar Light . . . . . . . . . . . . . . . 128
Information Displays
Driver Information Center (DIC) . . . . . . . . . . . . . . . . 128
Head-Up Display (HUD) . . . . . . 133
Vehicle Messages
Vehicle Messages . . . . . . . . . . . . 137
Engine Power Messages . . . . . 137
Vehicle Speed Messages . . . . . 138
Vehicle Personalization
Vehicle Personalization . . . . . . . 138
Universal Remote System
Universal Remote System . . . . 143
Universal Remote System Programming . . . . . . . . . . . . . . . 143
Universal Remote System Operation . . . . . . . . . . . . . . . . . . . 146
Page 107 of 378
Buick Regal Owner Manual (GMNA-Localizing-U.S./Canada-13557849) -
2020 - CRC - 6/25/19
106 Instruments and Controls
Warning Lights,
Gauges, and
Indicators
Warning lights and gauges can
signal that something is wrong
before it becomes serious enough
to cause an expensive repair or
replacement. Paying attention to the
warning lights and gauges could
prevent injury.
Some warning lights come on briefly
when the engine is started to
indicate they are working. When
one of the warning lights comes on
and stays on while driving, or when
one of the gauges shows there may
be a problem, check the section that
explains what to do. Waiting to do
repairs can be costly and even
dangerous.
Page 114 of 378
Buick Regal Owner Manual (GMNA-Localizing-U.S./Canada-13557849) -
2020 - CRC - 6/25/19
Instruments and Controls 113
exceed. To set the Speed Warning,
press
Twhen Speed Warning is
displayed. Scroll to Set Speed and
press
T. PressVto set the speed.
Once the speed is set, this feature
can be turned off by pressing
V
while viewing this page. If the
selected speed limit is exceeded, a
DIC message is displayed with a
chime.
Software Information : Displays
the open source software
information.
Speedometer
The speedometer shows the
vehicle's speed in either kilometers
per hour (km/h) or miles per
hour (mph).
Odometer
The odometer shows how far the
vehicle has been driven, in either
kilometers or miles.
Tachometer
The tachometer displays the engine
speed in revolutions per
minute (rpm).
For vehicles with the Stop/Start
system, when the ignition is on, the
tachometer indicates the vehicle
status. When pointing to AUTO
STOP, the engine is off but the
vehicle is on and can move. The
engine could auto start at any time.
When the indicator points to OFF,
the vehicle is off.
When the engine is on, the
tachometer will indicate the engine’s
revolutions per minute (rpm). The
tachometer may vary by several
hundred rpm’s, during Auto Stop
mode, when the engine is shutting
off and restarting.
Caution
If the engine is operated with the
rpm’s in the warning area at the
high end of the tachometer, the
(Continued)
Caution (Continued)
vehicle could be damaged, and
the damage would not be covered
by the vehicle warranty. Do not
operate the engine with the rpm’s
in the warning area.
Fuel Gauge
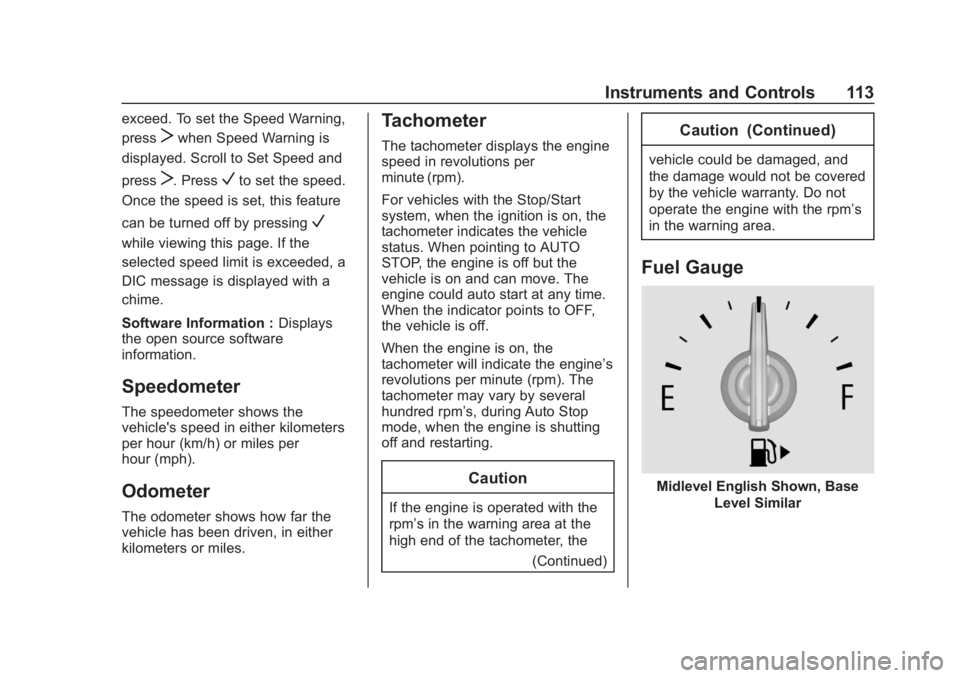
Midlevel English Shown, BaseLevel Similar