clock BUICK ROADMASTER 1993 Owners Manual
[x] Cancel search | Manufacturer: BUICK, Model Year: 1993, Model line: ROADMASTER, Model: BUICK ROADMASTER 1993Pages: 340, PDF Size: 18.34 MB
Page 70 of 340
A .CAUTION-
It can be 'dangerous to drive with the rear
mrindaw, and/or tailgate open. Carbmimonoxide
(CO) ,gas can come into your vehicle. You can't
see
03 smell co. It can -use unconsciousness
and even death.
If you must driv- ---'*,- 'he rer ---'xiow and/c
tailgate open:
Make sure al
Turn the fan on your heating or coolin!
system to
its highest speed with the
setting on
ECON. That will force outsic
Controls"
in the Index.
instrumen
ban open them a he way.
. . air into your vehicle. See '' Comfort
If you have air vents on or under the
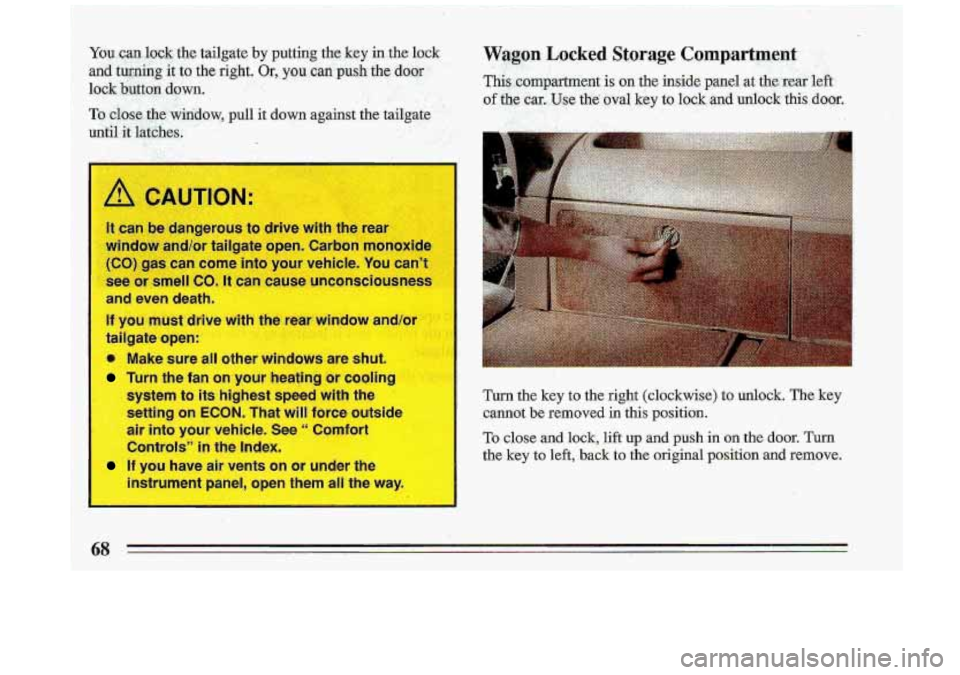
Turn the key to the right (clockwise) to.unlock. The key
cannot be removed in this position.
To close and lock, lift up and push in on the door. Turn
the kev to left, back to the original position and remove.
68
Page 138 of 340
..
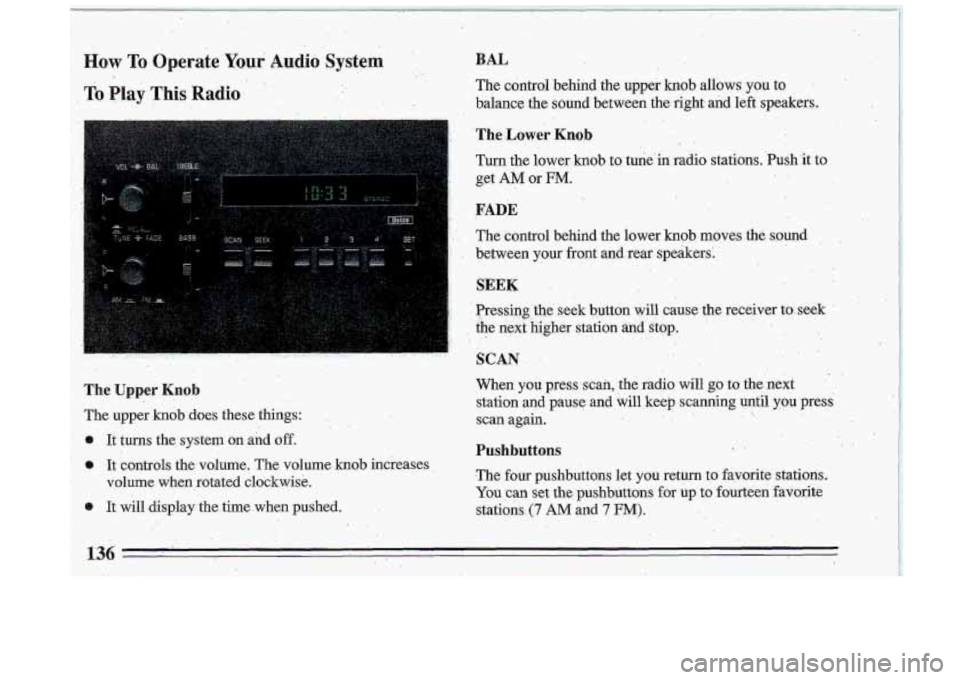
How To, Operate Y0u.r' Audio System . :.. .> ,
To Play This Radio'
' ., ... . ,. ..
,1
The Uppei Knob
The upper .knob does these things:
It tums the system
on and off.
o It controls the volume. The volume knob increases
volume when rotated clockwise.
0 It will display the time, when pushed.
..
BAL
The cdntrol behind the upper knob allows you to
,balance the sound bet,ween the
right and left speakers.
The Lower Knob . .
Turn the lower knob to tune'in. radio stations. .Push'it to
get
AM 'or FM.
..
..
FADE
'. The control behind the lower knob mpves the sound,
between
your front and rear speakers:
., . I
SEEK .
. Presshg'the ,. seek button will 'cause the receiver toseek '
. the '. b. next . .'. , .kigher station anclstop.. , :".. . ,..: - . . ,>
. :.. '
SCAN
.. ..
When you press scan, the radio will go to the next.
station and pause and will keep scanning until you press:
scan again.
. -. ,.
,. .. .
136
-
Pushbuttons ..
.The four pushbuttons let you return to favorite stations.
You can set the pushbuttons for up. to fourteen favorite
stations. (7 AM and 7 FM):
Page 139 of 340
e Tune in the desired station.
0 Press the SET pushbutton. (SET appears in the
display)
..
Within 5 seconds, push one of the four pushbuttons
to.store the- station. Whenever you press that button
again, the preset station will return.
In addition
to the 4 stations set as above, up to three
additional stations may be preset on each band by
pressing two adjoining buttons at the same time.
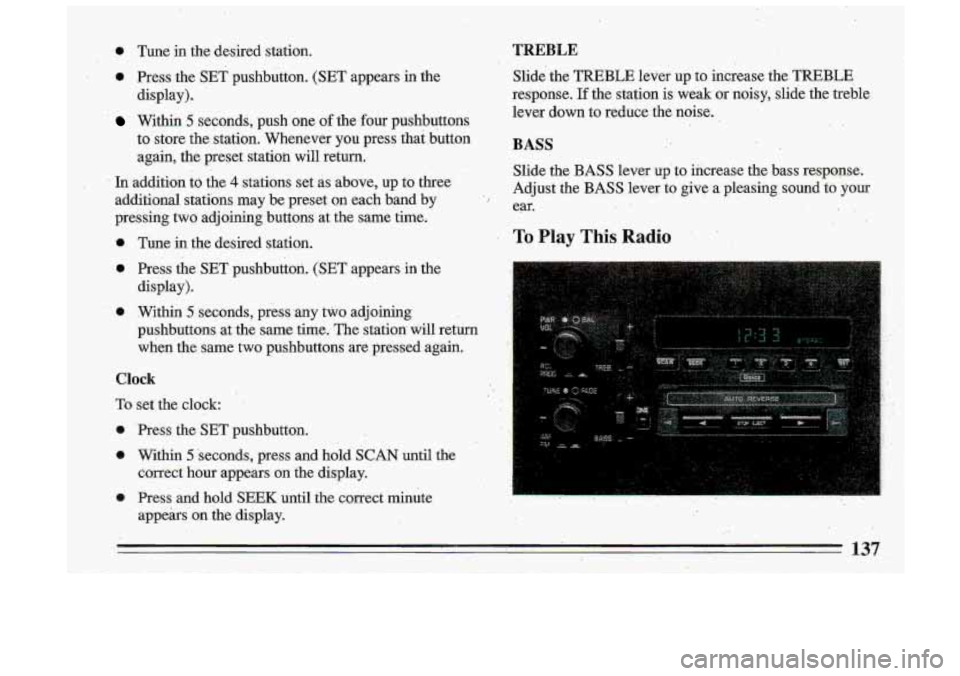
T.REBLE
Slide. the TREBLE lever up to increase the TREBLE.
response.
If the station is weak or noisy, slide the treble
lever
down to reduce the noise.
BASS
Tune in the desired station.
0 Press the SET pushbutton. (SET appears in the
display).
e Within 5 seconds, press 'any two adjoining
pushbuttons at the same time. The station- will return
when the. same two pushbuttons are pressed again.
Clock '.'
To set the clock:
0 'Press the SET pushbutton.
0 Within 5 'seconds, press and hold SCAN until the
correct hour appears on the display. Slide the
BASS lever up-to increase the bass response.
Adjust the
BASS lever to give a pleasing sound to your
ear. I
To Play This Radio
o Press and hold SEEK until the correct minute . :, ,,,~ . - ., _..^. , , I
appellss on the display. .- I
137, i
Page 147 of 340
Within 5 seconds, push one of the five pushbuttons.
SET will disappear from the display when the station
is set.
Whenever you press that button, the preset station
will
return.
Clock
To set the clock:
0 Press the SET pushbutton. ..
a Within .5 seconds, press and .hold SCAN until the
Press and hpld SEEK 4.m .until the correct
correct hour appears
on the display.
minute appears on the di,splay.
To Adjust The Tone
Use the'levers next to .the display to set the bass,
midrange and treble until y0.u get the sound you want.
,
The 60 and 250 levers hdjust the. bass; 1K is ,midrange;
and
3.5K and 1OK control the treble.
We suggest you start w.ith the center lever
(1K) in the
midpoint position. Then move the others
up until you
get the. amount .of bass and treble you like.
To Play A Compact Disc
Before you begin, please note: DO NOT use mini-discs
that are called singles. They won't eject. Use full-size
compact discs only.
I1
If the disc player is very hot, or if you're driving on a
very rough road, a disc may come out or just not.play. If
you see the- word HOT on the display, the disc player
is
too hot to play the disc. .Press RCL to make the word
HOT go off the display.
As soon as things get back to normal, the disc should
play again.
Press
PWR to turn the system on.
Insert a disc partway into the slot, label'side up. The
player will pull it in. Wait a few seconds and the disc
should play.
If the disc comes back out, check to see if,
0 The disc is upside down.
It is dirty, scratched, or wet.
There's too much moisture in the air. (If there is,
wait about an hour and try again.) '!
i
.I .
145
Page 173 of 340
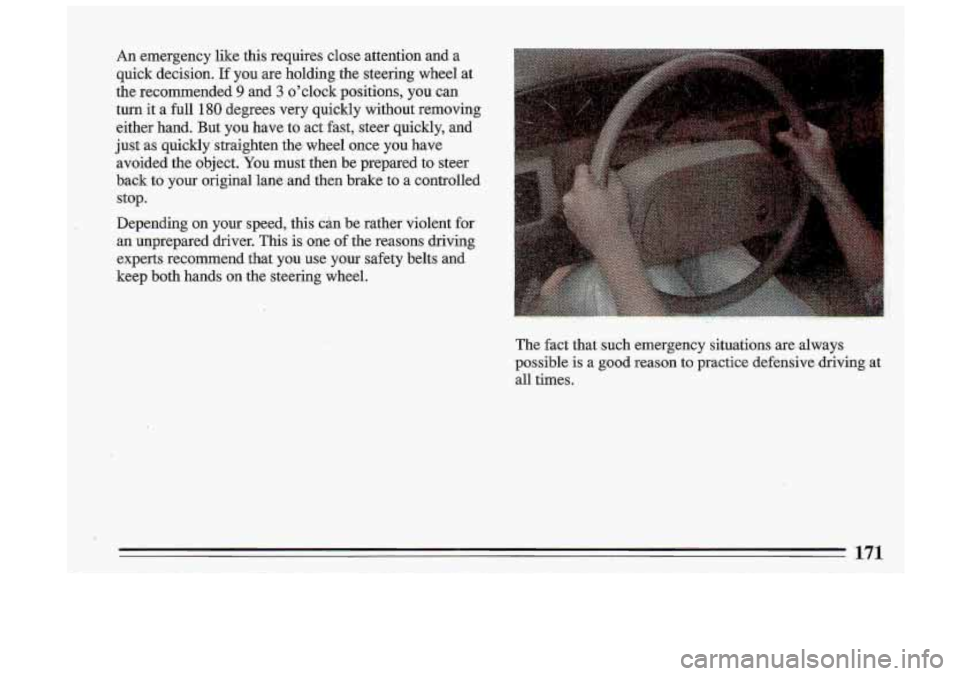
An emergency like this requires close attention and a
quick decision.
If you are holding the steering wheel at
the recommended
9 and 3 o'clock positions, you can
turn it a full 180 degrees very quickly without removing
either hand. But you have to act fast, steer quickly, and
just as quickly straighten the wheel once you have
avoided the object.
You must then be prepared to steer
back to y.our original lane and then brake
to a controlled
stop.
Depending on your speed, this can be rather violent
for
an unprepared driver. This is one of the reasons driving
experts recommend that you use your safety belts and
keep both hands on the steering wheel.
The fact that such emergency situations are .always
possible is a good reason to practice defensive driving at
all times.
171
Page 237 of 340
t
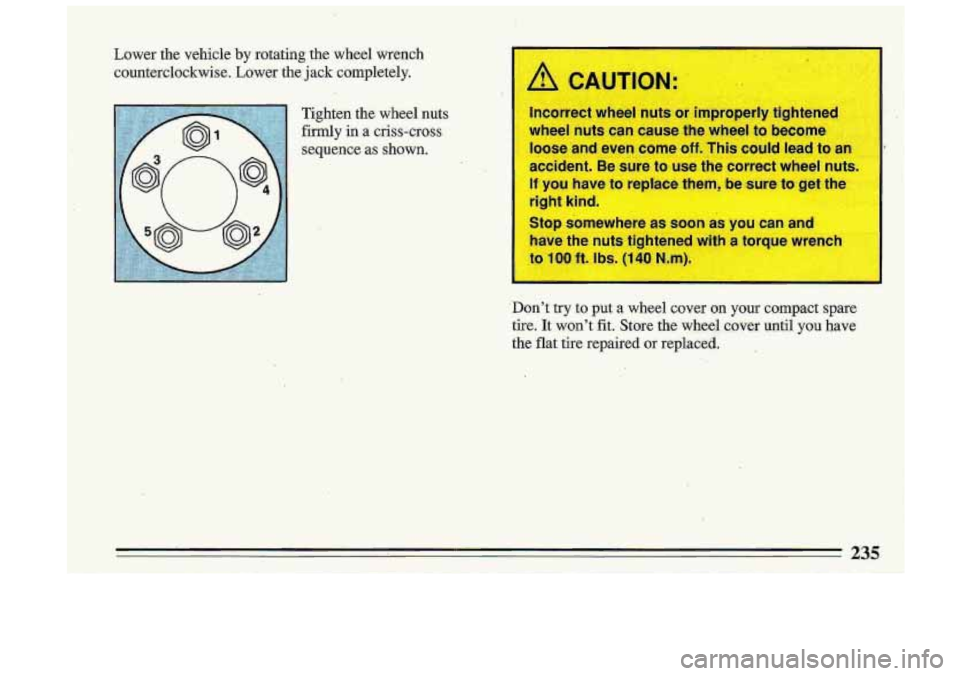
Lower the vehicle by rotating the wheel wrench
counterclockwise. Lower the jack completely.
Tighten the wheel nuts
firmly in a criss-cross
sequence as shown.
lncorrect wheel nuts or improperly tightened
wheel nuts can cause the wheel to become
loose and even come
off. This could lead to an
accident. Be sure to use the correct wheel nuts.
If you have to replace them, be sure to get the
right kind.
Stop somewhere
as soon as you can an
have the nuts tightened with
a
to I00 ft. Ibs. (1 40 N.m)
Don't try to put a wheel cover on your compact spare
tire. It won't fit. Store the wheel cover until
you have
the flat tire repaired or replaced.
. .. .i ,?. 1 C.".
235
Page 248 of 340
.,
..
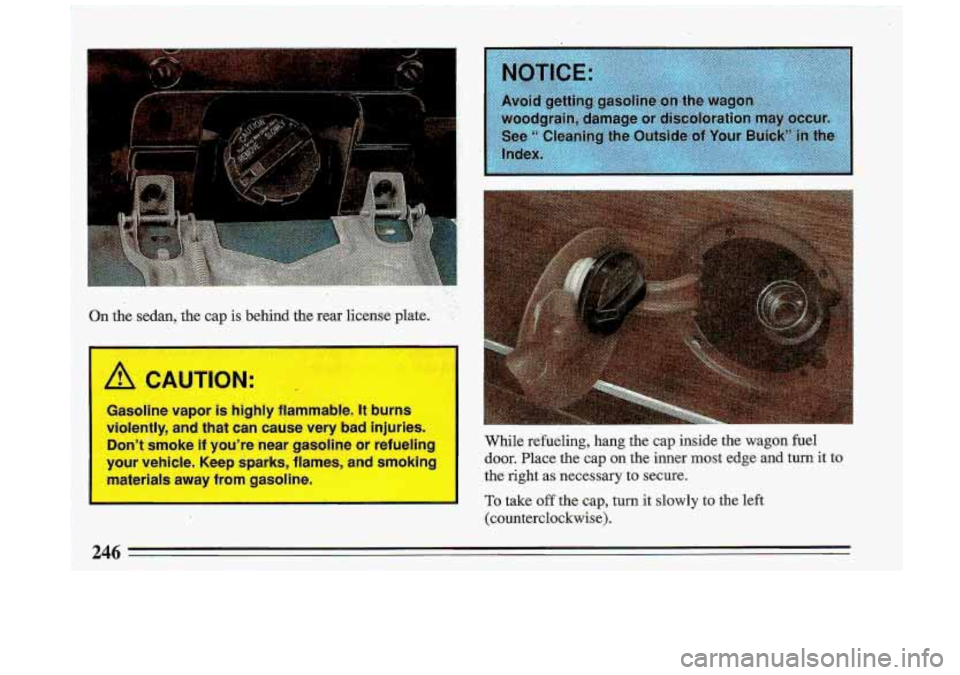
On. the sedan, the cap is behind the rear license plate. : '
m--
/! CAUTION:
Ga din rapor is ply tlammawe. It Durn:
violently, and that can cause very
bad injuries.
Don't smoke
if you're near gasoline or refueling
your vehicle. Keep sparks, flames, and smoking
materials away from gasoline. While refueling, hang the cap inside the wagon fuel
door. Place the cap on the inner most edge and turn it to
the
right as. necessary to secure.
To take off the cap, turn it slowly to the left
(counterclockwise).
246 =
Page 269 of 340
5. Bulb
I_ -. _I-
Replacement , . ..
. -.
j.! i I I. !
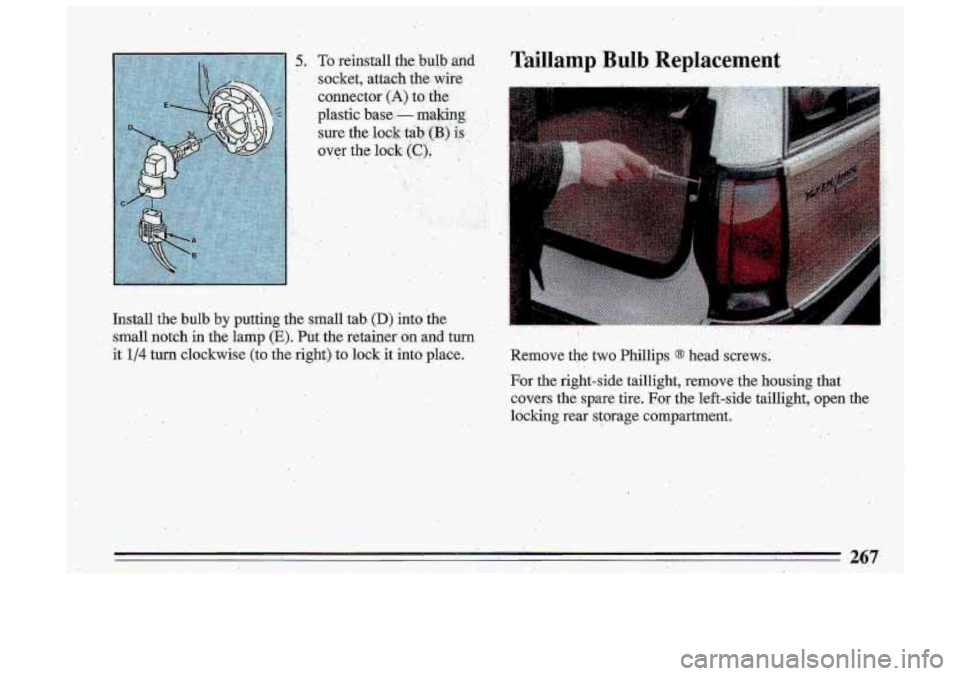
Install the bulb by putting the sriJall tab- (D) hto the J;: ~ I..' '
small notch in the lamb (E). PGt the 'retainer: on and. turn
. ..
it 1/4 tun clockwise (to the.right).'to lock it into place. Remove-the two Phillips @ head screws;
For .the right-side taillight, remove The housing that
covers the spare tire'. For the left-side taillight, open the
ldcking rear storage compartment.
267
Page 270 of 340
. ,. , .. ., , ...
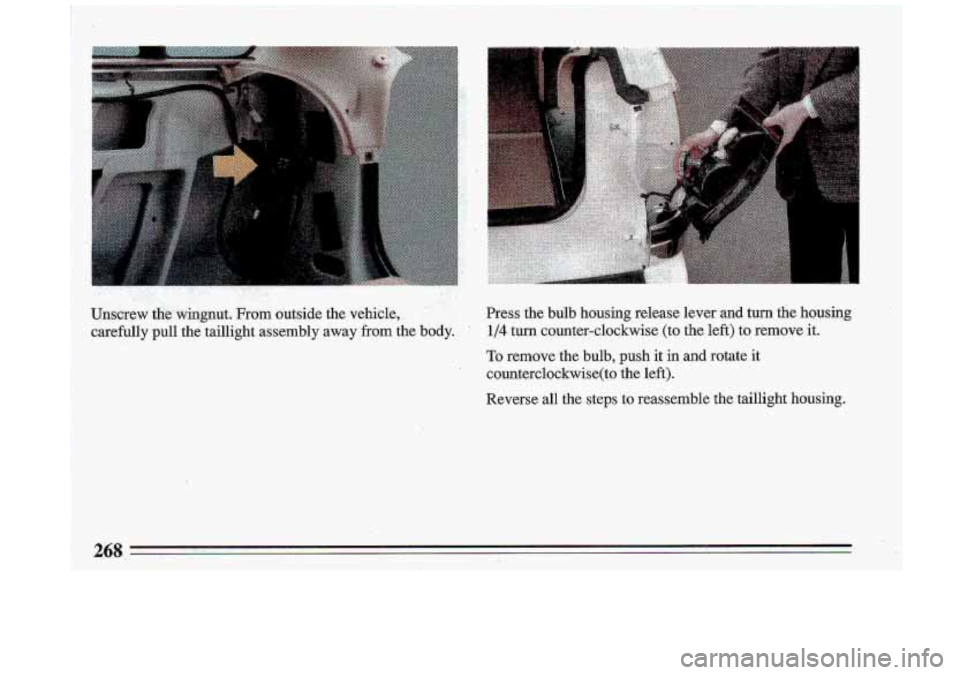
Unskrew .tht$wingnut. From outside the vehicle,,
carefully
pull the taillight assembly away from the body. Press the
bulb housing release lever and turn the housing
1/4.turn counter-clockwise (to the left) to remove it..
To remove the bulb, push it in and rotate it
counterclockwise(to the left).
Reverse
all the steps to reassemble the taillight housing.