buttons BUICK TERRAZA 2006 Owner's Manual
[x] Cancel search | Manufacturer: BUICK, Model Year: 2006, Model line: TERRAZA, Model: BUICK TERRAZA 2006Pages: 454, PDF Size: 2.7 MB
Page 9 of 454

Eight-Way Power Seats
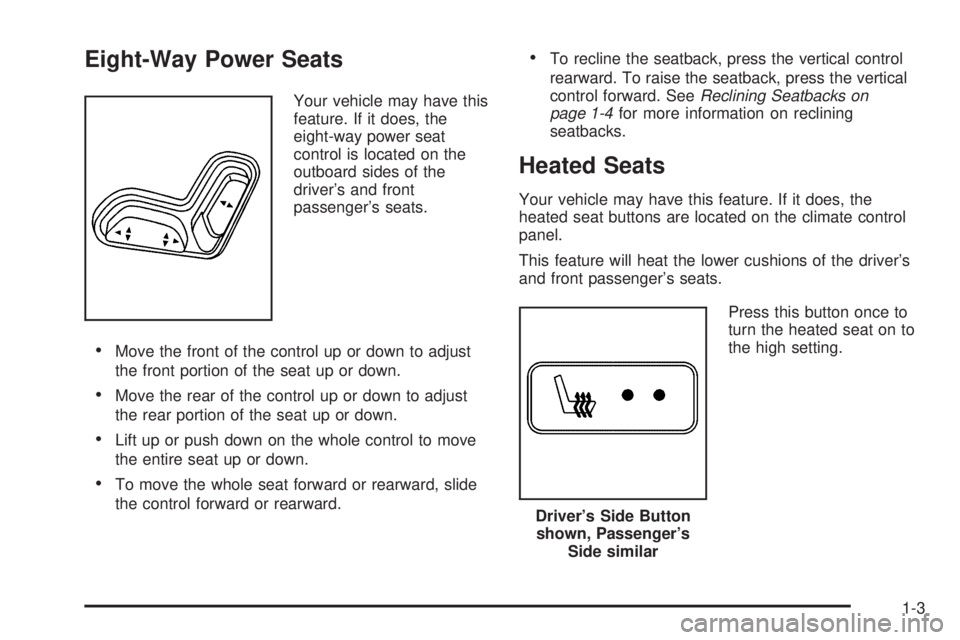
Your vehicle may have this
feature. If it does, the
eight-way power seat
control is located on the
outboard sides of the
driver’s and front
passenger’s seats.
Move the front of the control up or down to adjust
the front portion of the seat up or down.
Move the rear of the control up or down to adjust
the rear portion of the seat up or down.
Lift up or push down on the whole control to move
the entire seat up or down.
To move the whole seat forward or rearward, slide
the control forward or rearward.
To recline the seatback, press the vertical control
rearward. To raise the seatback, press the vertical
control forward. SeeReclining Seatbacks on
page 1-4for more information on reclining
seatbacks.
Heated Seats
Your vehicle may have this feature. If it does, the
heated seat buttons are located on the climate control
panel.
This feature will heat the lower cushions of the driver’s
and front passenger’s seats.
Press this button once to
turn the heated seat on to
the high setting.
Driver’s Side Button
shown, Passenger’s
Side similar
1-3
Page 85 of 454

At times you may notice a decrease in range. This is
normal for any remote keyless entry system. If the
transmitter does not work or if you have to stand closer
to your vehicle for the transmitter to work, try this:
Check the distance. You may be too far from your
vehicle. You may need to stand closer during
rainy or snowy weather.
Check the location. Other vehicles or objects may
be blocking the signal. Take a few steps to the
left or right, hold the transmitter higher, and
try again.
Check to determine if battery replacement is
necessary. See “Battery Replacement” under
Remote Keyless Entry System Operation on
page 2-5.
If you are still having trouble, see your dealer or a
quali�ed technician for service.
Remote Keyless Entry System
Operation
You can lock and unlock the vehicle’s doors and the
liftgate using the remote keyless entry transmitter
supplied with your vehicle.
The remote keyless entry
transmitter shown here is
for a vehicle equipped
with the remote vehicle
start feature and dual
power sliding doors.
The remote keyless entry transmitter supplied with your
vehicle will only contain the buttons speci�c to your
vehicle’s factory installed remote system features.
2-5
Page 87 of 454

Remote Power Sliding Door Operation
+
(Power Sliding Door):If your vehicle has
one power sliding door, the remote keyless entry
transmitter will have a button with a van symbol on it.
Press and hold this button to open or close the
power sliding door. SeePower Sliding Door (PSD) on
page 2-17.
*+(Dual Power Sliding Doors):If your vehicle
has dual power sliding doors, your remote keyless
entry transmitter will have two buttons that have a van
symbol on them. The van symbol on the left is for
the driver’s side sliding door and the van symbol on the
right is for the passenger’s side sliding door. Press
and hold the passenger’s or driver’s side button, with
the van symbol on it, to open or close the selected
power sliding door. SeePower Sliding Door (PSD) on
page 2-17.
You can operate the power sliding door(s) with the
remote keyless entry transmitter even if the power
sliding door override switch(es), on the overhead
console, are active or inactive. SeePower Sliding Door
(PSD) on page 2-17for additional information.If the sliding door is closed and the power sliding door
button on the transmitter is pressed and held, the
vehicle’s doors will be unlocked and then the power
sliding door will open. If the power sliding door has been
locked using the manual door lock lever, you will
need to unlock the power sliding door before it can be
opened with the remote keyless entry transmitter sliding
door button.
If your vehicle’s fuel �ller door is opened, the driver’s side
power sliding door will not open completely. Do not try to
force the door. Once the fuel �ller door is closed, the
driver’s side sliding door can be opened normally.
Matching Transmitter(s) to Your
Vehicle
Each remote keyless entry transmitter is coded to
prevent another transmitter from unlocking your vehicle.
If a transmitter is lost or stolen, a replacement can
be purchased through your dealer. Remember to bring
any remaining transmitters with you when you go to
your dealer. When the dealer matches the replacement
transmitter to your vehicle, any remaining transmitters
must also be matched. Once your dealer has coded the
new transmitter, the lost transmitter will not unlock
your vehicle. Each vehicle can have a maximum of four
transmitters matched to it.
See your dealer to match transmitters to another
vehicle.
2-7
Page 88 of 454

Battery Replacement
Under normal use, the battery in your remote keyless
entry transmitter should last about three years.
You can tell the battery is weak if the transmitter will not
work at the normal range in any location. If you have
to get close to your vehicle before the transmitter works,
it is probably time to change the battery.
Notice:When replacing the battery, use care not to
touch any of the circuitry. Static from your body
transferred to these surfaces may damage the
transmitter.
1. Insert a �at object, such as a coin, into the slot on
the side of the transmitter and twist it to separate
the halves.
2. Gently pry the battery out of the transmitter. Do not
use the metal �anges to pop out the battery.
3. Replace the battery.
4. Reassemble the transmitter. Make sure the halves
are snapped together tightly so water will not get in.
5. Press and hold the lock and unlock buttons
for seven seconds to synchronize the transmitter.
6. Check the transmitter operation.
2-8
Page 128 of 454

Universal Home Remote System
Operation
Do not use the Universal Home Remote with any
garage door opener that does not have the “stop and
reverse” feature. This includes any garage door opener
model manufactured before April 1, 1982. If you
have a newer garage door opener with rolling codes,
please be sure to follow Steps 6 through 8 to complete
the programming of your Universal Home Remote
Transmitter.
Read the instructions completely before attempting to
program the Universal Home Remote. Because of
the steps involved, it may be helpful to have another
person available to assist you in the programming steps.
Keep the original hand-held transmitter for use in
other vehicles as well as for future Universal Home
Remote programming. It is also recommended that upon
the sale of the vehicle, the programmed Universal
Home Remote buttons should be erased for security
purposes. See “Erasing Universal Home Remote
Buttons” later in this section or, for assistance, see
Customer Assistance Offices on page 7-4.Be sure that people and objects are clear of the garage
door or gate operator you are programming. When
programming a garage door, it is advised to park outside
of the garage.
It is recommended that a new battery be installed in
your hand-held transmitter for quicker and more
accurate transmission of the radio-frequency signal.
Programming Universal Home Remote
Follow these steps to program up to three channels:
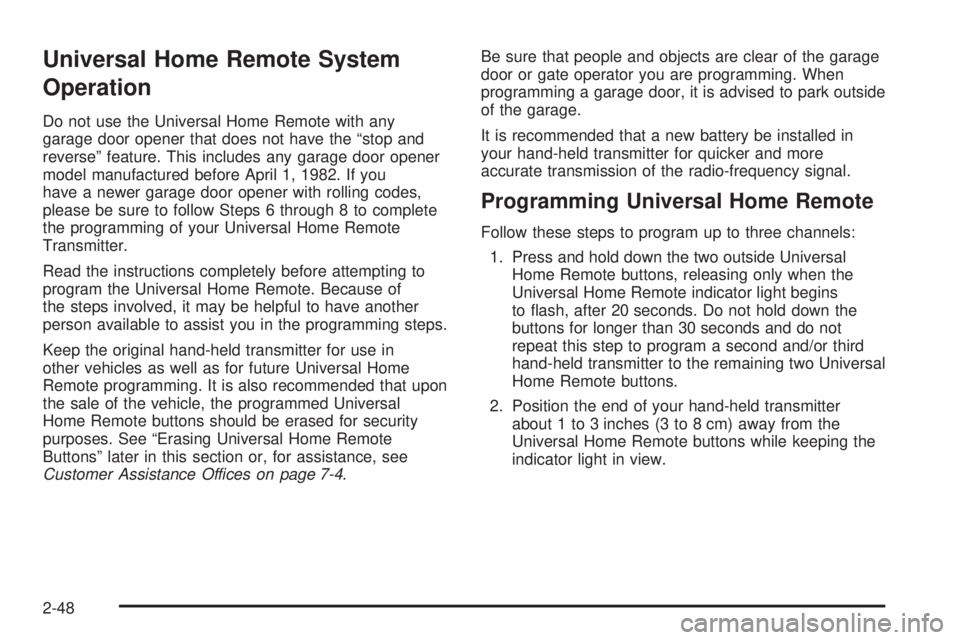
1. Press and hold down the two outside Universal
Home Remote buttons, releasing only when the
Universal Home Remote indicator light begins
to �ash, after 20 seconds. Do not hold down the
buttons for longer than 30 seconds and do not
repeat this step to program a second and/or third
hand-held transmitter to the remaining two Universal
Home Remote buttons.
2. Position the end of your hand-held transmitter
about 1 to 3 inches (3 to 8 cm) away from the
Universal Home Remote buttons while keeping the
indicator light in view.
2-48
Page 129 of 454

3. Simultaneously press and hold both the desired
Universal Home Remote button and the hand-held
transmitter button. Do not release the buttons
until Step 4 has been completed.
Some entry gates and garage door openers may
require you to substitute Step 3 with the procedure
noted in “Gate Operator and Canadian
Programming” later in this section.
4. The indicator light will �ash slowly at �rst and then
rapidly after Universal Home Remote successfully
receives the frequency signal from the hand-held
transmitter. Release both buttons.
5. Press and hold the newly-trained Universal Home
Remote button and observe the indicator light.
If the indicator light stays on constantly,
programming is complete and your device should
activate when the Universal Home Remote button is
pressed and released.
To program the remaining two Universal Home
Remote buttons, begin with Step 2 under
“Programming Universal Home Remote.” Do not
repeat Step 1 as this will erase all of the
programmed channels.
If the indicator light blinks rapidly for two seconds
and then turns to a constant light, continue with
Steps 6 through 8 following to complete the
programming of a rolling-code equipped device,
most commonly, a garage door opener.6. Locate in the garage, the garage door opener
receiver (motor-head unit). Locate the “Learn”
or “Smart” button. This can usually be found where
the hanging antenna wire is attached to the
motor-head unit.
7. Firmly press and release the “Learn” or “Smart”
button. The name and color of the button may
vary by manufacturer.
You will have 30 seconds to start Step 8.
8. Return to the vehicle. Firmly press and hold the
programmed Universal Home Remote button for
two seconds, then release. Repeat the
press/hold/release sequence a second time, and
depending on the brand of the garage door opener,
or other rolling code device, repeat this sequence
a third time to complete the programming.
The Universal Home Remote should now activate
your rolling-code equipped device.
To program the remaining two Universal Home Remote
buttons, begin with Step 2 of “Programming Universal
Home Remote.” You do not want to repeat Step 1,
as this will erase all previous programming from
the Universal Home Remote buttons.
2-49
Page 130 of 454

Gate Operator and Canadian
Programming
Canadian radio-frequency laws require transmitter
signals to time out or quit after several seconds of
transmission. This may not be long enough for Universal
Home Remote to pick up the signal during programming.
Similarly, some U.S. gate operators are manufactured
to time out in the same manner.
If you live in Canada, or you are having difficulty
programming a gate operator or garage door opener by
using the “Programming Universal Home Remote”
procedures, regardless of where you live, replace
Step 3 under “Programming Universal Home Remote”
with the following:
Continue to press and hold the Universal Home Remote
button while you press and release every two seconds
(cycle) the hand-held transmitter button until the
frequency signal has been successfully accepted by the
Universal Home Remote. The Universal Home Remote
indicator light will �ash slowly at �rst and then rapidly.
Proceed with Step 4 under “Programming Universal
Home Remote” to complete.
Using Universal Home Remote
Press and hold the appropriate Universal Home Remote
button for at least half of a second. The indicator light
will come on while the signal is being transmitted.
Erasing Universal Home Remote
Buttons
To erase programming from the three Universal Home
Remote buttons do the following:
1. Press and hold down the two outside buttons until
the indicator light begins to �ash, after 20 seconds.
Do not hold the two outside buttons for longer
than 30 seconds.
2. Release both buttons.
The Universal Home Remote is now in the train
(learning) mode and can be programmed at any time
beginning with Step 2 under “Programming Universal
Home Remote” shown earlier in this section.
Individual buttons cannot be erased, but they can be
reprogrammed. See “Reprogramming a Single Universal
Home Remote Button” following this section.
2-50
Page 132 of 454

Overhead Console (With Rail)
If your vehicle is equipped with an overhead console, it
may contain the following:
Reading lamps. SeeFront Reading Lamps on
page 3-20orRear Reading Lamps on page 3-20.
Switchbank. SeeOverhead Console Switchbank on
page 3-21.
OnStar®System buttons. SeeOnStar®System on
page 2-45.
Universal Home Remote buttons. SeeUniversal
Home Remote System on page 2-47.
See your dealer to purchase additional items for the rail
system.
Storage Bin
Your vehicle may have a storage bin located on the
overhead rail that you can use for storage.
1. Place the storage bin on to the rails in the desired
location.
2. Push �rmly upward on the bin while supporting it
with one hand.
3. Push in on the latch and then rotate it 90 degrees.
2-52
Page 137 of 454

6. Turn the hand knob clockwise until it is tight.
7. Pull up on the convenience center to make sure it
is locked into place.
The cover of the convenience center can be left in its
upright position while the vehicle is moving.
The convenience center and the third row seat both
have a maximum weight capacity of 400 lbs (181.6 kg).
Notice:Overloading your vehicle may cause
damage. Repairs would not be covered by your
warranty. Do not overload your vehicle.
Vehicle Personalization
In addition to the following features, your vehicle may
also have features that can be programmed through the
Driver Information Center (DIC). SeeDIC Vehicle
Personalization (Uplevel Only) on page 3-72for more
information.
Memory Seat
If your vehicle has this
feature, the controls for the
memory function are
located on the driver’s door.
These buttons are used to program and recall memory
settings for the driver’s seating position. The settings
for these features can be personalized for both driver 1
and driver 2. Driver 1 or driver 2 corresponds to the
memory buttons labelled 1 and 2 on the driver’s door.
2-57
Page 138 of 454

To store the memory settings, do the following:
1. Adjust the driver’s seat to your preference.
2. Press and hold the 1 or 2 button of the memory
control for three seconds. A double chime will
sound to let you know that the position has been
stored.
To repeat the procedure for a second driver, follow the
preceding steps, but press the other numbered
memory control button.
To recall the memory settings, press and release
button 1 or 2 while the vehicle is in PARK (P). A single
chime will sound and the memory position will be
recalled.
To stop recall movement of the memory seat feature at
any time, press one of the memory buttons or power
seat controls.
Easy Exit Seat
The control for the easy exit seat function is located on
the driver’s door below the memory buttons 1 and 2.
The easy exit seat button is used to program and recall
the desired driver’s seat position when exiting/entering
the vehicle. The seat position can be personalized
for both driver 1 and driver 2.To store the easy exit seat position for driver 1 or 2, do
the following:
1. Press and release the 1 or 2 button of the memory
control. The seat will move to the stored memory
position.
2. Adjust the seat to the desired exit position.
3. Press and hold the easy exit seat button for three
seconds. A double chime will sound to let you
know that the position has been stored for
the identi�ed driver 1 or 2.
To repeat the procedure for a second driver, follow the
preceding steps, but press the other numbered
memory control button.
To recall the easy exit seat position, press the easy exit
seat button on the memory control while the vehicle
is in PARK (P). A single chime will sound and the seat
will move to the stored exit position.
If an easy exit seat position has not been stored, the
default position is all the way rearward.
2-58