brake light BUICK TERRAZA 2007 Owner's Manual
[x] Cancel search | Manufacturer: BUICK, Model Year: 2007, Model line: TERRAZA, Model: BUICK TERRAZA 2007Pages: 562, PDF Size: 2.96 MB
Page 137 of 562
Parking Brake
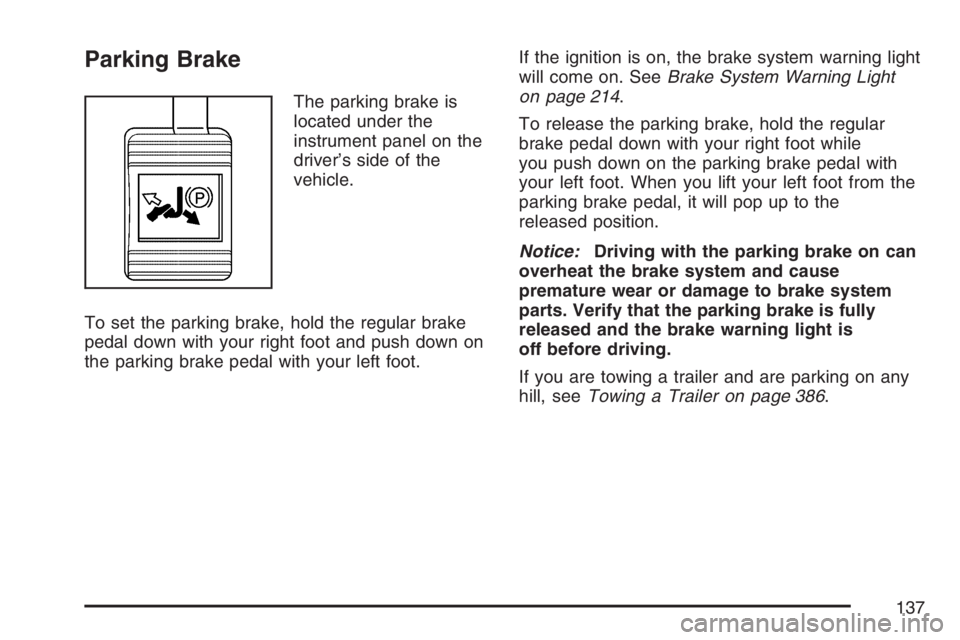
The parking brake is
located under the
instrument panel on the
driver’s side of the
vehicle.
To set the parking brake, hold the regular brake
pedal down with your right foot and push down on
the parking brake pedal with your left foot.If the ignition is on, the brake system warning light
will come on. SeeBrake System Warning Light
on page 214.
To release the parking brake, hold the regular
brake pedal down with your right foot while
you push down on the parking brake pedal with
your left foot. When you lift your left foot from the
parking brake pedal, it will pop up to the
released position.
Notice:Driving with the parking brake on can
overheat the brake system and cause
premature wear or damage to brake system
parts. Verify that the parking brake is fully
released and the brake warning light is
off before driving.
If you are towing a trailer and are parking on any
hill, seeTowing a Trailer on page 386.
137
Page 168 of 562
Tachometer............................................... 209
Safety Belt Reminder Light........................ 209
Passenger Safety Belt Reminder Light....... 210
Airbag Readiness Light............................. 210
Passenger Airbag Status Indicator............. 211
Charging System Light.............................. 213
Brake System Warning Light..................... 214
Anti-Lock Brake System Warning Light...... 215
Traction Control System (TCS)
Warning Light........................................ 216
Engine Coolant Temperature Gage............ 217
Malfunction Indicator Lamp........................ 217
Oil Pressure Light..................................... 220
Security Light............................................ 221
Cruise Control Light.................................. 221
Highbeam On Light................................... 221
Fuel Gage................................................. 222
Low Fuel Warning Light............................ 222
Driver Information Center (DIC).................. 223
DIC Operation and Displays...................... 224
DIC Compass (Uplevel Only)..................... 228
DIC Warnings and Messages.................... 230
DIC Vehicle Personalization
(Uplevel Only)........................................ 249Audio System(s)......................................... 258
Setting the Time........................................ 259
Radio with CD........................................... 260
Using an MP3........................................... 274
XM Radio Messages................................. 280
Navigation/Radio System........................... 282
Rear Seat Entertainment System
(Option A, Uplevel)................................ 282
Rear Seat Entertainment System
(Option B, Uplevel)................................ 298
Rear Seat Audio (RSA)
(Option A, Uplevel)................................ 314
Rear Seat Audio (RSA)
(Option B, Uplevel)................................ 316
Mobile Digital Media System..................... 319
Theft-Deterrent Feature............................. 340
Audio Steering Wheel Controls.................. 341
Radio Reception........................................ 342
Care of Your CDs and DVDs.................... 343
Care of the CD and DVD Player............... 343
Fixed Mast Antenna.................................. 344
XM™ Satellite Radio Antenna System....... 344
Chime Level Adjustment............................ 344
Section 3 Instrument Panel
168
Page 171 of 562
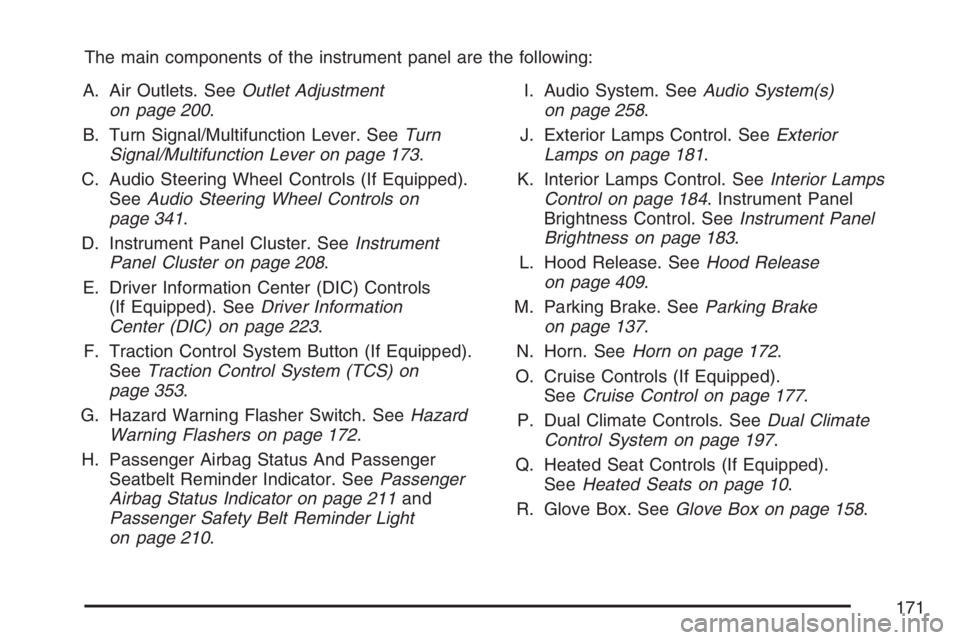
The main components of the instrument panel are the following:
A. Air Outlets. SeeOutlet Adjustment
on page 200.
B. Turn Signal/Multifunction Lever. SeeTurn
Signal/Multifunction Lever on page 173.
C. Audio Steering Wheel Controls (If Equipped).
SeeAudio Steering Wheel Controls on
page 341.
D. Instrument Panel Cluster. SeeInstrument
Panel Cluster on page 208.
E. Driver Information Center (DIC) Controls
(If Equipped). SeeDriver Information
Center (DIC) on page 223.
F. Traction Control System Button (If Equipped).
SeeTraction Control System (TCS) on
page 353.
G. Hazard Warning Flasher Switch. SeeHazard
Warning Flashers on page 172.
H. Passenger Airbag Status And Passenger
Seatbelt Reminder Indicator. SeePassenger
Airbag Status Indicator on page 211and
Passenger Safety Belt Reminder Light
on page 210.I. Audio System. SeeAudio System(s)
on page 258.
J. Exterior Lamps Control. SeeExterior
Lamps on page 181.
K. Interior Lamps Control. SeeInterior Lamps
Control on page 184. Instrument Panel
Brightness Control. SeeInstrument Panel
Brightness on page 183.
L. Hood Release. SeeHood Release
on page 409.
M. Parking Brake. SeeParking Brake
on page 137.
N. Horn. SeeHorn on page 172.
O. Cruise Controls (If Equipped).
SeeCruise Control on page 177.
P. Dual Climate Controls. SeeDual Climate
Control System on page 197.
Q. Heated Seat Controls (If Equipped).
SeeHeated Seats on page 10.
R. Glove Box. SeeGlove Box on page 158.
171
Page 180 of 562
Reducing Speed While Using
Cruise Control
There are two ways to reduce the vehicle’s speed
while using cruise control:
Push the cruise control lever downward toward
the minus (set/coast/decelerate) position until
a lower speed is reached, then release it.
To slow down in very small amounts, push
the cruise control lever downward toward the
minus (set/coast/decelerate) position brie�y.
Each time this is done, the vehicle will slow
down approximately one mph (1.6 km/h).
Passing Another Vehicle While
Using Cruise Control
Use the accelerator pedal to increase the vehicle’s
speed. When you take your foot off the pedal,
the vehicle will slow down to the cruise control
speed set earlier.
Using Cruise Control on Hills
How well the cruise control will work on hills
depends upon the vehicle’s speed, its load, and
the steepness of the hills. When going up steep
hills, the accelerator pedal might have to be
used in order to maintain the vehicle’s speed.When going downhill, the brakes might have to be
applied, or the transaxle might have to be shifted
to a lower gear to keep the vehicle’s speed down.
Doing either of these things will take the vehicle out
of cruise. It may be better not to use the cruise
control if the brakes constantly have to be applied,
or the vehicle continuously needs to be shifted to
a lower gear.
Cancelling Cruise Control
To cancel a cruise control session, pull the cruise
control lever forward, or step lightly on the
brake pedal.
Doing either of these things will only end the
current cruise control session, but the set speed
will be retained in memory.
Push the button at the end of the cruise control
lever to turn the system off.
Erasing Speed Memory
When the cruise control or the ignition is turned
off, the cruise control set speed memory is erased.
180
Page 190 of 562

How the System Works
Unless disabled, the URPA will turn on
automatically when the shift lever is moved into
REVERSE (R). When the system turns on, the
three lights on the display will illuminate for one and
a half seconds to let you know that the system is
working. If your vehicle is moving in REVERSE (R)
at a speed greater than 3 mph (5 km/h), the red
light will �ash to remind you that the system does
not work at speed greater than 3 mph (5 km/h).
If an object is detected at a REVERSE (R) speed
of less than 3 mph (5 km/h), one of the following
will occur:
Description English Metric
amber light 5 ft 1.5 m
amber/amber lights 40 in 1.0 m
amber/amber/red lights &
continuous chime20 in 0.5 m
amber/amber/
red lights �ashing &
continuous chime1 ft 0.3 m
A chime will sound the �rst time an object
is detected between 20 inches (0.5 m) and
5 feet (1.5 m) away.URPA cannot detect objects that are above liftgate
level. In order for the rear sensors to recognize
an object, it must be within detection range behind
the vehicle.
When the System Does Not Seem to
Work Properly
The light may �ash red when the vehicle is in
REVERSE (R) if the ultrasonic sensors are
not kept clean. So be sure to keep your rear
bumper free of mud, dirt, snow, ice and slush.
Other conditions that may affect system
performance include things like the vibrations from
a jackhammer or the compression of air brakes
on a very large truck. If after cleaning the
rear bumper and then driving forward at least
15 mph (25 km/h), the display continues to �ash
red, see your dealer.
If a trailer was attached to your vehicle, or a
bicycle or an object was on the back of, or hanging
out of your liftgate during your last drive cycle,
the light may also �ash red. The light will continue
to �ash whenever in REVERSE (R) until your
vehicle is driven forward at least 15 mph (25 km/h)
without any obstructions behind the vehicle.
190
Page 214 of 562
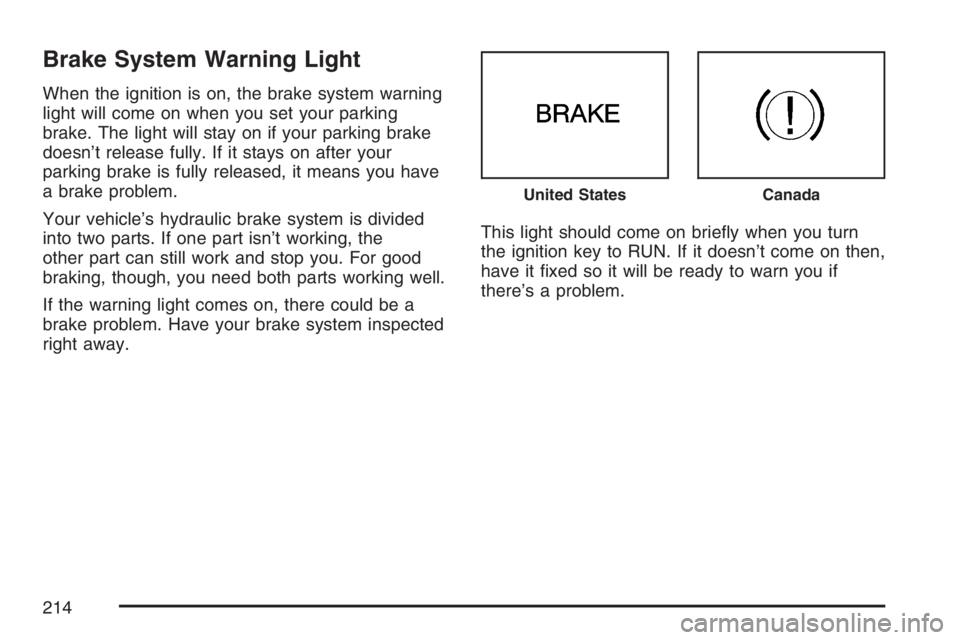
Brake System Warning Light
When the ignition is on, the brake system warning
light will come on when you set your parking
brake. The light will stay on if your parking brake
doesn’t release fully. If it stays on after your
parking brake is fully released, it means you have
a brake problem.
Your vehicle’s hydraulic brake system is divided
into two parts. If one part isn’t working, the
other part can still work and stop you. For good
braking, though, you need both parts working well.
If the warning light comes on, there could be a
brake problem. Have your brake system inspected
right away.This light should come on brie�y when you turn
the ignition key to RUN. If it doesn’t come on then,
have it �xed so it will be ready to warn you if
there’s a problem.
United StatesCanada
214
Page 215 of 562
If the light comes on while you are driving, pull off
the road and stop carefully. You may notice that the
pedal is harder to push. Or, the pedal may go closer
to the �oor. It may take longer to stop. If the light is
still on, have the vehicle towed for service. See
Anti-Lock Brake System Warning Light on page 215
andTowing Your Vehicle on page 384.
{CAUTION:
Your brake system may not be working
properly if the brake system warning light
is on. Driving with the brake system
warning light on can lead to an accident.
If the light is still on after you have pulled
off the road and stopped carefully, have
the vehicle towed for service.
Anti-Lock Brake System Warning
Light
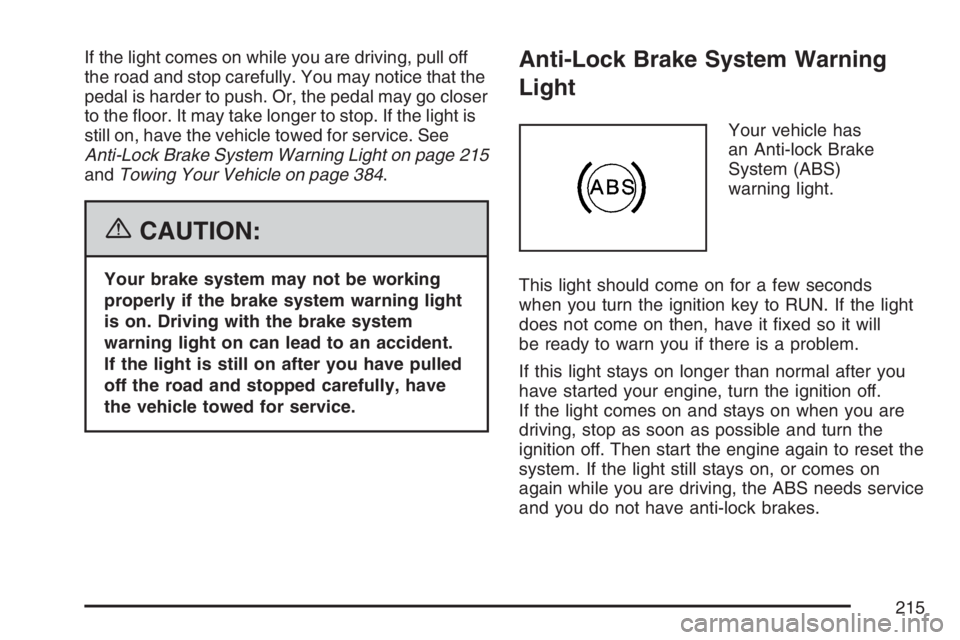
Your vehicle has
an Anti-lock Brake
System (ABS)
warning light.
This light should come on for a few seconds
when you turn the ignition key to RUN. If the light
does not come on then, have it �xed so it will
be ready to warn you if there is a problem.
If this light stays on longer than normal after you
have started your engine, turn the ignition off.
If the light comes on and stays on when you are
driving, stop as soon as possible and turn the
ignition off. Then start the engine again to reset the
system. If the light still stays on, or comes on
again while you are driving, the ABS needs service
and you do not have anti-lock brakes.
215
Page 216 of 562
Traction Control System (TCS)
Warning Light
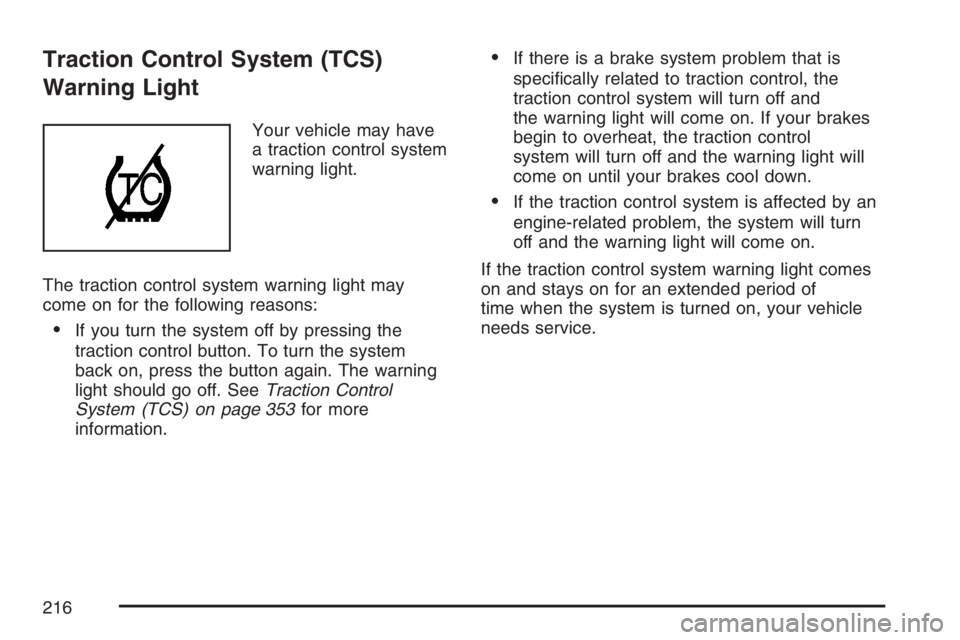
Your vehicle may have
a traction control system
warning light.
The traction control system warning light may
come on for the following reasons:
If you turn the system off by pressing the
traction control button. To turn the system
back on, press the button again. The warning
light should go off. SeeTraction Control
System (TCS) on page 353for more
information.
If there is a brake system problem that is
speci�cally related to traction control, the
traction control system will turn off and
the warning light will come on. If your brakes
begin to overheat, the traction control
system will turn off and the warning light will
come on until your brakes cool down.
If the traction control system is affected by an
engine-related problem, the system will turn
off and the warning light will come on.
If the traction control system warning light comes
on and stays on for an extended period of
time when the system is turned on, your vehicle
needs service.
216
Page 237 of 562
This message continues to display for two seconds
if it has not been acknowledged when the engine
is turned off. It also re-displays for two seconds if
the message has been acknowledged, but the
condition still exists when the engine is turned off.
If the condition still exists, the message re-appears
when the engine is turned on.
LIFT GATE AJAR
This message displays when the liftgate is not
closed completely. Make sure that the liftgate is
closed completely. SeeLiftgate on page 119.
This message displays while the ignition is in RUN.
A chime sounds when the ignition is shifted out
of PARK (P). Press any of the DIC buttons
to acknowledge this message and to clear it from
the screen.
This message continues to display for two seconds
if it has not been acknowledged when the engine
is turned off. It also re-displays for two seconds if
the message has been acknowledged, but the
condition still exists when the engine is turned off.
If the condition still exists, the message re-appears
when the engine is turned on.
LOW BRAKE FLUID
This message displays when the brake �uid
level is low. Have the brake system serviced by
your dealer as soon as possible. SeeBrakes
on page 434for proper �uid level.
The brake system warning light also appears on
the instrument panel cluster when this message
appears on the DIC. SeeBrake System Warning
Light on page 214.
This message displays and a chime sounds only
while the ignition is in RUN. Press any of the
DIC buttons to acknowledge this message and to
clear it from the screen.
This message continues to display for two seconds
if it has not been acknowledged when the engine
is turned off. It also re-displays for two seconds if
the message has been acknowledged, but the
condition still exists when the engine is turned off.
If the condition still exists, the message re-appears
when the engine is turned on.
237
Page 238 of 562
LOW FUEL
This message displays when your vehicle is low
on fuel. Re�ll the fuel tank as soon as possible.
SeeFuel Gage on page 222andFilling the Tank
on page 405for more information.
The message displays and a chime sounds
while the ignition is in RUN. Press any of the
DIC buttons to acknowledge this message and
to clear it from the screen.
If the condition still exists, the message re-appears
when the engine is turned on.
LOW OIL PRESSURE
Notice:If the LOW OIL PRESSURE warning
message appears on the DIC display, stop the
vehicle immediately. Do not drive the vehicle
until the cause of the low oil pressure is
corrected. Severe engine damage can result
from driving a vehicle with low oil pressure. See
Engine Oil on page 411for more information.
This message displays when the vehicle’s engine
oil pressure is low. The oil pressure light also
appears on the instrument panel cluster. See
Oil Pressure Light on page 220.Stop the vehicle immediately, as engine damage
can result from driving a vehicle with low oil
pressure. Have the vehicle serviced by your dealer
as soon as possible when this message is
displayed.
This message displays only when the ignition is in
RUN. A chime sounds continuously when this
message is displayed.
This message cannot be acknowledged and
cleared from the screen. This message re-displays
for a few seconds if the condition still exists
when the engine is turned off.
If the condition still exists, the message re-appears
when the engine is turned on.
PARKING BRAKE ON
This message displays to alert the driver when
the vehicle’s parking brake is on, the ignition is
in RUN, and the vehicle speed is greater
than 5 mph (8 km/h). Release the parking brake
before driving. SeeParking Brake on page 137
for more information.
238