buttons BUICK VERANO 2014 User Guide
[x] Cancel search | Manufacturer: BUICK, Model Year: 2014, Model line: VERANO, Model: BUICK VERANO 2014Pages: 392, PDF Size: 4.27 MB
Page 142 of 392
Black plate (36,1)Buick Verano Owner Manual (GMNA-Localizing-U.S./Canada/Mexico-
6042574) - 2014 - crc - 10/18/13
5-36 Instruments and Controls
Remote Door Unlock
This allows selection of which doors
will unlock when pressing
Kon the
RKE transmitter.
Press the TUNE/MENU knob when
Remote Door Unlock is highlighted.
Turn the knob to select All Doors or
Driver Door Only. When set to
Driver Door Only, the driver door will
unlock the first time
Kis pressed
and all doors will unlock when
Kis
pressed a second time. When set to
All Doors, all of the doors will unlock
at the first press of
K. Press the
TUNE/MENU knob to confirm and
go back to the last menu. Remote Unlock Feedback
If equipped, this allows selection of
what type of feedback is given when
unlocking the vehicle with the RKE
transmitter.
Press the TUNE/MENU knob when
Remote Unlock Feedback is
highlighted. Turn the knob to select
Flash Lights or Off. Press the
TUNE/MENU knob to confirm and
go back to the last menu.
Return to Factory Settings?
Select Return to Factory Settings?
to return all vehicle personalization
to the default settings. Turn the
knob to select Yes or No. Press the
TUNE/MENU knob to confirm and
go back to the last menu.
Universal Remote
System
See
Radio Frequency Statement on
page 13-15.
Universal Remote System
Programming
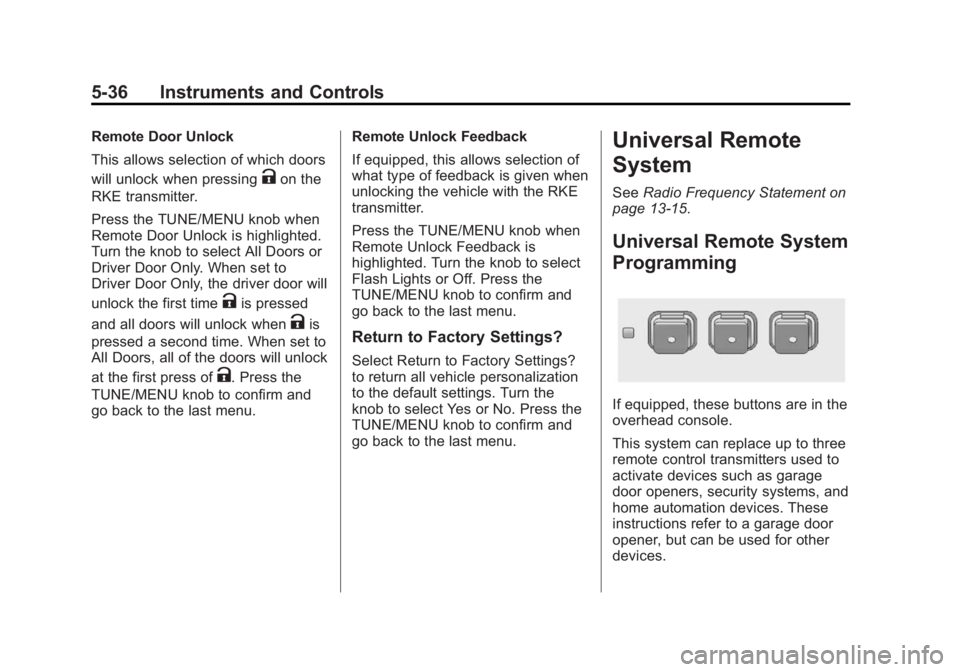
If equipped, these buttons are in the
overhead console.
This system can replace up to three
remote control transmitters used to
activate devices such as garage
door openers, security systems, and
home automation devices. These
instructions refer to a garage door
opener, but can be used for other
devices.
Page 143 of 392
Black plate (37,1)Buick Verano Owner Manual (GMNA-Localizing-U.S./Canada/Mexico-
6042574) - 2014 - crc - 10/18/13
Instruments and Controls 5-37
Do not use the Universal Remote
system with any garage door opener
that does not have the stop and
reverse feature. This includes any
garage door opener model
manufactured before April 1, 1982.
Read these instructions completely
before programming the Universal
Remote system. It may help to have
another person assist with the
programming process.
Keep the original hand-held
transmitter for use in other vehicles
as well as for future programming.
Erase the programming when
vehicle ownership is terminated.
See“Erasing Universal Remote
System Buttons” later in this
section.
To program a garage door opener,
park outside directly in line with and
facing the garage door opener
receiver. Clear all people and
objects near the garage door. Make sure the hand-held transmitter
has a new battery for quick and
accurate transmission of the
radio-frequency signal.
Programming the Universal
Remote System
For questions or help programming
the Universal Remote system, call
1-800-355-3515 or see
www.homelink.com.
Programming involves
time-sensitive actions, and may time
out causing the procedure to be
repeated.
To program up to three devices:
1. Hold the end of the hand-held
transmitter about 3 to 8 cm (1 to
3 in) away from the Universal
Remote system buttons with the
indicator light in view. The
hand-held transmitter was
supplied by the manufacturer of
the garage door opener receiver. 2. At the same time, press and
hold both the hand-held
transmitter button and one of the
three Universal Remote system
buttons to be used to operate
the garage door. Do not release
either button until the indicator
light changes from a slow to a
rapid flash. Then release both
buttons.
Some garage door openers may
require substitution of Step 2
with the procedure under “Radio
Signals for Canada and Some
Gate Operators” later in this
section.
3. Press and hold the newly programmed Universal Remote
system button for five seconds
while watching the indicator light
and garage door activation.
.If the indicator light stays on
continuously or the garage
door moves when the
button is pressed, then
Page 144 of 392
Black plate (38,1)Buick Verano Owner Manual (GMNA-Localizing-U.S./Canada/Mexico-
6042574) - 2014 - crc - 10/18/13
5-38 Instruments and Controls
programming is complete.
There is no need to
complete Steps 4–6.
.If the indicator light does
not come on or the garage
door does not move, a
second button press may
be required. For a second
time, press and hold the
newly programmed button
for five seconds. If the light
stays on or the garage door
moves, programming is
complete.
.If the indicator light blinks
rapidly for two seconds,
then changes to a solid light
and the garage door does
not move, continue with
programming Steps 4–6.
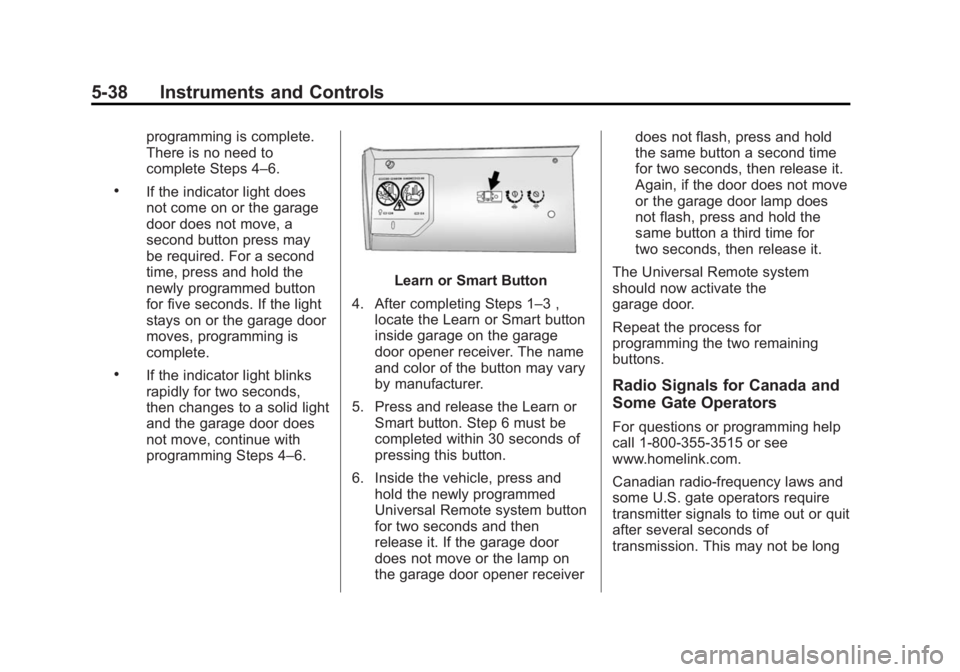
Learn or Smart Button
4. After completing Steps 1–3 , locate the Learn or Smart button
inside garage on the garage
door opener receiver. The name
and color of the button may vary
by manufacturer.
5. Press and release the Learn or Smart button. Step 6 must be
completed within 30 seconds of
pressing this button.
6. Inside the vehicle, press and hold the newly programmed
Universal Remote system button
for two seconds and then
release it. If the garage door
does not move or the lamp on
the garage door opener receiver does not flash, press and hold
the same button a second time
for two seconds, then release it.
Again, if the door does not move
or the garage door lamp does
not flash, press and hold the
same button a third time for
two seconds, then release it.
The Universal Remote system
should now activate the
garage door.
Repeat the process for
programming the two remaining
buttons.
Radio Signals for Canada and
Some Gate Operators
For questions or programming help
call 1-800-355-3515 or see
www.homelink.com.
Canadian radio-frequency laws and
some U.S. gate operators require
transmitter signals to time out or quit
after several seconds of
transmission. This may not be long
Page 145 of 392
Black plate (39,1)Buick Verano Owner Manual (GMNA-Localizing-U.S./Canada/Mexico-
6042574) - 2014 - crc - 10/18/13
Instruments and Controls 5-39
enough for the Universal Remote
system to pick up the signal during
programming.
If the programming did not work,
replace Step 2 under“Programming
the Universal Remote System” with
the following:
Press and hold the Universal
Remote system button while
pressing and releasing the
hand-held transmitter button every
two seconds until the signal has
been successfully accepted by the
Universal Remote system. The
Universal Remote system indicator
light will flash slowly at first and then
rapidly. Proceed with Step 3 under
“Programming the Universal Remote
System” to complete.Universal Remote System
Operation
Using the Universal Remote
System
Press and hold the appropriate
Universal Remote system button for
at least one-half second. The
indicator light will come on while the
signal is being transmitted.
Erasing Universal Remote
System Buttons
Erase all programmed buttons when
vehicle ownership is terminated.
To erase:
1. Press and hold the two outside
buttons until the indicator light
begins to flash. This should take
about 10 seconds.
2. Release both buttons.
Reprogramming a Single
Universal Remote System
Button
To reprogram any of the system
buttons:
1. Press and hold any one of the buttons. Do not release the
button.
2. The indicator light will begin to flash after 20 seconds. Without
releasing the button, proceed
with Step 1 under “Programming
the Universal Remote System.”
Page 156 of 392
Black plate (2,1)Buick Verano Owner Manual (GMNA-Localizing-U.S./Canada/Mexico-
6042574) - 2014 - crc - 10/18/13
7-2 Infotainment System
.Set up the tone, speaker
adjustments, and preset radio
stations.
See Defensive Driving on page 9-3.
The vehicle has Retained
Accessory Power (RAP). With RAP,
the audio system can be played
even after the ignition is turned off.
See Retained Accessory Power
(RAP) on page 9-21.
Navigation/Radio System
For vehicles with a navigation radio
system, see the separate navigation
manual.
Theft-Deterrent Feature
The theft-deterrent feature works by
learning a portion of the Vehicle
Identification Number (VIN) to the
infotainment system. The
infotainment system does not
operate if it is stolen or moved to a
different vehicle.
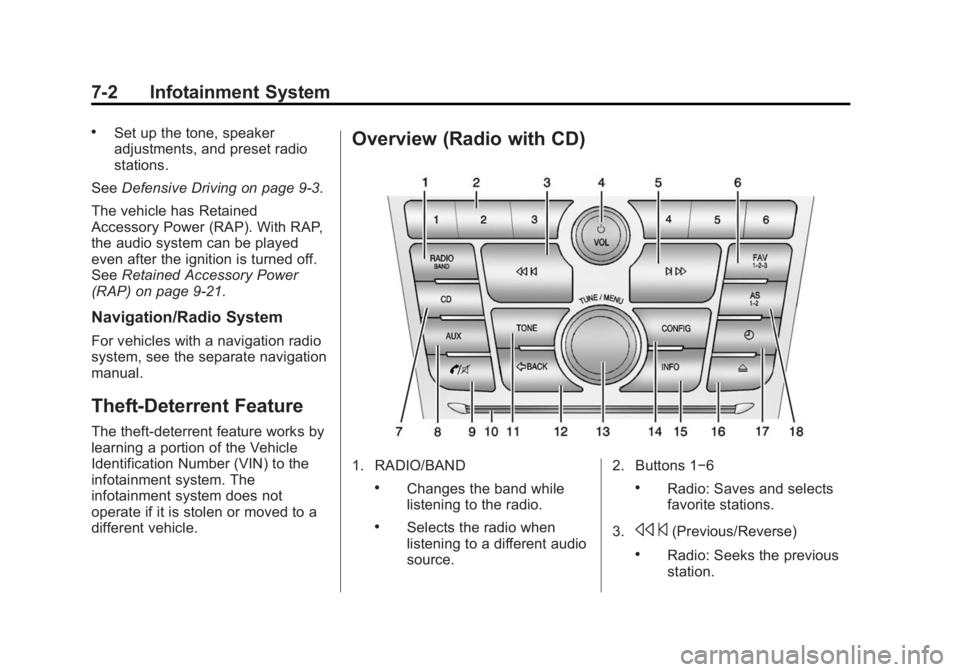
Overview (Radio with CD)
1. RADIO/BAND
.Changes the band while
listening to the radio.
.Selects the radio when
listening to a different audio
source. 2. Buttons 1−6
.Radio: Saves and selects
favorite stations.
3.
s ©(Previous/Reverse)
.Radio: Seeks the previous
station.
Page 158 of 392
Black plate (4,1)Buick Verano Owner Manual (GMNA-Localizing-U.S./Canada/Mexico-
6042574) - 2014 - crc - 10/18/13
7-4 Infotainment System
Operation
Controls
The infotainment system is operated
by using the pushbuttons,
multifunction knobs, menus shown
on the display, and steering wheel
controls, if equipped.
Turning the System On or Off
O/VOL (Power/Volume):Press to
turn the system on and off.
Automatic Switch-Off
If the infotainment system has been
turned on after the ignition is turned
off, the system will turn off
automatically after 10 minutes.
Volume Control
O/VOL (Power/Volume): Turn to
adjust the volume.
V/8(Phone/Mute): Press to
mute the infotainment system. Press
V/8again, or turn theO/VOL
knob to cancel mute.
Menu System (Radio with CD)
For radios with CD and touch
screen, see “Using the System” in
the infotainment manual.
Controls
The TUNE/MENU knob and
/
BACK are used to navigate the
menu system.
TUNE/MENU:
Press to:
.Enter the menu system.
.Select or activate the highlighted
menu option.
.Confirm a set value.
.Turn a system setting on or off.
Turn to:
.Highlight a menu option.
.Select a value.
/BACK:
Press to:
.Exit a menu.
.Return from a submenu screen
to the previous menu screen.
.Delete the last character in a
sequence.
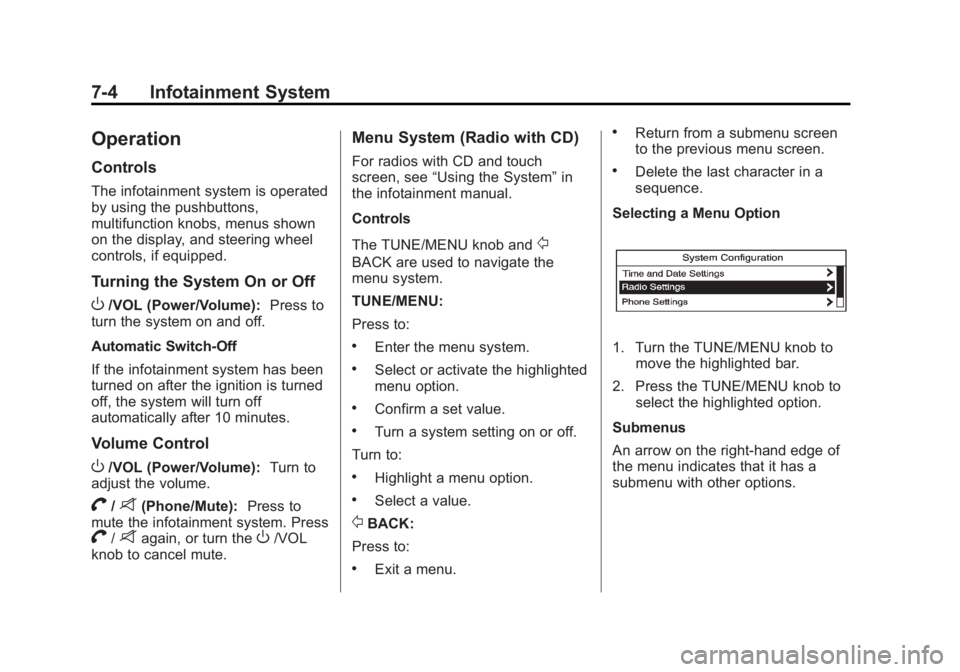
Selecting a Menu Option
1. Turn the TUNE/MENU knob to move the highlighted bar.
2. Press the TUNE/MENU knob to select the highlighted option.
Submenus
An arrow on the right-hand edge of
the menu indicates that it has a
submenu with other options.
Page 161 of 392
Black plate (7,1)Buick Verano Owner Manual (GMNA-Localizing-U.S./Canada/Mexico-
6042574) - 2014 - crc - 10/18/13
Infotainment System 7-7
Radio
AM-FM Radio
For radios with CD and touch
screen, see“AM-FM Radio” in the
infotainment manual.
Control Buttons
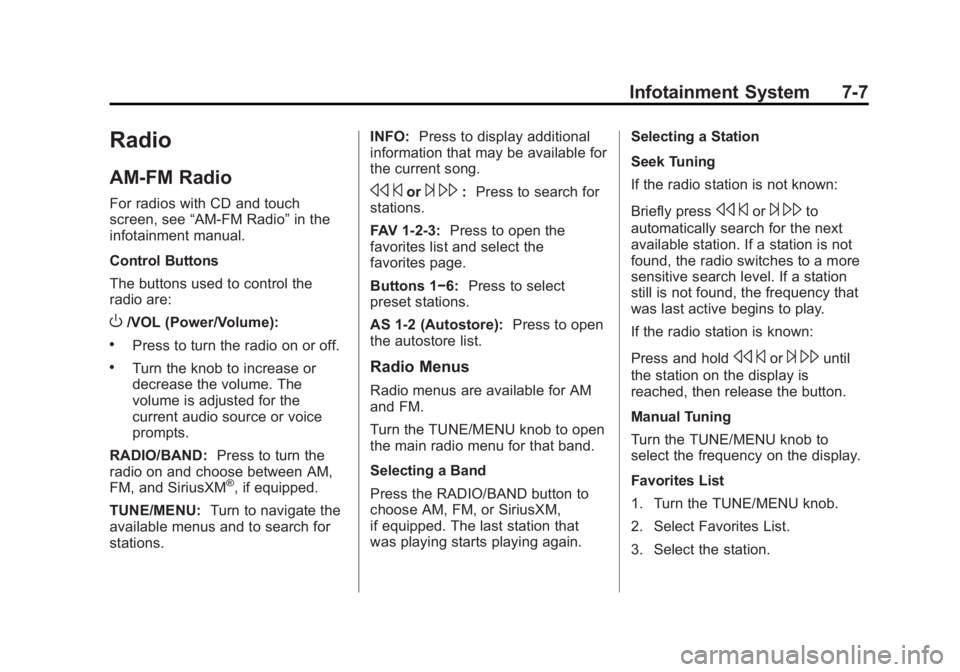
The buttons used to control the
radio are:
O/VOL (Power/Volume):
.Press to turn the radio on or off.
.Turn the knob to increase or
decrease the volume. The
volume is adjusted for the
current audio source or voice
prompts.
RADIO/BAND: Press to turn the
radio on and choose between AM,
FM, and SiriusXM
®, if equipped.
TUNE/MENU: Turn to navigate the
available menus and to search for
stations. INFO:
Press to display additional
information that may be available for
the current song.
s ©or¨\: Press to search for
stations.
FAV 1-2-3: Press to open the
favorites list and select the
favorites page.
Buttons 1−6: Press to select
preset stations.
AS 1-2 (Autostore): Press to open
the autostore list.
Radio Menus
Radio menus are available for AM
and FM.
Turn the TUNE/MENU knob to open
the main radio menu for that band.
Selecting a Band
Press the RADIO/BAND button to
choose AM, FM, or SiriusXM,
if equipped. The last station that
was playing starts playing again. Selecting a Station
Seek Tuning
If the radio station is not known:
Briefly press
s
©or¨\to
automatically search for the next
available station. If a station is not
found, the radio switches to a more
sensitive search level. If a station
still is not found, the frequency that
was last active begins to play.
If the radio station is known:
Press and hold
s ©or¨\until
the station on the display is
reached, then release the button.
Manual Tuning
Turn the TUNE/MENU knob to
select the frequency on the display.
Favorites List
1. Turn the TUNE/MENU knob.
2. Select Favorites List.
3. Select the station.
Page 163 of 392
Black plate (9,1)Buick Verano Owner Manual (GMNA-Localizing-U.S./Canada/Mexico-
6042574) - 2014 - crc - 10/18/13
Infotainment System 7-9
XM Categories:If equipped, turn
the TUNE/MENU knob to highlight
the category. Press the TUNE/
MENU knob to select. Turn the
TUNE/MENU knob to Show all XM
Categories to display all categories.
Finding a Station
Select a band such as AM, FM,
or SIriusXM (if equipped).
Turn the TUNE/MENU knob to find
a radio station. To select a preset
station, press the corresponding
preset button.
Seeking a Station
Press
s ©or¨\to search for a
station.
Storing a Station as a Favorite
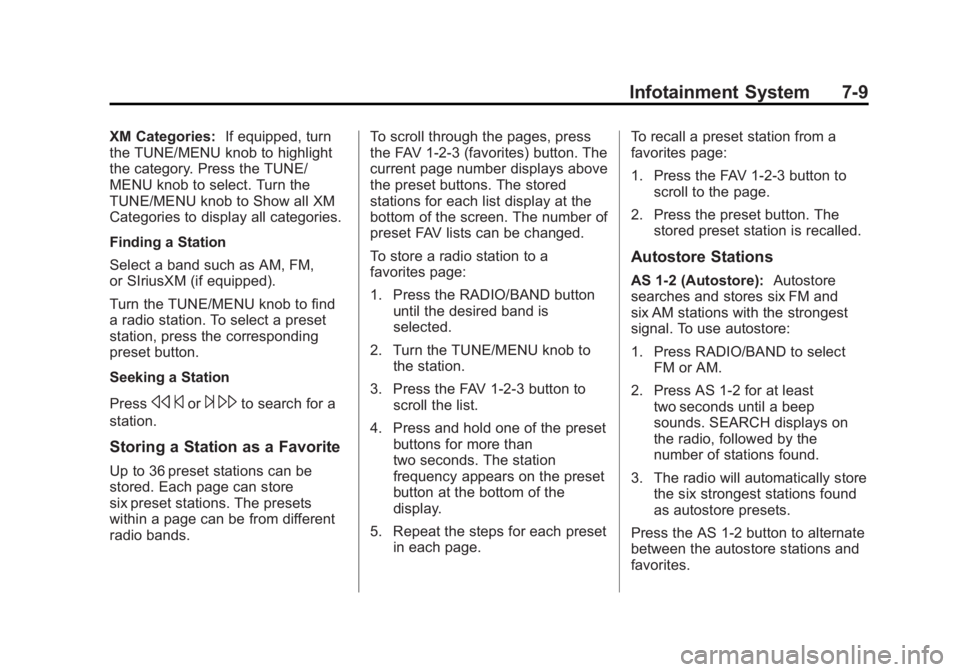
Up to 36 preset stations can be
stored. Each page can store
six preset stations. The presets
within a page can be from different
radio bands. To scroll through the pages, press
the FAV 1-2-3 (favorites) button. The
current page number displays above
the preset buttons. The stored
stations for each list display at the
bottom of the screen. The number of
preset FAV lists can be changed.
To store a radio station to a
favorites page:
1. Press the RADIO/BAND button
until the desired band is
selected.
2. Turn the TUNE/MENU knob to the station.
3. Press the FAV 1-2-3 button to scroll the list.
4. Press and hold one of the preset buttons for more than
two seconds. The station
frequency appears on the preset
button at the bottom of the
display.
5. Repeat the steps for each preset in each page. To recall a preset station from a
favorites page:
1. Press the FAV 1-2-3 button to
scroll to the page.
2. Press the preset button. The stored preset station is recalled.
Autostore Stations
AS 1-2 (Autostore): Autostore
searches and stores six FM and
six AM stations with the strongest
signal. To use autostore:
1. Press RADIO/BAND to select FM or AM.
2. Press AS 1-2 for at least two seconds until a beep
sounds. SEARCH displays on
the radio, followed by the
number of stations found.
3. The radio will automatically store the six strongest stations found
as autostore presets.
Press the AS 1-2 button to alternate
between the autostore stations and
favorites.
Page 164 of 392
Black plate (10,1)Buick Verano Owner Manual (GMNA-Localizing-U.S./Canada/Mexico-
6042574) - 2014 - crc - 10/18/13
7-10 Infotainment System
AS displays on the radio when using
autostore presets.
Autostore does not delete
previously stored favorite stations.
Autostore does not function with
SIriusXM radio stations.
Radio Data System (RDS)
The audio system has RDS. RDS
features are available for use only
on FM stations that broadcast RDS
information. With RDS, the
radio can:
.Seek to stations broadcasting
the selected type of
programming.
.Receive announcements
concerning local and national
emergencies.
.Display messages from radio
stations.
This system relies on receiving
specific information from these
stations and only works when the
information is available. In rare
cases, a radio station could broadcast incorrect information that
causes the radio features to work
improperly. If this happens, contact
the radio station.
The RDS system is always on.
When information is broadcast from
the current FM station, the station
name or call letters display on the
audio screen. RDS can provide a
program type (PTY) for current
programming and the name of the
program being broadcast.
Satellite Radio
For radios with CD and touch
screen, see
“Satellite Radio” in the
infotainment manual.
Vehicles with an SiriusXM
®Satellite
Radio tuner and a valid SiriusXM
Satellite Radio subscription can
receive SiriusXM programming.
SiriusXM Satellite Radio
Service
SiriusXM is a satellite radio service
based in the 48 contiguous United
States and 10 Canadian provinces. SiriusXM Satellite Radio has a wide
variety of programming and
commercial-free music, coast to
coast, and in digital-quality sound.
A service fee is required to receive
the SiriusXM service. If SiriusXM
service needs to be reactivated, the
radio will display "No Subscription
Please Renew" on channel XM1.
For more information, contact
SiriusXM at www.siriusxm.com or
1-866-635-2349 (U.S.), and
www.xmradio.ca or 1-877-209-0079
(Canada).
Control Buttons
The buttons used to control the
SiriusXM radio are:
RADIO/BAND:
Press to turn the
radio on and choose between AM,
FM, and XM.
s ©or¨\: Press to go to the
previous or next channel.
FAV 1-2-3: Press to open the
favorites list.
Buttons 1−6: Press to select a
favorite.
Page 165 of 392

Black plate (11,1)Buick Verano Owner Manual (GMNA-Localizing-U.S./Canada/Mexico-
6042574) - 2014 - crc - 10/18/13
Infotainment System 7-11
TUNE/MENU:Turn to select a
channel.
INFO: Press to display additional
information that may be available
about the current song.
w/j(Play/Pause): Press to
pause time shifted content,
if equipped.
Selecting the SiriusXM Band
Press the RADIO/BAND button to
choose between AM, FM, and XM.
The last channel played in that band
begins to play when that band is
selected.
SiriusXM Categories
SiriusXM channels are organized in
categories.
Removing or Adding Categories
Channels in a category that have
been removed can still be accessed
by using the
s ©or¨\buttons,
or the TUNE/MENU knob. To add or remove categories:
1. Press the CONFIG button.
2. Select Radio Settings.
3. Select XM Categories.
4. Turn the TUNE/MENU knob to
highlight the category.
5. Press the TUNE/MENU knob to remove or add the category.
Selecting an SiriusXM Channel
SiriusXM channels can be selected
by using
s©or¨\, the TUNE/
MENU knob, or the TUNE/MENU
system.
Selecting a Channel Using
s ©or
¨\
.Press and releases ©or¨\
to go to the previous or next
channel.
.Press and holds ©or¨\to
scroll through the previous or
next channel until the channel is
reached. Selecting a Channel Using the
TUNE/MENU Knob
To select a channel using the
TUNE/MENU knob:
1. Turn the TUNE/MENU knob and
select Channel List.
2. Select the desired channel.
Selecting a Channel Using the
TUNE/MENU System
1. Turn the TUNE/MENU knob.
2. Select XM Category List.
3. Select the category.
4. Select the channel.
Storing an SiriusXM Channel
as a Favorite
Channels from all bands can be
stored in any order in the favorite
pages.
Up to six channels can be stored in
each favorite page and the number
of available favorite pages can
be set.