transmission oil BUICK VERANO 2015 Owner's Manual
[x] Cancel search | Manufacturer: BUICK, Model Year: 2015, Model line: VERANO, Model: BUICK VERANO 2015Pages: 393, PDF Size: 4.74 MB
Page 8 of 393
Black plate (1,1)Buick Verano Owner Manual (GMNA-Localizing-U.S./Canada/Mexico-
7707488) - 2015 - CRC - 10/31/14
In Brief 1-1
In Brief
Instrument Panel
Instrument Panel Overview . . . . 1-2
Initial Drive Information
Initial Drive Information . . . . . . . . 1-4
Remote Keyless Entry (RKE)System . . . . . . . . . . . . . . . . . . . . . . 1-4
Remote Vehicle Start . . . . . . . . . 1-4
Door Locks . . . . . . . . . . . . . . . . . . . 1-5
Trunk Release . . . . . . . . . . . . . . . . 1-6
Windows . . . . . . . . . . . . . . . . . . . . . . 1-6
Seat Adjustment . . . . . . . . . . . . . . 1-6
Heated Seats . . . . . . . . . . . . . . . . . 1-8
Head Restraint Adjustment . . . . 1-9
Safety Belts . . . . . . . . . . . . . . . . . . . 1-9
Passenger Sensing System . . . 1-9
Mirror Adjustment . . . . . . . . . . . . 1-10
Steering Wheel Adjustment . . . . . . . . . . . . . . . . . 1-10 Interior Lighting . . . . . . . . . . . . . . 1-11
Exterior Lighting . . . . . . . . . . . . . 1-11
Windshield Wiper/Washer . . . . 1-12
Climate Controls . . . . . . . . . . . . . 1-13
Transmission . . . . . . . . . . . . . . . . 1-14
Vehicle Features
Infotainment System . . . . . . . . . 1-15
Radio(s) . . . . . . . . . . . . . . . . . . . . . 1-15
Satellite Radio . . . . . . . . . . . . . . . 1-16
Portable Audio Devices . . . . . . 1-16
Bluetooth
®. . . . . . . . . . . . . . . . . . . 1-17
Steering Wheel Controls . . . . . 1-17
Cruise Control . . . . . . . . . . . . . . . 1-18
Driver Information Center (DIC) . . . . . . . . . . . . . . . 1-18
Forward Collision Alert (FCA)
System . . . . . . . . . . . . . . . . . . . . . 1-18
Lane Departure Warning (LDW) . . . . . . . . . . . . . 1-19
Side Blind Zone Alert (SBZA) . . . . . . . . . . . . . . . 1-19 Rear Vision
Camera (RVC) . . . . . . . . . . . . . 1-19
Rear Cross Traffic Alert (RCTA) System . . . . . . . . . . . . 1-19
Parking Assist . . . . . . . . . . . . . . . 1-19
Power Outlets . . . . . . . . . . . . . . . 1-19
Universal Remote System . . . 1-20
Sunroof . . . . . . . . . . . . . . . . . . . . . . 1-20
Performance and Maintenance
Traction Control/Electronic
Stability Control . . . . . . . . . . . . 1-21
Tire Pressure Monitor . . . . . . . . 1-21
Engine Oil Life System . . . . . . 1-21
Driving for Better Fuel Economy . . . . . . . . . . . . . . . . . . . 1-22
Roadside Assistance
Program . . . . . . . . . . . . . . . . . . . . 1-22
OnStar
®. . . . . . . . . . . . . . . . . . . . . 1-22
Page 108 of 393
Black plate (1,1)Buick Verano Owner Manual (GMNA-Localizing-U.S./Canada/Mexico-
7707488) - 2015 - CRC - 10/31/14
Instruments and Controls 5-1
Instruments and
Controls
Controls
Steering Wheel Adjustment . . . 5-2
Steering Wheel Controls . . . . . . 5-2
Heated Steering Wheel . . . . . . . 5-3
Horn . . . . . . . . . . . . . . . . . . . . . . . . . . 5-3
Windshield Wiper/Washer . . . . . 5-3
Compass . . . . . . . . . . . . . . . . . . . . . 5-4
Clock . . . . . . . . . . . . . . . . . . . . . . . . . 5-5
Power Outlets . . . . . . . . . . . . . . . . . 5-6
Cigarette Lighter . . . . . . . . . . . . . . 5-7
Ashtrays . . . . . . . . . . . . . . . . . . . . . . 5-7
Warning Lights, Gauges, and
Indicators
Warning Lights, Gauges, andIndicators . . . . . . . . . . . . . . . . . . . . 5-8
Instrument Cluster . . . . . . . . . . . . 5-9
Speedometer . . . . . . . . . . . . . . . . 5-10
Odometer . . . . . . . . . . . . . . . . . . . . 5-10
Trip Odometer . . . . . . . . . . . . . . . 5-10
Tachometer . . . . . . . . . . . . . . . . . . 5-10
Fuel Gauge . . . . . . . . . . . . . . . . . . 5-10
Engine Coolant Temperature Gauge . . . . . . . . . . . . . . . . . . . . . . 5-11 Safety Belt Reminders . . . . . . . 5-11
Airbag Readiness Light . . . . . . 5-12
Passenger Airbag Status
Indicator . . . . . . . . . . . . . . . . . . . . 5-13
Charging System Light . . . . . . 5-13
Malfunction
Indicator Lamp . . . . . . . . . . . . . 5-14
Brake System Warning Light . . . . . . . . . . . . . . . . . . . . . . . 5-16
Electric Parking Brake Light . . . . . . . . . . . . . . . . . . . . . . . 5-17
Antilock Brake System (ABS) Warning Light . . . . . . . . . . . . . . 5-18
Lane Departure Warning (LDW) Light . . . . . . . . . . . . . . . . 5-18
Vehicle Ahead Indicator . . . . . . 5-18
Traction Off Light . . . . . . . . . . . . 5-19
StabiliTrak
®OFF Light . . . . . . . 5-19
Traction Control System (TCS)/StabiliTrak
®Light . . . . 5-19
Tire Pressure Light . . . . . . . . . . 5-20
Engine Oil Pressure Light . . . . 5-20
Low Fuel Warning Light . . . . . . 5-21
Security Light . . . . . . . . . . . . . . . . 5-21
High-Beam On Light . . . . . . . . . 5-21
Front Fog Lamp Light . . . . . . . . 5-22
Lamps On Reminder . . . . . . . . . 5-22
Cruise Control Light . . . . . . . . . 5-22
Door Ajar Light . . . . . . . . . . . . . . 5-22
Information Displays
Driver Information Center (DIC) . . . . . . . . . . . . . . . 5-23
Vehicle Messages
Vehicle Messages . . . . . . . . . . . 5-26
Battery Voltage and ChargingMessages . . . . . . . . . . . . . . . . . . 5-27
Brake System Messages . . . . 5-27
Compass Messages . . . . . . . . . 5-27
Door Ajar Messages . . . . . . . . . 5-28
Engine Cooling System Messages . . . . . . . . . . . . . . . . . . 5-28
Engine Oil Messages . . . . . . . . 5-29
Engine Power Messages . . . . 5-29
Fuel System Messages . . . . . . 5-29
Key and Lock Messages . . . . . 5-29
Object Detection System Messages . . . . . . . . . . . . . . . . . . 5-30
Ride Control System Messages . . . . . . . . . . . . . . . . . . 5-31
Security Messages . . . . . . . . . . 5-31
Tire Messages . . . . . . . . . . . . . . . 5-31
Transmission Messages . . . . . 5-32
Washer Fluid Messages . . . . . 5-32
Window Messages . . . . . . . . . . . 5-32
Vehicle Personalization
Vehicle Personalization . . . . . . 5-33
Page 215 of 393

Black plate (18,1)Buick Verano Owner Manual (GMNA-Localizing-U.S./Canada/Mexico-
7707488) - 2015 - CRC - 10/31/14
9-18 Driving and Operating
The key lock release is always
functional except in the case of an
uncharged or low voltage (less than
9-volt) battery. If the vehicle has an
uncharged battery or a battery with
low voltage, try charging or jump
starting the battery. SeeJump
Starting on page 10-70.
If charging or jump starting the
battery does not work, locate the
hole below the ignition lock. Insert a
flat bladed tool or another key from
the key chain into the opening.
When the lever can be felt, actuate
the lever toward the driver, and
remove the key from the ignition.
Starting the Engine
Place the transmission in the
proper gear.
Automatic Transmission
Move the shift lever to P (Park) or
N (Neutral). To restart the vehicle
when it is already moving, use
N (Neutral) only.
{Caution
Do not try to shift to P (Park) if the
vehicle is moving. If you do, you
could damage the transmission.
Shift to P (Park) only when the
vehicle is stopped.
{Caution
If you add electrical parts or
accessories, you could change
the way the engine operates. Any
resulting damage would not be
covered by the vehicle warranty.
See Add-On Electrical Equipment
on page 9-56.
Manual Transmission
The shift lever should be in Neutral
and the parking brake engaged.
Hold the clutch pedal down to the
floor and start the engine. Starting Procedure (Key Access)
1. With your foot off the accelerator
pedal, turn the ignition key to
START. When the engine starts,
let go of the key. The idle speed
will go down as the engine
warms. Do not race the engine
immediately after starting it.
Allow the oil to warm up and
lubricate all moving parts.
{Caution
Cranking the engine for long
periods of time, by returning the
ignition to the START position
immediately after cranking has
ended, can overheat and damage
the cranking motor, and drain the
battery. Wait at least 15 seconds
between each try, to let the
cranking motor cool down.
Page 216 of 393
Black plate (19,1)Buick Verano Owner Manual (GMNA-Localizing-U.S./Canada/Mexico-
7707488) - 2015 - CRC - 10/31/14
Driving and Operating 9-19
2. If the engine does not start afterfive to 10 seconds, especially in
very cold weather (below −18°C
or 0°F), it could be flooded with
too much gasoline. Push the
accelerator pedal all the way to
the floor and hold it there as you
hold the key in START for a
maximum of 15 seconds. Wait at
least 15 seconds between each
try, to allow the cranking motor
to cool. When the engine starts,
let go of the key and accelerator.
If the vehicle starts briefly but
then stops again, repeat the
procedure. This clears the extra
gasoline from the engine. Do not
race the engine immediately
after starting it. Operate the
engine and transmission gently
until the oil warms up and
lubricates all moving parts. Starting Procedure (Keyless
Access)
1. With the Keyless Access
system, the Remote Keyless
Entry (RKE) transmitter must be
in the vehicle. Press the
ENGINE START/STOP button
with the brake pedal applied.
When the engine begins
cranking, let go of the button.
The idle speed will go down as
your engine gets warm. Do not
race the engine immediately
after starting it. Allow the oil to
warm up and lubricate all
moving parts.
If the RKE transmitter is not in
the vehicle, if there is
interference, or the RKE battery
is low, the Driver Information
Center (DIC) will display a
message. See Key and Lock
Messages on page 5-29 and
Remote Keyless Entry (RKE)
System Operation on page 2-3.{Caution
Cranking the engine for long
periods of time, by returning the
ignition to the START position
immediately after cranking has
ended, can overheat and damage
the cranking motor, and drain the
battery. Wait at least 15 seconds
between each try, to let the
cranking motor cool down.
2. If the engine does not start after five to 10 seconds, especially in
very cold weather (below −18°C
or 0°F), it could be flooded with
too much gasoline. Try pushing
the accelerator pedal all the way
to the floor and holding it there
as you press the ENGINE
START/STOP button, for up to a
maximum of 15 seconds. Wait at
least 15 seconds between each
try, to allow the cranking motor
to cool down. When the engine
starts, let go of the button, and
the accelerator. If the vehicle
Page 217 of 393

Black plate (20,1)Buick Verano Owner Manual (GMNA-Localizing-U.S./Canada/Mexico-
7707488) - 2015 - CRC - 10/31/14
9-20 Driving and Operating
starts briefly but then stops
again, do the same thing. This
clears the extra gasoline from
the engine. Do not race the
engine immediately after starting
it. Operate the engine and
transmission gently until the oil
warms up and lubricates all
moving parts.
Engine Heater
The engine heater, if available, can
help in cold weather conditions at or
below−18°C (0°F) for easier starting
and better fuel economy during
engine warm-up. Plug in the heater
at least four hours before starting
the vehicle. An internal thermostat
in the plug end of the cord will
prevent engine heater operation at
temperatures above −18°C (0°F).
To Use the Engine Heater
1. Turn off the engine.
2. Open the hood and unwrap the
electrical cord. For vehicles with
a 2.4L engine, the electrical cord
is located on the passenger side
of the engine compartment, near
the air cleaner. For vehicles with
a 2.0L turbo engine, the
electrical cord is located on the
front of the engine, on the driver
side of the vehicle.
Check the heater cord for
damage. If it is damaged, do not
use it. See your dealer for a
replacement. Inspect the cord for
damage yearly.
3. Plug it into a normal, grounded 110-volt AC outlet.{Warning
Improper use of the heater cord
or an extension cord can damage
the cord and may result in
overheating and fire.
.Plug the cord into a
three-prong electrical utility
receptacle that is protected
by a ground fault detection
function. An ungrounded
outlet could cause an electric
shock.
.Use a weatherproof,
heavy-duty, 15 amp-rated
extension cord if needed.
Failure to use the
recommended extension cord
in good operating condition,
or using a damaged heater or
extension cord, could make it
(Continued)
Page 250 of 393
Black plate (53,1)Buick Verano Owner Manual (GMNA-Localizing-U.S./Canada/Mexico-
7707488) - 2015 - CRC - 10/31/14
Driving and Operating 9-53
lamps also flash, telling other
drivers the vehicle is turning,
changing lanes or stopping.
When towing a trailer, the arrows on
the instrument cluster flash for turns
even if the bulbs on the trailer are
burned out. Check occasionally to
be sure the trailer bulbs are still
working.
Driving on Grades
Reduce speed and shift to a lower
gear before starting down a long or
steep downgrade. If the
transmission is not shifted down, the
brakes might have to be used so
much that they would get hot and no
longer work well.
The vehicle can tow in D (Drive).
Use a lower gear if the transmission
shifts too often.
When towing at high altitude on
steep uphill grades, engine coolant
boils at a lower temperature than at
normal altitudes. If the engine is
turned off immediately after towing
at high altitude on steep uphillgrades, the vehicle could show
signs similar to engine overheating.
To avoid this, let the engine run
while parked, preferably on level
ground, with the transmission in
P (Park) for a few minutes before
turning the engine off. If the
overheat warning comes on, see
Engine Overheating on page 10-19.
Parking on Hills
{Warning
Parking the vehicle on a hill with
the trailer attached can be
dangerous. If something goes
wrong, the rig could start to move.
People can be injured, and both
the vehicle and the trailer can be
damaged. When possible, always
park the rig on a flat surface.
If parking the rig on a hill:
1. Press the brake pedal, but do
not shift into P (Park) yet. Turn
the wheels into the curb if facing
downhill or into traffic if facing
uphill.
2. Have someone place chocks under the trailer wheels.
3. When the wheel chocks are in place, release the brake pedal
until the chocks absorb the load.
4. Reapply the brake pedal. Then apply the parking brake and shift
into P (Park).
5. Release the brake pedal.
Leaving After Parking on a Hill
1. Apply and hold the brake pedal while you:
.Start the engine.
.Shift into a gear.
.Release the parking brake.
2. Let up on the brake pedal.
Page 251 of 393
Black plate (54,1)Buick Verano Owner Manual (GMNA-Localizing-U.S./Canada/Mexico-
7707488) - 2015 - CRC - 10/31/14
9-54 Driving and Operating
3. Drive slowly until the trailer isclear of the chocks.
4. Stop and have someone pick up and store the chocks.
Maintenance When Trailer
Towing
The vehicle needs service more
often when pulling a trailer. See the
Maintenance Schedule on
page 11-2. Things that are
especially important in trailer
operation are automatic
transmission fluid, engine oil, axle
lubricant, belts, cooling system and
brake system. Inspect these before
and during the trip.
Check periodically to see that all
hitch nuts and bolts are tight.
Engine Cooling When Trailer
Towing
The cooling system may temporarily
overheat during severe operating
conditions. See Engine Overheating
on page 10-19.
Trailer Towing (2.0L
Engine)
The vehicle is neither designed nor
intended to tow a trailer.
Trailer Towing (Except
2.0L Engine)
Before pulling a trailer, three
important considerations have to do
with weight:
.Weight of the trailer.
.Weight of the trailer tongue.
.Total weight on your vehicle's
tires.
Weight of the Trailer
How heavy can a trailer safely be?
It should never weigh more than
454 kg (1,000 lb). But even that can
be too heavy.
It depends on how the rig is used.
For example, speed, altitude, road
grades, outside temperature, and
how much the vehicle is used to pull a trailer are all important. It can
depend on any special equipment
on the vehicle, and the amount of
tongue weight the vehicle can carry.
See
“Weight of the Trailer Tongue”
later in this section.
Maximum trailer weight is calculated
assuming only the driver is in the
tow vehicle and it has all the
required trailering equipment. The
weight of additional optional
equipment, passengers, and cargo
in the tow vehicle must be
subtracted from the maximum trailer
weight.
Ask your dealer for trailering
information or advice, or write us at
our Customer Assistance Offices.
See Customer Assistance Offices
on page 13-3.
Weight of the Trailer Tongue
The tongue load (1) of any trailer is
an important weight to measure
because it affects the total gross
weight of the vehicle. The Gross
Vehicle Weight (GVW) includes the
curb weight of the vehicle, any
Page 254 of 393

Black plate (1,1)Buick Verano Owner Manual (GMNA-Localizing-U.S./Canada/Mexico-
7707488) - 2015 - CRC - 10/31/14
Vehicle Care 10-1
Vehicle Care
General Information
General Information . . . . . . . . . . 10-2
California Proposition65 Warning . . . . . . . . . . . . . . . . . 10-2
California Perchlorate Materials Requirements . . . . 10-3
Accessories and Modifications . . . . . . . . . . . . . . . 10-3
Vehicle Checks
Doing Your OwnService Work . . . . . . . . . . . . . . . 10-3
Hood . . . . . . . . . . . . . . . . . . . . . . . . 10-4
Engine Compartment Overview . . . . . . . . . . . . . . . . . . . 10-6
Engine Oil . . . . . . . . . . . . . . . . . . . 10-9
Engine Oil Life System . . . . . 10-11
Automatic Transmission Fluid . . . . . . . . . . . . . . . . . . . . . . 10-12
Manual Transmission Fluid . . . . . . . . . . . . . . . . . . . . . . 10-13
Hydraulic Clutch . . . . . . . . . . . . 10-13
Engine Air Cleaner/Filter . . . . 10-13
Cooling System . . . . . . . . . . . . 10-15
Engine Coolant . . . . . . . . . . . . . 10-16
Engine Overheating . . . . . . . . 10-19 Washer Fluid . . . . . . . . . . . . . . . 10-20
Brakes . . . . . . . . . . . . . . . . . . . . . 10-21
Brake Fluid . . . . . . . . . . . . . . . . . 10-22
Battery . . . . . . . . . . . . . . . . . . . . . 10-23
Starter Switch Check . . . . . . . 10-24
Automatic Transmission Shift
Lock Control Function
Check . . . . . . . . . . . . . . . . . . . . . 10-24
Ignition Transmission Lock Check . . . . . . . . . . . . . . . . . . . . . 10-25
Park Brake and P (Park) Mechanism Check . . . . . . . . 10-25
Wiper Blade Replacement . . . . . . . . . . . . . . 10-25
Headlamp Aiming
Headlamp Aiming . . . . . . . . . . 10-26
Bulb Replacement
Bulb Replacement . . . . . . . . . . 10-27
Halogen Bulbs . . . . . . . . . . . . . . 10-27
Headlamps, Front TurnSignal and Parking
Lamps . . . . . . . . . . . . . . . . . . . . 10-27
Fog Lamps . . . . . . . . . . . . . . . . . 10-28 Taillamps, Turn Signal,
Stoplamps, and Back-Up
Lamps . . . . . . . . . . . . . . . . . . . . 10-28
License Plate Lamp . . . . . . . . 10-30
Replacement Bulbs . . . . . . . . . 10-30
Electrical System
Electrical System Overload . . . . . . . . . . . . . . . . . . 10-31
Fuses and Circuit Breakers . . . . . . . . . . . . . . . . . . 10-31
Engine Compartment Fuse Block . . . . . . . . . . . . . . . . . . . . . 10-32
Instrument Panel Fuse Block . . . . . . . . . . . . . . . . . . . . . 10-36
Rear Compartment Fuse Block . . . . . . . . . . . . . . . . . . . . . 10-38
Wheels and Tires
Tires . . . . . . . . . . . . . . . . . . . . . . . . 10-40
All-Season Tires . . . . . . . . . . . . 10-41
Winter Tires . . . . . . . . . . . . . . . . 10-41
Low-Profile Tires . . . . . . . . . . . 10-41
Tire Sidewall Labeling . . . . . . 10-42
Tire Designations . . . . . . . . . . . 10-44
Tire Terminology and
Definitions . . . . . . . . . . . . . . . . 10-45
Tire Pressure . . . . . . . . . . . . . . . 10-48
Page 265 of 393
Black plate (12,1)Buick Verano Owner Manual (GMNA-Localizing-U.S./Canada/Mexico-
7707488) - 2015 - CRC - 10/31/14
10-12 Vehicle Care
Change the oil as soon as possible
within the next 1 000 km (600 mi).
It is possible that, if driving under
the best conditions, the oil life
system might indicate that an oil
change is not necessary for up to a
year. The engine oil and filter must
be changed at least once a year
and, at this time, the system must
be reset. Your dealer has trained
service people who will perform this
work and reset the system. It is also
important to check the oil regularly
over the course of an oil drain
interval and keep it at the proper
level.
If the system is ever reset
accidentally, the oil must be
changed at 5 000 km (3,000 mi)
since the last oil change.
Remember to reset the oil life
system whenever the oil is changed.How to Reset the Engine Oil
Life System
Reset the system whenever the
engine oil is changed so that the
system can calculate the next
engine oil change. To reset the
system:
1. Turn the ignition to ON/RUN withthe engine off.
2. Press the DIC MENU button on the turn signal lever to enter the
Vehicle Information Menu. Use
the thumbwheel to scroll through
the menu items until you reach
REMAINING OIL LIFE.
3. Press the SET/CLR button to reset the oil life at 100%.
4. Turn the ignition to LOCK/OFF.
The system is reset when the
CHANGE ENGINE OIL SOON
message is off and the REMAINING
OIL LIFE 100% message is
displayed. If the CHANGE ENGINE OIL SOON
message comes back on when the
vehicle is started, the engine oil life
system has not been reset. Repeat
the procedure.
Automatic Transmission
Fluid
How to Check Automatic
Transmission Fluid
It is not necessary to check the
transmission fluid level.
A transmission fluid leak is the only
reason for fluid loss. If a leak
occurs, take the vehicle to your
dealer and have it repaired as soon
as possible.
The vehicle is not equipped with a
transmission fluid level dipstick.
There is a special procedure for
checking and changing the
transmission fluid. Because this
procedure is difficult, this should be
done at the dealer. Contact the
dealer for additional information.
Page 266 of 393
Black plate (13,1)Buick Verano Owner Manual (GMNA-Localizing-U.S./Canada/Mexico-
7707488) - 2015 - CRC - 10/31/14
Vehicle Care 10-13
Change the fluid at the intervals
listed inMaintenance Schedule on
page 11-2, and be sure to use the
fluid listed in Recommended Fluids
and Lubricants on page 11-12.
Manual Transmission
Fluid
How to Check Manual
Transmission Fluid
It is not necessary to check the
manual transmission fluid level.
A transmission fluid leak is the only
reason for fluid loss. If a leak
occurs, take the vehicle to your
dealer and have it repaired as soon
as possible. See Recommended
Fluids and Lubricants on page 11-12
for the proper fluid to use.
Hydraulic Clutch
For vehicles with a manual
transmission, it is not necessary to
regularly check brake/clutch fluid
unless there is a leak suspected.
Adding fluid will not correct a leak. A fluid loss in this system could
indicate a problem. Have the
system inspected and repaired.
When to Check and What
to Use
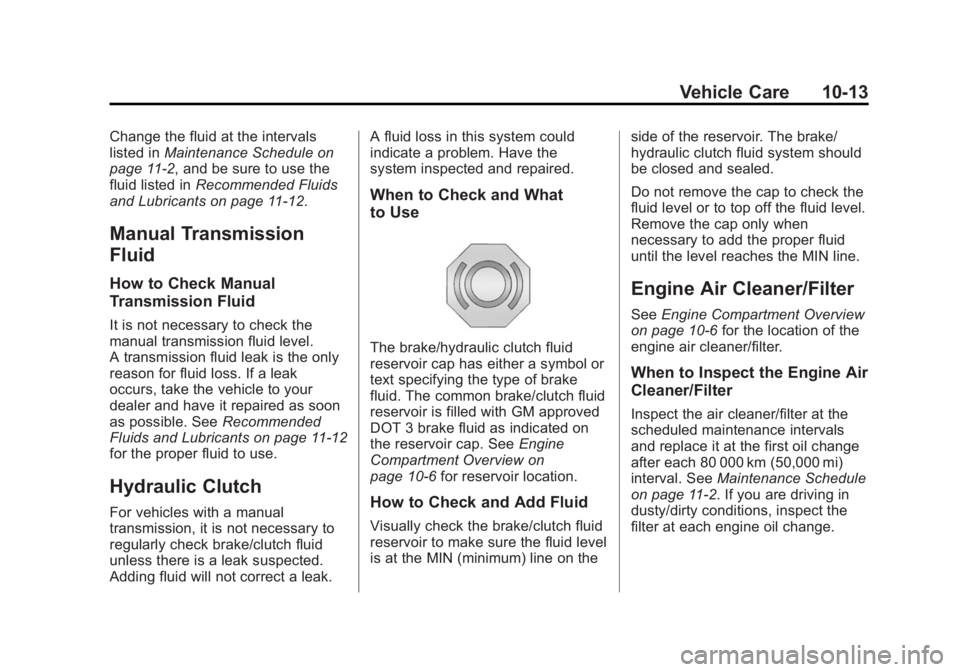
The brake/hydraulic clutch fluid
reservoir cap has either a symbol or
text specifying the type of brake
fluid. The common brake/clutch fluid
reservoir is filled with GM approved
DOT 3 brake fluid as indicated on
the reservoir cap. See
Engine
Compartment Overview on
page 10-6 for reservoir location.
How to Check and Add Fluid
Visually check the brake/clutch fluid
reservoir to make sure the fluid level
is at the MIN (minimum) line on the side of the reservoir. The brake/
hydraulic clutch fluid system should
be closed and sealed.
Do not remove the cap to check the
fluid level or to top off the fluid level.
Remove the cap only when
necessary to add the proper fluid
until the level reaches the MIN line.
Engine Air Cleaner/Filter
See
Engine Compartment Overview
on page 10-6 for the location of the
engine air cleaner/filter.
When to Inspect the Engine Air
Cleaner/Filter
Inspect the air cleaner/filter at the
scheduled maintenance intervals
and replace it at the first oil change
after each 80 000 km (50,000 mi)
interval. See Maintenance Schedule
on page 11-2. If you are driving in
dusty/dirty conditions, inspect the
filter at each engine oil change.