stop start BUICK VERANO 2017 Owner's Manual
[x] Cancel search | Manufacturer: BUICK, Model Year: 2017, Model line: VERANO, Model: BUICK VERANO 2017Pages: 354, PDF Size: 4.92 MB
Page 8 of 354

Buick Verano Owner Manual (GMNA- Localizing-U.S./Canada-10122753) -
2017 - crc - 5/16/16
In Brief 7
1.Air Vents 0174.
2. Headlamp High/Low-Beam
Changer 0134.
Turn Signal Lever. See Turn
and Lane-Change
Signals 0136.
Driver Information Center (DIC)
Buttons. See Driver Information
Center (DIC) 0115.
3. Instrument Cluster 0103.
4. Windshield Wiper/Washer 099.
5. Traction Control/Electronic
Stability Control 0203.
Lane Departure Warning
(LDW) 0215 (If Equipped).
6. Light Sensor. See Automatic
Headlamp System 0135.
7. Hazard Warning
Flashers 0135.
8. Passenger Airbag Status
Indicator 0106.
Trunk Release Button. See
Trunk 038.
9. Infotainment 0139. 10.
Dual Automatic Climate Control
System 0171 (If Equipped).
Heated Front Seats 054 (If
Equipped).
Heated Steering Wheel 099 (If
Equipped).
11. Electric Parking Brake 0201.
12. Shift Lever. See Automatic
Transmission 0197.
13. ENGINE START/STOP Button. SeeIgnition Positions (Keyless
Access) 0189 orIgnition
Positions (Key Access) 0187.
14. Steering Wheel Controls 098.
15. Horn 099.
16. Steering Wheel
Adjustment 098.
17. Cruise Control 0205.
Forward Collision Alert (FCA)
System 0211 (If Equipped).
18. Data Link Connector (DLC) (Out of View). See Malfunction
Indicator Lamp (Check Engine
Light) 0107. 19.
Instrument Panel Fuse
Block 0255.
20. Exterior Lamp Controls 0133.
Front Fog Lamps 0136 (If
Equipped).
Instrument Panel Illumination
Control 0137.
21. Hood Release. See Hood 0229.
Page 25 of 354
Buick Verano Owner Manual (GMNA- Localizing-U.S./Canada-10122753) -
2017 - crc - 5/16/16
24 In Brief
stop as soon as possible and inflate
the tires to the recommended
pressure shown on the Tire and
Loading Information label. See
Vehicle Load Limits0183. The
warning light will remain on until the
tire pressure is corrected.
The low tire pressure warning light
may come on in cool weather when
the vehicle is first started, and then
turn off as the vehicle is driven. This
may be an early indicator that the
tire pressures are getting low and
the tires need to be inflated to the
proper pressure.
The TPMS does not replace normal
monthly tire maintenance. Maintain
the correct tire pressures.
See Tire Pressure Monitor
System 0267.Fuel
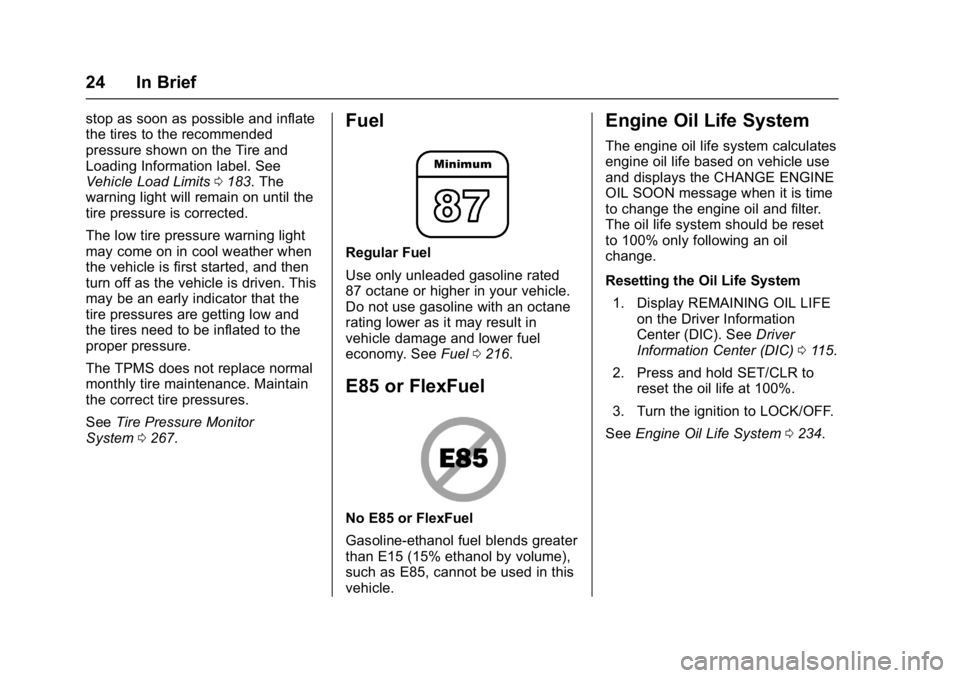
Regular Fuel
Use only unleaded gasoline rated
87 octane or higher in your vehicle.
Do not use gasoline with an octane
rating lower as it may result in
vehicle damage and lower fuel
economy. See Fuel0216.
E85 or FlexFuel
No E85 or FlexFuel
Gasoline-ethanol fuel blends greater
than E15 (15% ethanol by volume),
such as E85, cannot be used in this
vehicle.
Engine Oil Life System
The engine oil life system calculates
engine oil life based on vehicle use
and displays the CHANGE ENGINE
OIL SOON message when it is time
to change the engine oil and filter.
The oil life system should be reset
to 100% only following an oil
change.
Resetting the Oil Life System
1. Display REMAINING OIL LIFE on the Driver Information
Center (DIC). See Driver
Information Center (DIC) 0115.
2. Press and hold SET/CLR to reset the oil life at 100%.
3. Turn the ignition to LOCK/OFF.
See Engine Oil Life System 0234.
Page 26 of 354

Buick Verano Owner Manual (GMNA- Localizing-U.S./Canada-10122753) -
2017 - crc - 5/16/16
In Brief 25
Driving for Better Fuel
Economy
Driving habits can affect fuel
mileage. Here are some driving tips
to get the best fuel economy
possible.
.Avoid fast starts and accelerate
smoothly.
. Brake gradually and avoid
abrupt stops.
. Avoid idling the engine for long
periods of time.
. When road and weather
conditions are appropriate, use
cruise control.
. Always follow posted speed
limits or drive more slowly when
conditions require.
. Keep vehicle tires properly
inflated.
. Combine several trips into a
single trip.
. Replace the vehicle's tires with
the same TPC Spec number
molded into the tire's sidewall
near the size. .
Follow recommended scheduled
maintenance.Roadside Assistance
Program
U.S.: 1-800-252-1112
TTY Users (U.S. Only):
1-888-889-2438
Canada: 1-800-268-6800
New Buick owners are automatically
enrolled in the Roadside Assistance
Program.
See Roadside Assistance
Program 0323.
Page 33 of 354

Buick Verano Owner Manual (GMNA- Localizing-U.S./Canada-10122753) -
2017 - crc - 5/16/16
32 Keys, Doors, and Windows
Programming with Recognized
Transmitters (Keyless Access
Vehicles Only)
A new transmitter can be
programmed to the vehicle when
there are two recognized
transmitters. To program, the vehicle
must be off and all of the
transmitters, both currently
recognized and new, must be
with you.1. Place the two recognized transmitters near you.
2. Insert the vehicle key of the new transmitter into the key
lock cylinder on the outside of
the driver door and turn the key
to the unlock position five times
within 12 seconds.
The Driver Information Center
(DIC) displays READY FOR
REMOTE #2, 3, 4 or 5.
3. Place the new transmitter intothe transmitter pocket with the
buttons facing up. The
transmitter pocket is inside the
center console cupholder. The
cupholder liner will need to be
removed to access the
transmitter pocket. Use a finger
or a tool in the notch at the rear
of the cupholders to remove
the liner. See Cupholders095.
4. Press ENGINE START/STOP. When the transmitter is
learned, the Driver Information
Center (DIC) will show that it is
ready to program the next
transmitter. 5. Remove the transmitter from
the transmitter pocket and
press
K.
To program additional
transmitters, repeat Steps 3–5.
When all additional transmitters
are programmed, press and
hold ENGINE START/STOP for
at least 10 seconds to exit
programming mode.
Programming without Recognized
Transmitters (Keyless Access
Vehicles Only)
If two currently recognized
transmitters are not available, follow
this procedure to program up to
eight transmitters. This feature is
not available in Canada. This
procedure will take approximately
30 minutes to complete. The vehicle
must be off and all of the
transmitters you wish to program
must be with you. 1. Insert the vehicle key of the transmitter into the key lock
cylinder on the outside of the
Page 34 of 354
Buick Verano Owner Manual (GMNA- Localizing-U.S./Canada-10122753) -
2017 - crc - 5/16/16
Keys, Doors, and Windows 33
driver door and turn the key to
the unlock position five times
within 10 seconds.
The Driver Information Center
(DIC) displays REMOTE
LEARN PENDING,
PLEASE WAIT.
2. Wait for 10 minutes until the DIC displays PRESS ENGINE
START BUTTON TO LEARN
and then press ENGINE
START/STOP.
The DIC display will again
show REMOTE LEARN
PENDING, PLEASE WAIT.
3. Repeat Step 2 two additional times. After the third time all
previously known transmitters
will no longer work with the
vehicle. Remaining transmitters
can be relearned during the
next steps.
The DIC display should now
show READY FOR REMOTE
# 1.
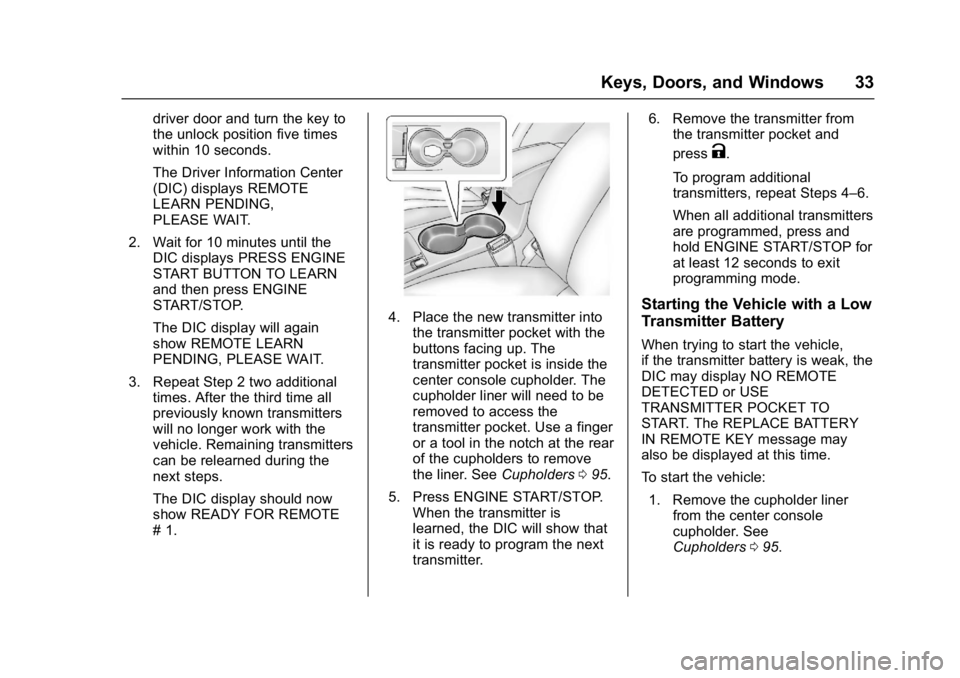
4. Place the new transmitter into
the transmitter pocket with the
buttons facing up. The
transmitter pocket is inside the
center console cupholder. The
cupholder liner will need to be
removed to access the
transmitter pocket. Use a finger
or a tool in the notch at the rear
of the cupholders to remove
the liner. See Cupholders095.
5. Press ENGINE START/STOP. When the transmitter is
learned, the DIC will show that
it is ready to program the next
transmitter. 6. Remove the transmitter from
the transmitter pocket and
press
K.
To program additional
transmitters, repeat Steps 4–6.
When all additional transmitters
are programmed, press and
hold ENGINE START/STOP for
at least 12 seconds to exit
programming mode.
Starting the Vehicle with a Low
Transmitter Battery
When trying to start the vehicle,
if the transmitter battery is weak, the
DIC may display NO REMOTE
DETECTED or USE
TRANSMITTER POCKET TO
START. The REPLACE BATTERY
IN REMOTE KEY message may
also be displayed at this time.
To start the vehicle: 1. Remove the cupholder liner from the center console
cupholder. See
Cupholders 095.
Page 35 of 354
Buick Verano Owner Manual (GMNA- Localizing-U.S./Canada-10122753) -
2017 - crc - 5/16/16
34 Keys, Doors, and Windows
2. Place the transmitter in thetransmitter pocket with the
buttons facing up.
3. With the vehicle in P (Park) or N (Neutral), press the brake
pedal and ENGINE START/
STOP. See Starting the Engine
0 191 for additional information
about the vehicle's keyless
ignition with pushbutton start.
Replace the transmitter battery
as soon as possible.
Battery Replacement
Replace the battery if the REPLACE
BATTERY IN REMOTE KEY
message displays in the DIC. See
Key and Lock Messages 0121.
Caution
When replacing the battery, do
not touch any of the circuitry on
the transmitter. Static from your
body could damage the
transmitter. The battery is not rechargeable. To
replace the battery:
1. Press the button on the transmitter to extend the key.
2. Remove the battery cover by prying it with a finger.
3. Remove the battery by pushing on the battery and sliding it
toward the key blade.
4. Insert the new battery, positive side facing up. Push the
battery down until it is held in
place. Replace with a CR2032
or equivalent battery.
5. Snap the battery cover back on to the transmitter.
Remote Vehicle Start
If equipped, this feature allows the
engine to be started from outside
the vehicle.
/:This button will be on the RKE
transmitter if the vehicle has remote
start.
The climate control system will use
the previous settings during a
remote start. The rear defog may come on during remote start based
on cold ambient conditions. The
rear fog indicator light does not
come on during remote start. If the
vehicle has heated seats, they may
come on during a remote start. See
Heated Front Seats
054.
Laws in some local communities
may restrict the use of remote
starters. For example, some laws
require a person using remote start
to have the vehicle in view. Check
local regulations for any
requirements.
Other conditions can affect the
performance of the transmitter. See
Remote Keyless Entry (RKE)
System 028.
Starting the Vehicle
To start the engine using the remote
start feature:
1. Press and releaseQ.
2. Immediately after completing Step 1, press and hold
/for at
least four seconds or until the
turn signal lamps flash. The
turn signal lamps flashing
Page 60 of 354

Buick Verano Owner Manual (GMNA- Localizing-U.S./Canada-10122753) -
2017 - crc - 5/16/16
Seats and Restraints 59
pelvic bones and you would be
less likely to slide under the lap
belt. If you slid under it, the belt
would apply force on your
abdomen. This could cause
serious or even fatal injuries.
. Wear the shoulder belt over the
shoulder and across the chest.
These parts of the body are best
able to take belt restraining
forces. The shoulder belt locks if
there is a sudden stop or crash.
{Warning
You can be seriously injured,
or even killed, by not wearing
your safety belt properly.
. Never allow the lap or
shoulder belt to become
loose or twisted.
. Never wear the shoulder
belt under both arms or
behind your back.
. Never route the lap or
shoulder belt over an
armrest.
Lap-Shoulder Belt
All seating positions in the vehicle
have a lap-shoulder belt.
The following instructions explain
how to wear a lap-shoulder belt
properly.
1. Adjust the seat, if the seat is adjustable, so you can sit up
straight. To see how, see
“Seats” in the Index.
2. Pick up the latch plate and pull
the belt across you. Do not let
it get twisted. The lap-shoulder belt may lock
if you pull the belt across you
very quickly. If this happens, let
the belt go back slightly to
unlock it. Then pull the belt
across you more slowly.
If the shoulder portion of a
passenger belt is pulled out all
the way, the child restraint
locking feature may be
engaged. If this happens, let
the belt go back all the way
and start again.
3. Push the latch plate into the
buckle until it clicks.
Page 101 of 354
Buick Verano Owner Manual (GMNA- Localizing-U.S./Canada-10122753) -
2017 - crc - 5/16/16
100 Instruments and Controls
{Warning
In freezing weather, do not use
the washer until the windshield is
warmed. Otherwise the washer
fluid can form ice on the
windshield, blocking your vision.
Clear snow and ice from the wiper
blades and windshield before using
them. If frozen to the windshield,
carefully loosen or thaw them.
Damaged blades should be
replaced. See Wiper Blade
Replacement 0246.
Heavy snow or ice can overload the
wiper motor.
Wiper Parking
If the ignition is turned to OFF while
the wipers are on LO, HI, or INT,
they will immediately stop.
If the windshield wiper lever is then
moved to OFF before the driver
door is opened or within 10 minutes,
the wipers will restart and move to
the base of the windshield. If the ignition is turned to OFF while
the wipers are performing wipes due
to windshield washing, the wipers
continue to run until they reach the
base of the windshield.
Compass
The vehicle may have a compass
display on the Driver Information
Center (DIC). The compass receives
its heading and other information
from the Global Positioning
System (GPS) antenna,
StabiliTrak
®, and vehicle speed
information.
The compass system is designed to
operate for a certain number of
miles or degrees of turn before
needing a signal from the GPS
satellites. When the compass
display shows CAL, drive the
vehicle for a short distance in an
open area where it can receive a
GPS signal. The compass system
will automatically determine when a
GPS signal is restored and provide a heading again. See
Compass
Messages 0119 for the messages
that may be displayed for the
compass.
Clock
The infotainment system controls
are used to access the time and
date settings through the menu
system. The clock menu can be
only be used with the radio on while
in ON/RUN or ACC/ACCESSORY.
See Operation 0142 for information
about how to use the menu system.
Setting the Clock (Radio
with CD)
To set the time:
1. Press the CONFIG button and select Time and Date or
press
H.
2. Select Set Time.
3. Turn the TUNE/MENU knob to adjust the highlighted number.
4. Press TUNE/MENU to select the next number.
Page 106 of 354
Buick Verano Owner Manual (GMNA- Localizing-U.S./Canada-10122753) -
2017 - crc - 5/16/16
Instruments and Controls 105
.The gauge takes a few seconds
to stabilize after the ignition is
turned on, and will go back to
empty when the ignition is
turned off.
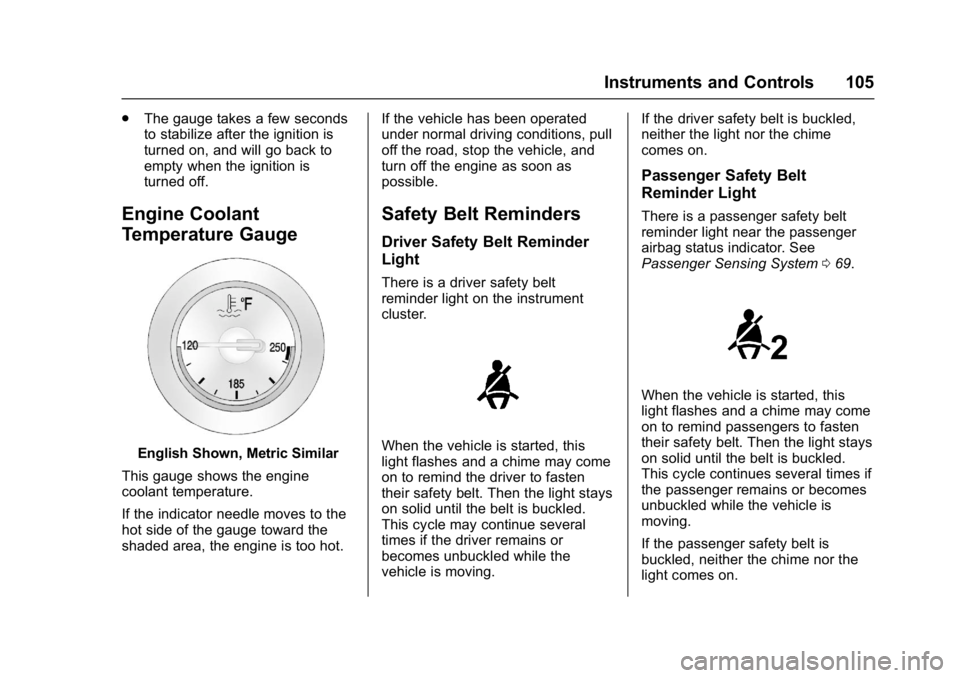
Engine Coolant
Temperature Gauge
English Shown, Metric Similar
This gauge shows the engine
coolant temperature.
If the indicator needle moves to the
hot side of the gauge toward the
shaded area, the engine is too hot. If the vehicle has been operated
under normal driving conditions, pull
off the road, stop the vehicle, and
turn off the engine as soon as
possible.
Safety Belt Reminders
Driver Safety Belt Reminder
Light
There is a driver safety belt
reminder light on the instrument
cluster.
When the vehicle is started, this
light flashes and a chime may come
on to remind the driver to fasten
their safety belt. Then the light stays
on solid until the belt is buckled.
This cycle may continue several
times if the driver remains or
becomes unbuckled while the
vehicle is moving.If the driver safety belt is buckled,
neither the light nor the chime
comes on.
Passenger Safety Belt
Reminder Light
There is a passenger safety belt
reminder light near the passenger
airbag status indicator. See
Passenger Sensing System
069.
When the vehicle is started, this
light flashes and a chime may come
on to remind passengers to fasten
their safety belt. Then the light stays
on solid until the belt is buckled.
This cycle continues several times if
the passenger remains or becomes
unbuckled while the vehicle is
moving.
If the passenger safety belt is
buckled, neither the chime nor the
light comes on.
Page 110 of 354
Buick Verano Owner Manual (GMNA- Localizing-U.S./Canada-10122753) -
2017 - crc - 5/16/16
Instruments and Controls 109
The vehicle may not pass
inspection if:
.The light is on when the engine
is running.
. The light does not come on
when the ignition is in ON/RUN
with the engine not running for
Key Access or in Service Only
Mode for Keyless Access.
. Critical emission control systems
have not been completely
diagnosed. If this happens, the
vehicle would not be ready for
inspection and might require
several days of routine driving
before the system is ready for
inspection. This can happen if
the 12-volt battery has recently
been replaced or run down, or if
the vehicle has been recently
serviced.
See your dealer if the vehicle will
not pass or cannot be made ready
for the test.Brake System Warning
Light
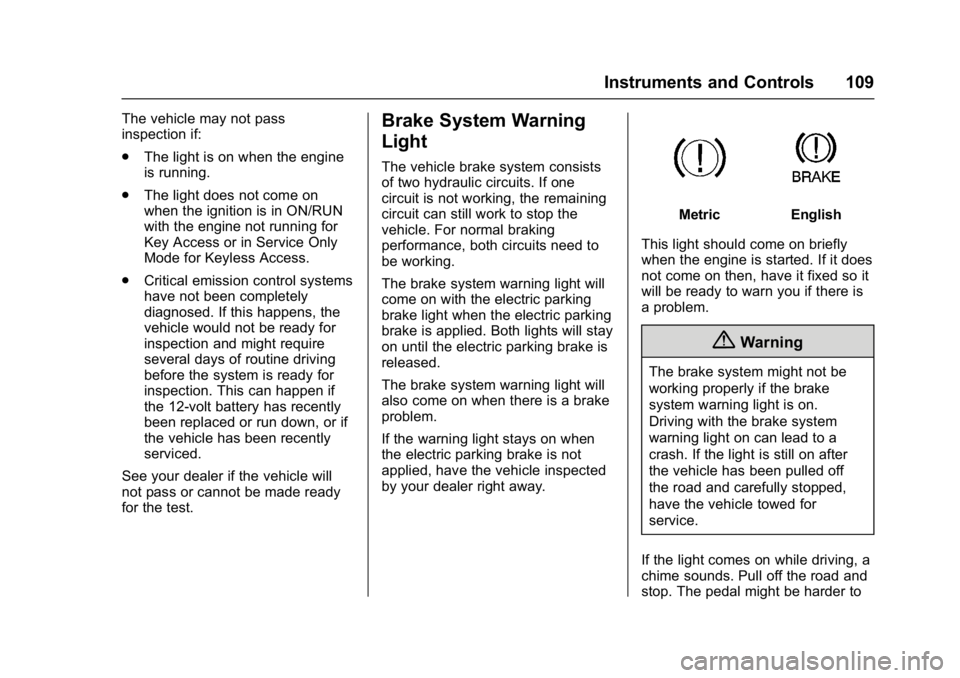
The vehicle brake system consists
of two hydraulic circuits. If one
circuit is not working, the remaining
circuit can still work to stop the
vehicle. For normal braking
performance, both circuits need to
be working.
The brake system warning light will
come on with the electric parking
brake light when the electric parking
brake is applied. Both lights will stay
on until the electric parking brake is
released.
The brake system warning light will
also come on when there is a brake
problem.
If the warning light stays on when
the electric parking brake is not
applied, have the vehicle inspected
by your dealer right away.
MetricEnglish
This light should come on briefly
when the engine is started. If it does
not come on then, have it fixed so it
will be ready to warn you if there is
a problem.
{Warning
The brake system might not be
working properly if the brake
system warning light is on.
Driving with the brake system
warning light on can lead to a
crash. If the light is still on after
the vehicle has been pulled off
the road and carefully stopped,
have the vehicle towed for
service.
If the light comes on while driving, a
chime sounds. Pull off the road and
stop. The pedal might be harder to