headlamp CADILLAC ATS 2014 Owner's Manual
[x] Cancel search | Manufacturer: CADILLAC, Model Year: 2014, Model line: ATS, Model: CADILLAC ATS 2014Pages: 434, PDF Size: 5.61 MB
Page 2 of 434
Black plate (2,1)Cadillac ATS Owner Manual (GMNA-Localizing-U.S./Canada/Mexico-
6014430) - 2014 - 2nd Edition - 8/23/13
2014 Cadillac ATS Owner ManualM
Vehicle Care. . . . . . . . . . . . . . . . . 10-1
General Information . . . . . . . . . . 10-2
Vehicle Checks . . . . . . . . . . . . . . . 10-3
Headlamp Aiming . . . . . . . . . . . 10-29
Bulb Replacement . . . . . . . . . . 10-29
Electrical System . . . . . . . . . . . . 10-31
Wheels and Tires . . . . . . . . . . . 10-40
Jump Starting . . . . . . . . . . . . . . . 10-72
Towing the Vehicle . . . . . . . . . . 10-74
Appearance Care . . . . . . . . . . . 10-77
Service and Maintenance . . . 11-1
General Information . . . . . . . . . . 11-1
Cadillac Premium Care
Maintenance . . . . . . . . . . . . . . . . 11-3
Maintenance Schedule . . . . . . . 11-3
Special Application Services . . . . . . . . . . . . . . . . . . . . 11-9
Additional Maintenance and Care . . . . . . . . . . . . . . . . . . . 11-10
Recommended Fluids,
Lubricants, and Parts . . . . . . 11-13
Maintenance Records . . . . . . . 11-16 Technical Data
. . . . . . . . . . . . . . . 12-1
Vehicle Identification . . . . . . . . . 12-1
Vehicle Data . . . . . . . . . . . . . . . . . . 12-2
Customer Information . . . . . . . 13-1
Customer Information . . . . . . . . 13-1
Reporting Safety Defects . . . . 13-12
Vehicle Data Recording and
Privacy . . . . . . . . . . . . . . . . . . . . 13-13
OnStar . . . . . . . . . . . . . . . . . . . . . . . 14-1
OnStar Overview . . . . . . . . . . . . . 14-1
OnStar Services . . . . . . . . . . . . . . 14-2
OnStar Additional Information . . . . . . . . . . . . . . . . . . 14-5
Index . . . . . . . . . . . . . . . . . . . . . i-1
Page 5 of 434
Black plate (5,1)Cadillac ATS Owner Manual (GMNA-Localizing-U.S./Canada/Mexico-
6014430) - 2014 - 2nd Edition - 8/23/13
Introduction v
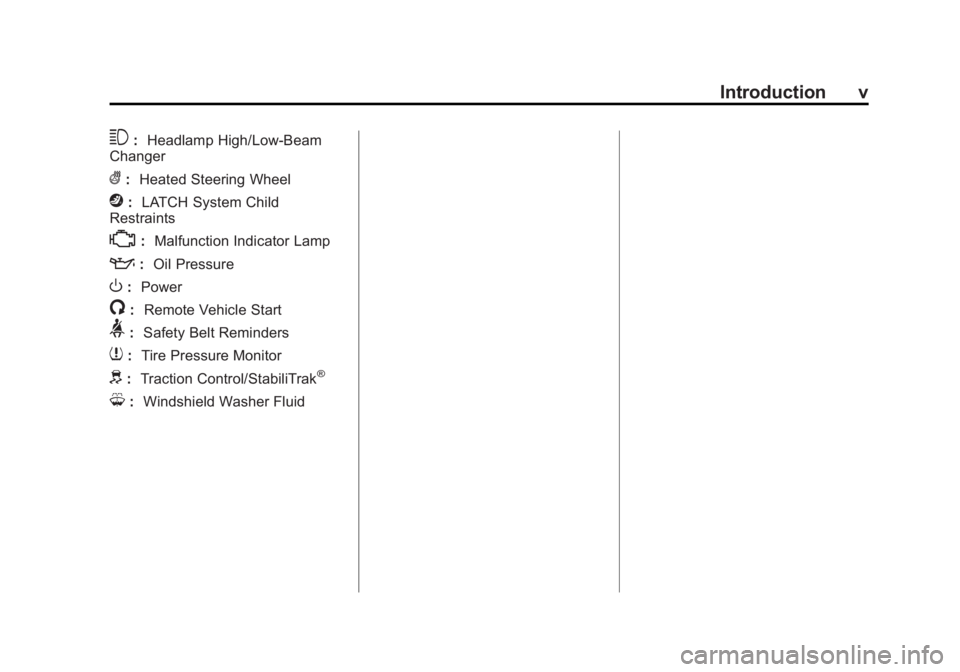
3:Headlamp High/Low-Beam
Changer
(: Heated Steering Wheel
j:LATCH System Child
Restraints
*: Malfunction Indicator Lamp
::Oil Pressure
O:Power
/:Remote Vehicle Start
>:Safety Belt Reminders
7:Tire Pressure Monitor
d:Traction Control/StabiliTrak®
M:Windshield Washer Fluid
Page 9 of 434
Black plate (3,1)Cadillac ATS Owner Manual (GMNA-Localizing-U.S./Canada/Mexico-
6014430) - 2014 - 2nd Edition - 8/23/13
In Brief 1-3
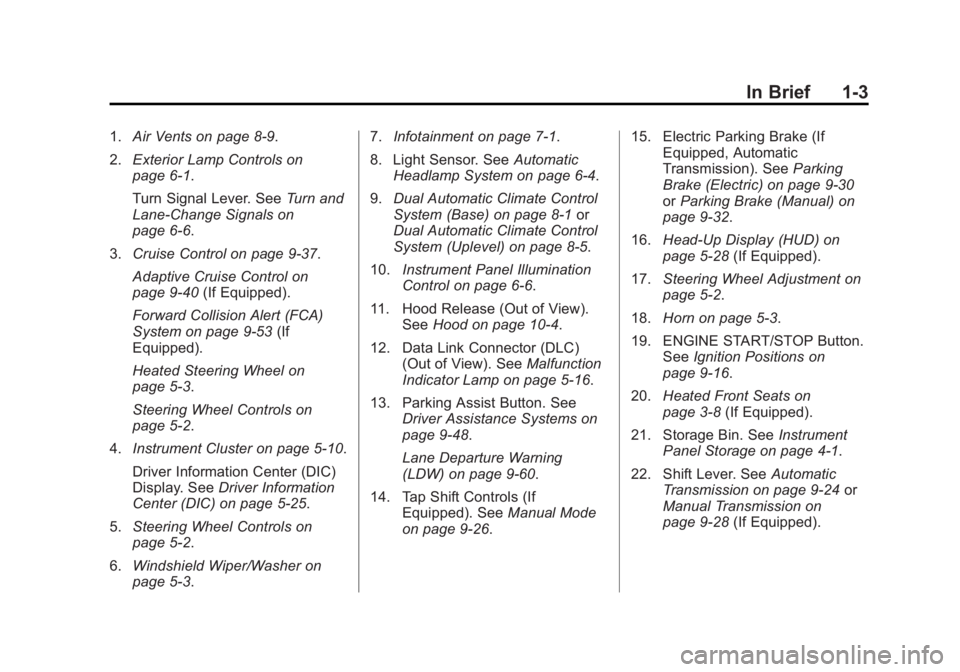
1.Air Vents on page 8-9.
2. Exterior Lamp Controls on
page 6-1.
Turn Signal Lever. See Turn and
Lane-Change Signals on
page 6-6.
3. Cruise Control on page 9-37.
Adaptive Cruise Control on
page 9-40 (If Equipped).
Forward Collision Alert (FCA)
System on page 9-53 (If
Equipped).
Heated Steering Wheel on
page 5-3.
Steering Wheel Controls on
page 5-2.
4. Instrument Cluster on page 5-10.
Driver Information Center (DIC)
Display. See Driver Information
Center (DIC) on page 5-25.
5. Steering Wheel Controls on
page 5-2.
6. Windshield Wiper/Washer on
page 5-3. 7.
Infotainment on page 7-1.
8. Light Sensor. See Automatic
Headlamp System on page 6-4.
9. Dual Automatic Climate Control
System (Base) on page 8-1 or
Dual Automatic Climate Control
System (Uplevel) on page 8-5.
10. Instrument Panel Illumination
Control on page 6-6.
11. Hood Release (Out of View). SeeHood on page 10-4.
12. Data Link Connector (DLC) (Out of View). See Malfunction
Indicator Lamp on page 5-16.
13. Parking Assist Button. See Driver Assistance Systems on
page 9-48.
Lane Departure Warning
(LDW) on page 9-60.
14. Tap Shift Controls (If Equipped). See Manual Mode
on page 9-26. 15. Electric Parking Brake (If
Equipped, Automatic
Transmission). See Parking
Brake (Electric) on page 9-30
or Parking Brake (Manual) on
page 9-32.
16. Head-Up Display (HUD) on
page 5-28 (If Equipped).
17. Steering Wheel Adjustment on
page 5-2.
18. Horn on page 5-3.
19. ENGINE START/STOP Button. SeeIgnition Positions on
page 9-16.
20. Heated Front Seats on
page 3-8 (If Equipped).
21. Storage Bin. See Instrument
Panel Storage on page 4-1.
22. Shift Lever. See Automatic
Transmission on page 9-24 or
Manual Transmission on
page 9-28 (If Equipped).
Page 16 of 434
Black plate (10,1)Cadillac ATS Owner Manual (GMNA-Localizing-U.S./Canada/Mexico-
6014430) - 2014 - 2nd Edition - 8/23/13
1-10 In Brief
3. Move the selector switch to)to
deselect the mirror.
The vehicle has manual folding
mirrors. See Folding Mirrors on
page 2-20.
Interior Mirrors
Adjustment
Adjust the rearview mirror for a clear
view behind the vehicle.
Manual Rearview Mirror
For vehicles with a manual rearview
mirror, push the tab forward for
daytime use and pull it for nighttime
use to avoid glare from the
headlamps from behind. See
Manual Rearview Mirror on
page 2-21.
Automatic Dimming Rearview
Mirror
For vehicles with an automatic
dimming rearview mirror, the mirror
will automatically reduce the glare
from the headlamps from behind.
The dimming feature comes on when the vehicle is started. See
Automatic Dimming Rearview Mirror
on page 2-21.
Steering Wheel
Adjustment
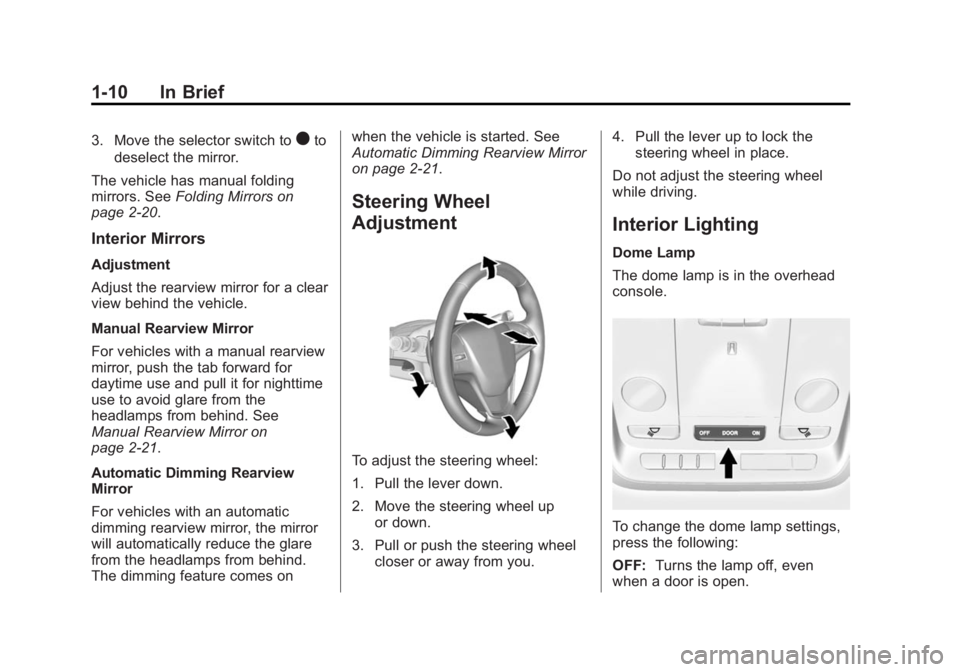
To adjust the steering wheel:
1. Pull the lever down.
2. Move the steering wheel up
or down.
3. Pull or push the steering wheel closer or away from you. 4. Pull the lever up to lock the
steering wheel in place.
Do not adjust the steering wheel
while driving.
Interior Lighting
Dome Lamp
The dome lamp is in the overhead
console.
To change the dome lamp settings,
press the following:
OFF: Turns the lamp off, even
when a door is open.
Page 17 of 434

Black plate (11,1)Cadillac ATS Owner Manual (GMNA-Localizing-U.S./Canada/Mexico-
6014430) - 2014 - 2nd Edition - 8/23/13
In Brief 1-11
DOOR:The lamp comes on when
a door is opened.
ON: Turns the lamp on.
Reading Lamps
There are reading lamps on the
overhead console and over the rear
passenger doors. These lamps
come on when any door is opened.
To manually turn the reading lamps
on or off:
Pressmornnext to each
overhead console reading lamp. Press the lamp lens to turn the rear
passenger reading lamps on or off.
For more information on interior
lighting, see
Instrument Panel
Illumination Control on page 6-6.
Exterior Lighting
The exterior lamp control is on the
turn signal lever.
Turn the control to the following
positions:
O: Turns off the exterior lamps.
The knob returns to the AUTO
position after it is released. Turn to
Oagain to reactivate the AUTO
mode. In Canada, the headlamps
will automatically reactivate when the vehicle is shifted out of P (Park)
on automatic transmission vehicles,
and when the parking brake is
released on manual transmission
vehicles.
AUTO:
Automatically turns the
exterior lamps on and off,
depending on outside lighting.
;: Turns on the parking lamps
including all lamps, except the
headlamps.
5: Turns on the headlamps
together with the parking lamps and
instrument panel lights.
See Exterior Lamp Controls on
page 6-1 andDaytime Running
Lamps (DRL) on page 6-4.
Windshield Wiper/Washer
Page 33 of 434
Black plate (3,1)Cadillac ATS Owner Manual (GMNA-Localizing-U.S./Canada/Mexico-
6014430) - 2014 - 2nd Edition - 8/23/13
Keys, Doors, and Windows 2-3
Remote Keyless Entry
(RKE) System Operation
The RKE transmitter functions may
work up to 60 m (197 ft) away from
the vehicle.
Keep in mind that other conditions,
such as those previously stated, can
impact the performance of the
transmitter.
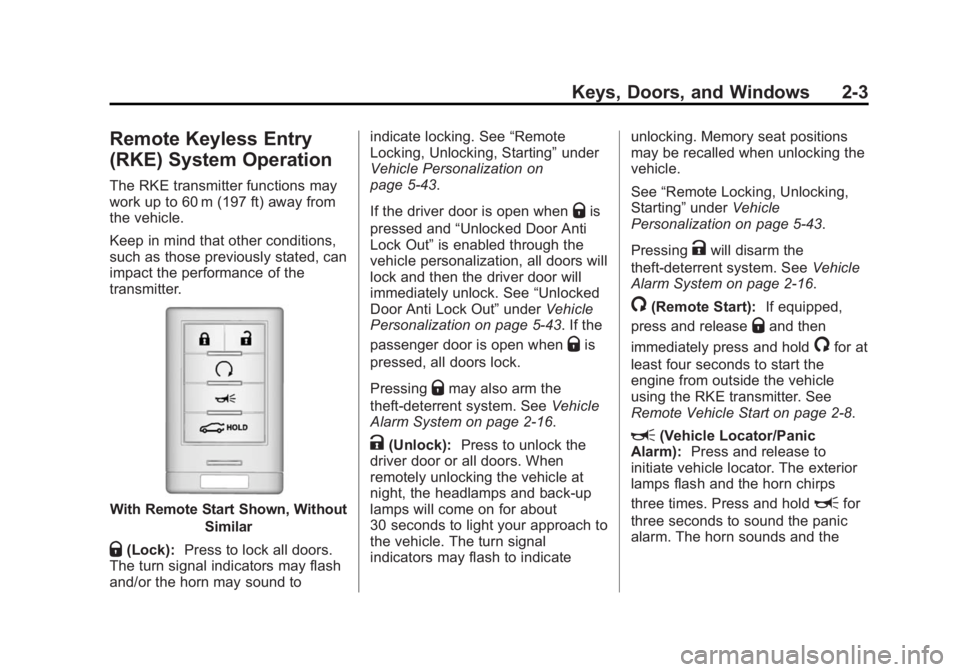
With Remote Start Shown, WithoutSimilar
Q(Lock):Press to lock all doors.
The turn signal indicators may flash
and/or the horn may sound to indicate locking. See
“Remote
Locking, Unlocking, Starting” under
Vehicle Personalization on
page 5-43.
If the driver door is open when
Qis
pressed and “Unlocked Door Anti
Lock Out” is enabled through the
vehicle personalization, all doors will
lock and then the driver door will
immediately unlock. See “Unlocked
Door Anti Lock Out” underVehicle
Personalization on page 5-43. If the
passenger door is open when
Qis
pressed, all doors lock.
Pressing
Qmay also arm the
theft-deterrent system. See Vehicle
Alarm System on page 2-16.
K(Unlock): Press to unlock the
driver door or all doors. When
remotely unlocking the vehicle at
night, the headlamps and back-up
lamps will come on for about
30 seconds to light your approach to
the vehicle. The turn signal
indicators may flash to indicate unlocking. Memory seat positions
may be recalled when unlocking the
vehicle.
See
“Remote Locking, Unlocking,
Starting” underVehicle
Personalization on page 5-43.
Pressing
Kwill disarm the
theft-deterrent system. See Vehicle
Alarm System on page 2-16.
/(Remote Start): If equipped,
press and release
Qand then
immediately press and hold
/for at
least four seconds to start the
engine from outside the vehicle
using the RKE transmitter. See
Remote Vehicle Start on page 2-8.
L(Vehicle Locator/Panic
Alarm): Press and release to
initiate vehicle locator. The exterior
lamps flash and the horn chirps
three times. Press and hold
Lfor
three seconds to sound the panic
alarm. The horn sounds and the
Page 50 of 434
Black plate (20,1)Cadillac ATS Owner Manual (GMNA-Localizing-U.S./Canada/Mexico-
6014430) - 2014 - 2nd Edition - 8/23/13
2-20 Keys, Doors, and Windows
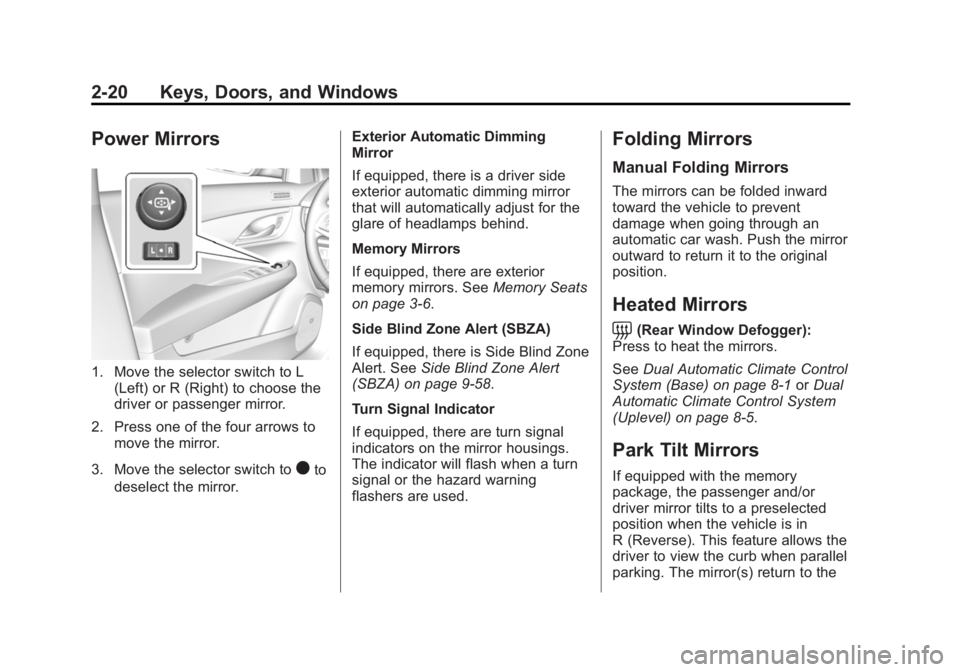
Power Mirrors
1. Move the selector switch to L(Left) or R (Right) to choose the
driver or passenger mirror.
2. Press one of the four arrows to move the mirror.
3. Move the selector switch to
)to
deselect the mirror. Exterior Automatic Dimming
Mirror
If equipped, there is a driver side
exterior automatic dimming mirror
that will automatically adjust for the
glare of headlamps behind.
Memory Mirrors
If equipped, there are exterior
memory mirrors. See
Memory Seats
on page 3-6.
Side Blind Zone Alert (SBZA)
If equipped, there is Side Blind Zone
Alert. See Side Blind Zone Alert
(SBZA) on page 9-58.
Turn Signal Indicator
If equipped, there are turn signal
indicators on the mirror housings.
The indicator will flash when a turn
signal or the hazard warning
flashers are used.
Folding Mirrors
Manual Folding Mirrors
The mirrors can be folded inward
toward the vehicle to prevent
damage when going through an
automatic car wash. Push the mirror
outward to return it to the original
position.
Heated Mirrors
=
(Rear Window Defogger):
Press to heat the mirrors.
See Dual Automatic Climate Control
System (Base) on page 8-1 orDual
Automatic Climate Control System
(Uplevel) on page 8-5.
Park Tilt Mirrors
If equipped with the memory
package, the passenger and/or
driver mirror tilts to a preselected
position when the vehicle is in
R (Reverse). This feature allows the
driver to view the curb when parallel
parking. The mirror(s) return to the
Page 51 of 434
Black plate (21,1)Cadillac ATS Owner Manual (GMNA-Localizing-U.S./Canada/Mexico-
6014430) - 2014 - 2nd Edition - 8/23/13
Keys, Doors, and Windows 2-21
original position when the vehicle is
shifted out of R (Reverse), the
ignition is turned off, or if the vehicle
is driven in (R) above a
predetermined speed.
Turn this feature on or off through
vehicle personalization. SeeVehicle
Personalization on page 5-43.Interior Mirrors
Interior Rearview Mirrors
Adjust the rearview mirror for a clear
view of the area behind your
vehicle.
Do not spray glass cleaner directly
on the mirror. Use a soft towel
dampened with water.
Manual Rearview Mirror
If equipped with a manual rearview
mirror, push the tab forward for
daytime use and pull it for nighttime
use to avoid glare from the
headlamps from behind.
Automatic Dimming
Rearview Mirror
If equipped, automatic dimming
reduces the glare of headlamps
from behind. The dimming feature
comes on when the vehicle is
started.
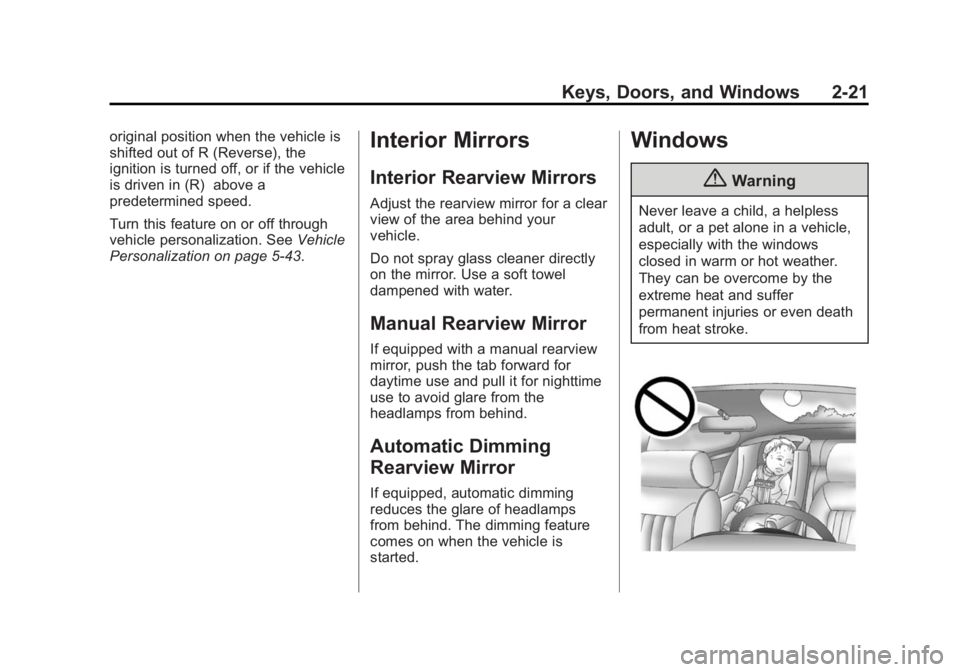
Windows
{Warning
Never leave a child, a helpless
adult, or a pet alone in a vehicle,
especially with the windows
closed in warm or hot weather.
They can be overcome by the
extreme heat and suffer
permanent injuries or even death
from heat stroke.
Page 109 of 434
Black plate (1,1)Cadillac ATS Owner Manual (GMNA-Localizing-U.S./Canada/Mexico-
6014430) - 2014 - 2nd Edition - 8/23/13
Instruments and Controls 5-1
Instruments and
Controls
Controls
Steering Wheel Adjustment . . . 5-2
Steering Wheel Controls . . . . . . 5-2
Heated Steering Wheel . . . . . . . 5-3
Horn . . . . . . . . . . . . . . . . . . . . . . . . . . 5-3
Windshield Wiper/Washer . . . . . 5-3
Headlamp Washer . . . . . . . . . . . . 5-5
Compass . . . . . . . . . . . . . . . . . . . . . 5-5
Clock (Base Radio) . . . . . . . . . . . 5-6
Clock (Uplevel Radio) . . . . . . . . . 5-6
Power Outlets . . . . . . . . . . . . . . . . . 5-7
Warning Lights, Gauges, and
Indicators
Warning Lights, Gauges, andIndicators . . . . . . . . . . . . . . . . . . . . 5-8
Instrument Cluster . . . . . . . . . . . 5-10
Speedometer . . . . . . . . . . . . . . . . 5-11
Odometer . . . . . . . . . . . . . . . . . . . . 5-11
Trip Odometer . . . . . . . . . . . . . . . 5-12
Tachometer . . . . . . . . . . . . . . . . . . 5-12
Fuel Gauge . . . . . . . . . . . . . . . . . . 5-12
Engine Coolant Temperature Gauge . . . . . . . . . . . . . . . . . . . . . . 5-13 Safety Belt Reminders . . . . . . . 5-13
Airbag Readiness Light . . . . . . 5-14
Passenger Airbag Status
Indicator . . . . . . . . . . . . . . . . . . . . 5-15
Charging System Light . . . . . . 5-15
Malfunction
Indicator Lamp . . . . . . . . . . . . . 5-16
Brake System Warning Light . . . . . . . . . . . . . . . . . . . . . . . 5-18
Parking Brake Light . . . . . . . . . . 5-19
Service Electric Parking Brake Light . . . . . . . . . . . . . . . . . . . . . . . 5-19
Antilock Brake System (ABS) Warning Light . . . . . . . . . . . . . . 5-20
Lane Departure Warning (LDW) Light . . . . . . . . . . . . . . . . 5-20
Vehicle Ahead Indicator . . . . . . 5-20
Traction Off Light . . . . . . . . . . . . 5-21
StabiliTrak
®OFF Light . . . . . . . 5-21
Traction Control System (TCS)/StabiliTrak
®Light . . . . 5-21
Engine Coolant Temperature Warning Light . . . . . . . . . . . . . . 5-22
Tire Pressure Light . . . . . . . . . . 5-22
Engine Oil Pressure Light . . . . 5-23
Low Fuel Warning Light . . . . . . 5-23
Security Light . . . . . . . . . . . . . . . . 5-23
High-Beam On Light . . . . . . . . . 5-24 Adaptive Forward Lighting
(AFL) Light . . . . . . . . . . . . . . . . . 5-24
Lamps On Reminder . . . . . . . . . 5-24
Cruise Control Light . . . . . . . . . 5-24
Information Displays
Driver Information Center (DIC) . . . . . . . . . . . . . . . 5-25
Head-Up Display (HUD) . . . . . 5-28
Vehicle Messages
Vehicle Messages . . . . . . . . . . . 5-32
Battery Voltage and Charging Messages . . . . . . . . . . . . . . . . . . 5-32
Brake System Messages . . . . 5-32
Compass Messages . . . . . . . . . 5-33
Cruise Control Messages . . . . 5-33
Door Ajar Messages . . . . . . . . . 5-34
Engine Cooling System Messages . . . . . . . . . . . . . . . . . . 5-34
Engine Oil Messages . . . . . . . . 5-35
Engine Power Messages . . . . 5-35
Fuel System Messages . . . . . . 5-35
Key and Lock Messages . . . . . 5-36
Lamp Messages . . . . . . . . . . . . . 5-36
Object Detection System Messages . . . . . . . . . . . . . . . . . . 5-37
Ride Control System Messages . . . . . . . . . . . . . . . . . . 5-39
Page 112 of 434

Black plate (4,1)Cadillac ATS Owner Manual (GMNA-Localizing-U.S./Canada/Mexico-
6014430) - 2014 - 2nd Edition - 8/23/13
5-4 Instruments and Controls
INT (Intermittent Wipes):Move
the lever up to INT for intermittent
wipes, then turn the
xINT band
up for more frequent wipes or down
for less frequent wipes.
If the windshield wipers are in use
for about six seconds while driving,
the exterior lamps come on
automatically if the exterior lamp
control is in AUTO. See “Lights On
with Wipers” underAutomatic
Headlamp System on page 6-4.
OFF: Use to turn the wipers off.
1X (Mist): For a single wipe, briefly
move the wiper lever down. For
several wipes, hold the wiper
lever down. Clear snow and ice from the wiper
blades and windshield before using
them. If frozen to the windshield,
carefully loosen or thaw them.
Damaged blades should be
replaced. See
Wiper Blade
Replacement on page 10-28.
Heavy snow or ice can overload the
wiper motor.
Wiper Parking
If the ignition is put in OFF while the
wipers are on LO, HI, or INT, they
will immediately stop.
If the windshield wiper lever is then
moved to OFF before the driver
door is opened or within 10 minutes,
the wipers will restart and move to
the base of the windshield.
If the ignition is put in OFF while the
wipers are performing wipes due to
windshield washing, the wipers
continue to run until they reach the
base of the windshield.
Rainsense™
If equipped with Rainsense, a
sensor near the top center of the
windshield detects the amount of
water on the windshield and
controls the frequency of the
windshield wiper.
Keep this area of the windshield
clear of debris to allow for best
system performance.
INT (Rainsense Wipe Sensitivity
Control): Move the windshield
wiper lever to INT. Turn the
xINT
band on the wiper lever to adjust the
sensitivity.
.Turn the band up for more
sensitivity to moisture.
.Turn the band down for less
sensitivity to moisture.