display CADILLAC ATS 2015 1.G CUE Manual
[x] Cancel search | Manufacturer: CADILLAC, Model Year: 2015, Model line: ATS, Model: CADILLAC ATS 2015 1.GPages: 138, PDF Size: 1.05 MB
Page 70 of 138
Black plate (70,1)Cadillac CUE Infotainment System (GMNA-Localizing-U.S./Canada-
7639728) - 2015 - CRC - 9/3/14
70 Infotainment System
Pressing on any of the options will
display the destination details view
for that location to allow you to
begin guidance to the selected
location.
Press the Nearest Address button
and then the Save screen button to
store the current location to the
Address Book.
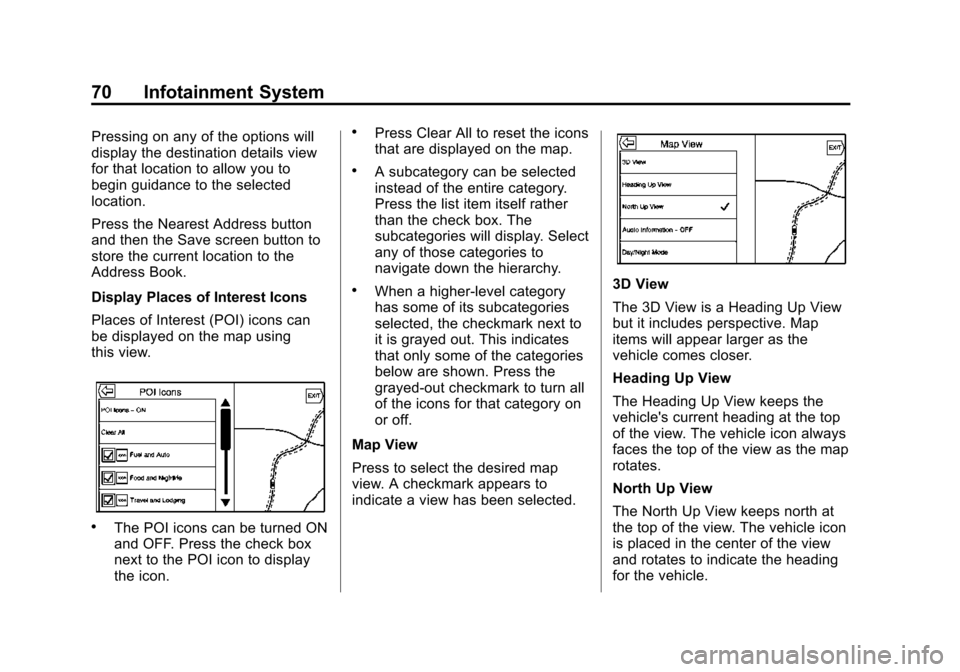
Display Places of Interest Icons
Places of Interest (POI) icons can
be displayed on the map using
this view.
.The POI icons can be turned ON
and OFF. Press the check box
next to the POI icon to display
the icon.
.Press Clear All to reset the icons
that are displayed on the map.
.A subcategory can be selected
instead of the entire category.
Press the list item itself rather
than the check box. The
subcategories will display. Select
any of those categories to
navigate down the hierarchy.
.When a higher-level category
has some of its subcategories
selected, the checkmark next to
it is grayed out. This indicates
that only some of the categories
below are shown. Press the
grayed-out checkmark to turn all
of the icons for that category on
or off.
Map View
Press to select the desired map
view. A checkmark appears to
indicate a view has been selected.3D View
The 3D View is a Heading Up View
but it includes perspective. Map
items will appear larger as the
vehicle comes closer.
Heading Up View
The Heading Up View keeps the
vehicle's current heading at the top
of the view. The vehicle icon always
faces the top of the view as the map
rotates.
North Up View
The North Up View keeps north at
the top of the view. The vehicle icon
is placed in the center of the view
and rotates to indicate the heading
for the vehicle.
Page 71 of 138
Black plate (71,1)Cadillac CUE Infotainment System (GMNA-Localizing-U.S./Canada-
7639728) - 2015 - CRC - 9/3/14
Infotainment System 71
Audio Information On/Off
Press to turn the audio information
view on or off from the main map
view. When ON, the audio
information becomes an audio
status pane. This allows for two
lines of audio information in the
status pane and enables the use of
some Interaction Selector controls.
The audio status screen contains
the following elements:
.Station Frequency
.Artist Information
.Song Information
.r/jort/uStation and
Channel Controls
Press the
t/uStation controls to
go to the next or previous strong
signal station or digital channel.
When the audio status pane
displays Artist and Song
Information, press the
t/u
controls to go to the next or
previous track based on the current
media mode.
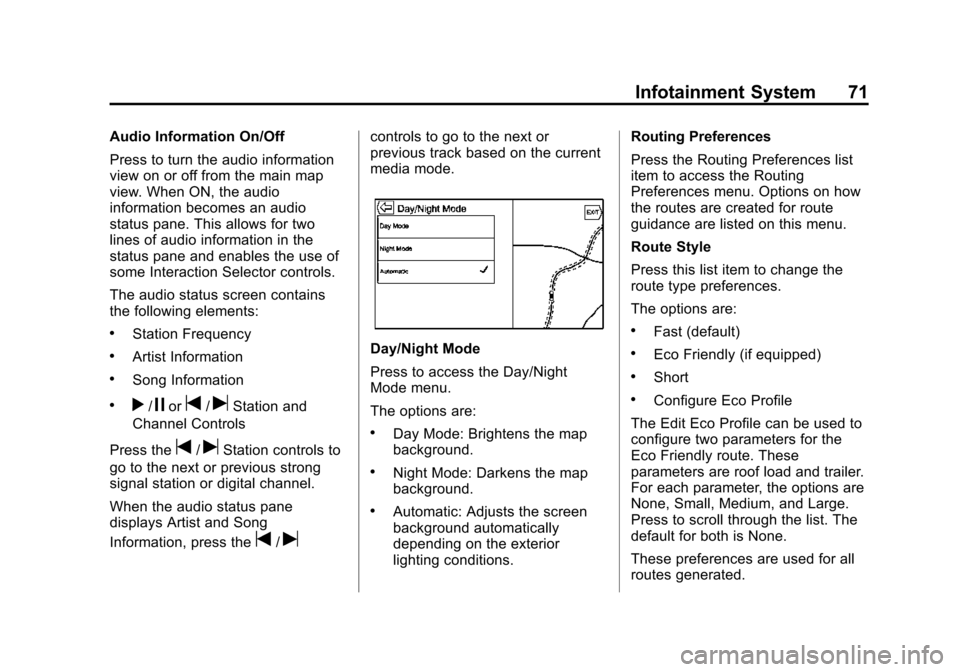
Day/Night Mode
Press to access the Day/Night
Mode menu.
The options are:
.Day Mode: Brightens the map
background.
.Night Mode: Darkens the map
background.
.Automatic: Adjusts the screen
background automatically
depending on the exterior
lighting conditions. Routing Preferences
Press the Routing Preferences list
item to access the Routing
Preferences menu. Options on how
the routes are created for route
guidance are listed on this menu.
Route Style
Press this list item to change the
route type preferences.
The options are:
.Fast (default)
.Eco Friendly (if equipped)
.Short
.Configure Eco Profile
The Edit Eco Profile can be used to
configure two parameters for the
Eco Friendly route. These
parameters are roof load and trailer.
For each parameter, the options are
None, Small, Medium, and Large.
Press to scroll through the list. The
default for both is None.
These preferences are used for all
routes generated.
Page 72 of 138
Black plate (72,1)Cadillac CUE Infotainment System (GMNA-Localizing-U.S./Canada-
7639728) - 2015 - CRC - 9/3/14
72 Infotainment System
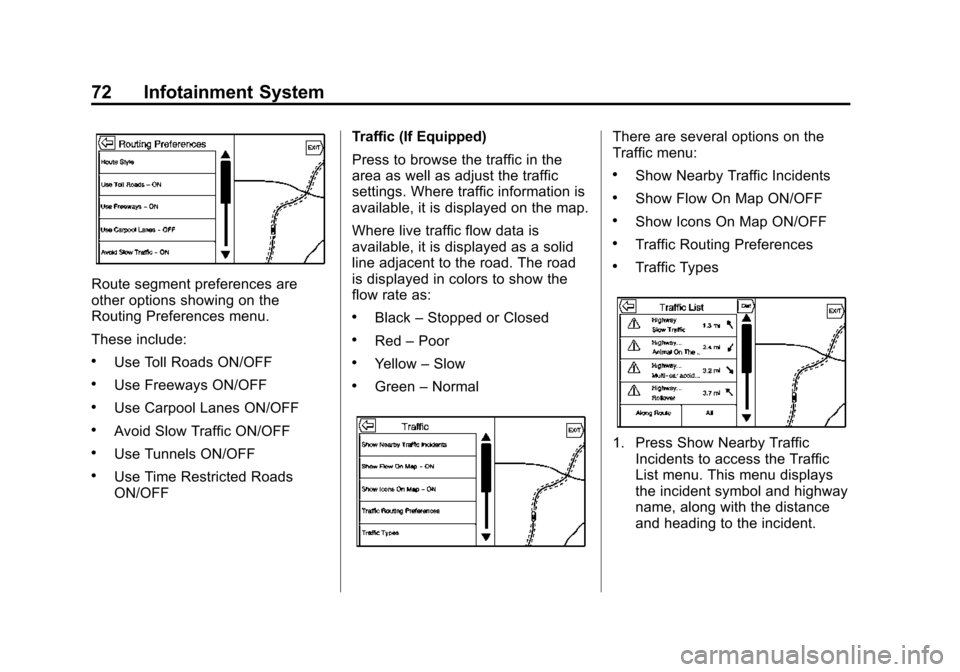
Route segment preferences are
other options showing on the
Routing Preferences menu.
These include:
.Use Toll Roads ON/OFF
.Use Freeways ON/OFF
.Use Carpool Lanes ON/OFF
.Avoid Slow Traffic ON/OFF
.Use Tunnels ON/OFF
.Use Time Restricted Roads
ON/OFFTraffic (If Equipped)
Press to browse the traffic in the
area as well as adjust the traffic
settings. Where traffic information is
available, it is displayed on the map.
Where live traffic flow data is
available, it is displayed as a solid
line adjacent to the road. The road
is displayed in colors to show the
flow rate as:
.Black
–Stopped or Closed
.Red –Poor
.Yellow –Slow
.Green –Normal
There are several options on the
Traffic menu:
.Show Nearby Traffic Incidents
.Show Flow On Map ON/OFF
.Show Icons On Map ON/OFF
.Traffic Routing Preferences
.Traffic Types
1. Press Show Nearby Traffic
Incidents to access the Traffic
List menu. This menu displays
the incident symbol and highway
name, along with the distance
and heading to the incident.
Page 73 of 138
Black plate (73,1)Cadillac CUE Infotainment System (GMNA-Localizing-U.S./Canada-
7639728) - 2015 - CRC - 9/3/14
Infotainment System 73
2. Press on the incident to displayadditional details about the
incident as well as an option to
avoid that particular incident if it
is along the current route.
Traffic Routing Preferences
The system can be configured as to
how it reacts when receiving traffic
information. Press Traffic Routing
Preferences to access the Traffic
Routing menu.
When this setting is OFF, the
system will never take traffic
conditions into account when
creating routes. In addition, the
two options below are grayed out. If one of the grayed-out options is
pressed, it automatically turns the
traffic avoidance feature ON and
performs the desired selection.
The two options, Ask Me Before
Avoiding and Automatically Avoid
Traffic, will adjust the system as
follows:
.If the Automatically Avoid Traffic
list item is pressed, the system
will automatically adjust the
route based on traffic without
notifying the driver.
.If the Ask Me Before Avoiding
list item is pressed, the system
will always use Alerts to show
when there is an incident and
allow it to be avoided by
pressing the avoid button.
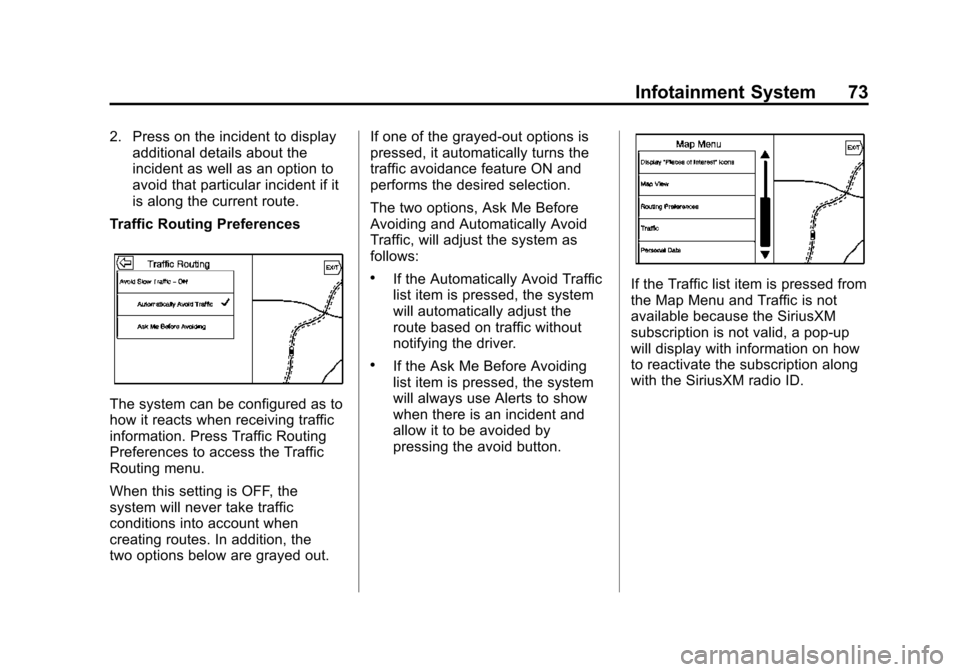
If the Traffic list item is pressed from
the Map Menu and Traffic is not
available because the SiriusXM
subscription is not valid, a pop-up
will display with information on how
to reactivate the subscription along
with the SiriusXM radio ID.
Page 74 of 138
Black plate (74,1)Cadillac CUE Infotainment System (GMNA-Localizing-U.S./Canada-
7639728) - 2015 - CRC - 9/3/14
74 Infotainment System
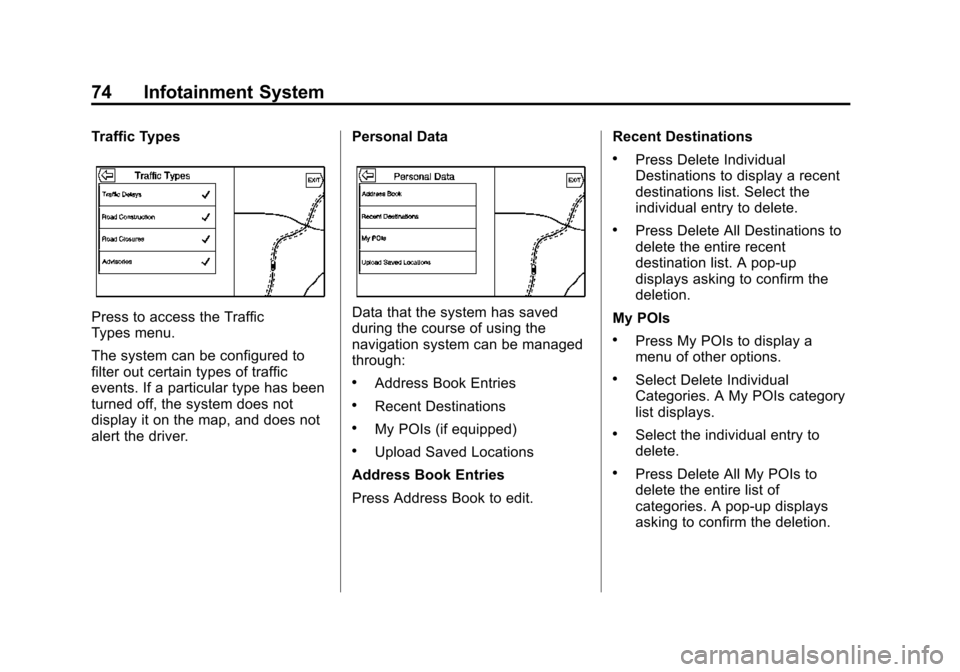
Traffic Types
Press to access the Traffic
Types menu.
The system can be configured to
filter out certain types of traffic
events. If a particular type has been
turned off, the system does not
display it on the map, and does not
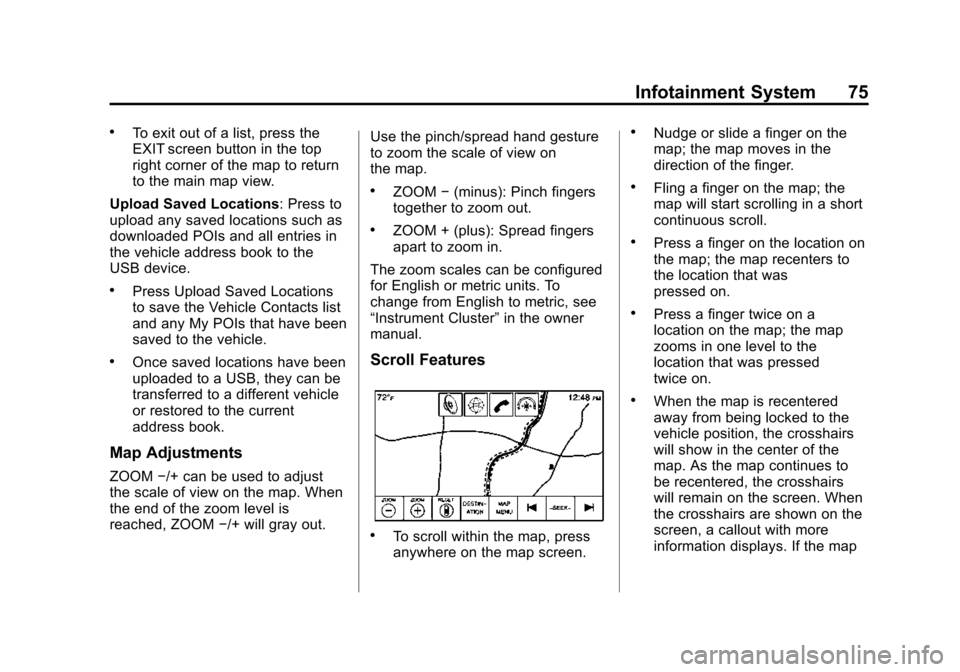
alert the driver.Personal DataData that the system has saved
during the course of using the
navigation system can be managed
through:
.Address Book Entries
.Recent Destinations
.My POIs (if equipped)
.Upload Saved Locations
Address Book Entries
Press Address Book to edit. Recent Destinations
.Press Delete Individual
Destinations to display a recent
destinations list. Select the
individual entry to delete.
.Press Delete All Destinations to
delete the entire recent
destination list. A pop-up
displays asking to confirm the
deletion.
My POIs
.Press My POIs to display a
menu of other options.
.Select Delete Individual
Categories. A My POIs category
list displays.
.Select the individual entry to
delete.
.Press Delete All My POIs to
delete the entire list of
categories. A pop-up displays
asking to confirm the deletion.
Page 75 of 138
Black plate (75,1)Cadillac CUE Infotainment System (GMNA-Localizing-U.S./Canada-
7639728) - 2015 - CRC - 9/3/14
Infotainment System 75
.To exit out of a list, press the
EXIT screen button in the top
right corner of the map to return
to the main map view.
Upload Saved Locations: Press to
upload any saved locations such as
downloaded POIs and all entries in
the vehicle address book to the
USB device.
.Press Upload Saved Locations
to save the Vehicle Contacts list
and any My POIs that have been
saved to the vehicle.
.Once saved locations have been
uploaded to a USB, they can be
transferred to a different vehicle
or restored to the current
address book.
Map Adjustments
ZOOM −/+ can be used to adjust
the scale of view on the map. When
the end of the zoom level is
reached, ZOOM −/+ will gray out. Use the pinch/spread hand gesture
to zoom the scale of view on
the map.
.ZOOM
−(minus): Pinch fingers
together to zoom out.
.ZOOM + (plus): Spread fingers
apart to zoom in.
The zoom scales can be configured
for English or metric units. To
change from English to metric, see
“Instrument Cluster” in the owner
manual.
Scroll Features
.To scroll within the map, press
anywhere on the map screen.
.Nudge or slide a finger on the
map; the map moves in the
direction of the finger.
.Fling a finger on the map; the
map will start scrolling in a short
continuous scroll.
.Press a finger on the location on
the map; the map recenters to
the location that was
pressed on.
.Press a finger twice on a
location on the map; the map
zooms in one level to the
location that was pressed
twice on.
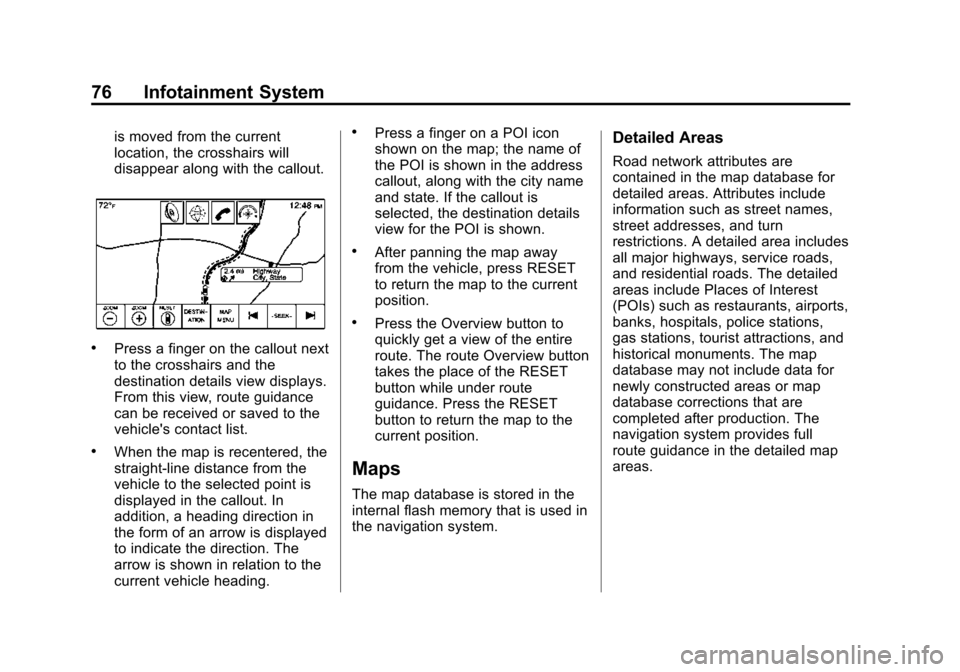
.When the map is recentered
away from being locked to the
vehicle position, the crosshairs
will show in the center of the
map. As the map continues to
be recentered, the crosshairs
will remain on the screen. When
the crosshairs are shown on the
screen, a callout with more
information displays. If the map
Page 76 of 138
Black plate (76,1)Cadillac CUE Infotainment System (GMNA-Localizing-U.S./Canada-
7639728) - 2015 - CRC - 9/3/14
76 Infotainment System
is moved from the current
location, the crosshairs will
disappear along with the callout.
.Press a finger on the callout next
to the crosshairs and the
destination details view displays.
From this view, route guidance
can be received or saved to the
vehicle's contact list.
.When the map is recentered, the
straight-line distance from the
vehicle to the selected point is
displayed in the callout. In
addition, a heading direction in
the form of an arrow is displayed
to indicate the direction. The
arrow is shown in relation to the
current vehicle heading.
.Press a finger on a POI icon
shown on the map; the name of
the POI is shown in the address
callout, along with the city name
and state. If the callout is
selected, the destination details
view for the POI is shown.
.After panning the map away
from the vehicle, press RESET
to return the map to the current
position.
.Press the Overview button to
quickly get a view of the entire
route. The route Overview button
takes the place of the RESET
button while under route
guidance. Press the RESET
button to return the map to the
current position.
Maps
The map database is stored in the
internal flash memory that is used in
the navigation system.
Detailed Areas
Road network attributes are
contained in the map database for
detailed areas. Attributes include
information such as street names,
street addresses, and turn
restrictions. A detailed area includes
all major highways, service roads,
and residential roads. The detailed
areas include Places of Interest
(POIs) such as restaurants, airports,
banks, hospitals, police stations,
gas stations, tourist attractions, and
historical monuments. The map
database may not include data for
newly constructed areas or map
database corrections that are
completed after production. The
navigation system provides full
route guidance in the detailed map
areas.
Page 77 of 138
Black plate (77,1)Cadillac CUE Infotainment System (GMNA-Localizing-U.S./Canada-
7639728) - 2015 - CRC - 9/3/14
Infotainment System 77
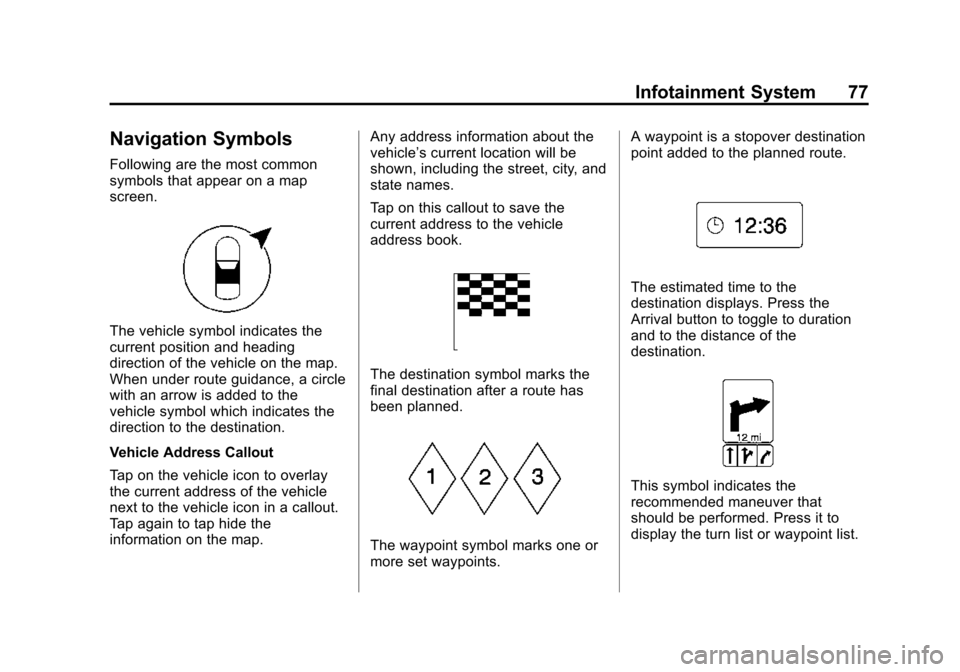
Navigation Symbols
Following are the most common
symbols that appear on a map
screen.
The vehicle symbol indicates the
current position and heading
direction of the vehicle on the map.
When under route guidance, a circle
with an arrow is added to the
vehicle symbol which indicates the
direction to the destination.
Vehicle Address Callout
Tap on the vehicle icon to overlay
the current address of the vehicle
next to the vehicle icon in a callout.
Tap again to tap hide the
information on the map.Any address information about the
vehicle’s current location will be
shown, including the street, city, and
state names.
Tap on this callout to save the
current address to the vehicle
address book.
The destination symbol marks the
final destination after a route has
been planned.
The waypoint symbol marks one or
more set waypoints.A waypoint is a stopover destination
point added to the planned route.
The estimated time to the
destination displays. Press the
Arrival button to toggle to duration
and to the distance of the
destination.
This symbol indicates the
recommended maneuver that
should be performed. Press it to
display the turn list or waypoint list.
Page 78 of 138
Black plate (78,1)Cadillac CUE Infotainment System (GMNA-Localizing-U.S./Canada-
7639728) - 2015 - CRC - 9/3/14
78 Infotainment System
The No GPS symbol appears when
there is no Global Positioning
System (GPS) satellite signal. When
the GPS is gone, the vehicle
position on the map may not be
accurate.
Autozoom
As a maneuver is being
approached, the map automatically
zooms in to give greater detail.
If lane guidance is available for the
maneuver, this is also shown.
When the system begins to
autozoom, it zooms in to its
minimum level. After the maneuver
is performed, the system slowly
zooms back out.
Driving on a Route
Maneuver Road Name
If the road name has multiple
names, all names are shown.
Map View with Proximity
Map View without ProximityIf the road that the system has
calculated for the next maneuver
has an icon, it will be shown to the
left of the maneuver road name.
The distance to the maneuver is
shown from the current location
along the route to the maneuver.
Off-Road Indication
When driving in an area with no
road showing on the map, the
system transitions to off-road mode.
The map displays a destination
pointer in the Turn List area. The
system will attempt to guide by
showing a highlighted route starting
at the nearest road. This road name
is shown in the next maneuver
name field at the top of the screen.
Page 79 of 138
Black plate (79,1)Cadillac CUE Infotainment System (GMNA-Localizing-U.S./Canada-
7639728) - 2015 - CRC - 9/3/14
Infotainment System 79
Navigation Next Turn Maneuver
Alert
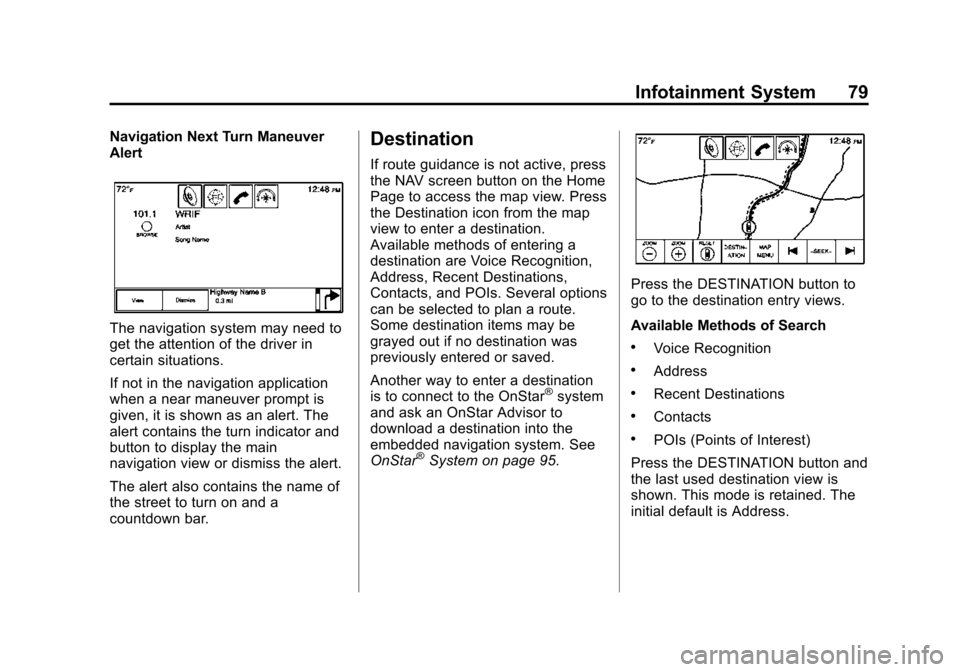
The navigation system may need to
get the attention of the driver in
certain situations.
If not in the navigation application
when a near maneuver prompt is
given, it is shown as an alert. The
alert contains the turn indicator and
button to display the main
navigation view or dismiss the alert.
The alert also contains the name of
the street to turn on and a
countdown bar.
Destination
If route guidance is not active, press
the NAV screen button on the Home
Page to access the map view. Press
the Destination icon from the map
view to enter a destination.
Available methods of entering a
destination are Voice Recognition,
Address, Recent Destinations,
Contacts, and POIs. Several options
can be selected to plan a route.
Some destination items may be
grayed out if no destination was
previously entered or saved.
Another way to enter a destination
is to connect to the OnStar
®system
and ask an OnStar Advisor to
download a destination into the
embedded navigation system. See
OnStar
®System on page 95.
Press the DESTINATION button to
go to the destination entry views.
Available Methods of Search
.Voice Recognition
.Address
.Recent Destinations
.Contacts
.POIs (Points of Interest)
Press the DESTINATION button and
the last used destination view is
shown. This mode is retained. The
initial default is Address.