light CADILLAC CT4 2020 Convenience & Personalization Guide
[x] Cancel search | Manufacturer: CADILLAC, Model Year: 2020, Model line: CT4, Model: CADILLAC CT4 2020Pages: 20, PDF Size: 3.25 MB
Page 8 of 20
8
CADILLAC USER EXPERIENCE FEATURES
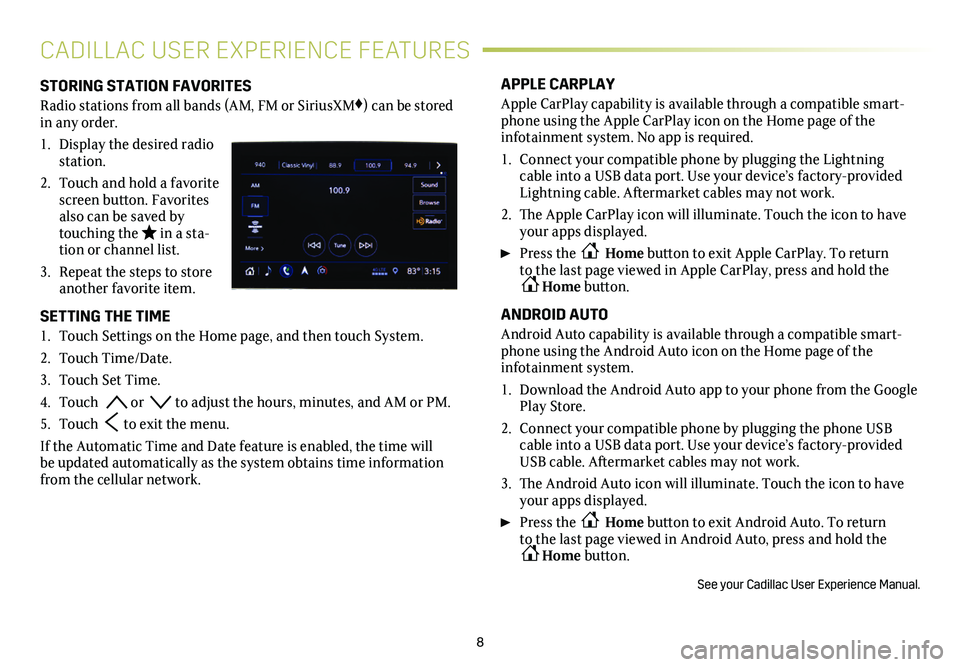
STORING STATION FAVORITES
Radio stations from all bands (AM, FM or SiriusXM♦) can be stored in any order.
1. Display the desired radio station.
2. Touch and hold a favorite screen button. Favorites also can be saved by touching the in a sta-tion or channel list.
3. Repeat the steps to store another favorite item.
SETTING THE TIME
1. Touch Settings on the Home page, and then touch System.
2. Touch Time/Date.
3. Touch Set Time.
4. Touch or to adjust the hours, minutes, and AM or PM.
5. Touch to exit the menu.
If the Automatic Time and Date feature is enabled, the time will be updated automatically as the system obtains time information from the cellular network.
APPLE CARPLAY
Apple CarPlay capability is available through a compatible smart-phone using the Apple CarPlay icon on the Home page of the
infotainment system. No app is required.
1. Connect your compatible phone by plugging the Lightning cable into a USB data port. Use your device’s factory-provided Lightning cable. Aftermarket cables may not work.
2. The Apple CarPlay icon will illuminate. Touch the icon to have your apps displayed.
Press the Home button to exit Apple CarPlay. To return to the last page viewed in Apple CarPlay, press and hold the Home button.
ANDROID AUTO
Android Auto capability is available through a compatible smart-phone using the Android Auto icon on the Home page of the infotainment system.
1. Download the Android Auto app to your phone from the Google Play Store.
2. Connect your compatible phone by plugging the phone USB cable into a USB data port. Use your device’s factory-provided USB cable. Aftermarket cables may not work.
3. The Android Auto icon will illuminate. Touch the icon to have your apps displayed.
Press the Home button to exit Android Auto. To return to the last page viewed in Android Auto, press and hold the Home button.
See your Cadillac User Experience Manual.
Page 11 of 20
TEEN DRIVER
Teen Driver allows multiple keys to be registered for beginning
drivers. When active, the system automatically activates certain safety systems, allows setting of some features, and limits the use of others. An in-vehicle Report Card records vehicle data about driving behavior. When the vehicle is started with a registered key, a Driver Information Center message displays that Teen Driver is active.
To create a Personal Identification Number, register a key, change Teen Driver settings, or access the Report Card, go to Settings > Vehicle > Teen Driver.
See your Cadillac User Experience Manual.
11
The Universal Remote System on the overhead console enables your vehicle to control 3 different devices, ranging from garage doors and gates to home lighting. Go to homelink.com for detailed videos and instructions on how to program the Universal Remote System. For additional assistance, call 1-800-355-3515.
See Instruments and Controls in your Owner’s Manual.
UNIVERSAL REMOTE SYSTEM♦
WIRELESS CHARGING♦
The wireless charging system for smartphones is located at the front of the center console. To check mobile device compatibility, visit my.cadillac.com/learn. See your phone retailer for required phone accessories or charging adapters.
1. The vehicle must be On, or Retained Accessory Power must be active.
2. Remove all objects from the charging pad.
3. Place the smartphone face up on the pad.
4. The battery charging symbol will display in green on the infotain-ment screen when the smartphone is charging. If not charging, remove the smartphone for 3 seconds and rotate it 180 degrees before placing it on the charging pad again.
See Instruments and Controls in your Owner’s Manual.
VEHICLE CUSTOMIZATION
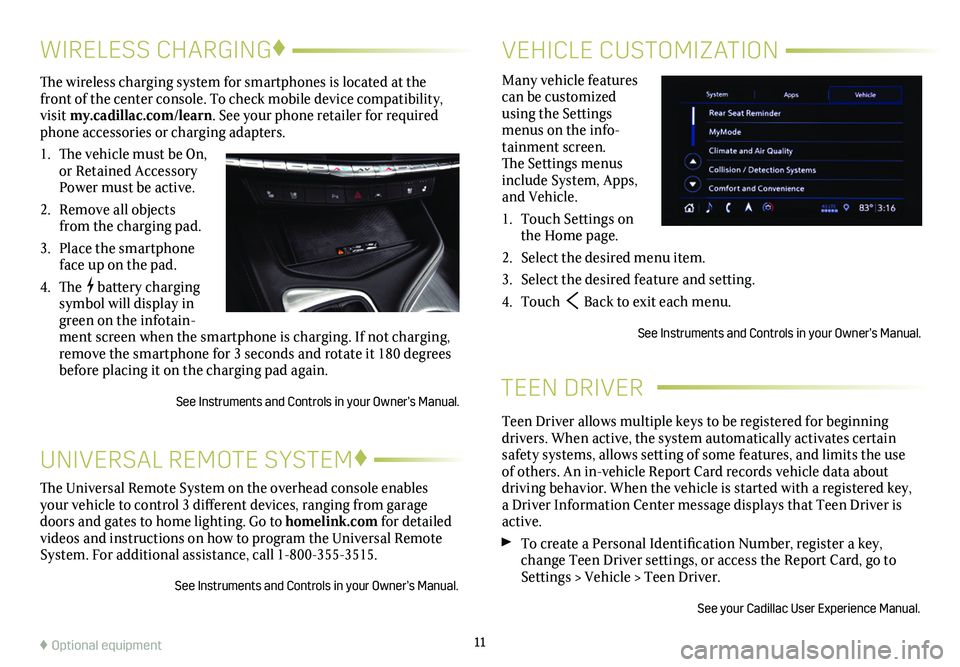
Many vehicle features can be customized using the Settings menus on the info-tainment screen. The Settings menus include System, Apps, and Vehicle.
1. Touch Settings on the Home page.
2. Select the desired menu item.
3. Select the desired feature and setting.
4. Touch Back to exit each menu.
See Instruments and Controls in your Owner’s Manual.
♦ Optional equipment
Page 13 of 20
13
EXTERIOR LIGHTINGWINDSHIELD WIPERS
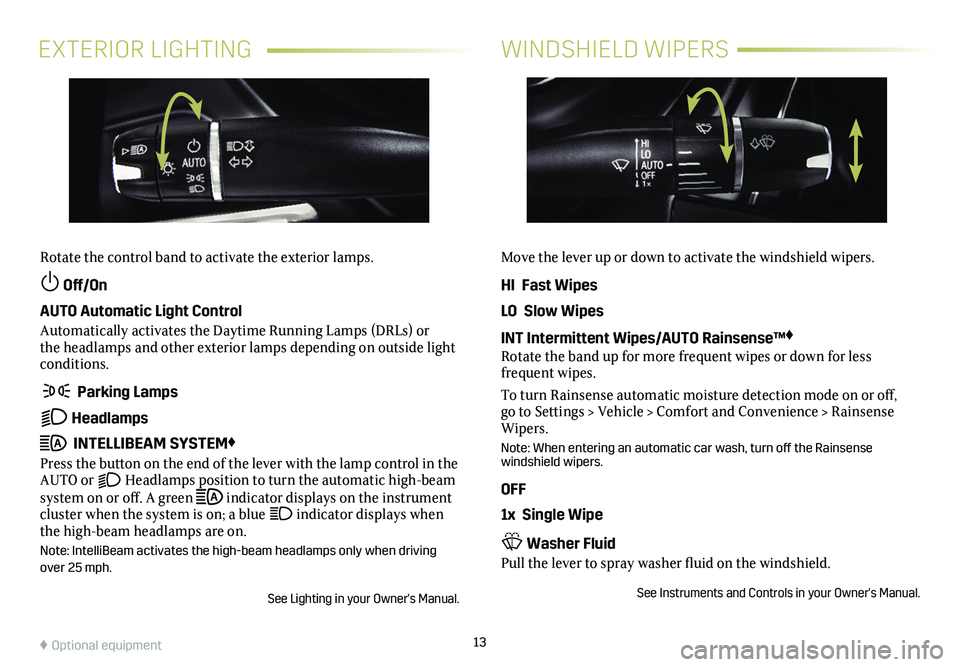
Rotate the control band to activate the exterior lamps.
Off/On
AUTO Automatic Light Control
Automatically activates the Daytime Running Lamps (DRLs) or the headlamps and other exterior lamps depending on outside light conditions.
Parking Lamps
Headlamps
INTELLIBEAM SYSTEM♦
Press the button on the end of the lever with the lamp control in the AUTO or Headlamps position to turn the automatic high-beam system on or off. A green indicator displays on the instrument cluster when the system is on; a blue indicator displays when the high-beam headlamps are on.
Note: IntelliBeam activates the high-beam headlamps only when driving over 25 mph.
See Lighting in your Owner's Manual.
Move the lever up or down to activate the windshield wipers.
HI Fast Wipes
LO Slow Wipes
INT Intermittent Wipes/AUTO Rainsense™♦
Rotate the band up for more frequent wipes or down for less frequent wipes.
To turn Rainsense automatic moisture detection mode on or off, go to Settings > Vehicle > Comfort and Convenience > Rainsense Wipers.
Note: When entering an automatic car wash, turn off the Rainsense windshield wipers.
OFF
1x Single Wipe
Washer Fluid
Pull the lever to spray washer fluid on the windshield.
See Instruments and Controls in your Owner's Manual.
♦ Optional equipment
Page 15 of 20
15
The traction control system limits wheelspin and the StabiliTrak stability control system assists with directional control of the vehicle in difficult driving conditions. Both systems turn on auto-matically every time the vehicle is started. Turn off traction control if the vehicle is stuck and rocking the vehicle is required.
Press the Traction Control button on the center console. The Traction Control Off light will illuminate on the instru-ment cluster. Press the button again to turn on
traction control.
See Driving and Operating in your Owner’s Manual.
TRACTION CONTROL
ELECTRONIC PRECISION SHIFT♦
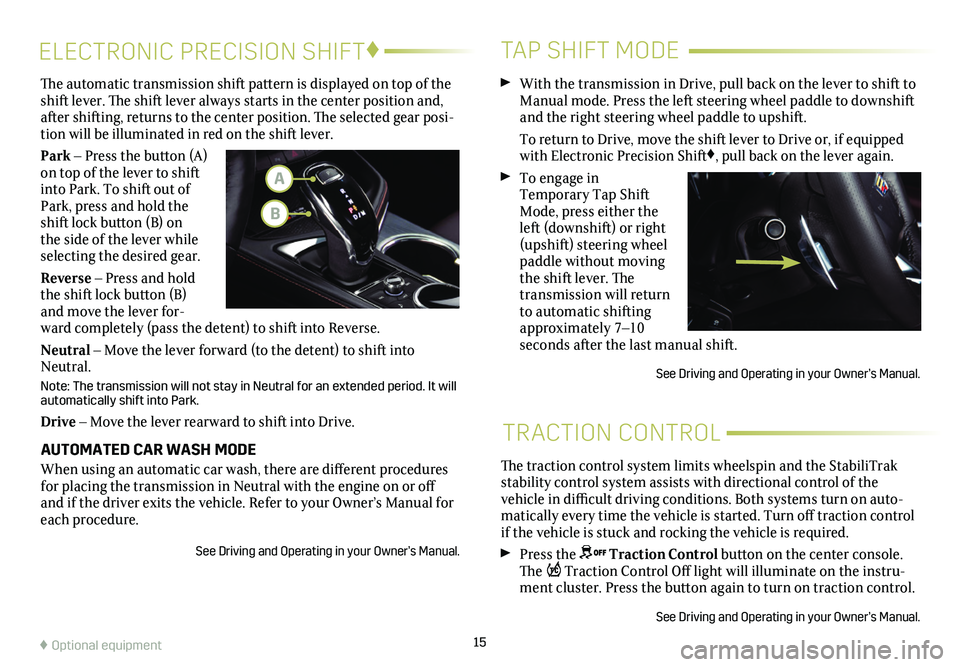
The automatic transmission shift pattern is displayed on top of the shift lever. The shift lever always starts in the center position and, after shifting, returns to the center position. The selected gear posi-tion will be illuminated in red on the shift lever.
Park – Press the button (A) on top of the lever to shift into Park. To shift out of Park, press and hold the shift lock button (B) on the side of the lever while selecting the desired gear.
Reverse – Press and hold the shift lock button (B) and move the lever for-ward completely (pass the detent) to shift into Reverse.
Neutral – Move the lever forward (to the detent) to shift into Neutral.
Note: The transmission will not stay in Neutral for an extended period. It will automatically shift into Park.
Drive – Move the lever rearward to shift into Drive.
AUTOMATED CAR WASH MODE
When using an automatic car wash, there are different procedures for placing the transmission in Neutral with the engine on or off and if the driver exits the vehicle. Refer to your Owner’s Manual for\
each procedure.
See Driving and Operating in your Owner’s Manual.
TAP SHIFT MODE
With the transmission in Drive, pull back on the lever to shift to Manual mode. Press the left steering wheel paddle to downshift and the right steering wheel paddle to upshift.
To return to Drive, move the shift lever to Drive or, if equipped with Electronic Precision Shift♦, pull back on the lever again.
To engage in Temporary Tap Shift Mode, press either the left (downshift) or right (upshift) steering wheel paddle without moving the shift lever. The transmission will return to automatic shifting approximately 7–10 seconds after the last manual shift.
See Driving and Operating in your Owner’s Manual.
♦ Optional equipment
A
B
Page 19 of 20
19
DRIVER ASSISTANCE SYSTEMS
FRONT AND REAR PARK ASSIST♦ – During low-speed park-ing maneuvers, the system provides “distance to closest object”
information on the Driver Information Center and the Safety Alert Seat pulses or a beep sounds (if selected). When an object is very close, the Safety Alert Seat pulses or 5 beeps sound (if selected).
Press the Park Assist button on the instrument panel
center controls to turn Park Assist, Reverse Automatic Braking♦, and Rear Cross Traffic Alert♦ on or off.
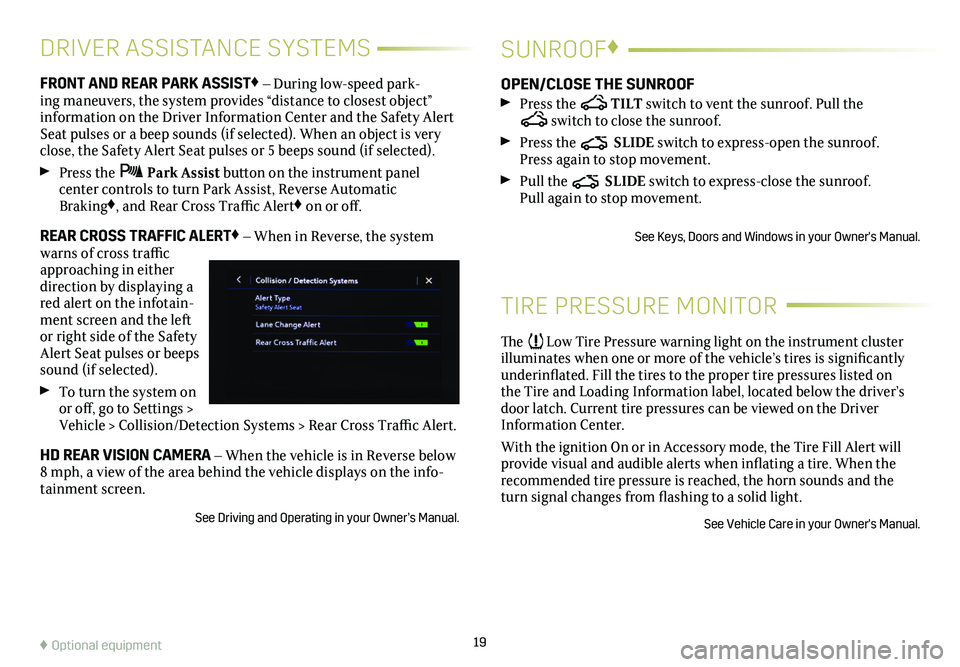
REAR CROSS TRAFFIC ALERT♦ – When in Reverse, the system warns of cross traffic approaching in either direction by displaying a red alert on the infotain-ment screen and the left or right side of the Safety Alert Seat pulses or beeps sound (if selected).
To turn the system on or off, go to Settings > Vehicle > Collision/Detection Systems > Rear Cross Traffic Alert.
HD REAR VISION CAMERA – When the vehicle is in Reverse below 8 mph, a view of the area behind the vehicle displays on the info-tainment screen.
See Driving and Operating in your Owner’s Manual.
TIRE PRESSURE MONITOR
The Low Tire Pressure warning light on the instrument cluster illuminates when one or more of the vehicle’s tires is
significantly underinflated. Fill the tires to the proper tire
pressures listed on the Tire and Loading Information label, located below the driver’s door latch. Current tire pressures can be viewed on the Driver Information Center.
With the ignition On or in Accessory mode, the Tire Fill Alert will provide visual and audible alerts when inflating a tire. When the recommended tire pressure is reached, the horn sounds and the turn signal changes from flashing to a solid light.
See Vehicle Care in your Owner's Manual.
SUNROOF♦
OPEN/CLOSE THE SUNROOF
Press the TILT switch to vent the sunroof. Pull the switch to close the sunroof.
Press the SLIDE switch to express-open the sunroof. Press again to stop movement.
Pull the SLIDE switch to express-close the sunroof. Pull again to stop movement.
See Keys, Doors and Windows in your Owner's Manual.
♦ Optional equipment