warning CADILLAC CT4 2021 Owner's Guide
[x] Cancel search | Manufacturer: CADILLAC, Model Year: 2021, Model line: CT4, Model: CADILLAC CT4 2021Pages: 434, PDF Size: 8.3 MB
Page 63 of 434
Cadillac CT4 Owner Manual (GMNA-Localizing-U.S./Canada-14584335) -
2021 - CRC - 11/23/20
62 SEATS AND RESTRAINTS
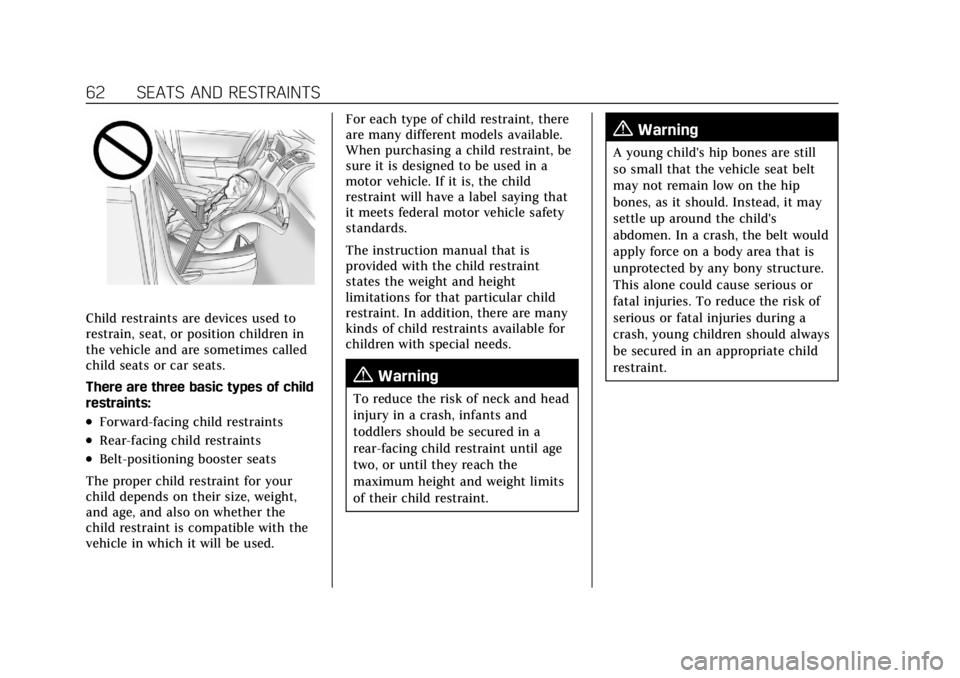
Child restraints are devices used to
restrain, seat, or position children in
the vehicle and are sometimes called
child seats or car seats.
There are three basic types of child
restraints:
.Forward-facing child restraints
.Rear-facing child restraints
.Belt-positioning booster seats
The proper child restraint for your
child depends on their size, weight,
and age, and also on whether the
child restraint is compatible with the
vehicle in which it will be used. For each type of child restraint, there
are many different models available.
When purchasing a child restraint, be
sure it is designed to be used in a
motor vehicle. If it is, the child
restraint will have a label saying that
it meets federal motor vehicle safety
standards.
The instruction manual that is
provided with the child restraint
states the weight and height
limitations for that particular child
restraint. In addition, there are many
kinds of child restraints available for
children with special needs.
{Warning
To reduce the risk of neck and head
injury in a crash, infants and
toddlers should be secured in a
rear-facing child restraint until age
two, or until they reach the
maximum height and weight limits
of their child restraint.
{Warning
A young child's hip bones are still
so small that the vehicle seat belt
may not remain low on the hip
bones, as it should. Instead, it may
settle up around the child's
abdomen. In a crash, the belt would
apply force on a body area that is
unprotected by any bony structure.
This alone could cause serious or
fatal injuries. To reduce the risk of
serious or fatal injuries during a
crash, young children should always
be secured in an appropriate child
restraint.
Page 65 of 434

Cadillac CT4 Owner Manual (GMNA-Localizing-U.S./Canada-14584335) -
2021 - CRC - 11/23/20
64 SEATS AND RESTRAINTS
Securing an Add-On Child
Restraint in the Vehicle
{Warning
A child can be seriously injured or
killed in a crash if the child
restraint is not properly secured in
the vehicle. Secure the child
restraint properly in the vehicle
using the vehicle seat belt or
LATCH system, following the
instructions that came with that
child restraint and the instructions
in this manual.
To help reduce the chance of injury,
the child restraint must be secured in
the vehicle. Child restraints must be
secured in vehicle seats by lap belts or
the lap belt portion of a lap-shoulder
belt, or by the LATCH system. See
Lower Anchors and Tethers for Children
(LATCH System) 065 for more
information. Children can be
endangered in a crash if the child
restraint is not properly secured in the
vehicle. When securing an add-on child
restraint, refer to the following:
1. Instruction labels provided on the child restraint
2. Instruction manual provided with the child restraint
3. This vehicle owner's manual
The child restraint instructions are
important, so if they are not available,
obtain a replacement copy from the
manufacturer.
Keep in mind that an unsecured child
restraint can move around in a
collision or sudden stop and injure
people in the vehicle. Be sure to
properly secure any child restraint in
the vehicle —even when no child is
in it.
In some areas Certified Child
Passenger Safety Technicians (CPSTs)
are available to inspect and
demonstrate how to correctly use and
install child restraints. In the U.S.,
refer to the National Highway Traffic
Safety Administration (NHTSA)
website to locate the nearest child
safety seat inspection station. For
CPST availability in Canada, check with Transport Canada or the
Provincial Ministry of Transportation
office.
Securing the Child Within the
Child Restraint
{Warning
A child can be seriously injured or
killed in a crash if the child is not
properly secured in the child
restraint. Secure the child properly
following the instructions that
came with that child restraint.
Where to Put the Restraint
According to accident statistics,
children and infants are safer when
properly restrained in an appropriate
child restraint secured in a rear
seating position.
Whenever possible, children aged
12 and under should be secured in a
rear seating position.
Never put a rear-facing child restraint
in the front. This is because the risk
to the rear-facing child is so great if
the airbag deploys.
Page 66 of 434

Cadillac CT4 Owner Manual (GMNA-Localizing-U.S./Canada-14584335) -
2021 - CRC - 11/23/20
SEATS AND RESTRAINTS 65
{Warning
A child in a rear-facing child
restraint can be seriously injured or
killed if the front passenger airbag
inflates. This is because the back of
the rear-facing child restraint would
be very close to the inflating airbag.
A child in a forward-facing child
restraint can be seriously injured or
killed if the front passenger airbag
inflates and the passenger seat is in
a forward position.
Even if the passenger sensing
system has turned off the front
passenger frontal airbag, no system
is fail-safe. No one can guarantee
that an airbag will not deploy under
some unusual circumstance, even
though it is turned off.
Secure rear-facing child restraints
in a rear seat, even if the airbag is
off. If you secure a forward-facing
child restraint in the front seat,
always move the front passenger(Continued)
Warning (Continued)
seat as far back as it will go. It is
better to secure the child restraint
in a rear seat.
SeePassenger Sensing System 053
for additional information.
When securing a child restraint with
the seat belts in a rear seat position,
study the instructions that came with
the child restraint to make sure it is
compatible with this vehicle.
Child restraints and booster seats vary
considerably in size, and some may fit
in certain seating positions better
than others. Do not install a child
restraint in any rear seating position
where it cannot be installed securely.
Depending on where you place the
child restraint and the size of the
child restraint, you may not be able to
access adjacent seat belts or LATCH
anchors for additional passengers or
child restraints. Adjacent seating
positions should not be used if the
child restraint prevents access to or
interferes with the routing of the
seat belt. The seat in front of an installed child
restraint should be adjusted to ensure
proper installation according to the
child restraint manual.
Wherever a child restraint is installed,
be sure to follow the instructions that
came with the child restraint and
secure the child restraint properly.
Keep in mind that an unsecured child
restraint can move around in a
collision or sudden stop and injure
people in the vehicle. Be sure to
properly secure any child restraint in
the vehicle
—even when no child is
in it.
Lower Anchors and
Tethers for Children
(LATCH System)
The LATCH system secures a child
restraint during driving or in a crash.
LATCH attachments on the child
restraint are used to attach the child
restraint to the anchors in the vehicle.
The LATCH system is designed to
make installation of a child restraint
easier.
Page 71 of 434
Cadillac CT4 Owner Manual (GMNA-Localizing-U.S./Canada-14584335) -
2021 - CRC - 11/23/20
70 SEATS AND RESTRAINTS
Securing a Child Restraint
Designed for the LATCH System
{Warning
A child could be seriously injured or
killed in a crash if the child
restraint is not properly attached to
the vehicle using either the LATCH
anchors or the vehicle seat belt.
Follow the instructions that came
with the child restraint and the
instructions in this manual.
{Warning
To reduce the risk of serious or
fatal injuries during a crash, do not
attach more than one child
restraint to a single anchor.
Attaching more than one child
restraint to a single anchor could
cause the anchor or attachment to
come loose or even break during a
crash. A child or others could be
injured.
{Warning
Children can be seriously injured or
strangled if a shoulder belt is
wrapped around their neck. The
shoulder belt can tighten but
cannot be loosened if it is locked.
The shoulder belt locks when it is
pulled all the way out of the
retractor. It unlocks when the
shoulder belt is allowed to go all
the way back into the retractor, but
it cannot do this if it is wrapped
around a child’s neck. If the
shoulder belt is locked and
tightened around a child’s neck, the
only way to loosen the belt is to
cut it.
Buckle any unused seat belts
behind the child restraint so
children cannot reach them. Pull
the shoulder belt all the way out of
the retractor to set the lock, and
tighten the belt behind the child
restraint after the child restraint
has been installed.
{Warning
The power seats will work with the
ignition off. Children could operate
the power seats and be injured.
Never leave children alone in the
vehicle.
Caution
Do not let the LATCH attachments
rub against the vehicle’s seat belts.
This may damage these parts.
If necessary, move buckled seat
belts to avoid rubbing the LATCH
attachments.
If you need to secure more than one
child restraint in the rear seat, see
Where to Put the Restraint 064.
1. Attach and tighten the lower attachments to the lower anchors.
If the child restraint does not have
lower attachments or the desired
seating position does not have
lower anchors, secure the child
restraint with the top tether and
the seat belt. Refer to the child
Page 73 of 434

Cadillac CT4 Owner Manual (GMNA-Localizing-U.S./Canada-14584335) -
2021 - CRC - 11/23/20
72 SEATS AND RESTRAINTS
If the position you are using
has an adjustable head
restraint and you are using a
dual tether, raise the head
restraint and route the tether
under the head restraint and
in between the head restraint
posts.
3. Before placing a child in the child restraint, make sure it is securely
held in place. To check, grasp the
child restraint at the LATCH path
and attempt to move it side to side
and back and forth. There should
be no more than 2.5 cm (1 in) of
movement for proper installation.
Replacing LATCH System
Parts After a Crash
{Warning
A crash can damage the LATCH
system in the vehicle. A damaged
LATCH system may not properly
secure the child restraint, resulting
in serious injury or even death in a
crash. To help make sure the
LATCH system is working properly
after a crash, see your dealer to
have the system inspected and any
necessary replacements made as
soon as possible.
If the vehicle has the LATCH system
and it was being used during a crash,
new LATCH system parts may be
needed.
New parts and repairs may be
necessary even if the LATCH system
was not being used at the time of the
crash.
Securing Child Restraints
(With the Seat Belt in the
Rear Seat)
When securing a child restraint with
the seat belts in a rear seat position,
study the instructions that came with
the child restraint to make sure it is
compatible with this vehicle.
If the child restraint has the LATCH
system, see Lower Anchors and Tethers
for Children (LATCH System) 065 for
how and where to install the child
restraint using LATCH. If a child
restraint is secured in the vehicle
using a seat belt and it uses a top
tether, see Lower Anchors and Tethers
for Children (LATCH System) 065 for
top tether anchor locations.
Do not secure a child seat in a
position without a top tether anchor if
a national or local law requires that
the top tether be anchored, or if the
instructions that come with the child
restraint say that the top tether must
be anchored.
Page 76 of 434
Cadillac CT4 Owner Manual (GMNA-Localizing-U.S./Canada-14584335) -
2021 - CRC - 11/23/20
SEATS AND RESTRAINTS 75
{Warning
A child in a rear-facing child
restraint can be seriously injured or
killed if the front outboard
passenger frontal airbag inflates.
This is because the back of the
rear-facing child restraint would be
very close to the inflating airbag.
A child in a forward-facing child
restraint can be seriously injured or
killed if the front outboard
passenger frontal airbag inflates
and the passenger seat is in a
forward position.
Even if the passenger sensing
system has turned off the front
outboard passenger airbag(s), no
system is fail-safe. No one can
guarantee that an airbag will not
deploy under some unusual
circumstance, even though the
airbag(s) are off.
Secure rear-facing child restraints
in a rear seat, even if the airbag(s)
are off. If you secure a
forward-facing child restraint in the(Continued)
Warning (Continued)
front outboard passenger seat,
always move the seat as far back as
it will go. It is better to secure the
child restraint in a rear seat.
SeePassenger Sensing System 053
for additional information.
If the child restraint uses a top tether,
see Lower Anchors and Tethers for
Children (LATCH System) 065 for top
tether anchor locations.
Do not secure a child seat in a
position without a top tether anchor if
a national or local law requires that
the top tether be anchored, or if the
instructions that come with the child
restraint say that the top tether must
be anchored.
In Canada, the law requires that
forward-facing child restraints have a
top tether, and that the tether be
attached. When using the lap-shoulder belt to
secure the child restraint in this
position, follow the instructions that
came with the child restraint and the
following instructions:
1. Move the seat as far back as it will go before securing the
forward-facing child restraint. Move
the seat upward or the seatback to
an upright position, if needed, to
get a tight installation of the child
restraint.
When the passenger sensing
system has turned off the front
outboard passenger frontal airbag
and knee airbag, the OFF indicator
on the passenger airbag status
indicator should light and stay lit
when you start the vehicle. See
Passenger Airbag Status Indicator
096.
2. Put the child restraint on the seat.
3. Pick up the latch plate, and run the lap and shoulder portions of the
vehicle seat belt through or around
the child restraint. The child
restraint instructions will show
you how.
Page 79 of 434
Cadillac CT4 Owner Manual (GMNA-Localizing-U.S./Canada-14584335) -
2021 - CRC - 11/23/20
78 STORAGE
Storage
Storage Compartments
Storage Compartments . . . . . . . . . . . . 78
Glove Box . . . . . . . . . . . . . . . . . . . . . . . . . . 78
Cupholders . . . . . . . . . . . . . . . . . . . . . . . . . 78
Center Console Storage . . . . . . . . . . . . 79
Umbrella Storage . . . . . . . . . . . . . . . . . . 79
Additional Storage Features
Cargo Tie-Downs . . . . . . . . . . . . . . . . . . . 80
Cargo Management System . . . . . . . 80
Storage Compartments{
Warning
Do not store heavy or sharp objects
in storage compartments. In a
crash, these objects may cause the
cover to open and could result in
injury.
Glove Box
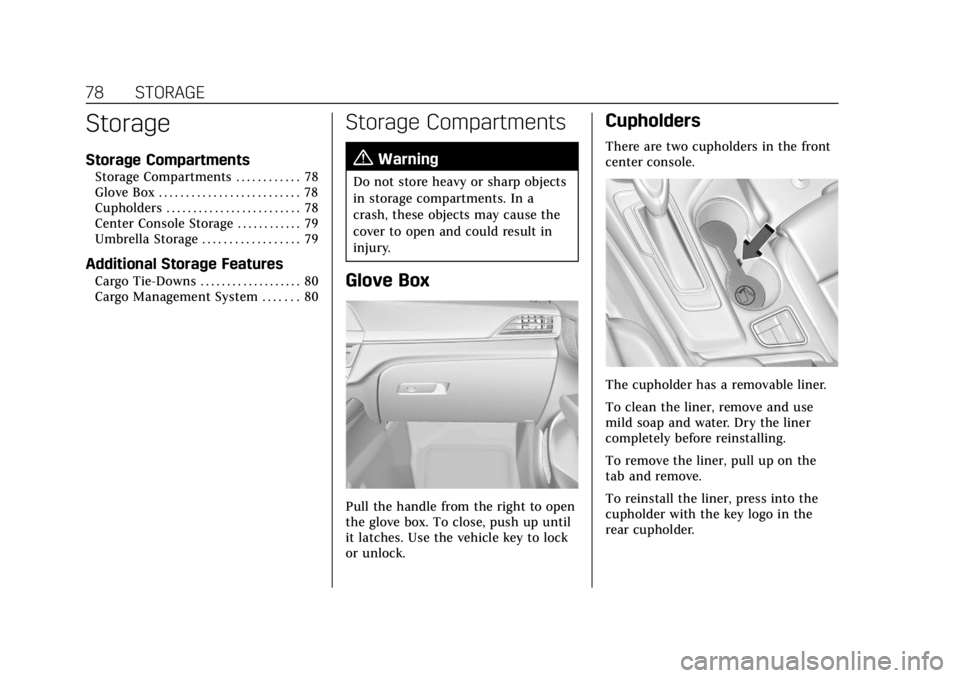
Pull the handle from the right to open
the glove box. To close, push up until
it latches. Use the vehicle key to lock
or unlock.
Cupholders
There are two cupholders in the front
center console.
The cupholder has a removable liner.
To clean the liner, remove and use
mild soap and water. Dry the liner
completely before reinstalling.
To remove the liner, pull up on the
tab and remove.
To reinstall the liner, press into the
cupholder with the key logo in the
rear cupholder.
Page 82 of 434
Cadillac CT4 Owner Manual (GMNA-Localizing-U.S./Canada-14584335) -
2021 - CRC - 12/4/20
INSTRUMENTS AND CONTROLS 81
Instruments and
Controls
Controls
Steering Wheel Adjustment . . . . . . . 82
Steering Wheel Controls . . . . . . . . . . 82
Heated Steering Wheel . . . . . . . . . . . . 82
Horn . . . . . . . . . . . . . . . . . . . . . . . . . . . . . . . . 82
Windshield Wiper/Washer . . . . . . . . 82
Compass . . . . . . . . . . . . . . . . . . . . . . . . . . . . 84
Clock . . . . . . . . . . . . . . . . . . . . . . . . . . . . . . . 84
Power Outlets . . . . . . . . . . . . . . . . . . . . . . 85
Wireless Charging . . . . . . . . . . . . . . . . . 85
Warning Lights, Gauges, and
Indicators
Warning Lights, Gauges, andIndicators . . . . . . . . . . . . . . . . . . . . . . . . . 87
Instrument Cluster (Base Level) . . . . . . . . . . . . . . . . . . . . . . . . . . . . . 88
Instrument Cluster (Uplevel) . . . . . 90
Speedometer . . . . . . . . . . . . . . . . . . . . . . . 93
Odometer . . . . . . . . . . . . . . . . . . . . . . . . . . . 93
Trip Odometer . . . . . . . . . . . . . . . . . . . . . 93
Tachometer . . . . . . . . . . . . . . . . . . . . . . . . 93
Fuel Gauge . . . . . . . . . . . . . . . . . . . . . . . . . 94
Engine Coolant Temperature
Gauge (Base Level) . . . . . . . . . . . . . . . 94 Engine Coolant Temperature
Gauge (Uplevel) . . . . . . . . . . . . . . . . . . 95
Seat Belt Reminders . . . . . . . . . . . . . . . 95
Airbag Readiness Light . . . . . . . . . . . . 96
Passenger Airbag Status Indicator . . . . . . . . . . . . . . . . . . . . . . . . . . 96
Charging System Light . . . . . . . . . . . . 97
Malfunction Indicator Lamp (Check Engine Light) . . . . . . . . . . . . 97
Brake System Warning Light . . . . . 99
Electric Parking Brake Light . . . . . 100
Service Electric Parking Brake Light . . . . . . . . . . . . . . . . . . . . . . . . . . . . . 100
Antilock Brake System (ABS) Warning Light . . . . . . . . . . . . . . . . . . 100
Performance Shifting Light . . . . . . 101
Automatic Vehicle Hold (AVH) Light . . . . . . . . . . . . . . . . . . . . . . . . . . . . . 101
Lane Keep Assist (LKA) Light . . . 101
Automatic Emergency Braking (AEB) Disabled Light . . . . . . . . . . . 101
Vehicle Ahead Indicator . . . . . . . . . 102
Pedestrian Ahead Indicator . . . . . . 102
Traction Off Light . . . . . . . . . . . . . . . . 102
StabiliTrak OFF Light . . . . . . . . . . . . 102
Traction Control System (TCS)/ StabiliTrak Light . . . . . . . . . . . . . . . . 103
Engine Coolant Temperature Warning Light . . . . . . . . . . . . . . . . . . 103
Driver Mode Control Light . . . . . . . 103 Tire Pressure Light . . . . . . . . . . . . . . . 104
Engine Oil Pressure Light . . . . . . . . 104
Low Fuel Warning Light . . . . . . . . . 105
Security Light . . . . . . . . . . . . . . . . . . . . . 105
High-Beam On Light . . . . . . . . . . . . . 105
Lamps On Reminder . . . . . . . . . . . . . 106
Cruise Control Light (Base
Level) . . . . . . . . . . . . . . . . . . . . . . . . . . . . 106
Cruise Control Light (Uplevel) . . . 106
Door Ajar Light . . . . . . . . . . . . . . . . . . . 107
Information Displays
Driver Information Center (DIC) (Base Level) . . . . . . . . . . . . . . . . . . . . . 107
Driver Information Center (DIC) (Uplevel) . . . . . . . . . . . . . . . . . . . . . . . . . 110
Head-Up Display (HUD) . . . . . . . . . 112
Vehicle Messages
Vehicle Messages . . . . . . . . . . . . . . . . . 116
Engine Power Messages . . . . . . . . . . 117
Vehicle Speed Messages . . . . . . . . . 117
Vehicle Personalization
Vehicle Personalization . . . . . . . . . . 117
Universal Remote System
Universal Remote System . . . . . . . . 122
Universal Remote System
Programming . . . . . . . . . . . . . . . . . . . 122
Universal Remote System Operation . . . . . . . . . . . . . . . . . . . . . . . . 124
Page 84 of 434
Cadillac CT4 Owner Manual (GMNA-Localizing-U.S./Canada-14584335) -
2021 - CRC - 12/4/20
INSTRUMENTS AND CONTROLS 83
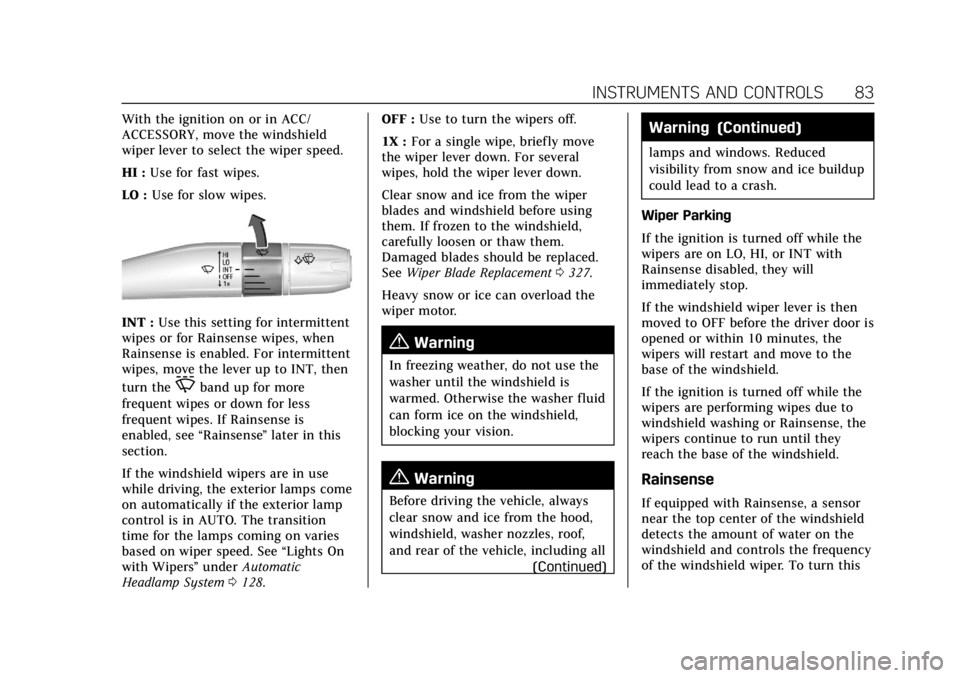
With the ignition on or in ACC/
ACCESSORY, move the windshield
wiper lever to select the wiper speed.
HI :Use for fast wipes.
LO : Use for slow wipes.
INT : Use this setting for intermittent
wipes or for Rainsense wipes, when
Rainsense is enabled. For intermittent
wipes, move the lever up to INT, then
turn the
Oband up for more
frequent wipes or down for less
frequent wipes. If Rainsense is
enabled, see “Rainsense”later in this
section.
If the windshield wipers are in use
while driving, the exterior lamps come
on automatically if the exterior lamp
control is in AUTO. The transition
time for the lamps coming on varies
based on wiper speed. See “Lights On
with Wipers ”under Automatic
Headlamp System 0128. OFF :
Use to turn the wipers off.
1X : For a single wipe, briefly move
the wiper lever down. For several
wipes, hold the wiper lever down.
Clear snow and ice from the wiper
blades and windshield before using
them. If frozen to the windshield,
carefully loosen or thaw them.
Damaged blades should be replaced.
See Wiper Blade Replacement 0327.
Heavy snow or ice can overload the
wiper motor.
{Warning
In freezing weather, do not use the
washer until the windshield is
warmed. Otherwise the washer fluid
can form ice on the windshield,
blocking your vision.
{Warning
Before driving the vehicle, always
clear snow and ice from the hood,
windshield, washer nozzles, roof,
and rear of the vehicle, including all (Continued)
Warning (Continued)
lamps and windows. Reduced
visibility from snow and ice buildup
could lead to a crash.
Wiper Parking
If the ignition is turned off while the
wipers are on LO, HI, or INT with
Rainsense disabled, they will
immediately stop.
If the windshield wiper lever is then
moved to OFF before the driver door is
opened or within 10 minutes, the
wipers will restart and move to the
base of the windshield.
If the ignition is turned off while the
wipers are performing wipes due to
windshield washing or Rainsense, the
wipers continue to run until they
reach the base of the windshield.
Rainsense
If equipped with Rainsense, a sensor
near the top center of the windshield
detects the amount of water on the
windshield and controls the frequency
of the windshield wiper. To turn this
Page 86 of 434
Cadillac CT4 Owner Manual (GMNA-Localizing-U.S./Canada-14584335) -
2021 - CRC - 12/4/20
INSTRUMENTS AND CONTROLS 85
Power Outlets
The accessory power outlets can be
used to plug in electrical equipment,
such as a cell phone or MP3 player.
The vehicle has two accessory power
outlets:
.Inside the center console
storage area.
.On the rear of the center floor
console.
Lift the cover to access the accessory
power outlet.
Certain electrical accessories may not
be compatible with the accessory
power outlet and could overload a
vehicle circuit breaker or adapter fuse.
If overloaded, the circuit breaker will
reset after all devices are disconnected
or if Retained Accessory Power (RAP)
is turned off and then back on. See
Retained Accessory Power (RAP) 0223.
Wait one minute to allow the circuit
breaker to reset before reconnecting
devices or turning RAP back on. If the
problem continues, the issue could be
within your device. Try another
known good device to make sure the circuit breaker is operating properly.
If this does not resolve your problem,
see your dealer.
Caution
Failure to replace the circuit
breaker with the minifuse could
overheat the cigar lighter and
damage the vehicle.
When adding electrical equipment, be
sure to follow the proper installation
instructions included with the
equipment. See Add-On Electrical
Equipment 0303.
Caution
Hanging heavy equipment from the
power outlet can cause damage not
covered by the vehicle warranty.
The power outlets are designed for
accessory power plugs only, such as
cell phone charge cords.
Always unplug electrical equipment
when not in use and do not plug in
equipment that exceeds the maximum
15 amps rating.
Wireless Charging
The vehicle may have a wireless
charging pad below the climate
controls. The system operates at
145 kHz and wirelessly charges one
Qi compatible smartphone. The power
output of the system is capable of
charging at a rate up to 3 amp (15W),
as requested by the compatible
smartphone. See Radio Frequency
Statement 0409.
{Warning
Wireless charging can affect the
operation of an implanted
pacemaker or other medical devices.
If you have one, it is recommended
to consult with your doctor before
using the wireless charging system.
The vehicle must be on, in ACC/
ACCESSORY, or Retained Accessory
Power (RAP) must be active. The
wireless charging feature may not
correctly indicate charging when the
vehicle is in RAP, or during Bluetooth
phone calls. See Retained Accessory
Power (RAP) 0223.