instrument cluster CADILLAC CT5 2021 Convenience & Personalization Guide
[x] Cancel search | Manufacturer: CADILLAC, Model Year: 2021, Model line: CT5, Model: CADILLAC CT5 2021Pages: 20, PDF Size: 3.57 MB
Page 5 of 20
5
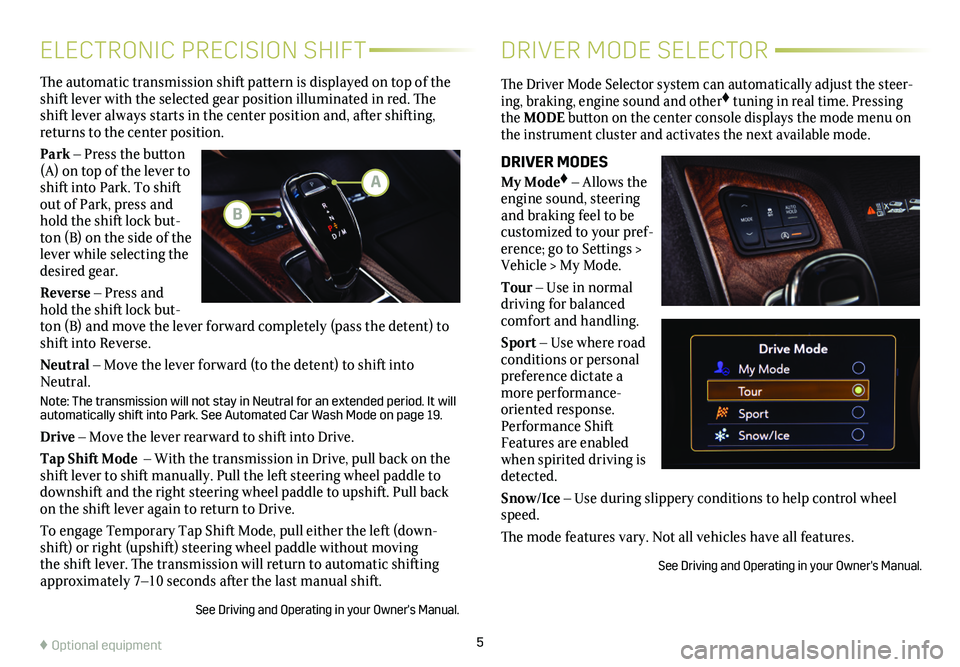
The Driver Mode Selector system can automatically adjust the steer-ing, braking, engine sound and other♦ tuning in real time. Pressing the MODE button on the center console displays the mode menu on the instrument cluster and activates the next available mode.
DRIVER MODES
My Mode♦ – Allows the engine sound, steering and braking feel to be customized to your pref-erence; go to Settings > Vehicle > My Mode.
Tour – Use in normal driving for balanced comfort and handling.
Sport – Use where road conditions or personal preference dictate a more performance-oriented response. Performance Shift Features are enabled when spirited driving is detected.
Snow/Ice – Use during slippery conditions to help control wheel speed.
The mode features vary. Not all vehicles have all features.
See Driving and Operating in your Owner's Manual.
The automatic transmission shift pattern is displayed on top of the shift lever with the selected gear position illuminated in red. The shift lever always starts in the center position and, after shifting, returns to the center position.
Park – Press the button (A) on top of the lever to shift into Park. To shift out of Park, press and hold the shift lock but-ton (B) on the side of the lever while selecting the desired gear.
Reverse – Press and hold the shift lock but-ton (B) and move the lever forward completely (pass the detent) to shift into Reverse.
Neutral – Move the lever forward (to the detent) to shift into Neutral.
Note: The transmission will not stay in Neutral for an extended period. It will automatically shift into Park. See Automated Car Wash Mode on page 19.
Drive – Move the lever rearward to shift into Drive.
Tap Shift Mode – With the transmission in Drive, pull back on the shift lever to shift manually. Pull the left steering wheel paddle to downshift and the right steering wheel paddle to upshift. Pull back on the shift lever again to return to Drive.
To engage Temporary Tap Shift Mode, pull either the left (down-shift) or right (upshift) steering wheel paddle without moving the shift lever. The transmission will return to automatic shifting approximately 7–10 seconds after the last manual shift.
See Driving and Operating in your Owner's Manual.
ELECTRONIC PRECISION SHIFTDRIVER MODE SELECTOR
A
B
♦ Optional equipment
Page 7 of 20
7
DRIVER INFORMATION CENTER
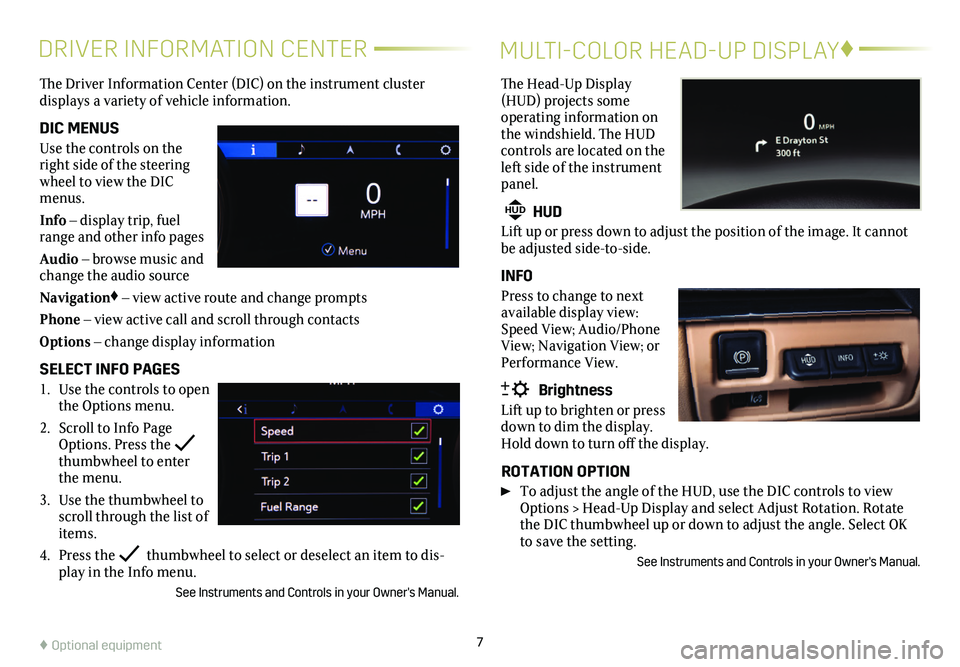
The Driver Information Center (DIC) on the instrument cluster
displays a variety of vehicle information.
DIC MENUS
Use the controls on the right side of the steering wheel to view the DIC menus.
Info – display trip, fuel range and other info pages
Audio – browse music and change the audio source
Navigation♦ – view active route and change prompts
Phone – view active call and scroll through contacts
Options – change display information
SELECT INFO PAGES
1. Use the controls to open the Options menu.
2. Scroll to Info Page Options. Press the thumbwheel to enter the menu.
3. Use the thumbwheel to scroll through the list of items.
4. Press the thumbwheel to select or deselect an item to dis-play in the Info menu.
See Instruments and Controls in your Owner's Manual.
MULTI-COLOR HEAD-UP DISPLAY♦
The Head-Up Display (HUD) projects some operating information on the windshield. The HUD
controls are located on the left side of the instrument panel.
HUD HUD
Lift up or press down to adjust the position of the image. It cannot be adjusted side-to-side.
INFO
Press to change to next available display view: Speed View; Audio/Phone View; Navigation View; or Performance View.
Brightness
Lift up to brighten or press down to dim the display. Hold down to turn off the display.
ROTATION OPTION
To adjust the angle of the HUD, use the DIC controls to view Options > Head-Up Display and select Adjust Rotation. Rotate the DIC thumbwheel up or down to adjust the angle. Select OK to save the setting.
See Instruments and Controls in your Owner's Manual.
♦ Optional equipment
Page 14 of 20
14
EXTERIOR LIGHTINGWINDSHIELD WIPERS
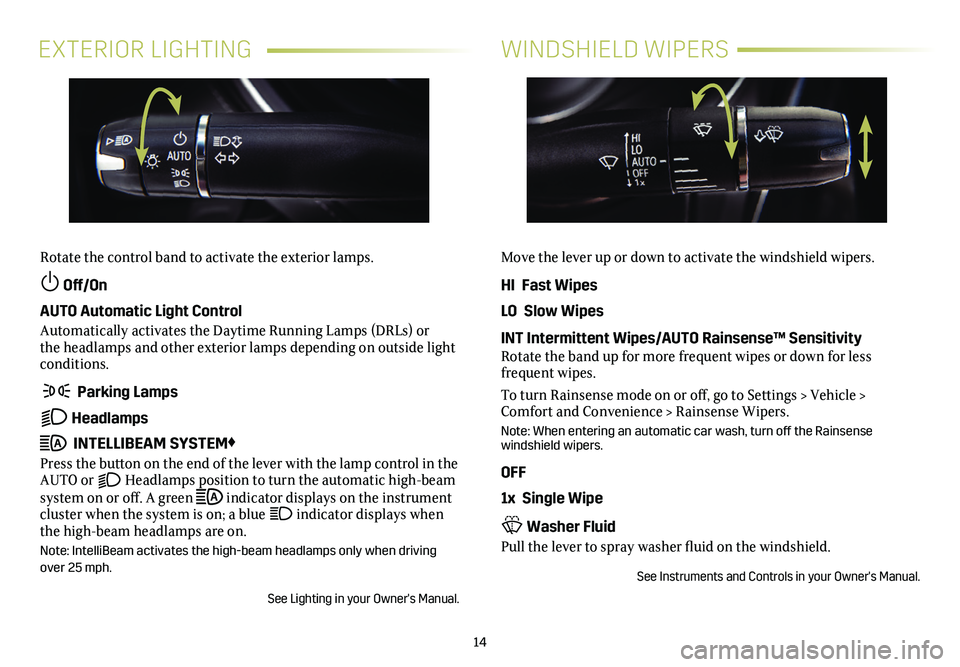
Rotate the control band to activate the exterior lamps.
Off/On
AUTO Automatic Light Control
Automatically activates the Daytime Running Lamps (DRLs) or the headlamps and other exterior lamps depending on outside light conditions.
Parking Lamps
Headlamps
INTELLIBEAM SYSTEM♦
Press the button on the end of the lever with the lamp control in the AUTO or Headlamps position to turn the automatic high-beam system on or off. A green indicator displays on the instrument cluster when the system is on; a blue indicator displays when the high-beam headlamps are on.
Note: IntelliBeam activates the high-beam headlamps only when driving over 25 mph.
See Lighting in your Owner's Manual.
Move the lever up or down to activate the windshield wipers.
HI Fast Wipes
LO Slow Wipes
INT Intermittent Wipes/AUTO Rainsense™ SensitivityRotate the band up for more frequent wipes or down for less frequent wipes.
To turn Rainsense mode on or off, go to Settings > Vehicle > Comfort and Convenience > Rainsense Wipers.
Note: When entering an automatic car wash, turn off the Rainsense windshield wipers.
OFF
1x Single Wipe
Washer Fluid
Pull the lever to spray washer fluid on the windshield.
See Instruments and Controls in your Owner's Manual.
Page 16 of 20
16
DRIVER ASSISTANCE SYSTEMS
Safety or driver assistance features are not a substitute for the driver’s responsibility to operate the vehicle in a safe manner. The driver should remain attentive to traffic, surroundings and road conditions at all times. Read your Owner’s Manual for important feature limitations and information\
.
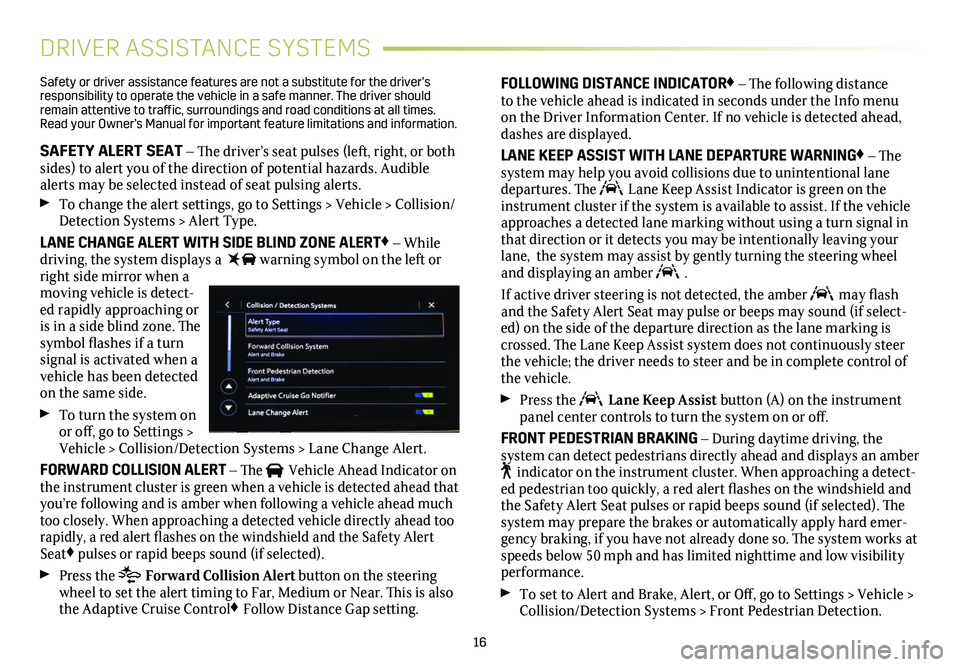
SAFETY ALERT SEAT – The driver’s seat pulses (left, right, or both sides) to alert you of the direction of potential hazards. Audible alerts may be selected instead of seat pulsing alerts.
To change the alert settings, go to Settings > Vehicle > Collision/Detection Systems > Alert Type.
LANE CHANGE ALERT WITH SIDE BLIND ZONE ALERT♦ – While driving, the system displays a warning symbol on the left or right side mirror when a moving vehicle is detect-ed rapidly approaching or is in a side blind zone. The symbol flashes if a turn signal is activated when a vehicle has been detected on the same side.
To turn the system on or off, go to Settings > Vehicle > Collision/Detection Systems > Lane Change Alert.
FORWARD COLLISION ALERT – The Vehicle Ahead Indicator on the instrument cluster is green when a vehicle is detected ahead that you’re following and is amber when following a vehicle ahead much too closely. When approaching a detected vehicle directly ahead too rapidly, a red alert flashes on the windshield and the Safety Alert Seat♦ pulses or rapid beeps sound (if selected).
Press the Forward Collision Alert button on the steering wheel to set the alert timing to Far, Medium or Near. This is also the Adaptive Cruise Control♦ Follow Distance Gap setting.
FOLLOWING DISTANCE INDICATOR♦ – The following distance to the vehicle ahead is indicated in seconds under the Info menu on the Driver Information Center. If no vehicle is detected ahead, dashes are displayed.
LANE KEEP ASSIST WITH LANE DEPARTURE WARNING♦ – The system may help you avoid collisions due to unintentional lane departures. The Lane Keep Assist Indicator is green on the instrument cluster if the system is available to assist. If the vehicle approaches a detected lane marking without using a turn signal in that direction or it detects you may be intentionally leaving your lane, the system may assist by gently turning the steering wheel and displaying an amber .
If active driver steering is not detected, the amber may flash and the Safety Alert Seat may pulse or beeps may sound (if select-ed) on the side of the departure direction as the lane marking is crossed. The Lane Keep Assist system does not continuously steer the vehicle; the driver needs to steer and be in complete control of the vehicle.
Press the Lane Keep Assist button (A) on the instrument panel center controls to turn the system on or off.
FRONT PEDESTRIAN BRAKING – During daytime driving, the
system can detect pedestrians directly ahead and displays an amber indicator on the instrument cluster. When approaching a detect-ed pedestrian too quickly, a red alert flashes on the windshield and the Safety Alert Seat pulses or rapid beeps sound (if selected). The system may prepare the brakes or automatically apply hard emer-gency braking, if you have not already done so. The system works at speeds below 50 mph and has limited nighttime and low visibility performance.
To set to Alert and Brake, Alert, or Off, go to Settings > Vehicle > Collision/Detection Systems > Front Pedestrian Detection.
Page 18 of 20
18
DRIVER ASSISTANCE SYSTEMS
AUTOMATIC PARKING ASSIST WITH BRAKING♦
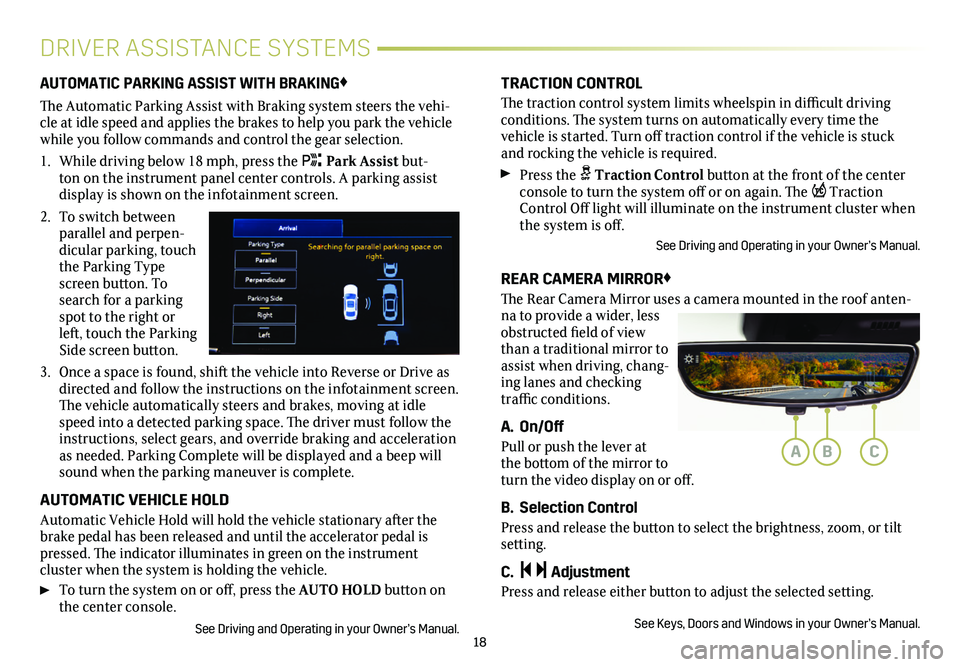
The Automatic Parking Assist with Braking system steers the vehi-cle at idle speed and applies the brakes to help you park the vehicle while you follow commands and control the gear selection.
1. While driving below 18 mph, press the Park Assist but-ton on the instrument panel center controls. A parking assist
display is shown on the infotainment screen.
2. To switch between parallel and perpen-dicular parking, touch the Parking Type screen button. To search for a parking spot to the right or left, touch the Parking Side screen button.
3. Once a space is found, shift the vehicle into Reverse or Drive as directed and follow the instructions on the infotainment screen. The vehicle automatically steers and brakes, moving at idle speed into a detected parking space. The driver must follow the instructions, select gears, and override braking and acceleration as needed. Parking Complete will be displayed and a beep will sound when the parking maneuver is complete.
AUTOMATIC VEHICLE HOLD
Automatic Vehicle Hold will hold the vehicle stationary after the brake pedal has been released and until the accelerator pedal is pressed. The indicator illuminates in green on the instrument
cluster when the system is holding the vehicle.
To turn the system on or off, press the AUTO HOLD button on the center console.
See Driving and Operating in your Owner’s Manual.
TRACTION CONTROL
The traction control system limits wheelspin in difficult driving conditions. The system turns on automatically every time the
vehicle is started. Turn off traction control if the vehicle is stuck and rocking the vehicle is required.
Press the Traction Control button at the front of the center console to turn the system off or on again. The Traction Control Off light will illuminate on the instrument cluster when the system is off.
See Driving and Operating in your Owner’s Manual.
REAR CAMERA MIRROR♦
The Rear Camera Mirror uses a camera mounted in the roof anten-na to provide a wider, less obstructed field of view than a traditional mirror to assist when driving, chang-ing lanes and checking traffic conditions.
A. On/Off
Pull or push the lever at the bottom of the mirror to turn the video display on or off.
B. Selection Control
Press and release the button to select the brightness, zoom, or tilt setting.
C. Adjustment
Press and release either button to adjust the selected setting.
See Keys, Doors and Windows in your Owner’s Manual.
ABC
Page 19 of 20
19
TIRE PRESSURE MONITOR
ELECTRIC PARK BRAKE
AUTOMATED CAR WASH MODE
POWER RELEASE TRUNK
The Low Tire Pressure warning light on the instrument cluster illuminates when one or more of the vehicle’s tires is
significantly underinflated. Fill the tires to the proper tire
pressures listed on the Tire and Loading Information label, located below the driver’s door latch. Current tire pressures can be viewed on the Driver Information Center.
With the ignition On or in Accessory mode, the Tire Fill Alert will provide visual and audible alerts when inflating a tire. When the recommended tire pressure is reached, the horn sounds and the turn signal changes from flashing to a solid light.
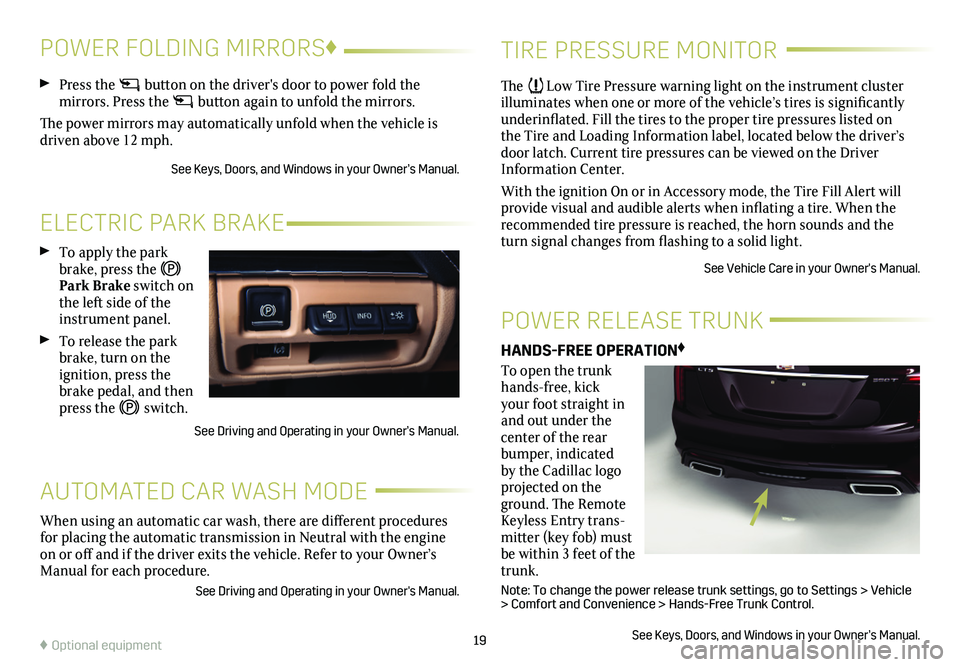
See Vehicle Care in your Owner's Manual. To apply the park brake, press the Park Brake switch on the left side of the instrument panel.
To release the park brake, turn on the ignition, press the brake pedal, and then press the switch.
See Driving and Operating in your Owner’s Manual.
When using an automatic car wash, there are different procedures for placing the automatic transmission in Neutral with the engine on or off and if the driver exits the vehicle. Refer to your Owner’s Manual for each procedure.
See Driving and Operating in your Owner's Manual.
HANDS-FREE OPERATION♦
To open the trunk hands-free, kick your foot straight in and out under the center of the rear bumper, indicated by the Cadillac logo
projected on the ground. The Remote Keyless Entry trans-mitter (key fob) must be within 3 feet of the trunk.
Note: To change the power release trunk settings, go to Settings > Vehicle > Comfort and Convenience > Hands-Free Trunk Control.
See Keys, Doors, and Windows in your Owner’s Manual.♦ Optional equipment
Press the button on the driver's door to power fold the
mirrors. Press the button again to unfold the mirrors.
The power mirrors may automatically unfold when the vehicle is driven above 12 mph.
See Keys, Doors, and Windows in your Owner’s Manual.
POWER FOLDING MIRRORS♦