replace battery CADILLAC CT5 2021 Owner's Manual
[x] Cancel search | Manufacturer: CADILLAC, Model Year: 2021, Model line: CT5, Model: CADILLAC CT5 2021Pages: 435, PDF Size: 8.9 MB
Page 8 of 435
Cadillac CT5 Owner Manual (GMNA-Localizing-U.S./Canada-14584312) -
2021 - CRC - 11/23/20
KEYS, DOORS, AND WINDOWS 7
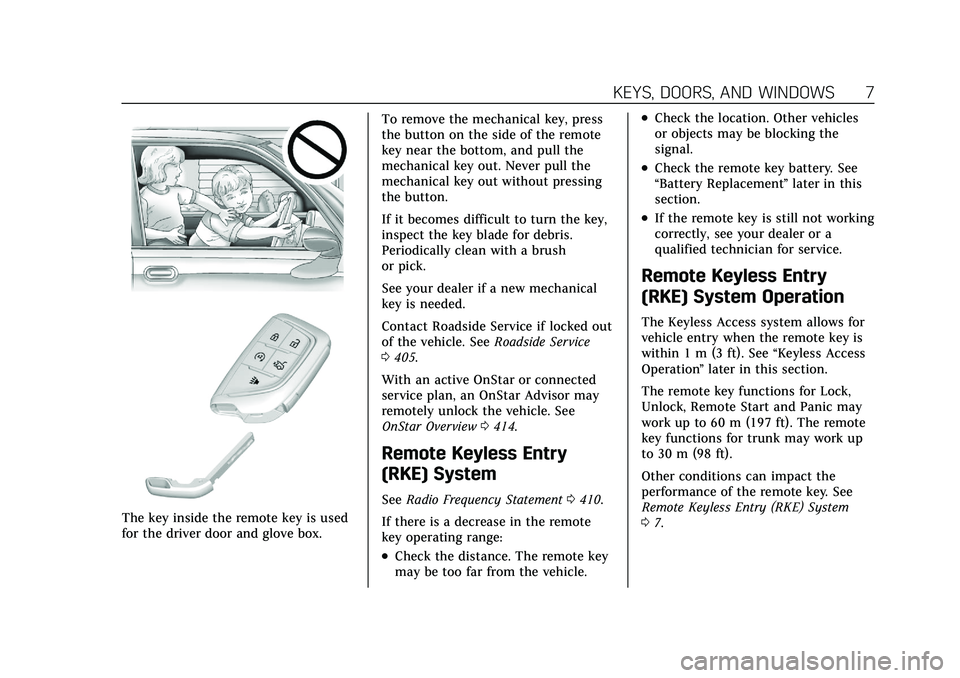
The key inside the remote key is used
for the driver door and glove box.To remove the mechanical key, press
the button on the side of the remote
key near the bottom, and pull the
mechanical key out. Never pull the
mechanical key out without pressing
the button.
If it becomes difficult to turn the key,
inspect the key blade for debris.
Periodically clean with a brush
or pick.
See your dealer if a new mechanical
key is needed.
Contact Roadside Service if locked out
of the vehicle. See
Roadside Service
0 405.
With an active OnStar or connected
service plan, an OnStar Advisor may
remotely unlock the vehicle. See
OnStar Overview 0414.
Remote Keyless Entry
(RKE) System
See Radio Frequency Statement 0410.
If there is a decrease in the remote
key operating range:
.Check the distance. The remote key
may be too far from the vehicle.
.Check the location. Other vehicles
or objects may be blocking the
signal.
.Check the remote key battery. See
“Battery Replacement ”later in this
section.
.If the remote key is still not working
correctly, see your dealer or a
qualified technician for service.
Remote Keyless Entry
(RKE) System Operation
The Keyless Access system allows for
vehicle entry when the remote key is
within 1 m (3 ft). See “Keyless Access
Operation ”later in this section.
The remote key functions for Lock,
Unlock, Remote Start and Panic may
work up to 60 m (197 ft). The remote
key functions for trunk may work up
to 30 m (98 ft).
Other conditions can impact the
performance of the remote key. See
Remote Keyless Entry (RKE) System
0 7.
Page 11 of 435
Cadillac CT5 Owner Manual (GMNA-Localizing-U.S./Canada-14584312) -
2021 - CRC - 11/23/20
10 KEYS, DOORS, AND WINDOWS
Enabling Keyless Unlocking:
With the vehicle off, press and hold
Q
andKon the remote key at the same
time for approximately four seconds.
The turn signal lamps will flash twice
quickly to indicate access is enabled.
Enabling Keyless Unlocking may also
be configured under Vehicle
Personalization. See Vehicle
Personalization 0123.
Passive (Walkaway) Locking
The Keyless Access system will lock
the vehicle several seconds after all
doors are closed if the vehicle is off
and at least one remote key has been
removed or none remain in the
vehicle.
If equipped, the fuel door will
also lock.
If other electronic devices interfere
with the remote key signal, the vehicle
may not detect the remote key inside
the vehicle. If passive (walkaway)
locking is enabled, the doors may lock
with the remote key inside the vehicle.
Do not leave the remote key in an
unattended vehicle. To customize the doors to
automatically lock when exiting the
vehicle, see
Vehicle Personalization
0 123.
If equipped with remote folding
mirror, passive (walkaway) locking
may fold and unfold the mirrors. See
Folding Mirrors 027.
Temporary Disable of Passive
(Walkaway) Locking
Temporarily disable passive locking by
pressing and holding
Kon the
interior door switch with a door open
for at least four seconds, or until three
chimes are heard. Passive (walkaway)
locking will then remain disabled until
Qon the interior door is pressed,
or until the vehicle is turned on.
Remote Key Left In Vehicle Alert
When the vehicle is turned off and a
remote key is left in the vehicle, the
horn will chirp three times after all
doors are closed. To turn on or off see
Vehicle Personalization 0123. Remote Key No Longer In Vehicle
Alert
If the vehicle is on, with a door open,
and then all doors are closed, the
vehicle will check for a remote key
inside. If a remote key is not detected,
the Driver Information Center (DIC)
will display NO KEY FOUND and the
horn will chirp three times.
This occurs only once each time the
vehicle is driven. See
Vehicle
Personalization 0123.
Keyless Trunk Opening
Press the touch pad on the rear of the
trunk above the license plate if the
remote key is within 1 m (3 ft).
Mechanical Key Access
To access a vehicle with a weak
remote key battery, see Door Locks
0 15.
Programming Remote Keys to
the Vehicle
Only remote keys programmed to the
vehicle will work. If a remote key is
lost or stolen, a replacement can be
purchased and programmed through
Page 12 of 435
Cadillac CT5 Owner Manual (GMNA-Localizing-U.S./Canada-14584312) -
2021 - CRC - 11/23/20
KEYS, DOORS, AND WINDOWS 11
your dealer. The vehicle can be
reprogrammed so that lost or stolen
remote keys no longer work. Each
vehicle can have up to eight remote
keys matched to it.
Programming with Recognized
Remote Keys
A new key can be programmed to the
vehicle when there are two
recognized keys.
To program, the vehicle must be in
RUN and all remote keys, both
currently recognized and new, must
be with you.1. Place the two recognized remote keys on the passenger seat.
2. Scroll to the DIC menu to "Remote Key Learn" menu and select.
The DIC displays READY FOR
REMOTE #3, 4, 5, ETC.
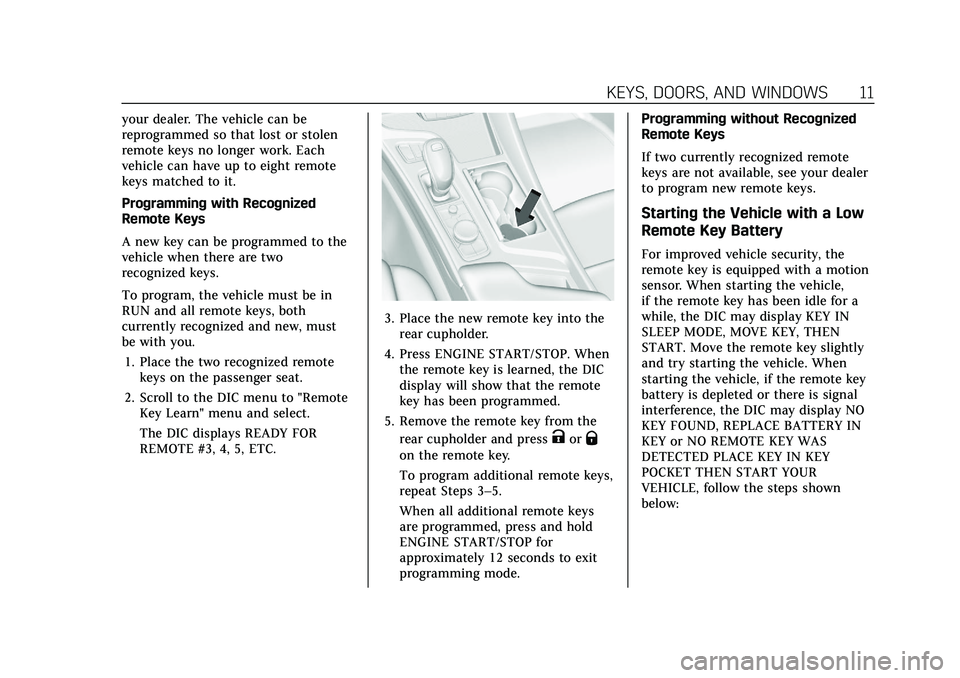
3. Place the new remote key into therear cupholder.
4. Press ENGINE START/STOP. When the remote key is learned, the DIC
display will show that the remote
key has been programmed.
5. Remove the remote key from the rear cupholder and press
KorQ
on the remote key.
To program additional remote keys,
repeat Steps 3–5.
When all additional remote keys
are programmed, press and hold
ENGINE START/STOP for
approximately 12 seconds to exit
programming mode. Programming without Recognized
Remote Keys
If two currently recognized remote
keys are not available, see your dealer
to program new remote keys.
Starting the Vehicle with a Low
Remote Key Battery
For improved vehicle security, the
remote key is equipped with a motion
sensor. When starting the vehicle,
if the remote key has been idle for a
while, the DIC may display KEY IN
SLEEP MODE, MOVE KEY, THEN
START. Move the remote key slightly
and try starting the vehicle. When
starting the vehicle, if the remote key
battery is depleted or there is signal
interference, the DIC may display NO
KEY FOUND, REPLACE BATTERY IN
KEY or NO REMOTE KEY WAS
DETECTED PLACE KEY IN KEY
POCKET THEN START YOUR
VEHICLE, follow the steps shown
below:
Page 13 of 435
Cadillac CT5 Owner Manual (GMNA-Localizing-U.S./Canada-14584312) -
2021 - CRC - 11/23/20
12 KEYS, DOORS, AND WINDOWS
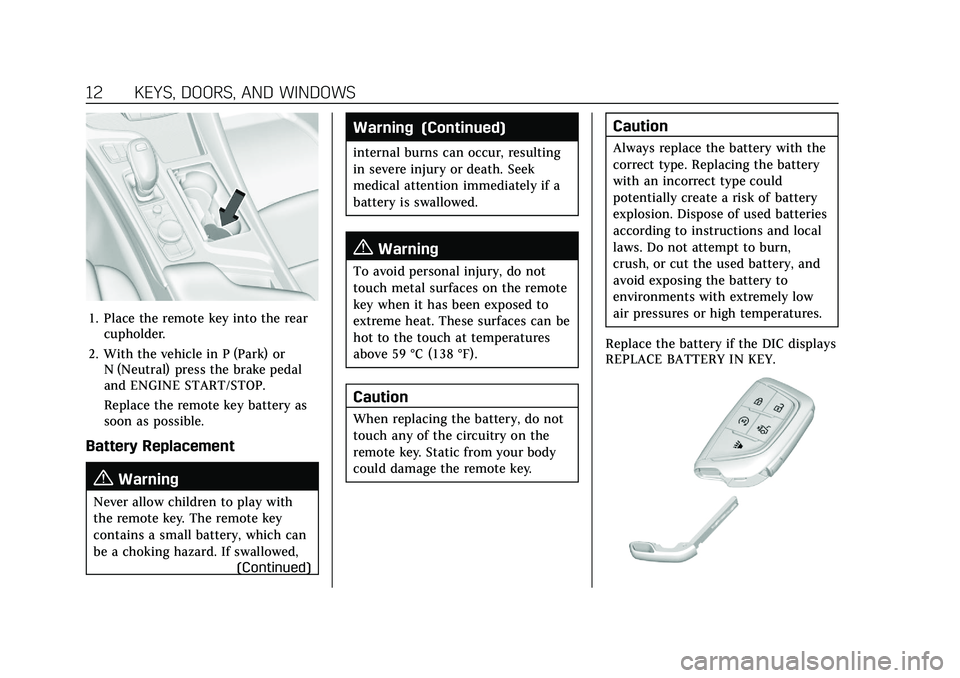
1. Place the remote key into the rearcupholder.
2. With the vehicle in P (Park) or N (Neutral) press the brake pedal
and ENGINE START/STOP.
Replace the remote key battery as
soon as possible.
Battery Replacement
{Warning
Never allow children to play with
the remote key. The remote key
contains a small battery, which can
be a choking hazard. If swallowed,
(Continued)
Warning (Continued)
internal burns can occur, resulting
in severe injury or death. Seek
medical attention immediately if a
battery is swallowed.
{Warning
To avoid personal injury, do not
touch metal surfaces on the remote
key when it has been exposed to
extreme heat. These surfaces can be
hot to the touch at temperatures
above 59 °C (138 °F).
Caution
When replacing the battery, do not
touch any of the circuitry on the
remote key. Static from your body
could damage the remote key.
Caution
Always replace the battery with the
correct type. Replacing the battery
with an incorrect type could
potentially create a risk of battery
explosion. Dispose of used batteries
according to instructions and local
laws. Do not attempt to burn,
crush, or cut the used battery, and
avoid exposing the battery to
environments with extremely low
air pressures or high temperatures.
Replace the battery if the DIC displays
REPLACE BATTERY IN KEY.
Page 14 of 435
Cadillac CT5 Owner Manual (GMNA-Localizing-U.S./Canada-14584312) -
2021 - CRC - 11/23/20
KEYS, DOORS, AND WINDOWS 13
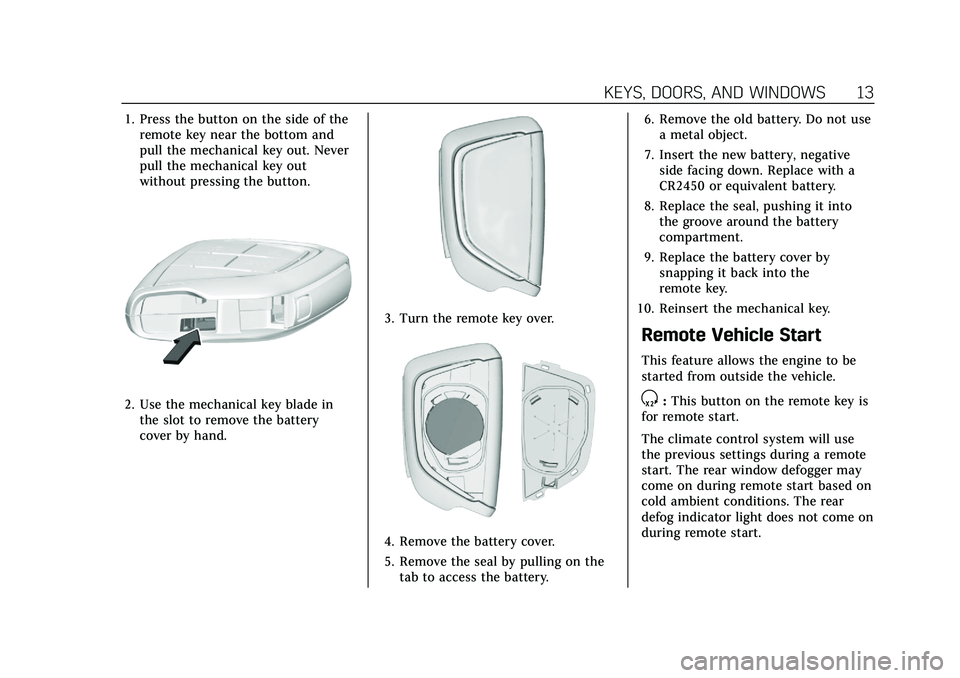
1. Press the button on the side of theremote key near the bottom and
pull the mechanical key out. Never
pull the mechanical key out
without pressing the button.
2. Use the mechanical key blade inthe slot to remove the battery
cover by hand.
3. Turn the remote key over.
4. Remove the battery cover.
5. Remove the seal by pulling on thetab to access the battery. 6. Remove the old battery. Do not use
a metal object.
7. Insert the new battery, negative side facing down. Replace with a
CR2450 or equivalent battery.
8. Replace the seal, pushing it into the groove around the battery
compartment.
9. Replace the battery cover by snapping it back into the
remote key.
10. Reinsert the mechanical key.
Remote Vehicle Start
This feature allows the engine to be
started from outside the vehicle.
S: This button on the remote key is
for remote start.
The climate control system will use
the previous settings during a remote
start. The rear window defogger may
come on during remote start based on
cold ambient conditions. The rear
defog indicator light does not come on
during remote start.
Page 17 of 435
Cadillac CT5 Owner Manual (GMNA-Localizing-U.S./Canada-14584312) -
2021 - CRC - 11/23/20
16 KEYS, DOORS, AND WINDOWS
button on the inside grip area of the
outside door handle. Touch the sensor
on the front outside door handle to
lock. See“Keyless Access Operation ”in
Remote Keyless Entry (RKE) System
Operation 07.
Driver Door Key Lock Cylinder
Access (In Case of Dead Battery)
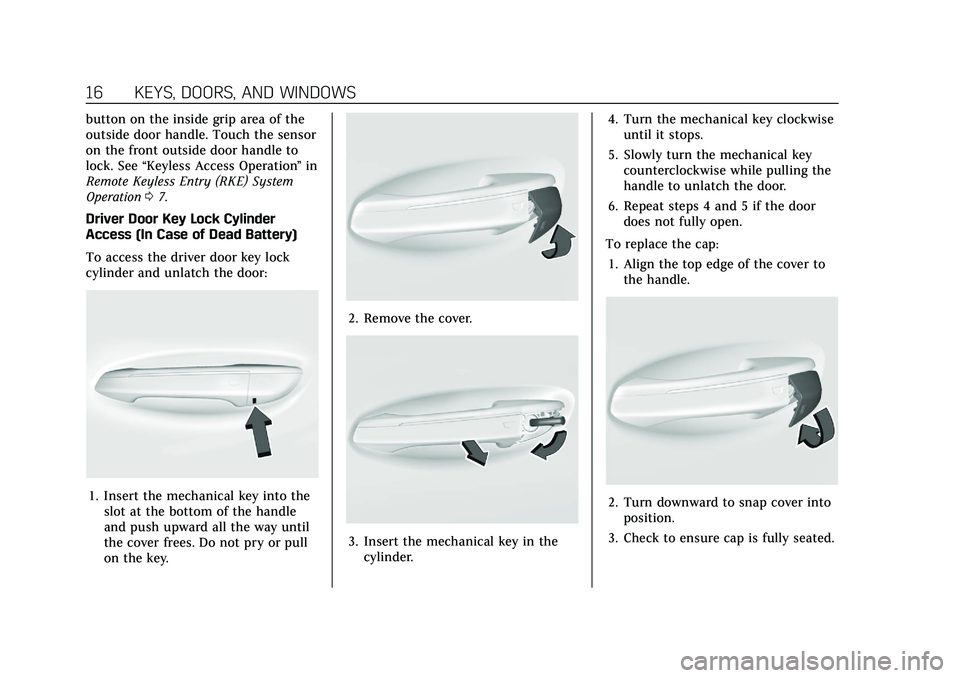
To access the driver door key lock
cylinder and unlatch the door:
1. Insert the mechanical key into the slot at the bottom of the handle
and push upward all the way until
the cover frees. Do not pry or pull
on the key.
2. Remove the cover.
3. Insert the mechanical key in thecylinder. 4. Turn the mechanical key clockwise
until it stops.
5. Slowly turn the mechanical key counterclockwise while pulling the
handle to unlatch the door.
6. Repeat steps 4 and 5 if the door does not fully open.
To replace the cap: 1. Align the top edge of the cover to the handle.
2. Turn downward to snap cover intoposition.
3. Check to ensure cap is fully seated.
Page 65 of 435
Cadillac CT5 Owner Manual (GMNA-Localizing-U.S./Canada-14584312) -
2021 - CRC - 11/23/20
64 SEATS AND RESTRAINTS
Servicing the
Airbag-Equipped Vehicle
Airbags affect how the vehicle should
be serviced. There are parts of the
airbag system in several places around
the vehicle. Your dealer and the
service manual have information
about servicing the vehicle and the
airbag system. To purchase a service
manual, seePublication Ordering
Information 0410.
{Warning
For up to 10 seconds after the
vehicle is turned off and the battery
is disconnected, an airbag can still
inflate during improper service. You
can be injured if you are close to an
airbag when it inflates. Avoid
yellow connectors. They are
probably part of the airbag system.
Be sure to follow proper service
procedures, and make sure the
person performing work for you is
qualified to do so.
Adding Equipment to the
Airbag-Equipped Vehicle
Adding accessories that change the
vehicle's frame, bumper system,
height, front end, or side sheet metal
may keep the airbag system from
working properly.
The operation of the airbag system
can also be affected by changing,
including improperly repairing or
replacing, any parts of the following:
.Airbag system, including airbag
modules, front or side impact
sensors, sensing and diagnostic
module, or airbag wiring
.Front seats, including stitching,
seams or zippers
.Seat belts
.Steering wheel, instrument panel,
overhead console, ceiling trim,
or pillar garnish trim
.Inner door seals, including speakers
Your dealer and the service manual
have information about the location of
the airbag modules and sensors, sensing and diagnostic module, and
airbag wiring along with the proper
replacement procedures.
In addition, the vehicle has a
passenger sensing system for the front
outboard passenger position, which
includes sensors that are part of the
passenger seat. The passenger sensing
system may not operate properly if
the original seat trim is replaced with
non-GM covers, upholstery, or trim; or
with GM covers, upholstery, or trim
designed for a different vehicle. Any
object, such as an aftermarket seat
heater or a comfort-enhancing pad or
device, installed under or on top of
the seat fabric, could also interfere
with the operation of the passenger
sensing system. This could either
prevent proper deployment of the
passenger airbag(s) or prevent the
passenger sensing system from
properly turning off the passenger
airbag(s). See
Passenger Sensing
System 060.
If the vehicle has rollover roof-rail
airbags, see Different Size Tires and
Wheels 0358 for additional important
information.
Page 106 of 435
Cadillac CT5 Owner Manual (GMNA-Localizing-U.S./Canada-14584312) -
2021 - CRC - 11/24/20
INSTRUMENTS AND CONTROLS 105
brand. It may require at least one
full tank of the proper fuel to turn
the light off. SeeRecommended Fuel
(LSY 2.0L L4 Engine) 0297 or
Recommended Fuel (LGY 3.0L
V6 Engine) 0297.
If the light remains on, see your
dealer.
Emissions Inspection and
Maintenance Programs
If the vehicle requires an Emissions
Inspection/Maintenance test, the test
equipment will likely connect to the
vehicle's Data Link Connector (DLC).
The DLC is under the instrument
panel to the left of the steering wheel.
Connecting devices that are not used
to perform an Emissions Inspection/
Maintenance test or to service the vehicle may affect vehicle operation.
See
Add-On Electrical Equipment 0307.
See your dealer if assistance is needed.
The vehicle may not pass
inspection if:
.The light is on when the engine is
running.
.The light does not come on when
the ignition is in Service Mode.
.Critical emission control systems
have not been completely
diagnosed. If this happens, the
vehicle would not be ready for
inspection and might require
several days of routine driving
before the system is ready for
inspection. This can happen if the
12-volt battery has recently been
replaced or run down, or if the
vehicle has been recently serviced.
See your dealer if the vehicle will not
pass or cannot be made ready for
the test.
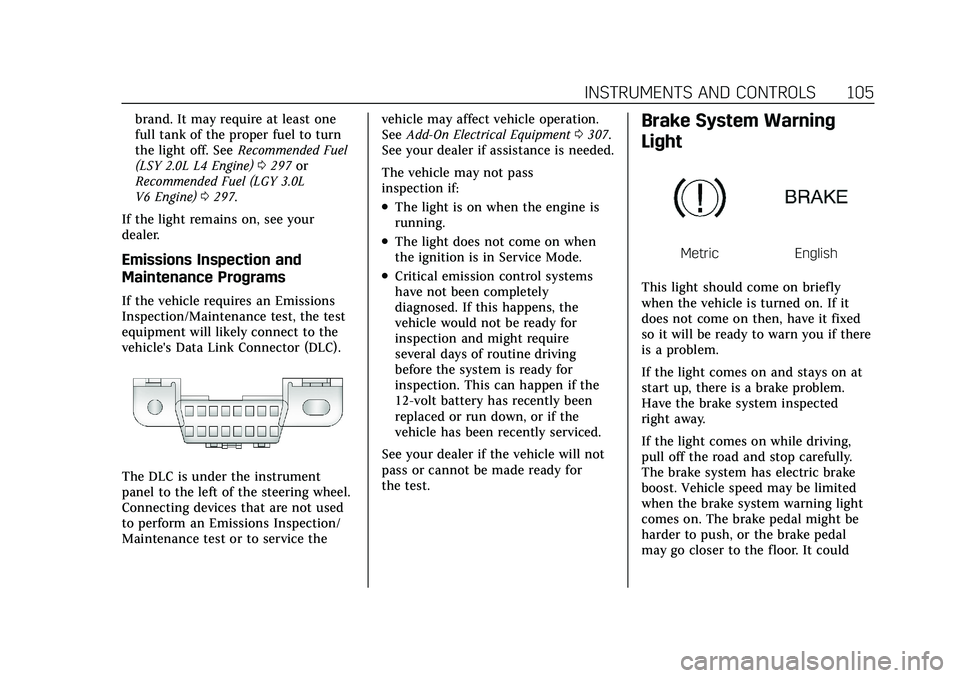
Brake System Warning
Light
MetricEnglish
This light should come on briefly
when the vehicle is turned on. If it
does not come on then, have it fixed
so it will be ready to warn you if there
is a problem.
If the light comes on and stays on at
start up, there is a brake problem.
Have the brake system inspected
right away.
If the light comes on while driving,
pull off the road and stop carefully.
The brake system has electric brake
boost. Vehicle speed may be limited
when the brake system warning light
comes on. The brake pedal might be
harder to push, or the brake pedal
may go closer to the floor. It could
Page 123 of 435
Cadillac CT5 Owner Manual (GMNA-Localizing-U.S./Canada-14584312) -
2021 - CRC - 11/24/20
122 INSTRUMENTS AND CONTROLS
Navigation Overlay :This displays
digital speed for Tour/ Sport, current
gear for Track, indicators from speed
view along with Turn-by-Turn
Navigation information in some
vehicles, vehicle ahead indicator, Lane
Departure Warning/Lane Keep Assist,
and Adaptive Cruise Control and set
speed. The compass heading is
displayed when navigation routing is
not active.
Navigation Turn-by-Turn Alerts
shown in the instrument cluster may
also be displayed in any HUD view.
Care of the HUD
Clean the inside of the windshield to
remove any dirt or film that could
reduce the sharpness or clarity of the
HUD image.
Clean the HUD lens with a soft cloth
sprayed with glass cleaner. Wipe the
lens gently, then dry it.
HUD Troubleshooting
If you cannot see the HUD image
when the ignition is on, check that:
.Nothing is covering the HUD lens.
.The HUD brightness setting is not
too dim or too bright.
.The HUD is adjusted to the proper
height.
.Polarized sunglasses are not worn.
.The windshield and HUD lens are
clean.
If the HUD image is not correct,
contact your dealer.
The windshield is part of the HUD
system. If the windshield needs
replacing, see Windshield Replacement
0 332.
Vehicle Messages
Messages displayed on the Driver
Information Center (DIC) indicate the
status of the vehicle or some action
that may be needed to correct a
condition. Multiple messages may
appear one after another.
The messages that do not require
immediate action can be
acknowledged and cleared by pressing
the thumbwheel. The messages that
require immediate action cannot be
cleared until that action is performed. All messages should be taken
seriously; clearing the message does
not correct the problem.
If a SERVICE message appears, see
your dealer.
Follow the instructions given in the
messages. The system displays
messages regarding the following
topics:
.Service Messages
.Fluid Levels
.Vehicle Security
.Brakes
.Steering
.Ride Control Systems
.Driver Assistance Systems
.Cruise Control
.Lighting and Bulb Replacement
.Wiper/Washer Systems
.Doors and Windows
.Seat Belts
.Airbag Systems
.Engine and Transmission
.Tire Pressure
.Battery
Page 130 of 435
Cadillac CT5 Owner Manual (GMNA-Localizing-U.S./Canada-14584312) -
2021 - CRC - 11/24/20
INSTRUMENTS AND CONTROLS 129
Universal Remote System
Programming
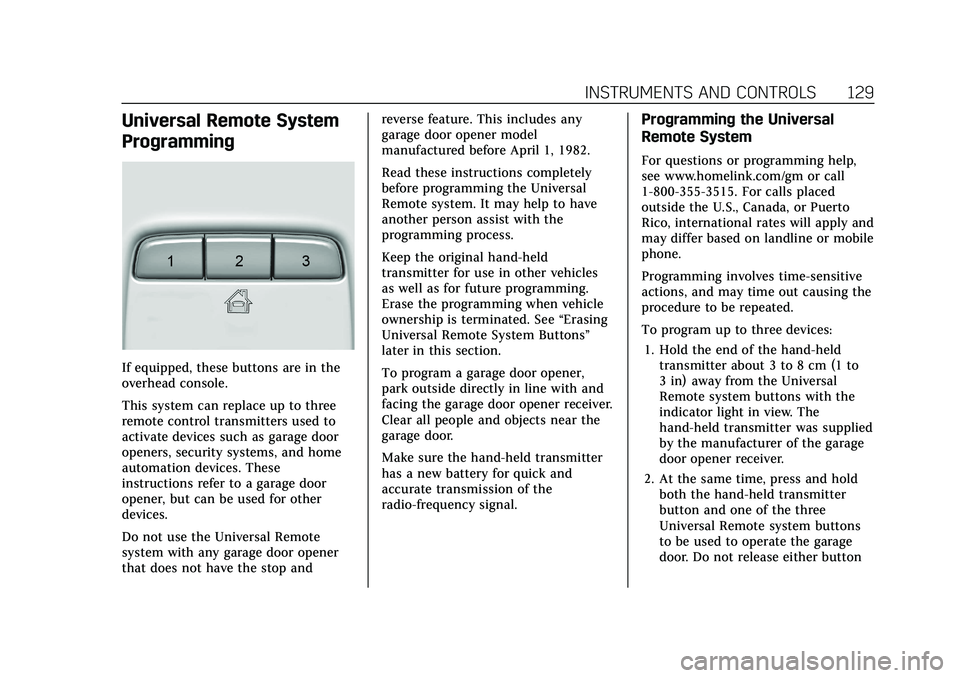
If equipped, these buttons are in the
overhead console.
This system can replace up to three
remote control transmitters used to
activate devices such as garage door
openers, security systems, and home
automation devices. These
instructions refer to a garage door
opener, but can be used for other
devices.
Do not use the Universal Remote
system with any garage door opener
that does not have the stop andreverse feature. This includes any
garage door opener model
manufactured before April 1, 1982.
Read these instructions completely
before programming the Universal
Remote system. It may help to have
another person assist with the
programming process.
Keep the original hand-held
transmitter for use in other vehicles
as well as for future programming.
Erase the programming when vehicle
ownership is terminated. See
“Erasing
Universal Remote System Buttons”
later in this section.
To program a garage door opener,
park outside directly in line with and
facing the garage door opener receiver.
Clear all people and objects near the
garage door.
Make sure the hand-held transmitter
has a new battery for quick and
accurate transmission of the
radio-frequency signal.
Programming the Universal
Remote System
For questions or programming help,
see www.homelink.com/gm or call
1-800-355-3515. For calls placed
outside the U.S., Canada, or Puerto
Rico, international rates will apply and
may differ based on landline or mobile
phone.
Programming involves time-sensitive
actions, and may time out causing the
procedure to be repeated.
To program up to three devices:
1. Hold the end of the hand-held transmitter about 3 to 8 cm (1 to
3 in) away from the Universal
Remote system buttons with the
indicator light in view. The
hand-held transmitter was supplied
by the manufacturer of the garage
door opener receiver.
2. At the same time, press and hold both the hand-held transmitter
button and one of the three
Universal Remote system buttons
to be used to operate the garage
door. Do not release either button